3.6.8 Procedure 22 ACCEPT THE UPGRADE

Table 3-26 Procedure 22 ACCEPT THE UPGRADE

STEP # A B This procedure will accept the upgrade. Estimated time: 5 minutes

1.

☐

☐

MPS X: Log in to the server as the user “root”.

Login: root

Password: <root_password>

2.

☐

☐

MPS X: Start platcfg utility.

# su – platcfg

3.

☐

☐

MPS X: Accept Upgrade


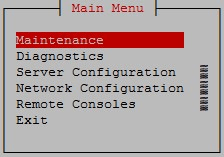
Main menu with Maintenance selected.

On the “Main Menu”, select Maintenance and press [ENTER].
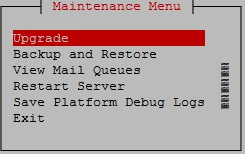

Maintenance menu with Upgrade selected.

Select the “Upgrade” menu and press [ENTER].

Select the “Accept Upgrade” menu and press [ENTER].
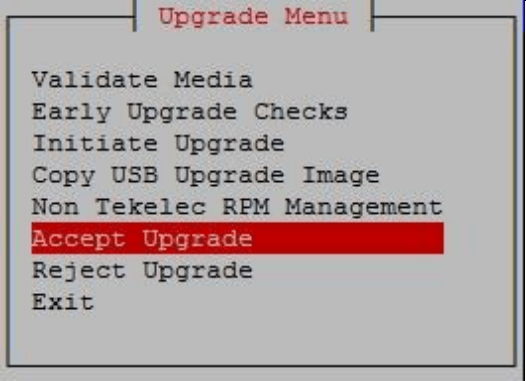

Upgrade menu with Accept Upgrade selected.

Note: The “Reject Upgrade” menu is also available after the ELAP installation. However, this option should not be used after the first installation of application. It should be used in subsequent upgrades to return to a previous application release.

Select Yes and press [ENTER].
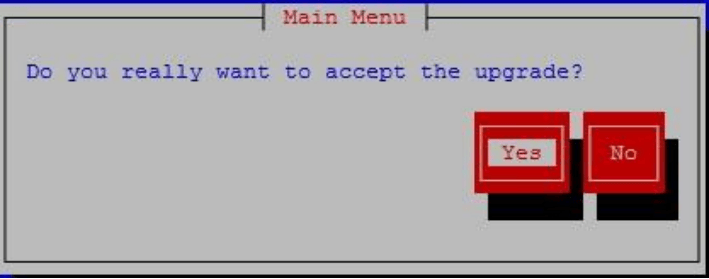

Confirmation to accept the upgrade.


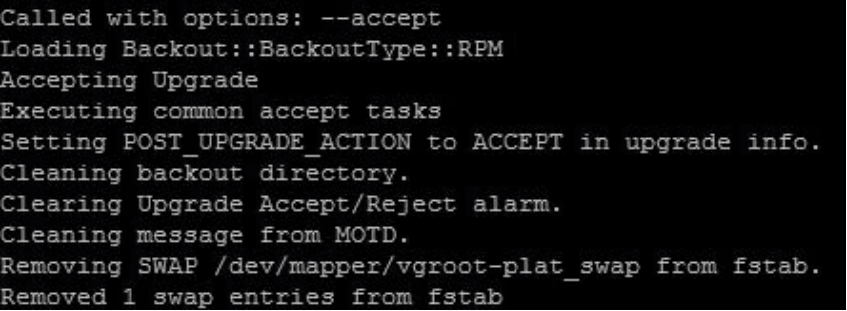
Console output while accepting the upgrade and clearing upgrade state.


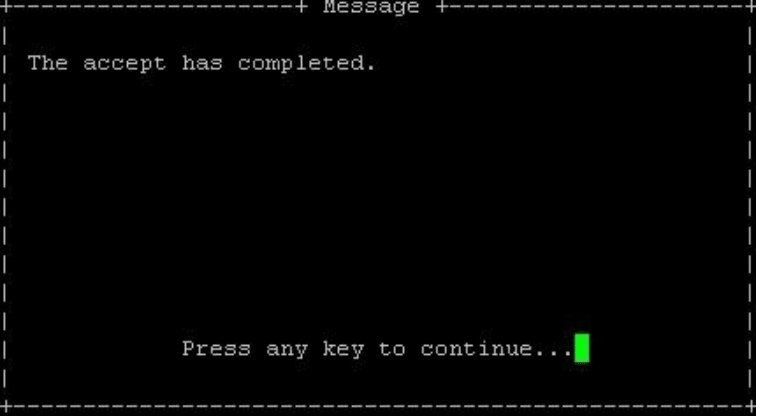
Confirmation that accepting the upgrade has completed.

NOTE: If Accept upgrade is successful, then skip the next step in this procedure. If accept upgrade fails, then go to the next step of this procedure.

4.

☐

☐

MPS X: If accept upgrade fails but disk redundacy is

restored, follow these steps to remove the false alarm of upgrade pending accept.

Following error is observed when accepting the upgrade fails: 
Called with options: --accept 
Loading Backout::BackoutType::SPLIT_MIRROR 
Accepting Upgrade 
Re-joining raid mirrors. 
        Adding /dev/sdb3 to /dev/md1 mdadm: added /dev/sdb3 
        Adding /dev/sdb2 to /dev/md2 mdadm: re-added /dev/sdb2                 md1 is syncing...                 md2 is syncing...                 md2 is syncing...                 md2 is syncing...                 md2 is syncing...                 md2 is syncing...                 md2 is syncing...                 md2 is syncing...                 md2 is syncing...                 md2 is syncing...                 md2 is syncing... 
        Adding /dev/sdb1 to /dev/md3 
ERROR: Command Failed! 
ERROR: Child process has exited with: 
     CMD: '/sbin/mdadm --add /dev/md3 /dev/sdb1' 
      RC: 1 
  SIGNAL: 0 
    CORE: no <<< CMD OUTPUT >>> 
mdadm: Cannot open /dev/sdb1: Device or resource busy 
<<< END OF CMD OUTPUT >>> ERROR: Failed to accept upgrade. mdadm: Cannot open /dev/sdb1: Device or resource busy 
=== Window terminated (Thu Jan 16 13:17:39 2020) === 
Check disk redundancy by below command. 
# cat /proc/mdstat 
NOTE: If you observe the output as given below then follow the APPENDIX F remove the false alarm. Here [UU] implies both the mirror disks are synchronized 
# cat /proc/mdstat Personalities : [raid1] 
md1 : active raid1 sdb3[2] sda3[0]       262080 blocks super 1.0 [2/2] [UU] 
md2 : active raid1 sdb2[1] sda2[0] 
      26198016 blocks super 1.1 [2/2] [UU]       bitmap: 1/1 pages [4KB], 65536KB chunk 
md3 : active raid1 sdb1[1] sda1[0] 
      442224640 blocks super 1.1 [2/2] [UU]       bitmap: 3/4 pages [12KB], 65536KB chunk 

5.

☐

☐

MPS X: Note down the timestamp in log.

Run the following command:

$ date

This procedure is complete!