3.8.1 Procedure 19 Restore Database
Table 3-24 Procedure 19 - Restore Database
| S T E P # | This procedure restores the database on the LSMS server. Estimated time:60 minutes | |
|---|---|---|
|
☐1. |
MPS A server: Log in to the server as the user “root”. |
|
|
☐2. |
MPS A server: Copy the snapshot files from the Remote server to the current LSMS Active server. |
Transfer all the NPAC region DB snapshot files, supDB MySQL dump and users MySQL dump from the Remote server to current LSMS A server. Note: The NPAC regions are: CanadaDB, MidAtlanticDB, MidwestDB, NortheastDB, SoutheastDB, SouthwestDB, WestCoastDB and WesternDB |
|
3. |
MPS A server: Create DB schema for all regional DB for which restore needs to be done |
Switch user to lsmsadm and create regional DB for all regions that were connected to LSMS before migration Note: Run above command for all regions. |
|
☐4. |
MPS A and B server: Stop LSMS processes |
Run this step on Standby LSMS server first followed by the active LSMS server. # su – lsmsmgr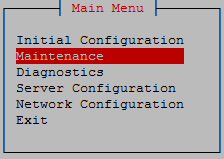 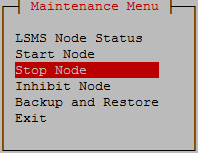 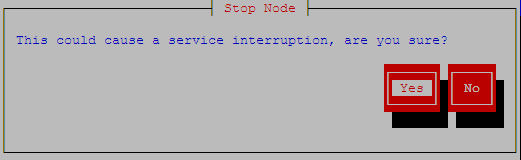 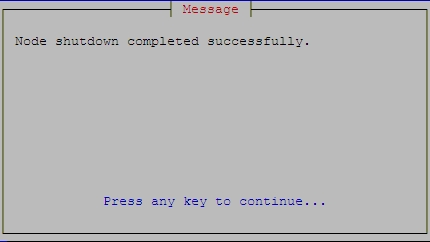 Exit the lsmsmgr menu. |
|
☐4. |
MPS A and B: Run the “hastatus” command to verify the HA state of this server. |
Run the following command on both LSMS A and B to verify the HA state of mated LSMS pair. # hastatusVerify that the hastatus of both the servers is ‘UNINITIALIZED "INHIBITED"’. WARNING: If the output from the above command is anything else other, do not proceed with this procedure and contact My Oracle Support following the instructions on the Appendix E. |
|
☐5. |
MPS A server: Extract the snapshot data from the archive tar files copied from LSMS. |
# cd /var/TKLC/lsms/freeRestore the <regionDB> with the regional database name (For example: CanadaDB) |
|
☐6. |
MPS A server: Restore supDB and MySQL Users. |
Run the below commands: # systemctl start mysqldRestore the ‘supDB’ Restore MySQL users Note: Below warning message can be ignored if displayed: |
|
☐7. |
MPS A server: Remove the snapshot files |
Remove the snapshot files. |
|
☐8. |
MPS A server: Check ownership of database files |
Verify dbadm:dbadm ownership of all database files and directories. where <DB NAME> is supDB or <region> DB, where <region> is the name of an NPAC region. If any databases have ownership other than dbadm:dbadm, change them using this command: |
|
☐9. |
MPS A and B server: Start LSMS processes |
Run this step on LSMS A server first followed by LSMS B server. Run the below command to check if lsms status is UNINITIALIZED "INHIBITED" before running startNode. If the status is UNINITIALIZED and not UNINITIALIZED "INHIBITED", run hafailover, else continue with Step 3. |
|
☐10. |
MPS A and B: System Heath Check |
Perform Procedure 18 to verify the system health check after DB full migration. |
|
☐11. |
LSMS Active server: Login to LSMS GUI |
Login to LSMS Active GUI as lsmsall user. |
|
☐12. |
LSMS Active server: Configure MySQL Port |
Refer to the recorded value of MySQL Port in 28 Procedure 6 step 11. If the MySQL Port is default port, then skip the next step. Otherwise, go to “Admin -> MySQL Port -> Modify” and configure the port recorded from LSMS 13.5.X. |
|
☐13. |
LSMS Active server: Verify the ELAP Credentials |
Go to “Configure -> LNP System -> EMS -> View” to verify the ELAP Credentials are identical to the recorded value of the ELAP Credentials in Procedure 6, step 12. Otherwise, go to “Configure -> LNP System -> EMS -> Modify” and configure the ELAP Credentials recorded from LSMS 13.5.X. Note: Re-configure the EMS on LSMS with the details captured in Procedure 6, step 8. |
|
This procedure is complete! |
||