Links
This section allows you to change settings related to Links. Links are used in dashboards and represent physical or logical connections between interfaces on devices.
Viewing Existing Links
In this tab you can view and edit all existing links in Vision. The following shows you how to navigate in the UI:
- Links -> View
The following figure shows all added links in Vision.

Description of illustration links-view.png
You can edit the following columns:
-
Carrier: The carrier associated with this link.
-
CID: The ID of this link.
-
Start Source: Name of the source of the entity on one end of the link.
-
Start Entity: Name of the entity on one end of the link.
-
Start Device: Name of the device within the entity on one end of the link.
-
End Source: Name of the source of the entity on the other end of the link.
-
End Entity: Name of the entity on the other end of the link.
-
End Device: Name of the device within the entity on the other end of the link.
-
Description: Description of the link.
-
CKT: Name of the Circuit.
-
Bandwidth: The bandwidth of the link in MBs.
-
Start Interface: Name of the Interface within the device on one end of the link.
-
Start Interface Facing CKT: Name of the start interface facing circuit.
-
End Interface: Name of the Interface within the device on the other end of the link.
-
End Interface Facing CKT: Name of the end interface facing circuit.
Adding a Link
Use this tab to add a new link to be used in Vision. The following path shows you how to navigate in the UI:
- Links -> Add
The following figure shows the form for adding a link in Vision.
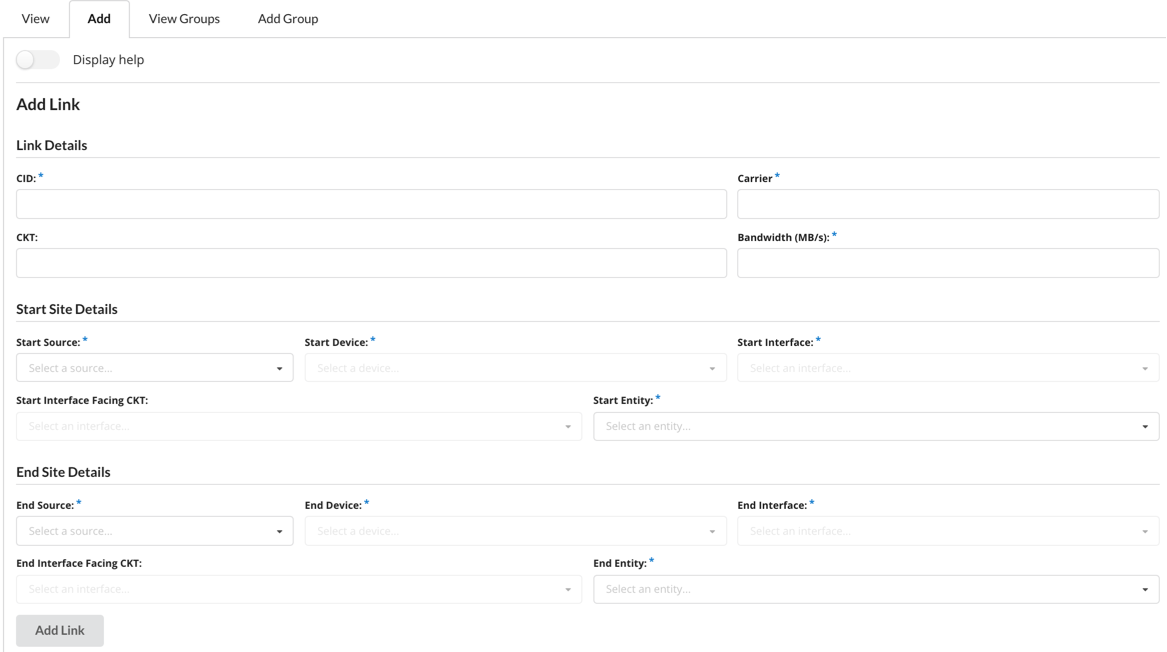
Description of illustration links-form.png
Use this interface to add a link in Vision.
-
Click the Display Help slider for more help on this page.
-
Mandatory fields are CID, Carrier, Bandwidth, Start/End Source, Start/End Device, Start/End Interface and Start/End Entity.
-
Once a link has been added it will appear in Links -> View.
Viewing Link Groups
The following path shows how to navigate in the UI:
- Links -> View Groups
The following shows the Link Groups view.

Description of illustration links-groups-view.png
This tab gives a list of all link groups currently in Vision. This list can be ordered by clicking on the column you wish to order by. You can edit the following columns:
-
Name: Name of the link group.
-
Link IDs: IDs of the link that are in the group.
-
User IDs: IDs of the users that are in the group.
To edit a link group, click the pencil on the end of the row. A form will be displayed to allow you to make changes, click Edit Item to confirm the changes. A popup appears asking you to confirm your edit.
Adding a Link Group
The following path shows how to navigate in the UI:
- Links -> Add Group
The following figure shows the form for adding an Link Group.
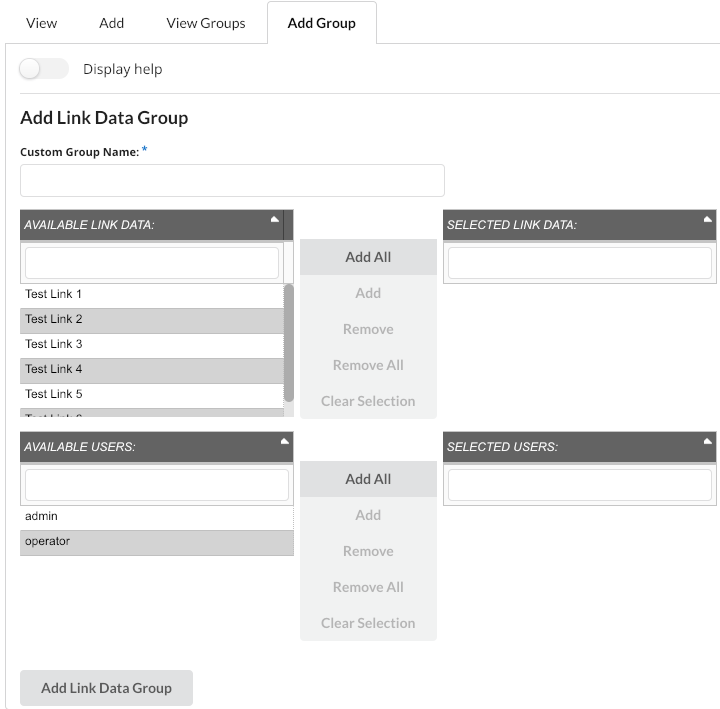
Description of illustration links-group-form.png
This tab allows you to add in a single link group. The only mandatory field is Name. Click Add Link Group after fields are filled out to create a link group. For more information on how to interact with this form see Adding a Group.