Configure ETL Source for OUAW
This page describes the integration flow between source data and target data, detailing its preparation process and the configuration steps for the ETL process.
On this page:
Prerequisites
- Ensure that Oracle GoldenGate is installed and configured on source and target database servers.
- Ensure that Oracle GoldenGate Monitor Agent is installed and create an instance on source and target database servers.
- Ensure that Oracle GoldenGate Monitor Agent instance is created and set Wallet on the source database server.
- Ensure that installing the Oracle Data Integrator (ODI)-based ETL component is completed.
- Ensure that the Oracle Data Integrator domain is created on the target application server.
See Perform Pre-Installation Steps for OUAW for more information.
Set Up Oracle GoldenGate on Source Database Server
To set up each source instance:
- Make sure that the source database is enabled in the ARCCHIVELOG mode.
- Connect to the source database as a sys user and execute the following statements.
Copy
alter database add supplemental log data (primary key) columns;
alter system set enable_goldengate_replication=TRUE scope=both; - On the command prompt, navigate to the Oracle GoldenGate Home (OGG_Home) directory, open the GLOBALS file in the editor, and add the following command.
- Navigate to the OGG_Home directory and run the sqlplus to connect to the database using SYSDBA sys user.
- Create a new user. This will be the Oracle GoldenGate Owner. Make sure to assign to the new user a tablespace that is not assigned to any other.
- For a standalone database: CCB01SRC
- For a multi-tenant database: C##GGOWNER
Note: Keep track of the GoldenGate Owner sername. It will be used in the Oracle Utilities Analytics Warehouse installation.
- Connect to the source database with the sys user and run the following commands.
- For a standalone database:
- For a multi-tenant database:
Note: Replace the GoldenGate Owner placeholder with the actual name for the database user that was created in the previous step.
Copygrant CREATE SESSION,CONNECT,RESOURCE,ALTER SYSTEM to <GoldenGate Owner>;
grant unlimited tablespace to <GoldenGate owner> with admin option;
EXECUTE dbms_goldengate_auth.grant_admin_privilege('<GoldenGate Owner>','capture');
grant unlimited tablespace to <GoldenGate Owner> with admin option;
Revoke dba from <GoldenGate Owner>;
grant create any view to <GoldenGate Owner>;
grant select any dictionary to <GoldenGate Owner>;
GRANT CREATE ANY DIRECTORY TO <GoldenGate Owner>;
GRANT DROP ANY DIRECTORY TO <GoldenGate Owner>;
GRANT EXP_FULL_DATABASE TO <GoldenGate Owner>;
GRANT IMP_FULL_DATABASE TO <GoldenGate Owner>;Note: Modify the common user used for the GoldenGate owner placeholder <Common user for GG> with the actual name of the container common user created on your multi-tenant database.
Copygrant CONNECT to <Common user for GG> container=all;
grant IMP_FULL_DATABASE to <Common user for GG> container=all;
grant RESOURCE to <Common user for GG> container=all;
grant EXP_FULL_DATABASE to <Common user for GG> container=all;
grant DROP ANY DIRECTORY to <Common user for GG> container=all;
grant UNLIMITED TABLESPACE to <Common user for GG> container=all;
grant CREATE ANY DIRECTORY to <Common user for GG> container=all;
grant ALTER SYSTEM to <Common user for GG> container=all;
grant SELECT ANY DICTIONARY to <Common user for GG> container=all;
grant CREATE ANY VIEW to <Common user for GG> container=all;
EXECUTE dbms_goldengate_auth.grant_admin_privilege('<GoldenGate Owner>','capture'); - For a standalone database:
- Connect to the <source application> ADM schema (for example, CISADM) and run the following commands.
- For the Oracle Utilities Customer Care and Billing source database, run the following grants for the USER created in step 5:
- For the Oracle Utilities Operational Device Management source database, run the following grants:
- For the Oracle Utilities Meter Data Management source database, run the following grants:
- For the Oracle Utilities Work and Asset Management source database, run the following grants:
CopyGrant select on F1_MST_CONFIG to <GoldenGate owner>
Grant select on F1_EXT_LOOKUP_VAL to <GoldenGate owner>
Grant select on F1_BKT_CONFIG to <GoldenGate owner>
Grant select on F1_BKT_CONFIG_VAL to <GoldenGate owner>CopyGrant select on F1_MST_CONFIG to <GoldenGate owner>
Grant select on F1_EXT_LOOKUP_VAL to <GoldenGate owner>CopyGrant select on <application ADM Schema>.F1_MST_CONFIG to <GoldenGate Owner>;
Grant select on <application ADM Schema>.F1_EXT_LOOKUP_VAL to <GoldenGate Owner>;CopyGrant select on <application ADM Schema>. F1_EXT_LOOKUP_VAL to <GoldenGate Owner>;
Grant select on <application ADM Schema>.F1_MST_CONFIG to <GoldenGate Owner>;
Grant select on <application ADM Schema>. F1_BKT_CONFIG to <GoldenGate Owner>;
Grant select on <application ADM Schema>. F1_BKT_CONFIG_VAL to <GoldenGate Owner>;
EnableMonitoring
cd <OGG Home>
sqlplus sys/<sys password>@<source db service name>Configure Data Encryption Using ENCKEYS Method
Note: Complete this task before running the Oracle Utilities Analytics Warehouse installer (config.sh). Moreover, note that all the scripts mentioned below are located under the <OGG Home> directory and must be run after connecting to the database through the sys user.
- Change the directory to the Oracle GoldenGate Home directory.
- Copy the key value to the ENCKEYS file against a logical name such as <CCB1KEY>. You must provide a unique logical name for each key-value generated above. The logical name should have this structure: logical name/space/key-value.
Example: - Repeat the step above for each key-value.
- Save the file with the name ENCKEYS (upper case only) without any extension.
- Create an ASCII ENCKEYS file, or open an existing ENCKEYS text file and append the generated key.
cd <Oracle GoldenGate HOME>
keygen <encryption key length (in bits)> [number of keys to generate]
Example:
cd $OGG_HOME
./keygen 128 1
0x8CE55035DD6893205A7BD6773FA8E670
<CCB1KEY> 0x8CE55035DD6893205A7BD6773FA8E670The source ENCKEYS file entry has to be appended to the intermediate server or target server, which would be configured with the source system where the target Oracle GoldenGate is being configured.
Generate Shared Secret Password
Note: Complete this task before running the Oracle Utilities Analytics Warehouse installer (config.sh) and note that all the scripts mentioned below are located under the <OGG Home> directory and must be run after connecting to the database through the sys user.
- Ensure that a key specified with KEYNAME is present in the ENCKEYS file.
- Change the directory to the Oracle GoldenGate Home directory.
- Set ORACLE_HOME and PATH variables.
- Run the following command.
./ggsci
ENCRYPT PASSWORD <GG Owner password> <algorithm> ENCRYPTKEY <key_name>
Example:
cd $<GoldenGate Home>
./ggsci
GGSCI (hostname) 1> ENCRYPT PASSWORD <CCB01SRC> AES128 ENCRYPTKEY <CCB1KEY>
Example of Encrypted password:
AADAAAAAAAAAAAIAVGNHBFLGFCHBTCVBFJFHUEJGNCFAOAFEOFBALELISFOEIFWGRBZHCCMCYGYBDAZHAlgorithm used:
AES128Note: Keep track of the generated ENCKEYS file logical name, key-value, algorithm name used, and the generated encrypted password.
Configure Buckets and Extract Parameters
Before attaching a specific source system to Oracle Utilities Analytics Warehouse, it is necessary to complete some source application configurations as detailed on Configure ETL Parameters & Buckets.
Source Configuration Using OUAW Wizard
- Log in to the source database server and execute the following commands.
-
Create a directory under the Goldengate home with the context code name (<GG Home>/dirdat/<PRODUCT NAME WITH CONTEXT CODE>) in both the source and the target servers. Example:
Copy<GG HOME>/dirdat/CCB1 - Optional: For the Network Management System (NMS) source application, perform in ODI Studio the steps from the sectionNetwork Management System (NMS) Source Applicationbefore continuing with this process.
- Log in to the application server.
- Navigate to <ETL Home>/bin and run the following: ./config.sh. The configuration wizard opens.
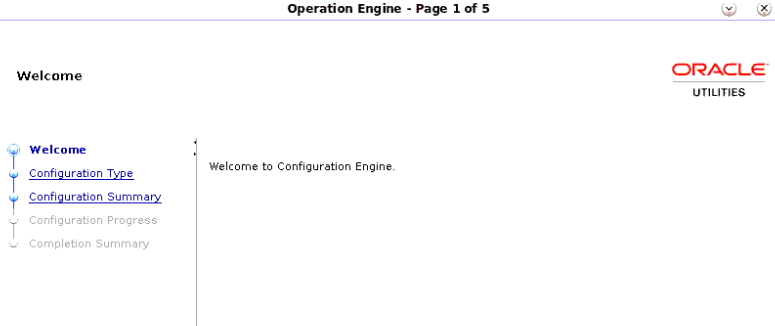
- On the Welcome page, click Next.
- On the Configuration Type page, select Configure Source and click Next.

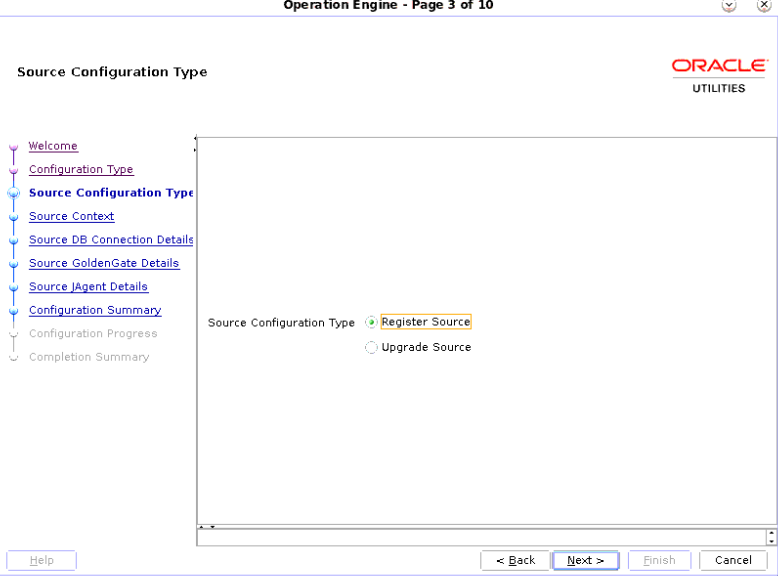
- On the Source Configuration Type page, select Register Source and click Next.
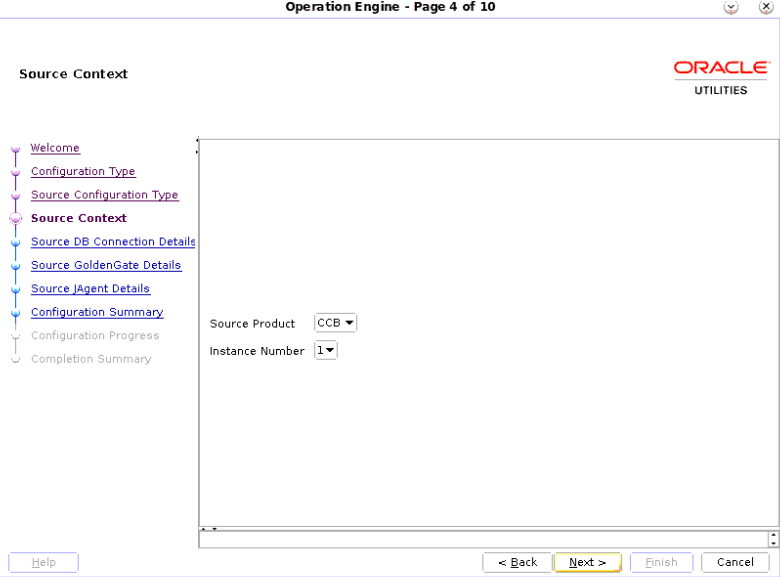
- On the Source Context page, select the appropriate source product and instance number from the drop-down menu and click Next.
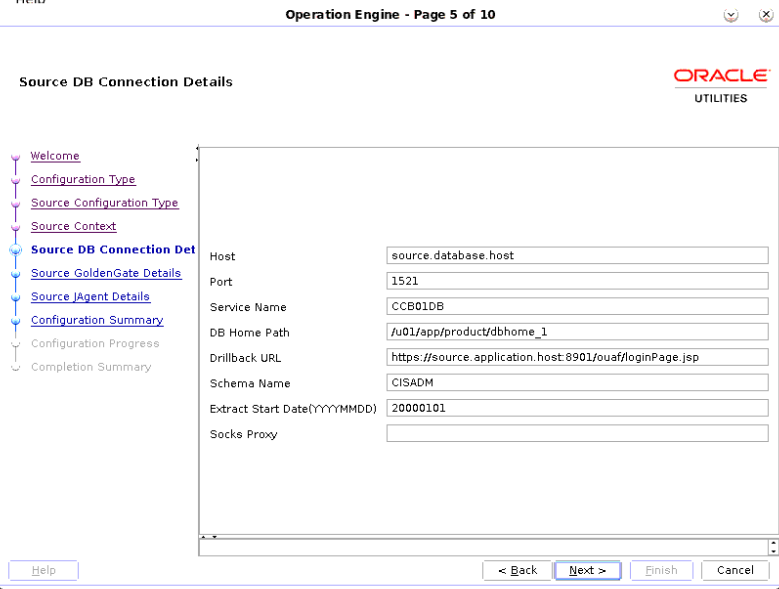
- On the Source DB Connection Details page, enter the information as in the table below and click Next.
Field Name and Description
Value
Host: Enter the source database host name.
Example: <dbserver.hostname>
Port: Enter the source database server port.
Example: <1521> Service Name: Enter the source database service name.
<Source database service name>
DB Home Path: Enter the source Database installed path.
Example: <ORACLE HOME>
Drillback URL: Enter the Edge product application URL.
Example: <http://source.application.host:port/ouaf>
Schema Name: Enter the source database schema name.
Example: <CISADM>
Extract Start Date (YYYYMMDD): This is the date from which data should be
extracted from the source database.20000101
Socks Proxy: This is the socks proxy host and port separated by a (:). Provide the value only if
a socks proxy has been set up. Otherwise, leave the field blank.[ BLANK ]
- On the Source GoldenGate Details page, enter the details as in the table below and click Next.
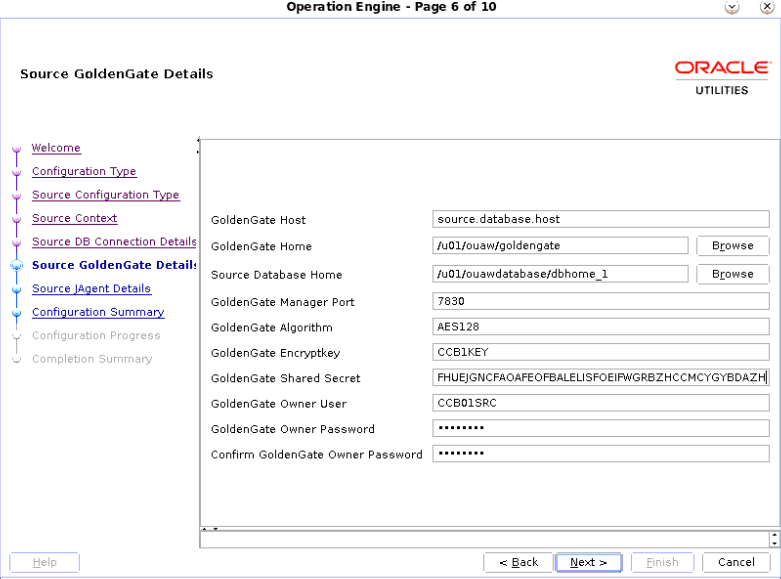
Field Name and Description
Value
GoldenGate Host: Enter the source database host where GoldenGate is installed.
Example: <dbserver.hostname>
GoldenGate Home: Enter the source database server where Oracle GoldenGate is installed.
Example: <GOLDENGATE HOME>
Source Database Home: Enter the source database home location.
Example: <ORACLE HOME>
GoldenGate Manager Port : Enter the source database server GoldenGate manager port.
Example: <7830>
GoldenGate Algorithm:This is the algorithm configured in GoldenGate on the source database server.
AES128
GoldenGate Encryptkey:The GoldenGate Encryptkey configured the source database server.
Generate ENCKEY. See Configure Data Encryption Using ENCKEYS Method.
GoldenGate Shared Secret:This is the shared secret key configured in Oracle GoldenGate on the source database server.
Shared Secret Generation. See Generate Shared Secret Password.
GoldenGate Owner User:This is the user name of the GoldenGate Owner user.
Example: <C##GGOWNER>
GoldenGate Owner Password: This is the password of the GoldenGate Owner user.
<GoldenGate Owner user password>
Confirm GoldenGate Owner Password: Re-enter the password of the GoldenGate Owner user.
<GoldenGate Owner user password>
- On the Source JAgent Details page, enter the details as in the table below and click Next.
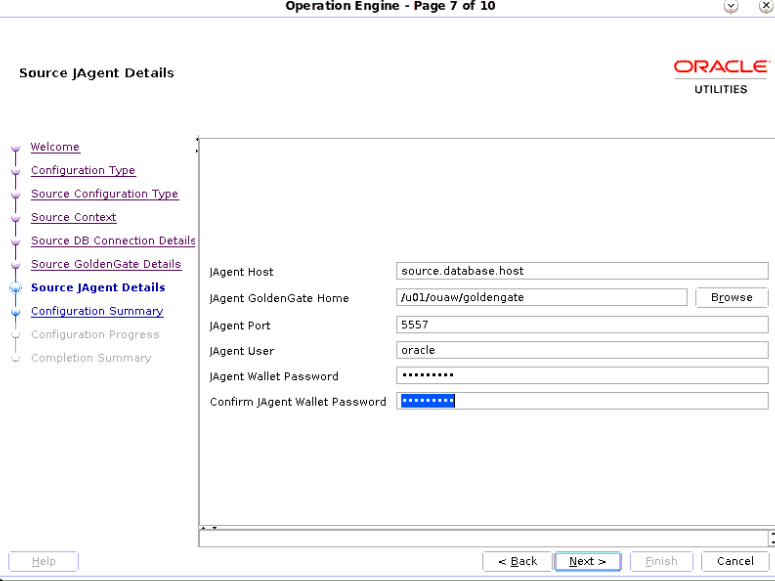
Field name and Description
Value Examples
JAgent Host: Enter the source database server host where JAgent is running.
Example: <dbserver.hostname>
JAgent GoldenGate: Enter the source database server Oracle GoldenGate installed location where GoldenGate JAgent is running.
Example: <GoldenGate home>
JAgent Port: Enter the port number on which Oracle GoldenGate JAgent is running on the source database server GoldenGate host.
Example: <5557>
JAgent User: Enter the user used for running JAgent.
Example: <oracle>
JAgent Wallet Password: Enter the JAgent Wallet Password.
<JAGENT wallet password>
Confirm JAgent Wallet Password: Enter the same JAgent Wallet Password as above.
<JAGENT wallet password>
- On the Configuration Summary page, review the summary to verify that the entered information is correct, and click Configure.
-
On the Configuration Progress page, review the progress of the configuration. Click Next when the progress bar is 100%.
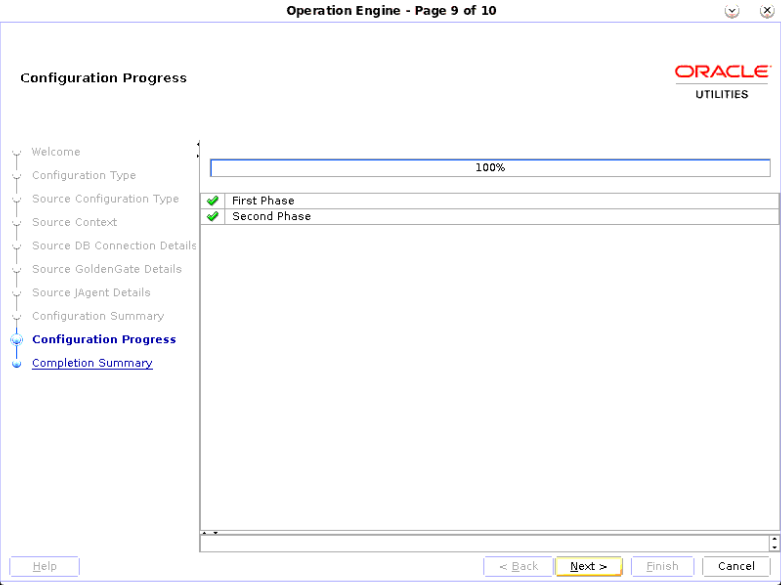
-
On the Complete summary page, review the log file path and the source database connection details. Click Finish. Upon completion, the status of the source registration is shown in a prompt.
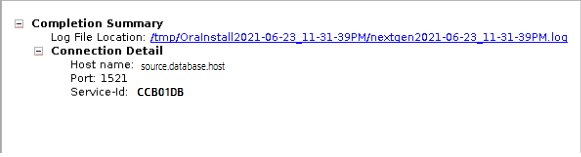
Note: The detailed logs of the operation will be available in the logs/system/deployodi.log file in the Oracle Utilities Analytics Warehouse home.
Example:
Copy<ETL Home>/logs/system/deployodi.log
set ORACLE_HOME, ORACLE_SID and PATH
cd <GG Home>
./ggsci
dblogin userid <GG Owner schema name>@<source db name>:<source db port>/<source db SID>,password <source shared secret>, encryptkey <encrypt key>
add schematrandata <Source app schema name> ALLCOLSConfigure the Source Product in Oracle Data Integrator
- Navigate to Oracle GoldenGate home.
- Set ORACLE_HOME and PATH, connect the ggsci command prompt, and run the command to stop the respective context code replicat processes on the GoldenGate target database server side.
- Exit the ggsci prompt.
- Navigate to <FMW HOME>/odi/studio/bin, set JAVA HOME and PATH, and execute the ODI file. Oracle Data Integrator Studio opens.
- Click Connect to Repository and provide the necessary inputs to execute the connection.

Field Name and Description
Value
ODI Connection
Login Name: Enter the name.
Example: <ODIREPO2800>
User Name: Enter the username as SUPERVISOR
SUPERVISOR
Password: Enter the password of user SUPERVISOR.
<password of SUPERVISOR>
Database connection(Master repository)
User: Target database master repository user name
Example: <OUA_MASTER>
Password: Target database master repository user password
Enter the password of Target database master repository user password
Driver list: Select the drivers from the list
Oracle JDBC Driver
Driver Name: Select the driver name from the list
oracle.jdbc.OracleDriver
Credentials Details
URL: Provide the target database connection url
Example: <targetdatabase.host>:<port>/<target database servicename>
Work Repository
Work Repository: Select the work repository from the search
OBIU
-
Click the Designer tab and navigate to the Load Plans and Scenario folder.

-
Expand the Framework and Scheduler folders.

-
Right click on B1_SYNC_CONTEXT Version 001 and click Run. A popup window opens.

-
In the Context menu, select the appropriate source product and instance number. In this example, Context is CCB1, which refers to instance 1 of the Customer Care and Billing (CCB) application.
-
In the Logical Agent field, select the appropriate logical agent. In this example, Logical Agent is set to WLS_Agent (ODI Agent).

-
Click OK.
cd <GOLDENGATE HOME>
export ORACLE_HOME=<ORACLE_HOME>
export PATH=$ORACLE_HOME/bin:$PATH
./ggsci
stop REPLICAT <product_contextcode>
Example:
stop REPLICAT <CCB1AA>
export JAVA_HOME=<JAVA HOME>
export PATH=$JAVA_HOME/bin:$PATH
./odiNetwork Management System (NMS) Source Application
This section details the steps for the source application setup in different versions of Network Management System (NMS).
Notes:
- Steps below are to be performed in ODI Studio.
- Ignore the steps below in case the names for scenarios, dimensions, or facts are already set to the ones defined throughout this process.
Versions 2.5.0.2 and Later
-
Rename the scenario name for the CD_ALARM_LOG NMS Dimension.
Navigate to Load Plans and Scenarios > Oracle Utilities BI > NMS > Dimensions > Alarm Log Dimension FROM2502.
On the Definition tab, double-click B1_D_ALARM_LOG_VW_FROM2502 Version 001, and rename it to B1_D_ALARM_LOG_VW Version 001.
On the Definition tab, double-click B1_PKG_CD_ALARM_LOG_FROM2502 Version 001, and rename it to B1_PKG_CD_ALARM_LOG Version 001.
- Click Save.
-
Rename the scenario for the CF_ABNORMAL_DEVICE_LOG NMS Fact.
Navigate to Load Plans and Scenarios > Oracle Utilities BI > NMS > Facts > Abnormal Device Log Fact FROM2502.
On the Definition tab, double-click B1_F_ABNORMAL_DEVICE_LOG_VW_FROM2502 Version 001, and rename it to B1_F_ABNORMAL_DEVICE_LOG_VW Version 001.
On the Definition tab, double-click B1_PKG_CF_ABNORMAL_DEVICE_LOG_FROM2502 Version 001, and rename it to B1_PKG_CF_ABNORMAL_DEVICE_LOG Version 001.
Click Save.
-
Rename the scenario for the New Damage Assessment Detail NMS Fact.
Navigate to Load Plans and Scenarios > Oracle Utilities BI > NMS > Facts > New Damage Assessment Detail Fact.
Expand the Fact, Right click on B1_PKG_CF_DAMAGE_ASMT_NEW_DETAIL_FROM2401 scenario and select Open.
Navigate to Definition tab and modify the name of the scenario to B1_PKG_CF_DAMAGE_ASMT_DETAIL.
Click Save.
Note: Once you go through these steps, go back to step three in Source Configuration Using OUAW Wizard
Versions 2.4.0.1 to 2.5.0.2
-
Rename the scenario for the CD_ALARM_LOG NMS Dimension.
Navigate to Load Plans and Scenarios > Oracle Utilities BI > NMS > Dimensions > Alarm Log Dimension.
On the Definition tab, double-click B1_D_ALARM_LOG_VW_UPTO2502 Version 001 and rename it to B1_D_ALARM_LOG_VW Version 001.
On the Definition tab, double-click B1_PKG_CD_ALARM_LOG_UPTO2502 Version 001 and rename it to B1_PKG_CD_ALARM_LOG Version 001.
- Click Save.
-
Rename the scenario for the CF_ABNORMAL_DEVICE_LOG NMS Fact.
Navigate to Load Plans and Scenarios > Oracle Utilities BI > NMS > Facts > Abnormal Device Log Fact.
On the Definition tab, double-click B1_F_ABNORMAL_DEVICE_LOG_VW_UPTO2502 Version 001 and rename it to B1_F_ABNORMAL_DEVICE_LOG_VW Version 001.
On the Definition tab, double-click B1_PKG_CF_ABNORMAL_DEVICE_LOG_UPTO2502 Version 001 and rename it to B1_PKG_CF_ABNORMAL_DEVICE_LOG Version 001.
Click Save.
-
Rename the scenario for the New Damage Assessment Detail NMS Fact.
Navigate to Load Plans and Scenarios > Oracle Utilities BI > NMS > Facts > New Damage Assessment Detail Fact.
Expand the Fact, right-click on B1_PKG_CF_DAMAGE_ASMT_NEW_DETAIL_FROM2401 scenario, and select Open.
Navigate to the Definition tab and modify the name of the scenario to B1_PKG_CF_DAMAGE_ASMT_DETAIL.
Click Save
Note: Once you go through these steps, go back to step three in Source Configuration Using OUAW Wizard
Versions below 2.4.0.1
-
Rename the scenario for the Damage Assessment Detail NMS Fact.
Navigate to Load Plans and Scenarios > Oracle Utilities BI > NMS > Facts > Damage Assessment Detail Fact.
Expand the Fact, Right click on B1_PKG_CF_DAMAGE_ASMT_DETAIL_UPTO_2401 scenario and select Open.
Navigate to the Definition tab and rename the scenario to B1_PKG_CF_DAMAGE_ASMT_DETAIL.
- Click Save.
-
Rename the scenario for the CD_ALARM_LOG NMS Dimension.
Navigate to Load Plans and Scenarios > Oracle Utilities BI > NMS > Dimensions > Alarm Log Dimension.
On the Definition tab, double-click B1_D_ALARM_LOG_VW_UPTO2502 Version 001 and rename it to B1_D_ALARM_LOG_VW Version 001.
On the Definition tab, double-click B1_PKG_CD_ALARM_LOG_UPTO2502 Version 001 and rename it to B1_PKG_CD_ALARM_LOG Version 001.
Click Save.
-
Rename the scenario for the New Damage Assessment Detail NMS Fact.
Navigate to Load Plans and Scenarios > Oracle Utilities BI > NMS > Facts > Abnormal Device Log Fact.
On the Definition tab, double-click B1_F_ABNORMAL_DEVICE_LOG_VW_UPTO2502 Version 001, and rename it to B1_F_ABNORMAL_DEVICE_LOG_VW Version 001.
On the Definition tab, double-click B1_PKG_CF_ABNORMAL_DEVICE_LOG_UPTO2502 Version 001, and rename it to B1_PKG_CF_ABNORMAL_DEVICE_LOG Version 001.
Click Save.
Note: Once you go through these steps, go back to step three in Source Configuration Using OUAW Wizard