Oracle Human Capital Management Cloud Configuration for Craft
This section focuses on importing the files that come as a part of the package and configuring them in the Oracle Human Capital Management Cloud environment for the integration to run successfully. Make sure to follow the same sequence for successful configuration.
The following topics are included:
Defining Extensible Flexfield
To define an extensible flexfield:
1. Navigate to Setup and Maintenance > Search.
2. Click Manage Workforce Structures Extensible Flexfields.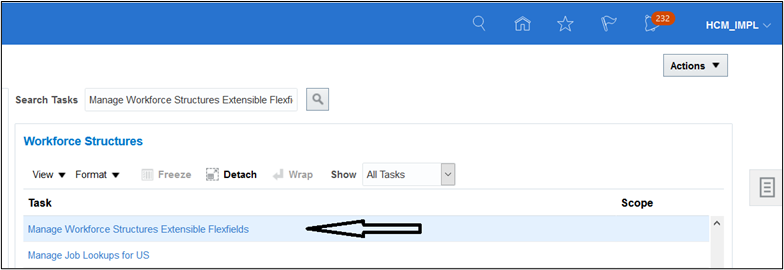

3. Click PER_JOBS_EIT_EFF.

4. Click the pencil icon to edit.
5. On the Manage Workforce Structures Extensible Flexfields edit view, click Manage Contexts.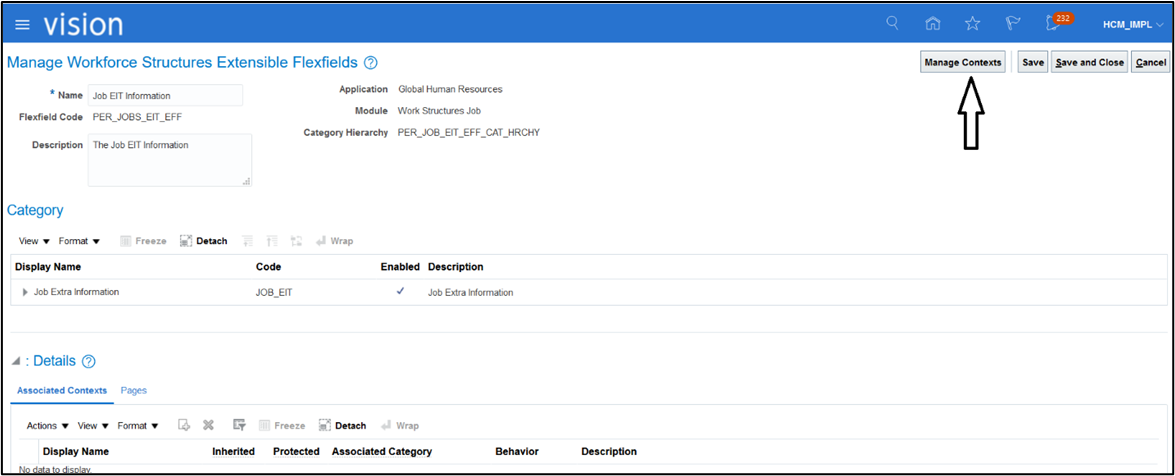

6. Click the add button (+).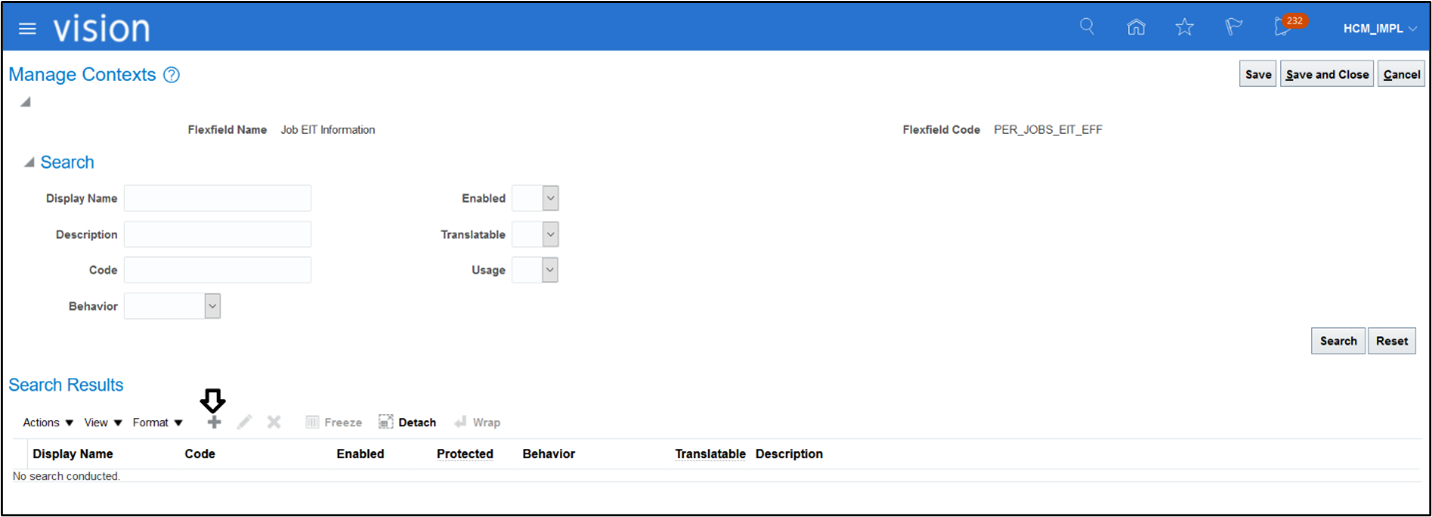
7. Add Context Usage and Add Context Sensitive Segments.
Flexfield Name: Job EIT Information
Flexfield Code: PER_JOBS_EIT_EFF
Display Name: WACS_JOB
Code: WACS_JOB
API name: WacsJob
Description: WACS JOB
Enabled: YES
Instruction Help Text: WACS Job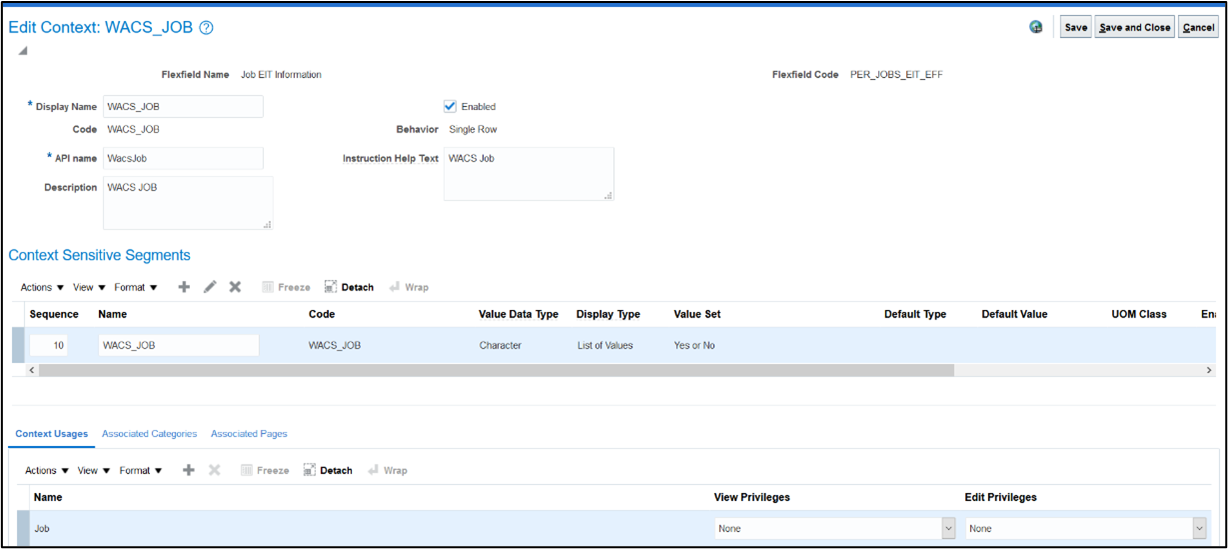

8. Click Save.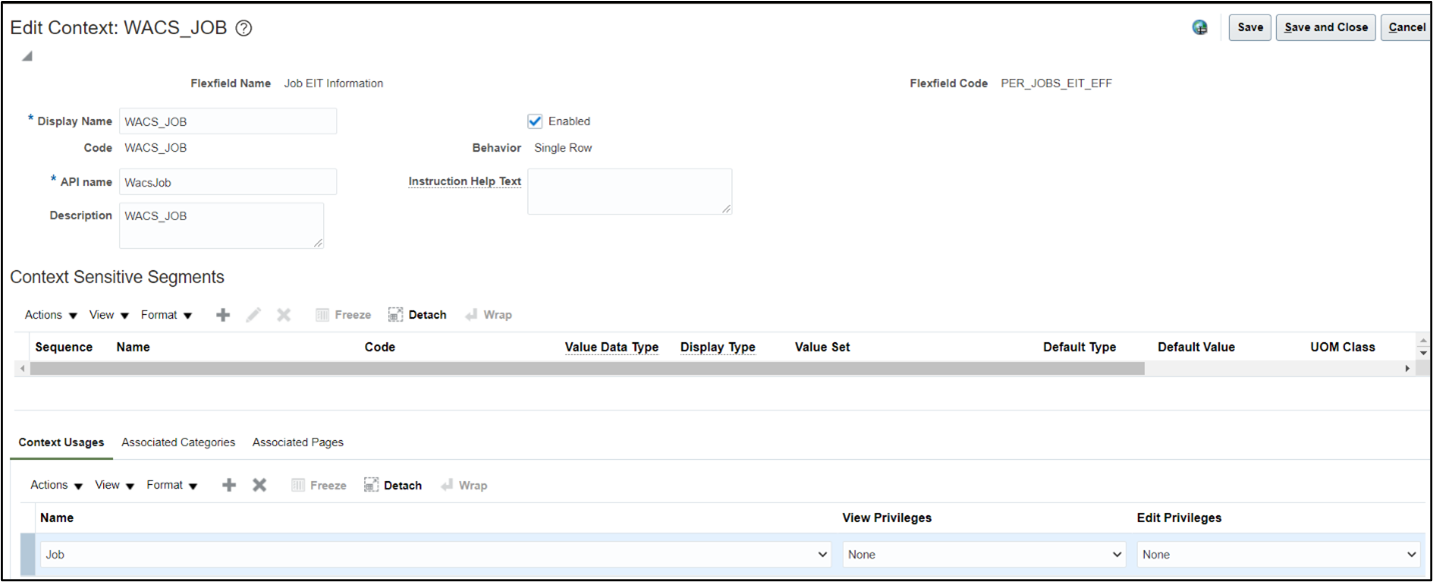

9. Navigate to Context Sensitive Segments and click the add button (+) to add a segment. Fill the data as shown below.
Name: WACS_JOB
Code: WACS_JOB
API Name: wacsJob
Data Type: Character
Value Set: Yes or No
Prompt: WACS_JOB
Display Type: List of Values
BI Enabled: Yes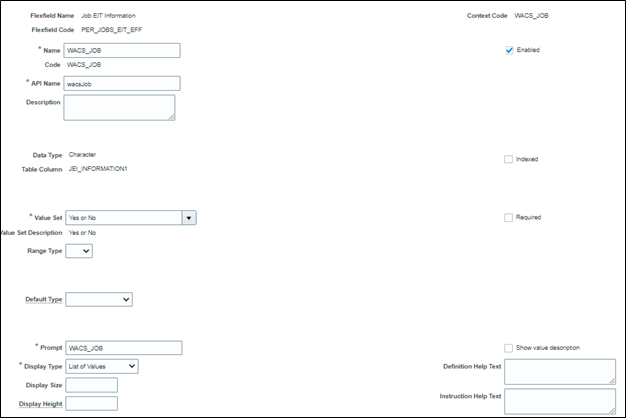

10. Click Save and Close. 

11. Select the search result and click the add button (+).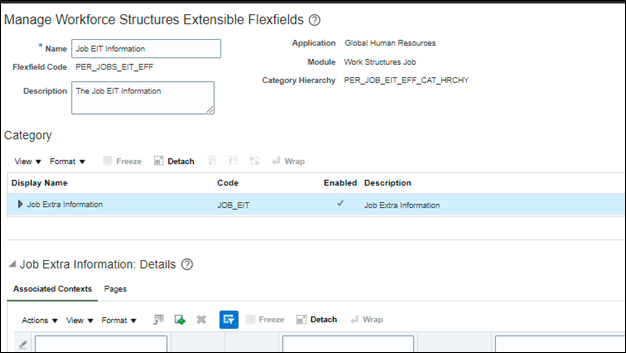

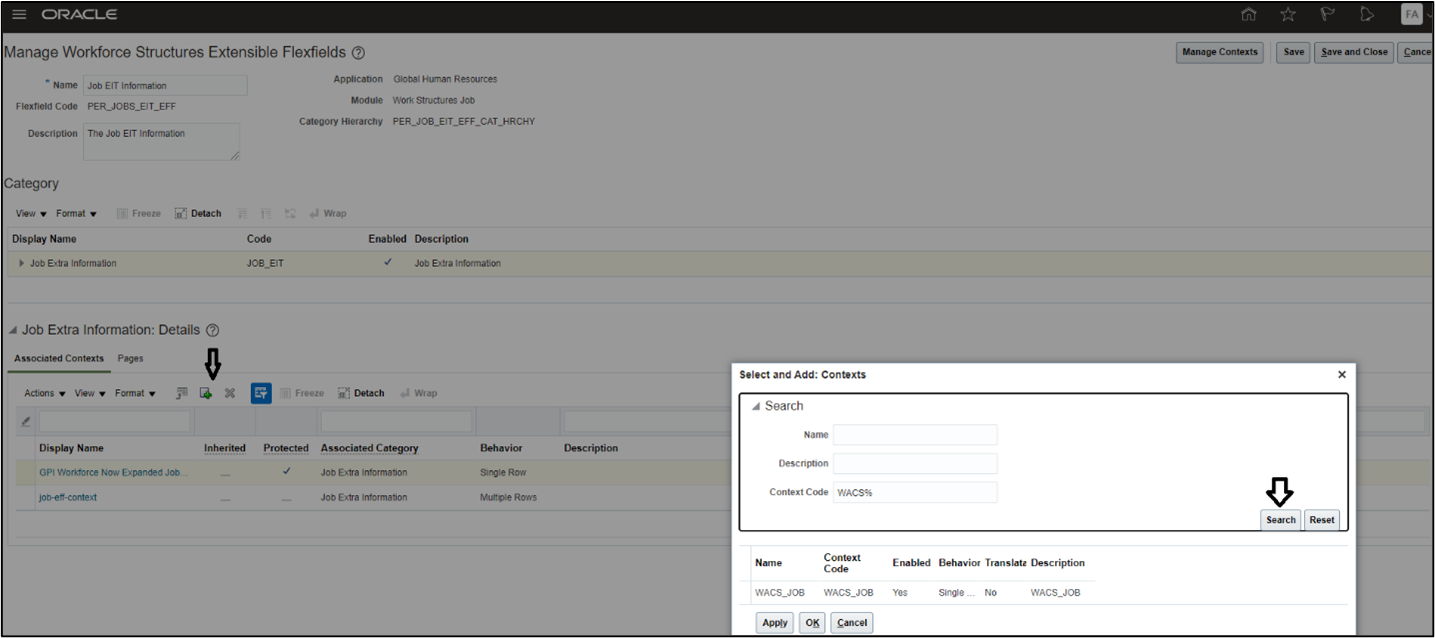
12. Search for “WACS_JOB”. Click Apply and then OK. The Associate page is shown as below after the Associated context is attached.
13. Click Save and Close.
14. Deploy Flexfield as shown below and make sure that the deployment status is highlighted in green.

To attach an EFF to a job in ERP:
1. Query any job that needs to be attached. Filter WACS JOB and attach EFF.
2. Navigate to Setup and Maintenance > Search > Manage Jobs.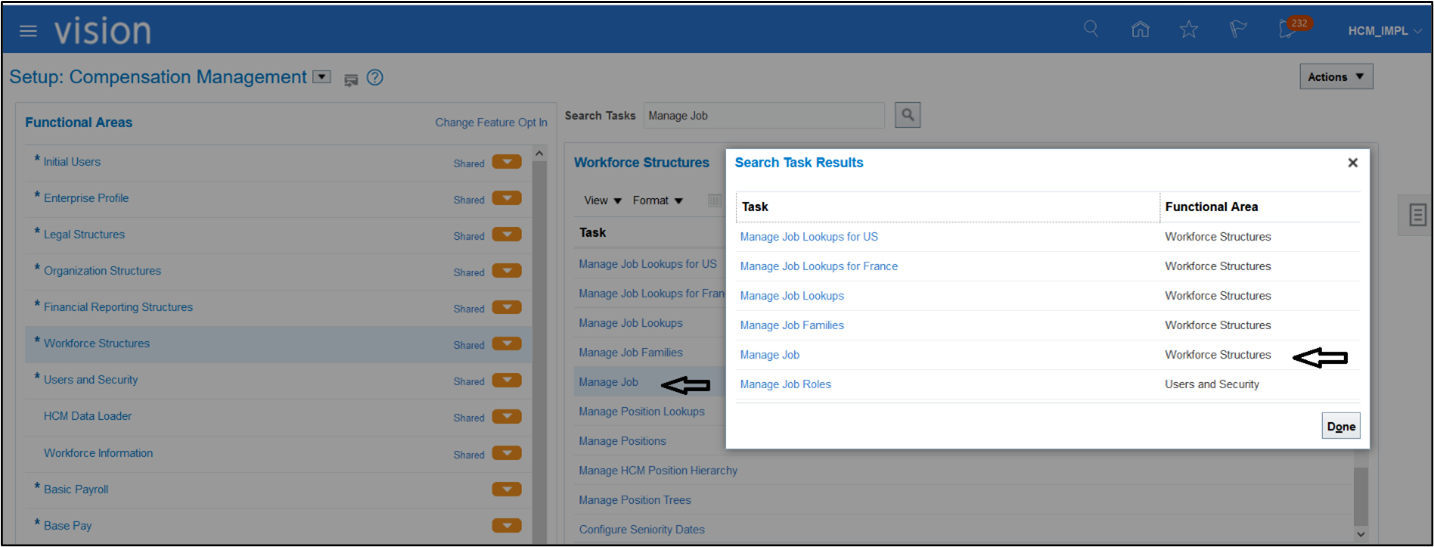

3. Query the Required JOBS.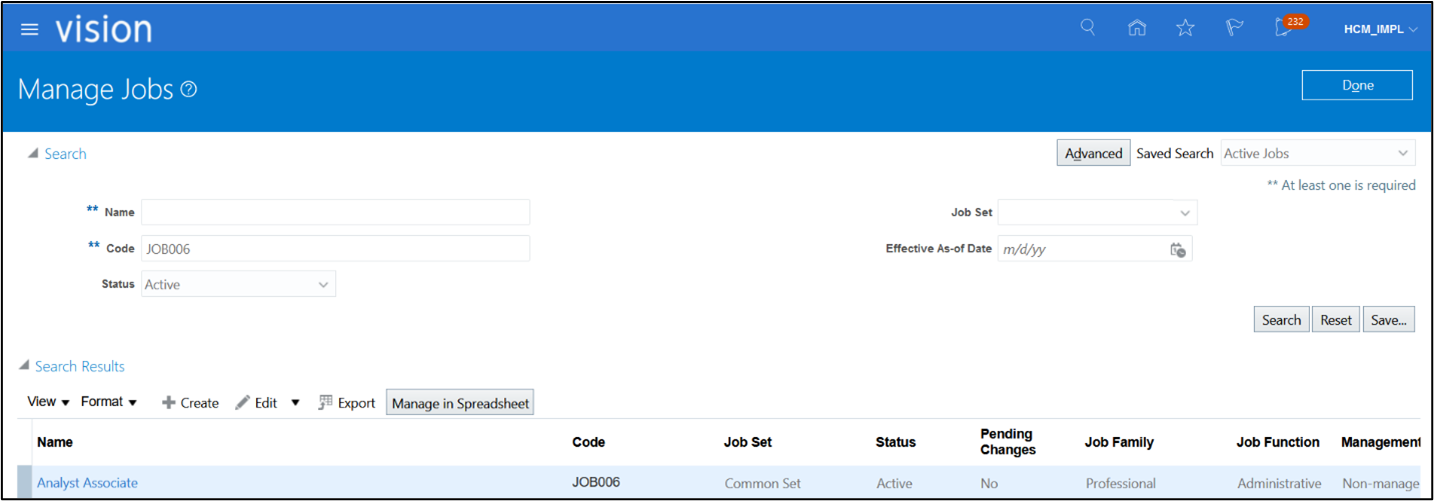

4. Click the job name and edit it.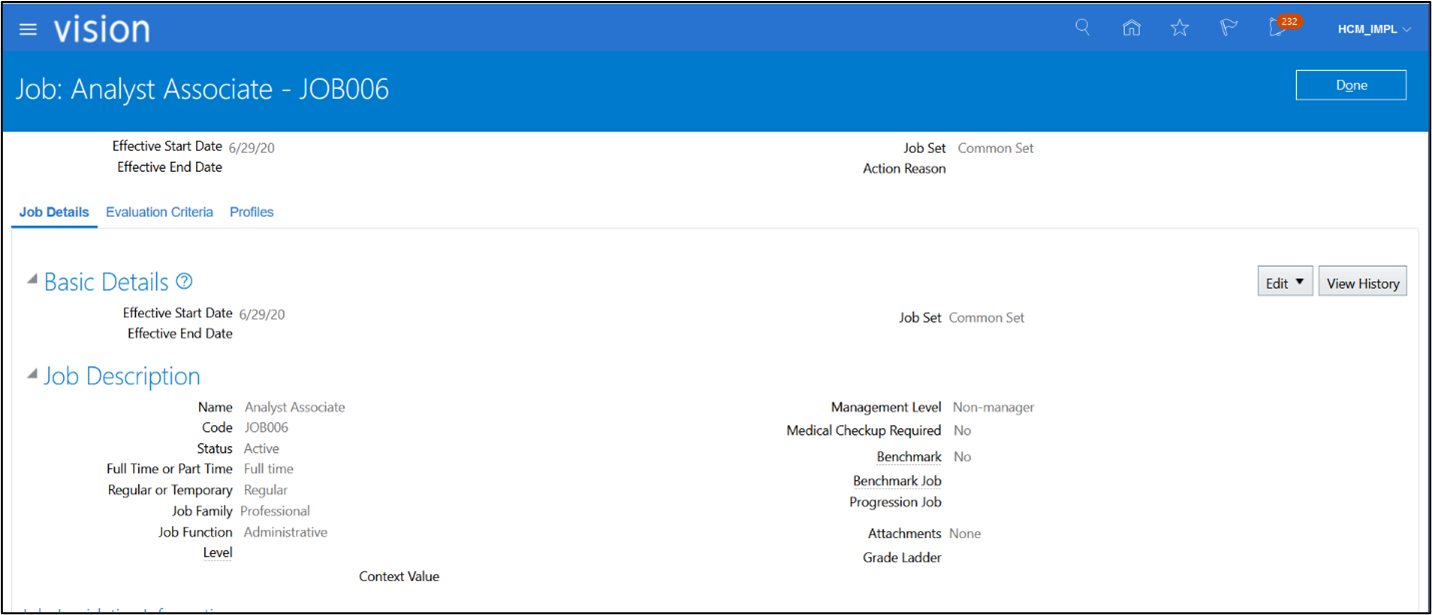

5. Click WACS Job and select Yes from the LOV. 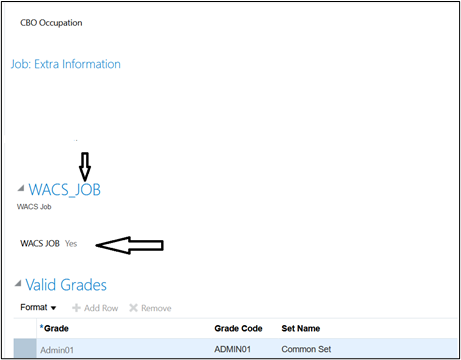

6. Click Done.
JOB006 is displayed in the Bulk extract or Incremental (if any changes).
Fast Formula
To use the Fast Formula file from the package available for Job extract:
1. Navigate to Setup and Maintenance > Search > Fast Formulas.
2. Enter Formula Name, Type and Description from the package (refer to the accelerator package on Market Place). Click Continue.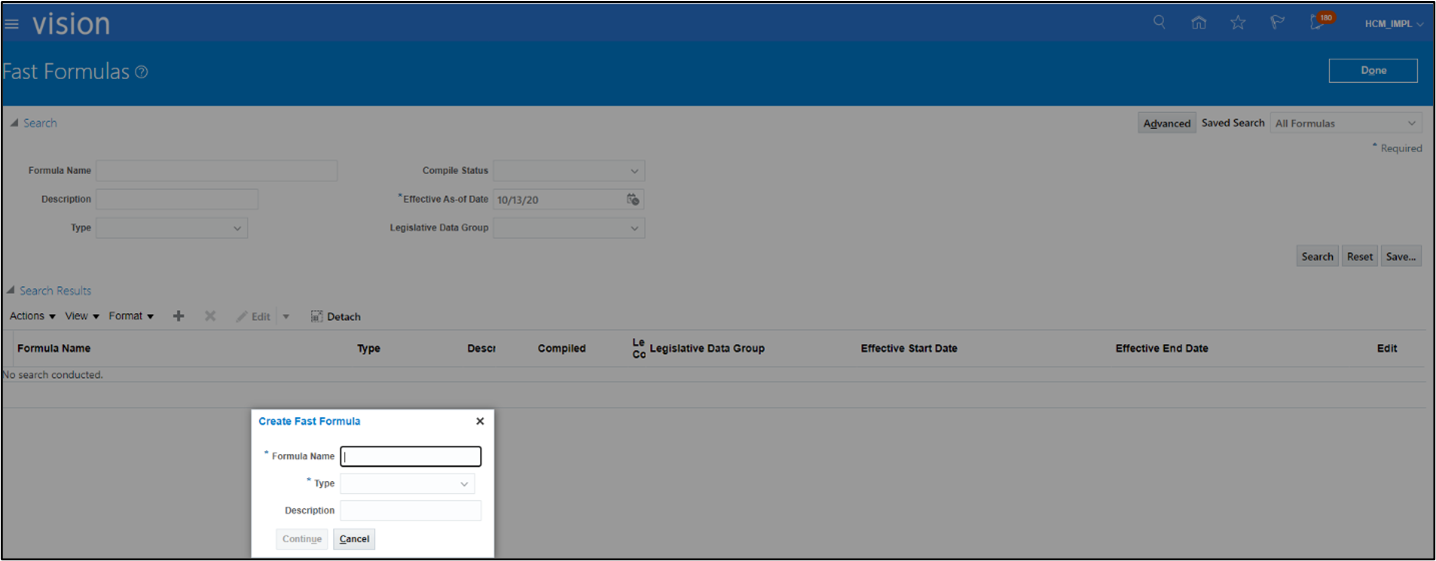

3. Take the text file (HCM_WACS_JOB_RATE_FF.txt) from the accelerator package and paste its code to Fast Formulas.
Formula Name: HCM_WACS_JOB_RATE_FF
Type: Extract Rule
Effective Start Date: 1/1/51
Description: HCM: WACS JOB Rate Calculation
4. Save it and click Compile.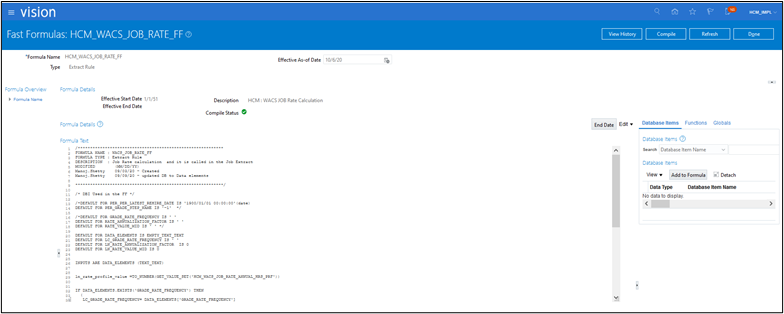

5. Make sure the Compile Status shows a green icon with a check-mark.
Business Intelligence Report Template for Job (Used in Data Exchange)
This template is used in data exchange to calculate the average rate of the job using the midpoint of multiple grades attached to it. For more information, refer to the Business Rules section.
Use the “.xdo.calatalog” file from package to a specified folder: Shared > Custom > HCMJOBWACS
Migrating Reports in Oracle Cloud Instance
The migration process involves un-archiving the report and data model.
To migrate reports in Oracle Cloud Instance:
1. Navigate to Tools > Report and Analytics.
2. Browse to the folder where the report and data model is placed.
3. Create a “HCMWACSJOB” folder in Shared Folder > Custom Folder (the name cannot change).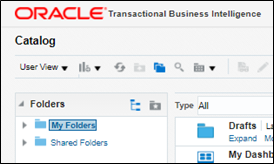

4. Use the files in the package with an extension of “xdo.catalog”.
5. Un-archive the report and data model.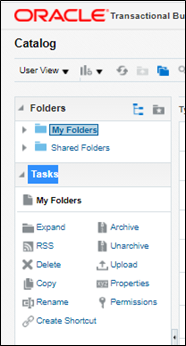

6. Un-archive files in the new instance.
a. Navigate to the folder where the report should be uploaded.
b. Click Unarchive in the Tasks pane.
c. The system prompts to browse and upload the file from your desktop. Make sure to select the “.xdo.catalog” file for the report.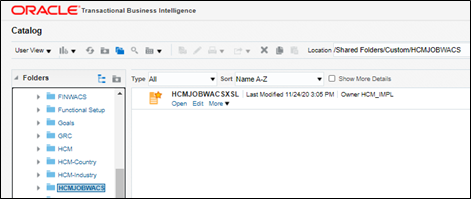

Extracting an Upload
To extract an upload:
1. Navigate to Tools > Report and Analytics > Data Exchange > HCM Extract.
2. Click Upload and Browse.
3. Upload the extract file “HCM_JOB_WACS”. 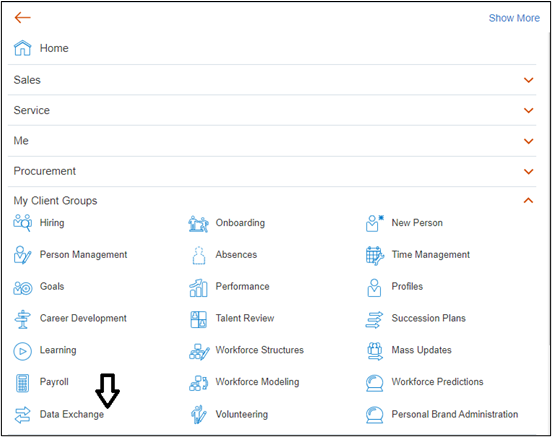

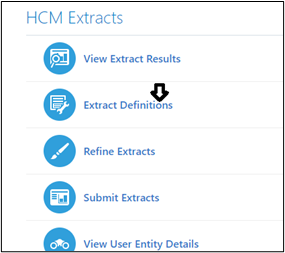

4. Click Compile and Validate.
5. Query the extract. Navigate to Advanced and click Extract Execution Tree.
6. After the Compile Status is green, click Save and Close.
7. Click the extract definition. Lock and save it.
8. Check all the value sets and mandatory fields are set.
9. Click the name of the extract.
10. Check if the Run screen is populated with the appropriate values in the respective fields.
11. On the Submit Extracts page, search for the job extract.

12. Click the Extract Name and verify the Legislative Group and Job Set values.
