Crew Operations on the Activity
This section provides step-by-step instructions for user operations from starting the activity to completing it.
1. Login to the Oracle Field Service Mobility application.
Note: You can access the application by adding '/m' to the Oracle Field Service URL <ofsc_link/m>.
2. Access the Mobility page using the worker/technician’s credentials. The page shows activities in the queue of the worker. To start working on the activity, the crew’s queue has to be activated.
3. Click Start to start the activity in the worker's queue.
4. Click “>” against the activity. The options Start, Cancel, Suspend, Map, and Book Activity are displayed.
5. Click Start to start the activity in worker's queue.
6. Enter the odometer details and click Submit.
7. Click Meter Details and then click Verify Device.
8. Enter the badge number and click Submit.
After the verification is successful, meter reading information is displayed in the Registers Information section.
9. Enter the respective details in the Meter Information and Registers Information sections. Click Submit.
This section includes the following:
Adding Service Histories
Service History Data is supported at the Meter/Item and Equipment level in Oracle Field Service. Hence, the end user need not configure any data on the Oracle Field Service side.
Meter/Item-Level Service Histories
Service history types are synchronized to Oracle Field Service when the activity is created successfully with added Service History Data to asset from Oracle Utilities Customer to Meter. The Oracle Field Service input properties are updated with activity level service history data.
Existing Meter
For an existing meter, the Service History button is displayed if the asset has valid service history types in Oracle Utilities Customer Cloud Service.
Click Service History. It loads the Service History plugin and displays the Service History page with the list of supported service history types of this asset.
New Meter
1. Click Verify Device to verify the details of the new device/item.
If the device has valid service history types in Oracle Utilities Customer to Meter, the Service Histories button is displayed along with the device details.
2. Click Service Histories to display the list of service histories of this asset.
The Service History plugin is loaded and the details are displayed on the Service History screen.
3. Add the service history details related to the service history types as shown in step 2.
4. Complete All to save and complete the service histories.
Viweing Equipment-Level Service Histories
The service history types are synchronized to Oracle Field Service when the crew queries for it. Equipment data will not be synchronized to Oracle Field Service when the activity is created, even though the equipment from Oracle Utilities Customer to Meter has the service history data. In Oracle Field Service, the input property is updated with equipment level service history data.
Existing Equipment
This section focuses on fetching service history data for the existing equipment (sent from Oracle Utilities Customer Cloud Service as part of activity create/update message).
As Oracle Utilities Customer Cloud Service sends the equipment's service history data only on a need basis, crew has to fetch the service history data explicitly.
1. For an existing equipment, Get Service History is displayed by default.
2. Click Get Service History to request for the service history data from Oracle Utilities Customer Cloud Service.
3. If Oracle Utilities Customer Cloud Service returns any service history data for this equipment, Service History is enabled.
4. Click Service History to load the service history plugin. The following Service History List screen is displayed.
5. Add service histories related to above service history types. Click Complete All to save and complete them.
New Attached/Installed Equipment
1. When the crew attaches or installs new equipment, if that equipment has service history types added in Oracle Utilities Customer to Meter, Service History is displayed.
2. Click Service History to load the service history plugin.
3. Add service histories related to above service history types. Click Complete All to save and complete them.
Adding Planned Service Histories
The Planned Service History button is displayed if the activity has valid service history types in Oracle Utilities Customer to Meter.
Click Planned Service History. It loads the Planned Service History plugin and displays the Activity-level Service History screen with a list of supported service history types of this activity.
When service histories are added for different services history types for this activity, and are completed in the Planned Service History plugin, the activity level service history data is saved to the respective output property.
Adding Attachments
The Oracle Field Service screens are enhanced to support attachments at service point level, existing meter/item/equipment level, new meter/item/equipment level, and activity level.
Attachment Screens
A technician can upload the attachments at the following levels.
• Attachments at Service point
• Attachments at New Device
• Attachments at Existing Device
• Attachments at Activity
Note: Devices include meter, item, and equipment.
Supported Mime Types for Attachments
The technician can upload the attachments of the following mime types at service point/new device/existing device/activity level in Oracle Field Service.
• image/gif
• image/jpeg
• text/plain
• text/html
• video/mpeg
• audio/x-wav
• application/zip
• application/vnd.ms-excel
• application/pdf
• application/msword
Attachments at Service Point
The following figure shows the Attachment option available in the Service Point section.
After uploading the attachments, saved and unsaved attachments can be viewed as shown below.
Attachments at New Device
The following figure shows the Attachment option available at the New Device section.
After uploading attachments, saved and unsaved attachments can be viewed as below.
Attachments at Existing Device
The following figure shows the Attachment button in the Existing Device section.
After uploading attachments, both saved and unsaved attachments can be viewed.
Attachments at Activity
The figure below shows the Activity Attachments button.
After uploading attachments, both saved and unsaved attachments can be viewed.
Customer Signature
As part of the 20C changes, Oracle Field Service is enhanced to allow technicians to take the customer signature before completing an activity and Oracle Integration Cloud sends the customer signature to Oracle Utilities Customer Cloud Service as part of activity completion information.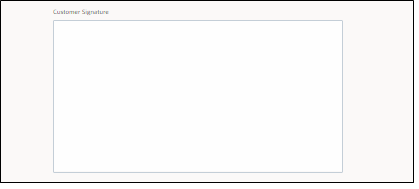
After the customer signs in the Customer Signature field, the technician clicks Submit to complete the activity.
Note: Use Clear to clear the customer signature.
Customer Signature is also sent as an attachment in the Jpeg format to Oracle Utilities Customer Cloud Service as part of activity completion information.
Adding Equipment
The Oracle Field Service application is enhanced to support equipment that includes attaching, detaching, and replacing or exchanging which comes as part of activity from the source application.
The equipment includes support at service point level, meter level measuring component level.
Equipment Screens
Oracle Field Service includes the following screens to attach an equipment:
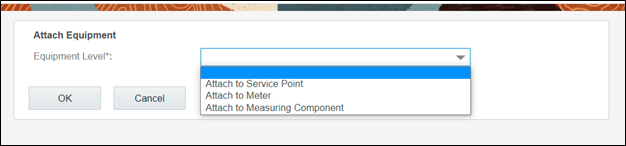
Attach Equipment to Service Point
This screen allows to attach an equipment to the Service Point.
Provide the badge number or serial number to verify the equipment. After the verification is successful, the equipment appears on the screen labeled as 'SP'.
Attach Equipment to Meter
This screen allows to verify the attach. After the verification is successful, equipment will be attached to Meter.
Provide the badge number or the serial number and click Submit. 
After the verification is successful, equipment navigates to the Attached screen labeled with Meter.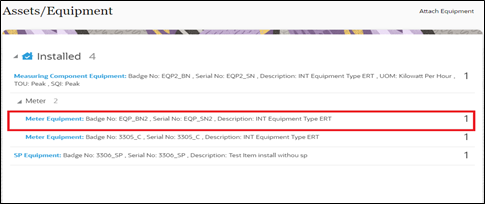
Attach Equipment to Measuring Component
This screen allows you to verify the attachment. After successful verification, equipment will be attached to Measuring Component.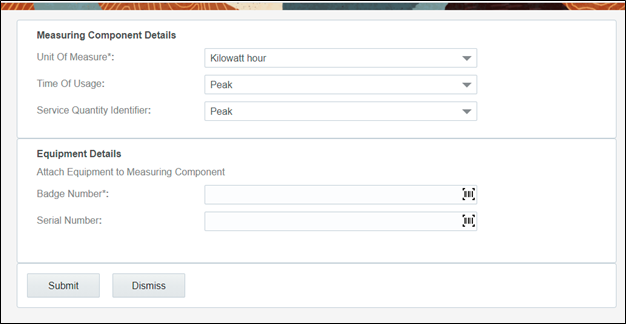
Enter the Unit of Measure, Time of Usage, Service Quantity Identifier, and Badge Number or Serial Number. Click Submit. After verification is successful, equipment navigates to the Installed screen labeled with Measurement Component.
Undo Attach
After attaching an equipment, it can be detached. To undo an equipment attach:
1. Click the attached equipment. The equipment details are displayed along with the Undo Attach option.
2. Click Undo Attach. A confirmation alert is displayed.
3. Click Yes to delete the equipment from the inventory.
Replace Equipment
The existing equipment can be replaced from the Service Point or Meter or Measuring Component level.
To replace an existing equipment:
1. Navigate to the Existing screen and click the equipment.
2. Click Replace.
3. Enter the badge number or the serial number values to verify. Click Submit.
The existing equipment is added to the Detached screen and the new equipment appears in the Installed screen.
Exchange Meter
Meter from the Service Point can be exchanged with a new meter. You can either move all equipment attached to the existing meter to the new meter or attach new equipment to the new meter.
After verifying the new device, the Equipment screen displays the following options:
• Attach Equipment
• Move Equipment to New Meter
Attach Equipment
This Attach screen is similar to the Attach Equipment screen that is used to verify the equipment and install the equipment to a new meter.
Move Equipment to New Meter
This screen allows you to move all equipment attached to the existing meter to the new meter.
Click Move Equipment to New Meter to move all the equipment of old meter to installed screen.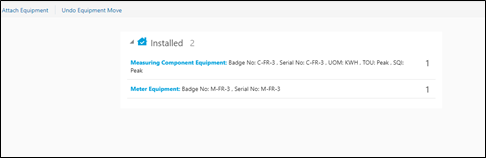
Note: We can undo the Equipment move by clicking Undo Equipment Move.
Custom Activities Support for Move Equipment to New Meter
Currently, the Exchange Meter and Meter Disconnect activities support the Move operation. It does not work for other operations.
To support custom activities:
1. Configure the Custom Activity property.
a. Login to Oracle Field Service.
b. Navigate to Properties and search for "c2m_ert_custom_move_act_types" property.
c. Click Modify and add the custom activity to the property.
Syntax: [description][Activity type label]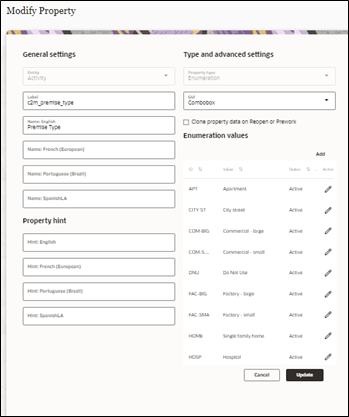
d. In the English field, enter the description and activity type label.
Example: Move Registers[Move ERT Registers]
e. Click Update. The value is updated in the property list.
2. Add the Condition to the Move Register operation in Inventory Grid.
After adding the custom activity to property, add the custom activity type to the inventory grid condition.
1. Login to Oracle Field Service.
2. Navigate to Configuration > User Type > C2M OFSC.
3. Navigate to Screen Configuration > Inventory Grid.
4. Click Move Equipment to New Meter operation and add the condition.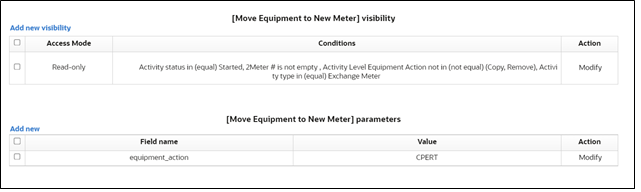
5. Select the custom activity type from list of activity types available in the Oracle Field Service environment.
6. Click Save.
7. Add the same condition for the Undo Equipment Move operation.
Create unrelated pickup work:
1. On the Mobility page, select Unrelated Pickup to use this feature.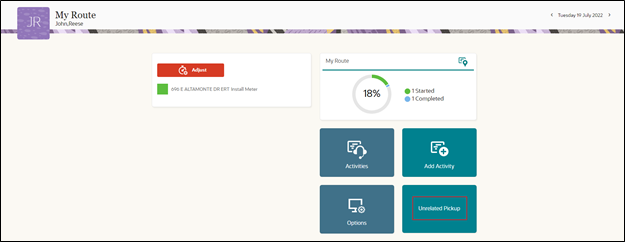
2. On the Unrelated Pickup page search for service points.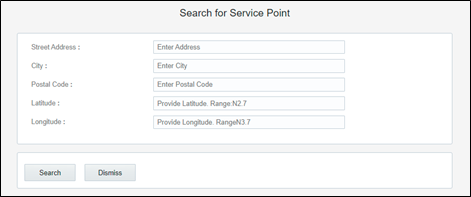

3. Select the desired service point from the list and click Select.
4. Click Add Activity to create the activity.
After successful creation of the activity in Oracle Field Service, the corresponding activity is created in Oracle Utilities Customer Cloud Service.
5. Click Complete.
6. On the End Activity page, enter the required details. Click Submit.