Asset Installs and Removals
This section includes instructions to perform asset installs and removals.
Make sure the Asset Component Install Exchange Undo plugin is configured correctly with the Oracle Integration Cloud endpoint.
Installing Assets
To install an asset:
1. Start the activity.
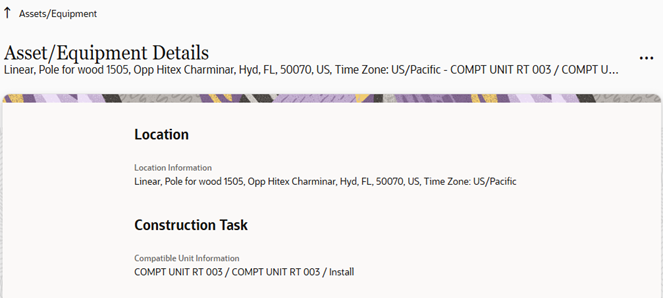
2. To install an asset, click the location.
3. Click Install Asset.
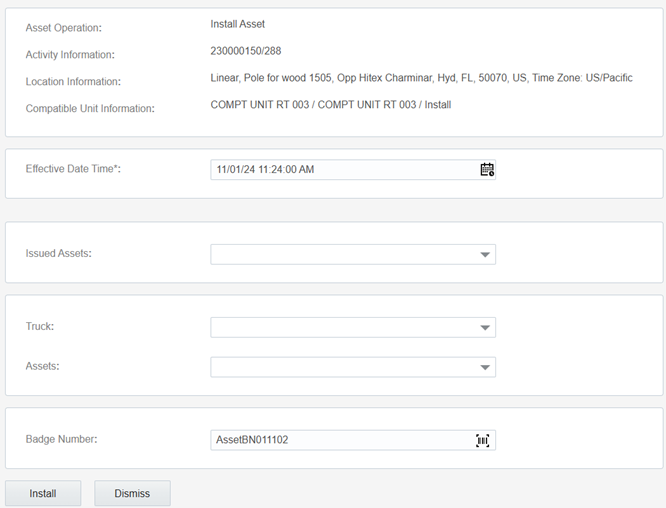
4. Enter the Badge Number of the asset to be installed in this location and click Install.
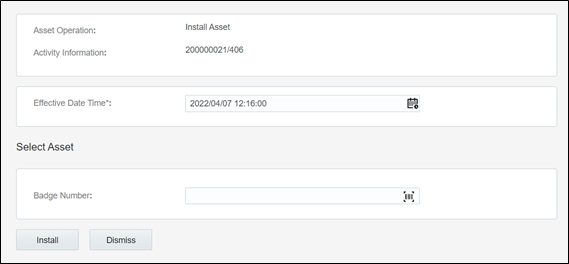
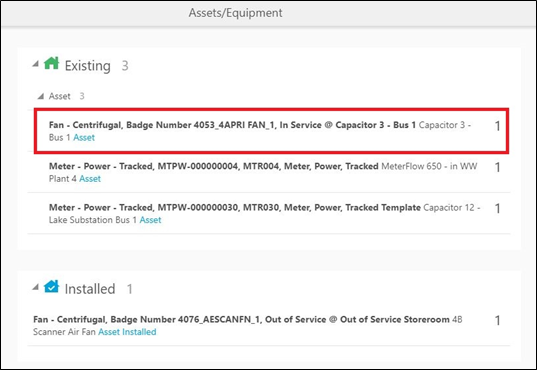
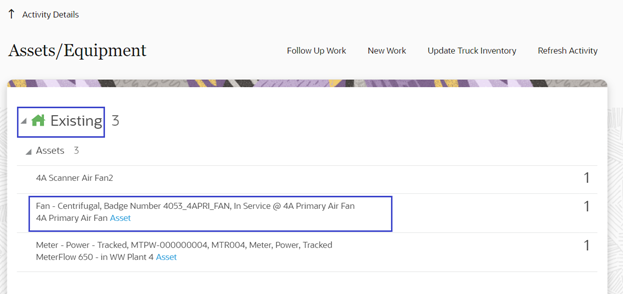
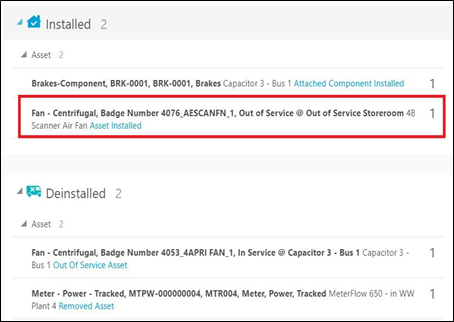
The newly installed asset is shown in the Installed pool.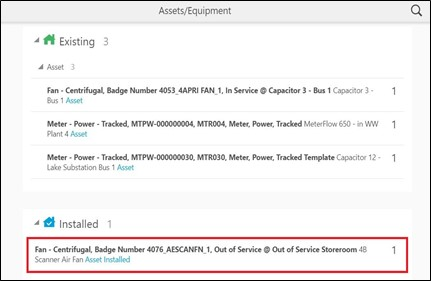
Make sure that the Oracle Integration Cloud endpoints are configured in the Asset Component Install Exchange Undo plugin. If not, the ‘plugin not loaded error’ is displayed.
Make sure that the asset and location are configured with valid values in Oracle Utilities Work and Asset Cloud Service. If they are not, the asset installation will fail.
Example: Invalid location for asset installation
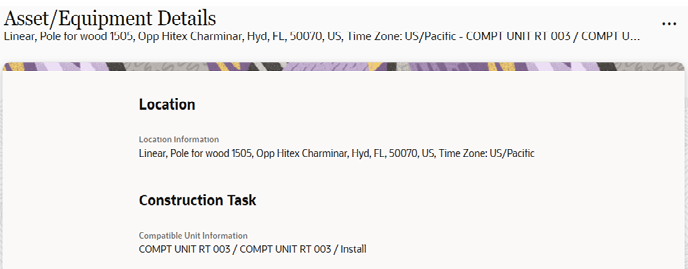
Installing Assets for Construction Work Activity
To install a non-tracked asset for construction work activity:
1. Start the activity.
2. Select the location where the asset should be installed and click Install Asset.
3. The Badge Number, Serial Number, and Asset Number fields should be displayed and validated based on the value of the corresponding assetNoControl, badgeNoControl, and serialNoControl elements.
• W1NP (Not Present): This field should not be included on the page.
• W1DO (Display Only): This field should be present but display only.
• W1OP (Optional): This field should be present and the value should be editable. When the entered details are validated, if the value is blank, no error should occur.
• W1RQ (Required): This field should be present and the value should be editable. When the entered details are validated, if the value is blank, an error should occur.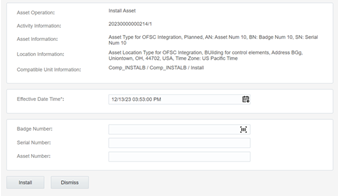
The new asset installed is shown in the Installed pool.
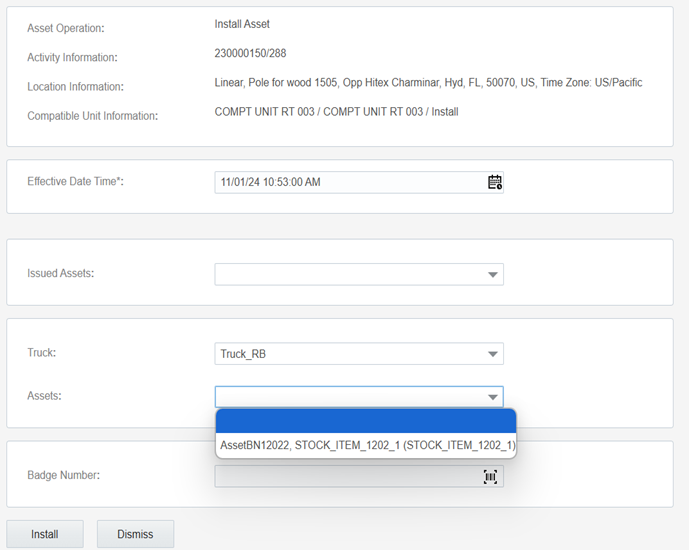
Tracked assets are created in Oracle Utilities Work and Asset Cloud Service and they can be either Truck assets or Issued assets. Issued assets are present in regular storeroom. The user must request to install the same asset in Oracle Field Service. Truck assets are present in truck storeroom and they are synchronized to Oracle Field Service by Oracle Utilities WACS OFSC Schedule Storeroom Sync in Oracle Integration Cloud by scheduling this flow. Alternatively, you can click Update Truck Inventory available on the Assets/Equipment page in Oracle Field Service. Click Install Asset to view the assets in the Issued Asset and Truck Asset drop-down lists.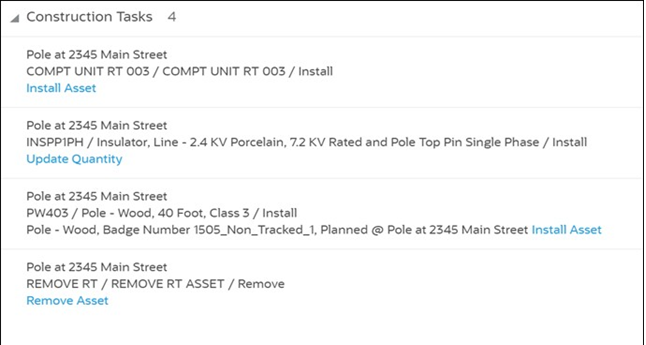
Install Issued Asset
The field worker can install the issued asset on the location. The location type and asset type should be same. Else, the assets will not be shown in the Issued Asset drop-down list.


The real time asset verification call will go to Oracle Utilities Work and Asset Cloud Service. After the successful response, the asset will be moved to Install pool in Oracle Field Service.
Install Truck Asset
The field worker can install a truck asset on the location. The compatible unit asset type and asset type should be same. Else, the assets will not be shown in the Asset drop-down list. Select the truck from the Truck drop-down list to view the assets in that truck.
The asset will be removed from respective Truck inventory pool and moved to Install pool in Oracle Field Service.
The field worker can install the truck asset from the inventory itself using the Materials plugin. Navigate to the respective asset in truck inventory pool. Click Install Asset to view the Location drop-down list containing unique combination of location and compatible unit.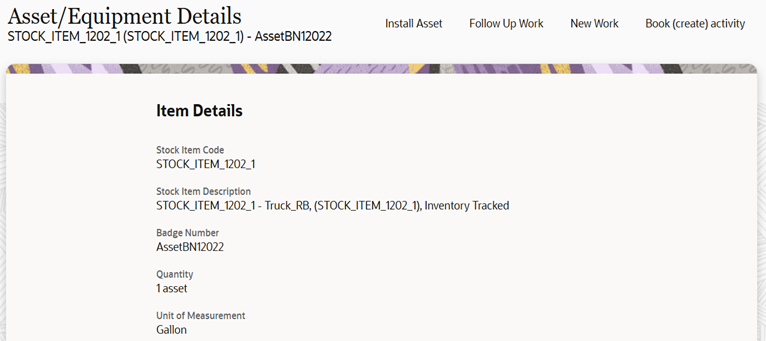
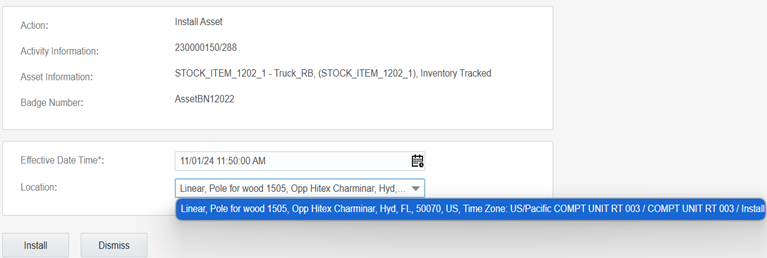
After successful verification, the inventory quantity will be reduced to ‘0’, and asset will be moved to Install pool in Oracle Field Service.
Install a Non-Issued Asset
The field worker can install a non-issued tracked asset on the location using the Badge Number field. The real-time asset verification call is sent to Oracle Utilities Work and Asset Cloud Service. After successful response, asset type of the asset will be validated to match the asset type of the compatible unit. Then, the asset will be moved to Install pool in Oracle Field Service.

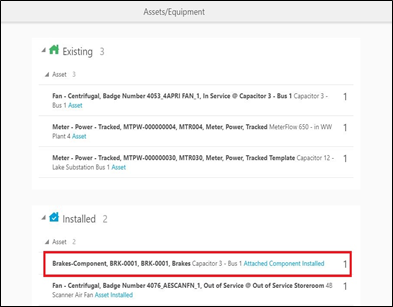
Attaching Components
To attach a component:
1. Start the activity.
2. To attach a component, click the asset.
3. Click Attach Component.
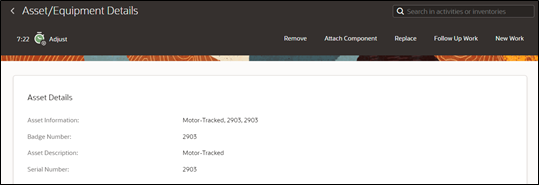
4. Enter the Badge Number of the component to be attached and click Attach.

The attached component is shown in the Installed Pool.
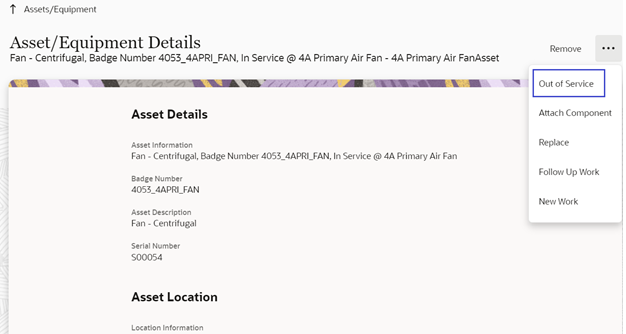
Moving Assets Out of Service
To move an asset out of service:
1. Start the activity.
2. To move an asset out of service, click the asset.
3. Click Out of Service.
4. Enter the Effective Date/Time and click Submit.
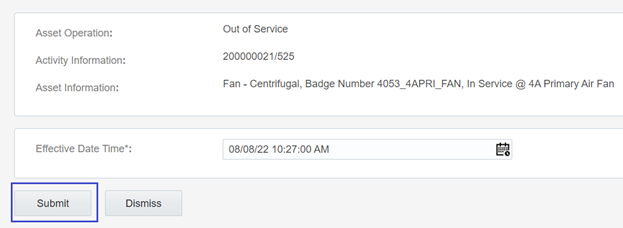
The asset moves to ‘out of service’ status in the Deinstalled pool.
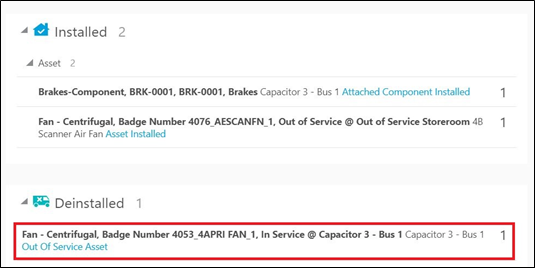
Removing Assets or Components
To remove an asset/component:
1. Start the activity.
2. Click the asset or component to be removed.

3. Click Remove.
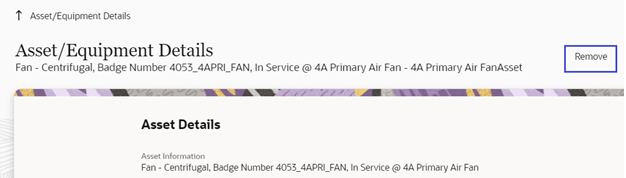
4. Enter the Effective Date/Time and click Submit.
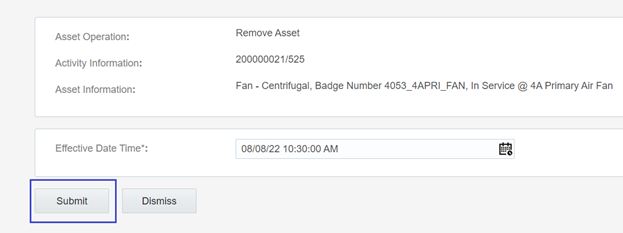
The asset or component is removed and moved to the Deinstalled pool.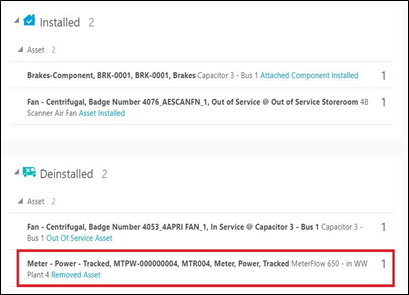
Removing Assets for Construction Work Activity
To remove an asset for construction work activity:
1. Start the activity. Select the asset to be removed and click Remove.
2. Select the asset from the Asset drop-down list.
3. Select the condition based of which the asset has to be removed, and then click Submit. The asset to be removed should be selected from the assets in the installedAsset list where:
• The asset type in the installedAsset list matches the compatible unit's asset type; and
• The asset has not already been removed (and so in the Deinstalled group); and
• The node identifier in the installedAsset list matches the location's node identifier.
The asset or component is removed and moved to the Deinstalled pool.
Undoing Installations
To undo the installation:
1. To undo an installation, click the newly installed asset in the Installed pool.
2. Click Undo Install Asset.
3. Click Submit.
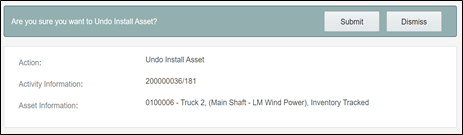
The asset or component installation is undone and it disappears from the Installed pool.
Undoing Newly Attached Components
To undo a newly attached component:
1. To undo attach, click the newly attached component in the Installed pool.

2. Click Undo Attach Component.
3. Click Submit.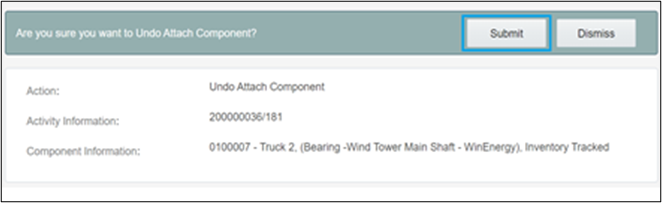
The attach operation is undone and the component disappears from the Installed pool.
Navigating to Parent Assets
To navigate to the parent asset:
1. Click the newly attached component in the Installed pool.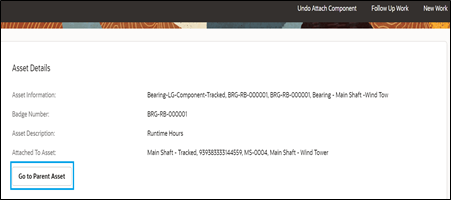
2. Click Go to Parent Asset and proceed to the parent asset to which the component is attached.
Undoing Asset Removals
To undo an asset removal:
1. Select the removed asset.
2. Click Undo Remove.
3. Click Submit.
The removal is undone and asset disappears from the Deinstalled pool.
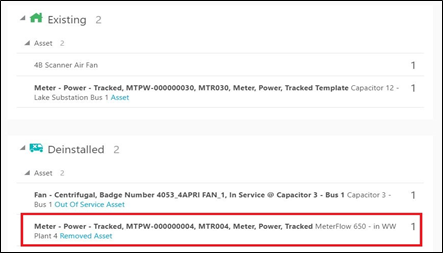
Moving Assets Back to Service
To move an asset back to service:
1. Click Asset in Out of Service.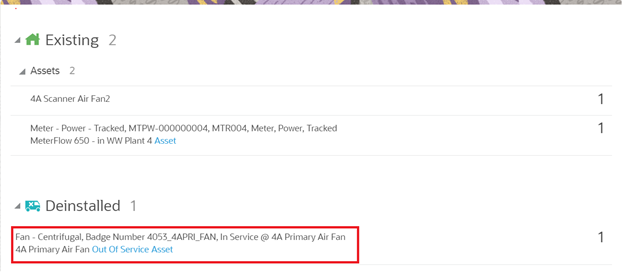
2. Click Back to Service.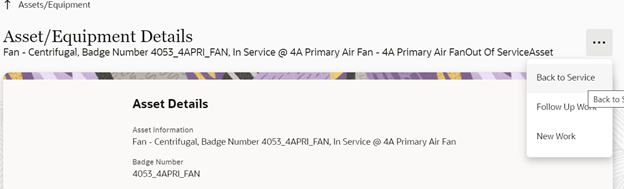
3. Click Submit.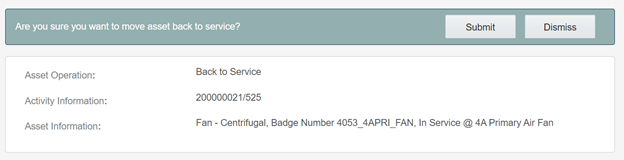
The asset moves to the Existing pool.
Replacing Assets
To replace an asset:
1. Select the asset that needs to be replaced.
2. Click Replace.
3. Enter the badge number of the asset to be replaced with and click Replace.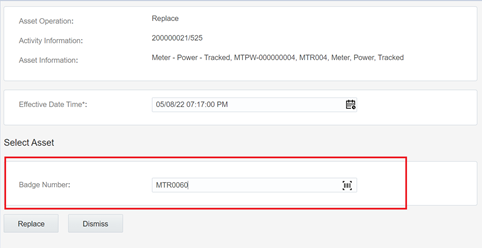
The new asset moves to the Installed pool and the replaced asset moves to the Deinstalled pool.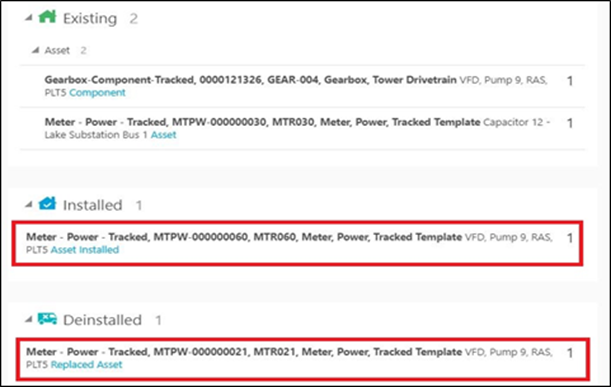
Replacing Components
To replace a component:
1. Select the component to be replaced.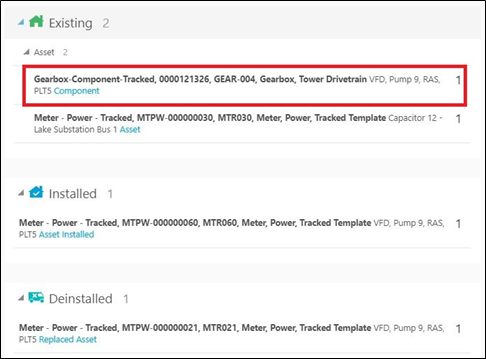
2. Click Replace.
3. Enter the badge number of the replacing component and click Replace.

The replaced component moves to the Deinstalled pool and the newly attached component moves to the Installed pool.
Undoing Asset Replacements
To undo replace an asset:
1. Click Installed Asset/Component.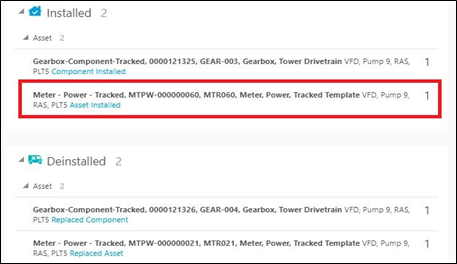
2. Click Undo Replace.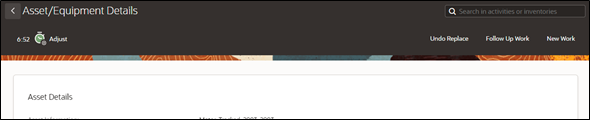
3. Click Submit.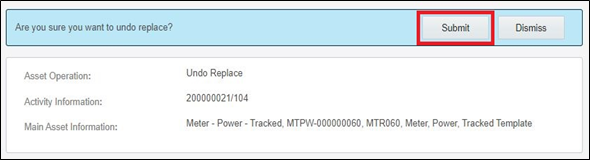
The replaced asset moves back to Existing pool.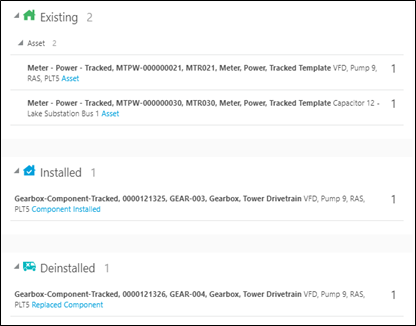
4. Repeat the above steps to undo replace for a component.
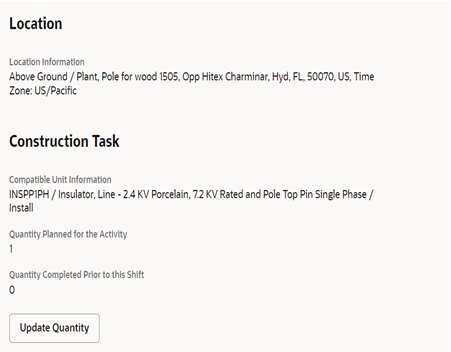
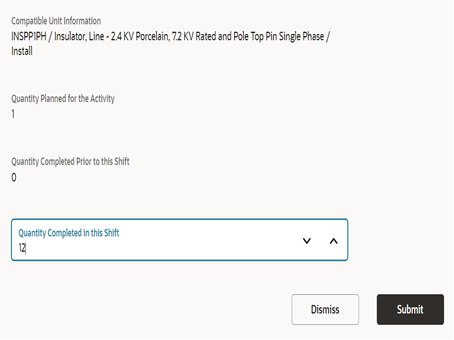
Update Quantity in Construction Work Activity
Field worker can update any extra quantity of equipment that is required apart from the planned quantity and quantity completed is divided into two fields Quantity Completed prior to this shift (sum of previous segments quantity for multiday activities and 0 for normal activity) and Quantity completed in this shift.