Adding Columns to the Work Queue
You can use VB Studio to extend the data that is displayed in the Work Queue table. You can add new or existing fields that are available in your Oracle Utilities customer information system APIs and are mapped in the Utility Data Model template.
For example, you might want to add new columns to the Work Queue that provide your agents with additional data about service requests and to do tasks.
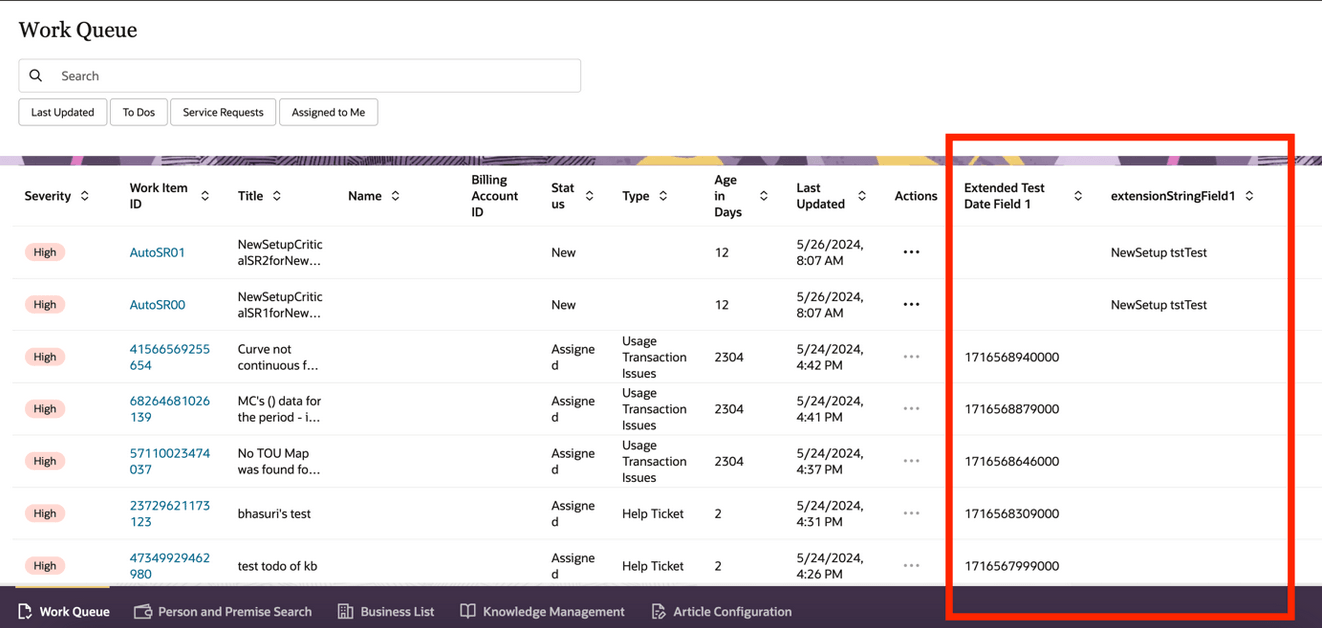
This image shows an example of new columns that are added as extension.
Figure 14-4 Work Queue

Before you complete this task, you must first use the information available in the Work Queue Extended Fields Configuration topic to complete these tasks:
-
Update the utility configuration for the WQ_Default template.
-
Configure the new fields from the Oracle Utilities customer information system APIs in the extension fields that are provided.
This example assumes that the reader understands how to use Visual Builder. For additional information, see:
-
The Visual Builder Studio library in the Oracle Help Center
-
Customizing Variables and Constants in the Extending Oracle Cloud Applications with Visual Builder Studio Guide
Example: Adding New Columns to the Work Queue Table
-
Log into CX for Utilities Agent Service of CX for Utilities Sales as an administrator.
-
Click the menu at the top right of the page and select Edit Page in Visual Builder Studio.
-
Select your workspace and click Select. Note that you can also create a new workspace if needed.
-
Select Layouts and in the App UIs panel, expand Oracle Utilities Advanced Care UI application and then select the Activity layout.
-
Select the Activity rule set and create a copy of that rule set.
-
Select the rule set you just created and then select the fields that you have configured as extension fields in the WQ_Default template. This configuration should have been completed as a prerequisite to this task.
-
Click the Preview button to view the extended fields as new columns in the Work Queue table.
Now that you have added new fields to the Work Queue, you can also update the names (column headers) of those columns on the screen using these steps.
-
Log into CX for Utilities Agent Service as an administrator.
-
Click the menu at the top right of the page and select Edit Page in Visual Builder Studio.
-
Select your workspace and click Select. Note that you can also create a new workspace if needed.
-
Select Layouts and in the App UIs panel, expand Oracle Utilities Advanced Care UI application and then select the Activity layout.
-
Click on Fields and then choose the field you want to update.
-
In the Label Hint field, enter the name you want to display as the column header. For example, enter Account Party Number.
-
Click the advance-customer-care tab and then click Preview to view your changes.
Parent topic: Use Cases for Customer Experience for Utilities