Configuring Notifications
Notifications are defined using Digital Self Service - Transactions self-service master configuration. The inclusion of the applicable Digital Self Service - Transactions Integration APIs packaged with Customer Care and Billing and Customer to Meter, provides a base configuration for all alerts and notifications within the master configuration. Oracle Utilities recommends using the default configuration, which is described below.
Note: This documentation provides steps to complete these configuration tasks using Oracle Utilities Customer Care and Billing. However, many of these tasks can be completed with other applicable products such as Oracle Utilities Customer to Meter or Oracle Utilities Customer Cloud Service. Refer to your applicable product documentation for steps to complete the configuration using your Oracle Utilities product. Additionally, this documentation assumes that you know how to create the various objects listed below as well as modify or create master configurations. For additional details on these tasks, refer to the applicable Oracle Utilities Documentation.
Alerts and Notifications
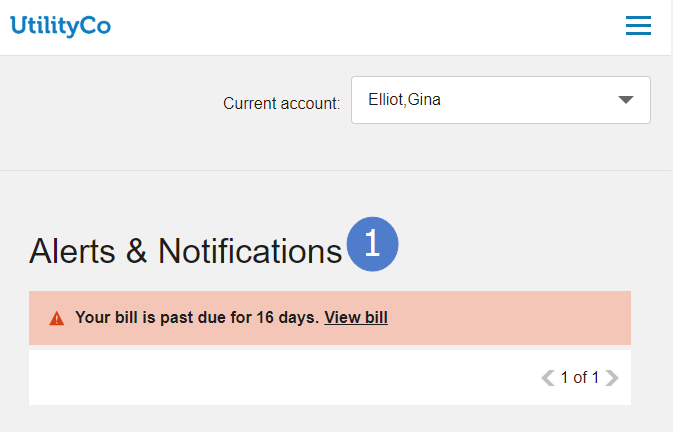
Alerts and notifications provide important information to the customer such as an outstanding balance notice, program enrollment status, open service tickets, general announcements, or pending start or stop service requests.
To review alerts and notifications configuration and log account access events:
The steps below guide you in locating and reviewing the default alerts and notifications configuration. You can also review the supporting objects listed in the steps below to review additional details about the alert and notification configuration. The steps below also enable the logging of account access events by customers. This information is required for alerts and notifications to determine the last login for a customer, which impacts which alerts and notifications to display to the customer.
Notes:
- For steps to define alerts for guest user invitations, see Defining Invite Guest User Tasks, Roles, and Alerts.
- For steps to define alerts for need to schedule service appointments, see Configuring Service Appointments.
- Log in to Customer Care and Billing as a user with edit access for the CC&B Self-Service Integration master configuration.
- From the Admin menu, select General, and select Master Configuration. From the Master Configuration zone, select the Edit option for the CC&B Self-Service Integration master configuration. The master configuration is displayed.
- From the Digital Self Service Alerts zone, review the alert and notification configuration, including:
- Alert Category: Alerts and notifications are grouped by alert categories, which also determines the script that processes the alerts and notifications. The alert categories are defined in the
CX_CCB_ALERT_TYPE_FLGlookup table. - Alert Type: Alerts and notifications are defined as an applicable alert type. You can use the Alert Type drop-down list to review the alert types that are available for an alert category.
- Priority: Alerts and notifications with a lower priority are shown higher in the list of alerts and notifications for a customer. For example, if two alerts are available for a customer, one with priority 10 and one with priority 15, the alert with priority 10 is shown higher in the list and followed by the alert with priority 15.
- Severity: For critical alerts, a severity of High configures the critical alert to be displayed on the Overview Dashboard.
- Script: A script is available for each alert category that defines how the alerts and notifications are processed:
- CX-AccAlert: This script supports account status alerts.
- CX-DueAlert: This script supports bill due alerts and notifications.
- CX-PayAlert: This script supports payment status alerts and notifications.
- CXInvAlert: This script supports invite guest user alerts and notifications.
- Alert Category: Alerts and notifications are grouped by alert categories, which also determines the script that processes the alerts and notifications. The alert categories are defined in the
- From the Log Self-Service Access zone, ensure the following configurations are defined to log account access events:
- Log Self-Service Access Script:
C1-CSSCreCC - Customer Contact Class and Customer Contact Type: Customer contacts track the creation of self-service tasks to aid customer service representatives in reviewing tasks created for an account. In addition to selecting applicable customer contacts with these options, review Logging Self-Service Tasks for more information on configuring customer contacts.
- Log Self-Service Access Script:
- Click Save to save the master configuration changes.
General Announcements
All general announcements messages are configured using the Opower Configuration Tool. Up to two general announcements can be displayed simultaneously, one urgent and one notification. Multiple messages can be configured with effective and expiration dates, allowing you to plan and schedule important communications efficiently.
Note: This documentation provides steps to complete configuration tasks using the Opower Configuration Tool. For more information on using the Opower Configuration Tool, refer to the Oracle Utilities Opower Configuration Tool User Guide.
To configure general announcements messaging and behavior:
- From the Opower Configuration Tool, select Widgets, and then select Toast Notification. The configurations for Toast Notification are displayed.
- To configure text and messages related to general announcements:
- Select Text (locale), where locale is the language locale you are configuring.
- From the Announcement Message tab, select Add New Announcements to create a new announcement message and complete the following configurations:
- Key: The first field is automatically assigned a key value, which is used later to link it to your general announcement functionality.
- Text: Include the text and content that is displayed as part of the banner.
- Select Add New Announcements to create as many messages as required for separate banners.
- Select Save Changes to save any changes to the default text and messages.
- To configure the behavior of the general announcements:
- Select Functionality.
- From the General Announcements tab, select Add New General Announcements to create a new announcement banner and complete the following configurations:
- The first value is an automatically generated value for the banner. You can use the default value.
- Key: Type the key value created previously in the procedure when creating the message for the banner.
- Effective At and Expires At: Provide date and time values that define when a general announcement is first displayed and then hidden from view, respectively. The values must be provided in YYYY-MM-DD HH:mm format. Be aware that only one urgent and one regular general announcement can be displayed at a time, so ensure that general announcements with the same severity use different time ranges.
- Enabled: Set to Yes to display the general announcement for the defined time range.
- Severity: Set to either Urgent or Regular. Urgent general announcements are given top priority and appear prominently at the beginning of the notifications list. Regular general announcements are displayed alongside other notifications without heightened priority.
- Select Save Changes to save any changes to the default configurations. Certain configurations that are directly available are updated in the preview, while some configurations may not be directly highlighted in the preview.
- Refer to the Oracle Utilities Opower Configuration Tool User Guide for steps to publish configuration changes.
Account Notifications
The account notification options, which define preferences for outbound notifications, available to a customer depend on the configuration of notification types, service tasks, and suppression criteria, which are further defined in the configuration steps. Preferences for the following notification types are included in the base product:
- Push Notifications: Utilities can configure if customers can opt-out of push notifications, which include:
- Marketing Communication Preferences: Applies to communications about initiatives your business may market to customers. It is recommended that marketing and communication preferences allow opt-out to comply with CAN-SPAM laws and regulations.
- Credit and Collections Preferences: Applies to customers whose accounts enter the collections process.
- Service Advisory: Applies to communications about service disruptions.
- Subscription Notifications: Subscription notifications require explicit enrollment from the customer to be received, which include:
- Prepaid Billing New Charge Notification: Applies to customers on prepaid service and is sent out each time a new bill segment is calculated.
- Prepaid Billing Payment Request Notification: Applies to customers on prepaid service and is sent out when the customer's prepaid balance drops below a calculated minimum threshold.
- Late Payment Notification: Sent to customers if no payments are received after the last bill's due date has passed.
- Payment Received Notification: Sent to customers each time a payment is received.
- Bill Due Notification: Sent to customers a designated number of days before the last bill's due date.
- Bill Ready Notification: Sent to customers when their bill is ready.
Note: This documentation provides steps to complete these configuration tasks using Oracle Utilities Customer Care and Billing. However, many of these tasks can be completed with other applicable products such as Oracle Utilities Customer to Meter or Oracle Utilities Customer Cloud Service. Refer to your applicable product documentation for steps to complete the configuration using your Oracle Utilities product. Additionally, this documentation assumes that you know how to create the various objects listed below as well as modify or create master configurations. For additional details on these tasks, refer to the applicable Oracle Utilities Documentation. To deliver these notifications to customers through outbound delivery such as email or SMS, refer to the Outbound Notification Configuration Guide.
To configure account notifications:
Complete the following steps to define notifications and support billing and payment notifications in Digital Self Service - Transactions.
- Log in to Customer Care and Billing as a user with edit access for the CC&B Self-Service Integration master configuration.
- If the notifications available with the base product do not cover all your notification use cases, create any additional necessary objects. When defining your master configuration, this can include:
- Notification Type: The notifications that are displayed such as late payment notices and bill due notices. From the Admin menu, select Database, select Lookup, and select Search. Search for C1_NF_SSTASK_TYPE_FLG, which is the lookup table to modify if you need to add additional notification types.
- Service Task Type: The notifications for Digital Self Service - Transactions require service tasks that store the notification preferences or manage the timing of when a notification is sent. The business objects C1-NotifyTaskType and C1-PPBPaymentNotifyTaskType support the notifications available with the base product.
- Suppression Criteria: The scripts that define when to hide a notification from a customer. From the Admin menu, select System, select Script, and select Add to create a new script. You can also select Search to review the available scripts. The script C1-CkSuppPPB provides an example suppression criteria script.
Note: If you add additional notification types, be aware that the script WX-NotfPref compiles the list of notifications for self-service applications, which are then made available through the WXSetNotificationPreferences inbound web service. For additional information on the integration of notification management, refer to the Oracle Utilities Customer Self Service Implementation Guide.
- From the Admin menu, select General, and select Master Configuration. From the Master Configuration zone, select the Edit option for the CC&B Self-Service Integration master configuration. The master configuration is displayed.
- From the Notification Service Tasks zone, include all required notifications that are to be available in a customer's account preferences. You can use the demo Self-Service Integration master configuration as a starting point, or create your own master configuration and add applicable notifications. To include additional notifications, click the plus icon and then define the following:
- Template-Based Notification Type and Service Task Type: Select the notification and applicable notification task. For example, to include bill due notifications select Bill Due Notification and Bill Due Notification Task respectively.
- Suppression Criteria: If required for a notification, search for and apply suppression criteria to a notification to ensure that only a defined set of customers receive the notification. For example, notifications related to prepaid billing should only be available for customers with prepaid service, which is supported through the service script C1-CkSuppPPB.
- Click Save to save the master configuration changes.
To deliver notifications to customers through outbound delivery, such as email or SMS, refer to Configuring Outbound Notifications.