Steps
The steps are grouped within a block step that can be expanded or collapsed by clicking the icons displayed to the far left of the block row’s name.
When shown, each step will have a step number to the far left along with the following fields:
• The Crew field displays all of the crews that are currently assigned to this step.
• The Status field displays the current state of the step. This includes, but is not limited to New, Instructed, and Completed. For a full list of step states, see “Switching Sheet Step States”.
• The Device field displays the device alias referenced in the step.
• The Operation displays the description of the switching action. When the switching action is associated to a safety document, then the safety document type and number will be displayed in this field after the switching description.
• The Address displays the address of the device referenced in this step. This field is only visible when the switching step card is selected. To the right of the address is an address edit icon (), that, when tapped, will bring up an Enter or Change Step Address panel that allows you to change the address. This icon will only be visible if your crew has been assigned to the step.
• The External ID displays the external id (if one exists) of the tag referenced in the step. To the right of the External ID field, is an edit icon (), that, when tapped, will bring up an Enter or Change Step External ID panel that allows you to edit the ID. The icon is visible only if your crew has been assigned to the step. You cannot edit the ID if the step is completed.
When the switching step card is selected, a set of available icons will be shown for that step. Not all the icons will be shown at the same time and some will be dependent on the state of the step. Below is the list of available icons.
• The Show/Hide Child Steps icons (, ) expand or collapse additional switching step cards pertaining to an aggregate step. These icons will only be shown when an aggregate step is highlighted. Note: The child steps cannot be individually selected, instructed or executed and are only there for display purposes.
• The map icon (), when tapped will take the user to the OMA map panel and center the map on the step’s location.
• The navigation icon (), when tapped will open the device’s native navigation application to assist you in driving to the switching step’s location.
• Users with permission to self-instruct switching steps will see a self-assign icon () for steps that have not been instructed or assigned to a different crew. When selected, it will instruct the step.
• If a step is in the New or Uninstructed state, a Ready for Instruct icon () will appear and allow the OMA user to notify the NMS operator they are ready to be instructed. This will appear on the NMS Switching Step row. If the step already has been marked as Ready for Instruct, a Not Ready for Instruct icon () will appear and allow the OMA user to clear a previous notification of ready for instruct.
• If the step has been instructed to be complete, three extra icons will be shown:
• A Step Complete icon ().
• A Step Abort icon ().
• A Step Fail icon ().
• For steps that have been instructed, you will see an un-instruct icon () that allows you to un-instruct the step.
When any of the step state transition icons are tapped, an Enter or Change Step Information panel will appear and allow you to enter updated step Details, Date/Time or Comments. After clicking the save icon () on the Enter or Change Step Information panel, the server will be notified and if applicable, the step’s operation will be applied to the NMS model. The step data entered and the state of the step will be broadcast to any NMS users that may be monitoring the switching steps at that time.
Understanding the Safety Tab - Full Operations User Type
The Safety tab displays a list of Safety documents assigned to your crew. Each assigned Safety document, when selected, will provide options specific to the type and state of the Safety document.

You have the option to view the Safety document and execute the steps to place it. You may also unissue the Safety document or release it.
• The Unissue icon () is used to place an issued safety document into an Unissued state to be updated.
• The Release icon () releases an issued safety document so it may be assigned to another crew.
Understanding the Map Tab - Full Operations User Type
The map panel provides the user with a map of the area they are working and will over lay the electrical facilities and model conditions. The map provides interaction icons in two locations:
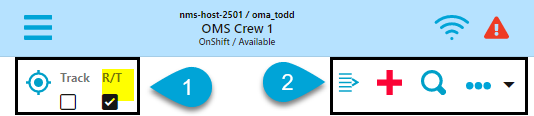
1. The left side of the header contains the following icons:
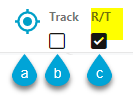
a. Focus the map on my current GPS location.
b. Enable Map Tracking feature that will move the current GPS location symbol in the map automatically as you drive and will auto-pan the map to keep the GPS location symbol visible.
c. Enable the Real Time refresh feature that will keep the electrical network in the map up to date with real time information (energization, switch statuses, and conditions).
2. The right side map page main menu icons.

1. Opens or Closes the Selection List panel.
2. Zooms the Map in. This icon is hidden when you are already zoomed in.
3. Opens the Search panel. See “Understanding the Map Search” for details.
4. More Options
a. Map Color Legend: Displays the Map Color Legend, which shows the conductor colors and state.
 conductor colors for different states and attributes.")
b. Map Refresh: Refreshes the map with the selected information or state.
• Current Information. Will refresh the map with real-time device statuses (open/closed/mixed). If too many objects are in the map area, you may be asked to zoom in and try again. Real-time statuses will be reset in the map if you go to a different page. Real-time statuses will need to be re-requested if you pan or zoom away from the area where real-time statuses were last requested. Real-time statuses can get stale over time so you should re-request statuses as needed.
• Notes, Tags, Crews, Events, etc. Refresh the map with latest conditions (events, crews, notes, tags, an so on). This will not load new maps or change the map mode (real-time vs nominal).
• Default Network Status. Refresh the map to nominal device statuses. If the map has some real-time statuses, this icon will be red indicating it will be reset to nominal if tapped.
c. Map Selection Mode
• Select Map Location
• Single Touch Action: Select map objects with single touch action
• Circle Action: Select map objects with circle action
• Box Action: Select map object with box action
• Polygon Action: Select map object with polygon action
• Clear Selection and Action: Clears the selected objects from the Selection List panel and the map.
• Change Touch Radius: Opens the Touch Selection Radius Settings panel that lets you set the radius value and value type (pixels, feet, meters).
d. GPS Location. Provides options to focus the Map on your desired location.
• Goto GPS Location: Focuses the Map on your GPS location.
• Select Map Location: Focuses the Map on a selected location.
• Navigate to Location. Opens the device's native navigation app to assist you in driving to the task location.
• Add Damage Report for Location. Allows you to create a damage report at the selected location.
e. Hide/Display. Reveals a popup dialog box with options to enable and disable the visibility of information on the map. The options are organized on three tabs:
• Layers Tab
• Landbase, Offline Landbase, and Automatic Landbase: Show online landbase, off line landbase, or automatically switch when the device goes off line/online.
• Secondary: Toggle display of the secondary level of the network.
• Autoload Maps: As you pan or zoom to show new areas of the map, autoload devices and other parts of the network automatically.
• Declutter: As you zoom in and out, object will automatically become visible or declutter.
• Structures: Toggle visibility of structures.
• Phase Annotation: Show phase annotation on switches and service transformers.
• Non-Main Asset DA: Toggle visibility of non-main asset damage report symbols.
• Customer Calls: Toggle visibility of customer call symbols.
• Big Symbols: Enables big symbols mode to show defined symbols larger when zoomed out.
• Conductors Tab
• Conductor Color radio buttons: Select the color of the conductors as feeder colored, phase colored, or nominal voltage colored.
• Conductor Highlighting options: Toggle display conductor highlighting including Assessed, predicted de-energized, Confirmed De-energized, Confirmed Degraded and Flow Direction arrows.
• Crews Tab
• Crew Types: Be able to select which crew types to display and/or filter to show only crews on the same feeder or nearby geographically.
Hide/Display also allows you to set the Map panel to automatically load maps as you pan and zoom in the map area.
f. Conductor Color. Allows you to choose how to show conductors: by Feeder, Phase, or Nominal Voltage. The Conductor Highlight sub-menu allows you to select whether to highlight conductors based on certain conditions: Assessed, Predicted De-energized, and Confirmed De-energized (only when affects customers).
g. Find Assessments. Lists all of your active patrol assessment conditions. From the Assessment panel, you can select an assessment condition and the map will focus on the condition.
h. Map Updates. Will check for available map updates.
Understanding the Map Search

Based on your configuration, the Search Type drop‑down list will allow you to select the type of object you would like to search for. For example, Device ID, Customer Name, Account ID, and so on. The selected search type will populate the title of the search field.
You may use a wild card search when you aren't exactly sure of the value to search on. For example, in the NMS OPAL model, searching for F147% with Wildcard After selected, will return a Device ID Search Results dialog box with multiple potential matches.

Click the check mark selection icon () to focus the map on the search item.