Using the Event Management Rules Tab
The Event Management Rules tab allows an administrator to add, edit, remove, update, and activate Event Management Rules in the Oracle Utilities Network Management System. These rules govern the behavior and output of Web Trouble in various situations, such as outage prediction, crew behavior, and so on.
This section contains the following information:
Event Management Rules Components
The Event Management Rules tabs contains three panes:
Rule Categories Pane
The Rule Categories pane on the Event Management Rules tab lists all of the Event Management Rules available for configuration, organized by functional category. The search function at the top of the pane allows you to search for rules.
The Rule Categories may be expanded or collapsed using the buttons below the Categories tree:
• Expand All: expands all of the rule category folders to display their contents.
• Collapse All: collapses all of the rule category folders.
Selecting a Category to View
When you select a category folder from the Rule Categories pane, the folder expands to display the names of the Event Management Rules within that category. Some of the categories may also have sub-categories.
When an individual rule is displayed in the list, a symbol appears to the left of the rule. The bullet () symbol indicates that the rule is already configured in at least one rule set. The red circle with an X () symbol indicates that the rule is not presently configured in any rule set.
When you select an individual rule (or certain categories) in the list, the Documentation pane on the Event Management Rules tab populates with documentation for the selected rule.
Resizing the Rule Categories Pane
You can resize the Rule Categories pane by dragging the right side of the pane to the left or right. You can also quickly expand or collapse it by clicking the directional arrows next to the upper right corner of the rules categories pane.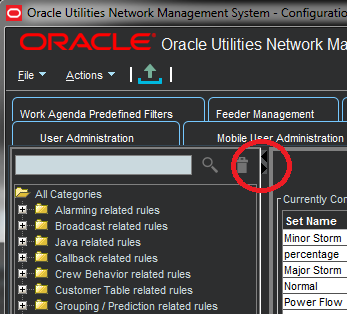
Searching for a Rule
You may filter the rules by adding a search term to the search field and clicking the search () button. 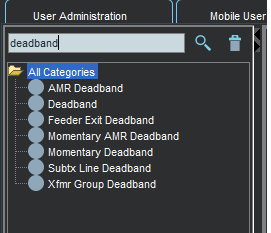
To clear the search, click the trash can button ().
Currently Configured Rules Pane
The Currently Configured Rules pane on the Using the Event Management Rules Tab tab lists the SRS rules configured for Oracle Utilities Network Management System. It allows you to add, edit, and remove rules.
Note: The table uses friendly names for readability. For example, one SCADA data related rule has a friendly Rule Name of Allow Calculated Points, but the code rule name is RT_CALCULATED_POINTS. See “Documentation Pane” for more information.
Action Buttons
• The Add button allows you to add a rule to the configuration.
• The Remove button allows you to remove a selected rule from the configuration.
• The Edit button allows you to edit the selected rule in the configuration.
• The Refresh button refreshes the table with the current contents of the database.
• The Service Recache button causes the Oracle Utilities Network Management System services to recache with the changes you made in the Configuration Assistant window. If you do not do this, your changes will not recognized until Oracle Utilities Network Management System services are restarted.
• The Export Configuration... button generates SQL statements for the current state of the configuration associated with the Event Management Rules tab. These SQL statements may then be saved to a file and/or printed.
Currently Configured Rules Table
The Currently Configured Rules pane displays the following fields and buttons:
• The Set Name column displays the friendly Set Name that the rule is configured in.
• The Incident Type column displays the configured Incident Type value of the rule.
• The Rule Name column displays the rule name.
• The Rule Value 1 column displays the configured Rule Value 1 value of the rule.
• The Rule Value 2 column displays the configured Rule Value 2 value of the rule.
• The NCG Class column displays the configured ncg class value of the rule.
• The NCG Index column displays the configured ncg index value of the rule.
• The Rule Value Integer 1 column displays the configured Rule Value Integer 1 value of the rule.
• The Rule Value Integer 2 column displays the configured Rule Value Integer 2 value of the rule.
• The Rule Value Integer 3 column displays the configured Rule Value Integer 3 value of the rule.
• The Rule Value Integer 4 column displays the configured Rule Value Integer 4 value of the rule.
• The Rule Value Integer 5 column displays the configured Rule Value Integer 5 value of the rule.
Filtering the Currently Configured Rules Table
To filter the Currently Configured Rules table based upon a selected column value, complete these steps:
1. Click a cell that contains the value you want to filter the table by. The row will be highlighted and the cell that was clicked will have a border indicating that it is selected.
2. Right-click and choose Toggle Auto Filter from the context menu to filter the table by the selected column/cell value combination.
To remove filtering, right-click anywhere in the table and select Toggle Auto Filter. The filter will be removed and all table rows will appear.
Documentation Pane
When you select an individual rule and certain categories from the list in the Rule Categories pane, the Documentation pane populates with documentation for the selected rule. For categories, the information is usually descriptive, but the individual rules documentation has the database names for the rule, its attributes, and valid values. If there are related rules, the related rule will be included and will link to the documentation content for that rule.
Example
If you select the Broadcast related rules category, the Documentation pane populates with:
These rules control how calls and events get broadcast, including which calls appear in the viewer.
If you select the Broadcast Clues rule, the Documentation pane will update with documentation for broadcastClues (the database name). Part of the broadcastClues description includes a link to the documentation page for the related broadcastIncidents rule, which broadcastClues is normally used with.
The friendly names in the Currently Configured Rules pane correspond to the database names as follows:
Friendly Name | Database Name | Database Description |
|---|---|---|
Set Name | set_name | A name used to identify what set a rule should belong to. |
Incident Type | incident_type | See each individual rule description for valid value for this column. |
Rule Name | rule_name | The name of the rule. |
Rule Value 1 | rule_value_1 | A character string. See each individual rule description for valid and default values, if applicable. |
Rule Value 2 | rule_value_2 | An integer value. See each individual rule description for valid and default values, if applicable. |
NCG CLS | ncg_cls | Used in conjunction with the ncg_idx value to narrow the application of a rule to a specific control zone. |
NCG Index | ncg_idx | Used in conjunction with the ncg_cls value to narrow the application of a rule to a specific control zone. |
Zone | N/A | The name of the control zone as derived from NCG CLS and NCG Index (as queried from the control_zones table). |
Rule Value Integer 1 | rule_value_integer_1 | An integer value. See each individual rule description for valid and default values. |
Rule Value Integer 2 | rule_value_integer_2 | An integer value. See each individual rule description for valid and default values. |
Rule Value Integer 3 | rule_value_integer_3 | An integer value. See each individual rule description for valid and default values. |
Rule Value Integer 4 | rule_value_integer_4 | An integer value. See each individual rule description for valid and default values. |
Rule Value Integer 5 | rule_value_integer_5 | An integer value. See each individual rule description for valid and default values, if applicable. |
Active | rule_active | The active state of the rule. |
Working with Rules
Add a Rule to the Configuration
To add a rule to the configuration, complete these steps:
1. Click Add to open the Event Management Rule Fields dialog box.
Note: If you had first selected a row in the Currently Configured Rules table, the dialog box will be initialized with the values from that row.
2. Select the name of the rule you wish to add from the Rule Name drop-down list.
3. Select the name of the rule set you wish to add the rule to from the Ruleset drop-down list.
4. Indicate whether or not you want the rule to be activated in the rule set by checking (or unchecking) the Active check box.
5. Enter the desired configuration values for the remainder of the fields.
Note: See the information in the Documentation pane for valid values for the fields.
6. Click Save to save the newly added rule.
7. If the newly added rule already exists in the specified rule set, a conformation dialog box appears.
• Clicking Yes overwrites the existing rule configuration with the new configuration.
• Clicking No will not add the new rule and you will be returned to the Event Management Rule Fields dialog box.
Note: This is the only validation currently performed when adding a rule. Please refer to the individual rule documentation in the Documentation pane for further information regarding valid values.
Edit a Rule in the Configuration
To edit a rule in the configuration, complete these steps:
1. Select the rule you wish to edit in the Currently Configured Rules table.
2. Click Edit. The Event Management Rule Fields dialog box appears.
3. Modify the rule fields as desired.
Note: See the Documentation pane for valid field values.
4. Click Save. The rule information is updated in the Currently Configured Rules table.
Note: If you modify a rule's rule set to have values that already exists in that other rule set, an error dialog box appears. Clicking Yes will overwrite the existing rule configuration with the new configuration that you specified. Clicking No will preserve the existing rule.
For example, you select a Crew Incident Alarm rule that is in the Major Storm rule set and then select Minor Storm from the Ruleset options. If the rule already exists in the Minor Storm rule set, you will get the error.
This is the only validation currently performed when editing a rule. Please refer to the individual rule documentation for further information regarding what the valid values are for a particular rule.
Remove a Rule from the Configuration
To remove a rule from the configuration, complete these steps:
1. Select the rule you wish to remove in the Currently Configured Rules table.
2. Click Remove. A confirmation dialog box appears.
3. Click Yes to remove the rule or No to cancel.
Export Configuration
To generate and save SQL statements for the current state of the configuration associated with the Event Management Rules tab, complete the following steps:
1. Click the Export Configuration... button beneath the Currently Configured Rules table. A dialog box appears indicating that the configuration is being generated.
2. Once the generation is finished, the Generated Configuration dialog box appears.
• To save the generated SQL statements to a file, click Save. The Save Configuration File dialog box appears. Type a name for the file into the File name field. The Save Configuration File dialog box disappears.
• To print out the generated SQL statements, click Print. The Print Preview dialog box appears.
• Click the Cancel button to close the Generated Configuration dialog box.