- Nostro Reconciliation User Guide
- Nostro Configurations
- Nostro Account Classes
- Create Account Class
2.1.1 Create Account Class
An accounting class helps to categorize a bank’s customers into different groups and captures information specific to that group. Create a Nostro account class by following the instructions provided in this topic.
A Nostro account class is required to create a Nostro account. The GL Reporting Lines and Statement and Account Preferences configured in the account class propagate to the Nostro account.
- In the left navigation panel, click Nostro Account
Configuration. Under Nostro Account Configuration, click
Account Class, then click
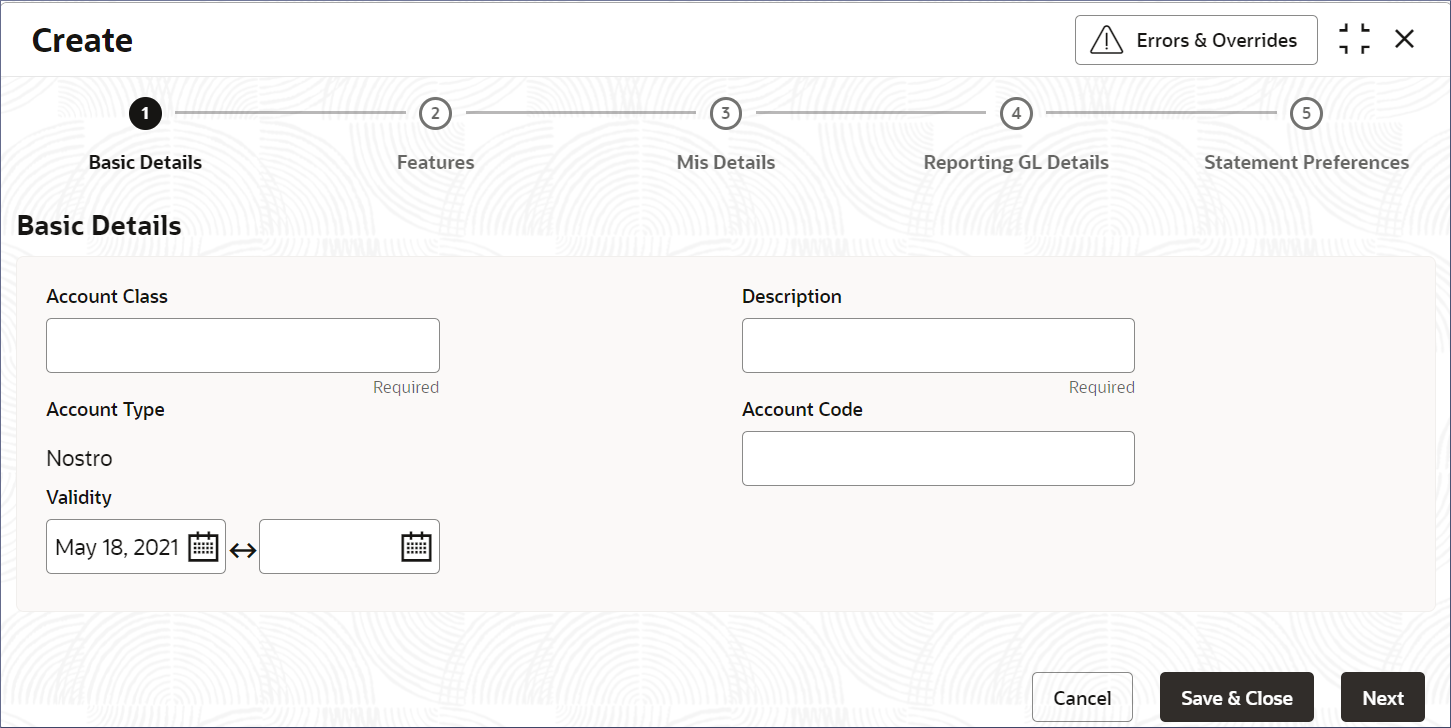
Create.The Create page opens on the Basic Details page.
Figure 2-1 Create Nostro Account Class - Basic Details
- Specify the details on the Basic Details page.
Table 2-1 Field Description table - Basic Details
Field Description Account Class Specify the Nostro account class name to be maintained. This indicates the class code used to create Nostro accounts. Account Code Provide an account code with a maximum of four characters. Use the bank’s specification for character classes to classify different customer groups. Note:
The account code can be a part of the customer account mask used to generate the account number.Description Describe the account class. Validity Specify the validity period of the account class by selecting the start and end dates. The end date is optional. Account Type This field is auto-populated and cannot be changed. It has a fixed value "NOSTRO" account type. - Click Next. The Features page displays.
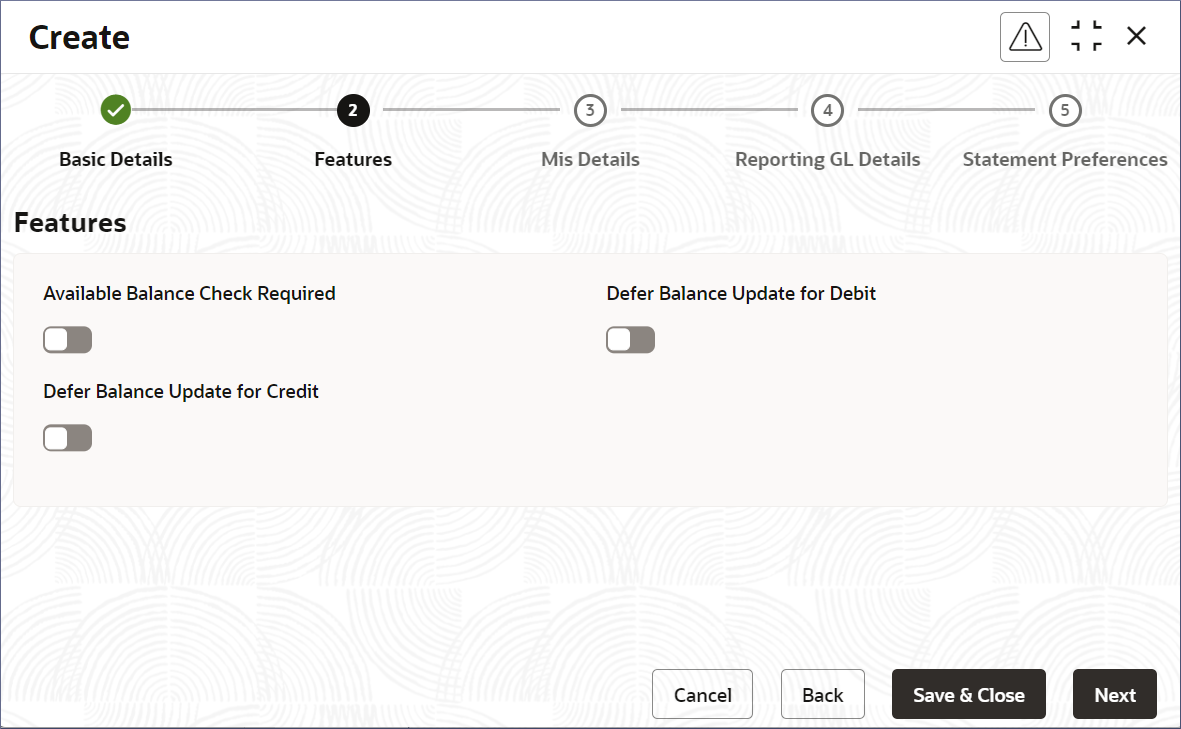
Figure 2-2 Create Account Class - Features
- Select the Features to enable. The features are
described in the following table.
Table 2-2 Field Description table - Features
Feature Description Available Balance Check Required Select this option to check available funds in the customer's account before posting a debit entry. Defer Balance Update for Debit Select this option to defer balance updates for debit transactions. If selected, the balance after debit transactions updates at the end of the day. Defer Balance Update for Credit Select this option to defer the balance update for credit transactions. If selected, the balance after credit transactions updates at the end of the day. - Click Next.The MIS Details page displays.
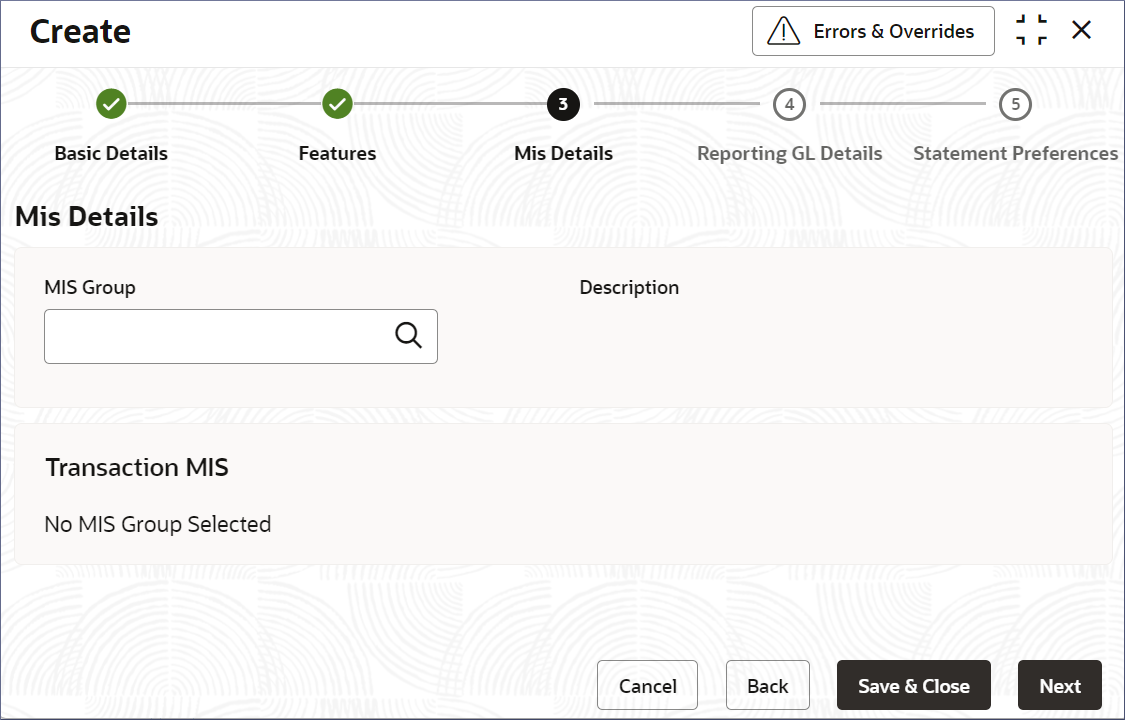
Figure 2-3 Create Account Class - MIS Details
- Specify the field values on the MIS Details page.
Table 2-3 Field Description table - MIS Details - Create Account Class
Field Description MIS Group Specify the MIS gspecify Nostro account classes for different industry verticals. Reflecting the needs of those verticals. MIS Class Code Specify the MIS Class code associated with the selected MIS Group. MIS Class Description Describes the MIS Class and is auto-populated. - Click Next.The Reporting GL Details page displays.
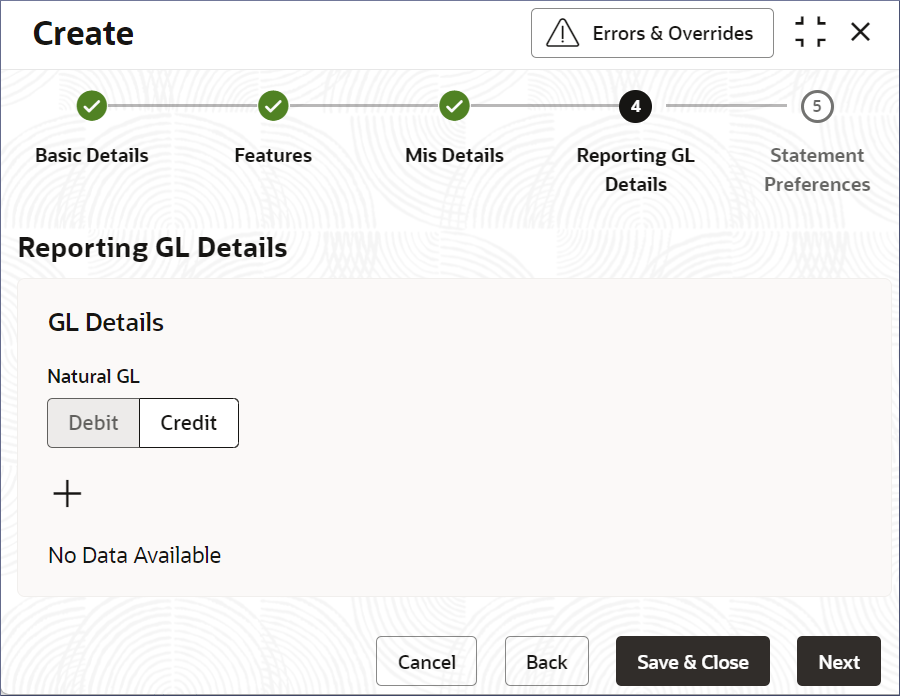
Figure 2-4 Create Account Class - Reporting GL Details
- Specify the following detailsNatural GL: Specify if the General Ledger is for a
Debit or Credit.
- Click Debit or Credit,
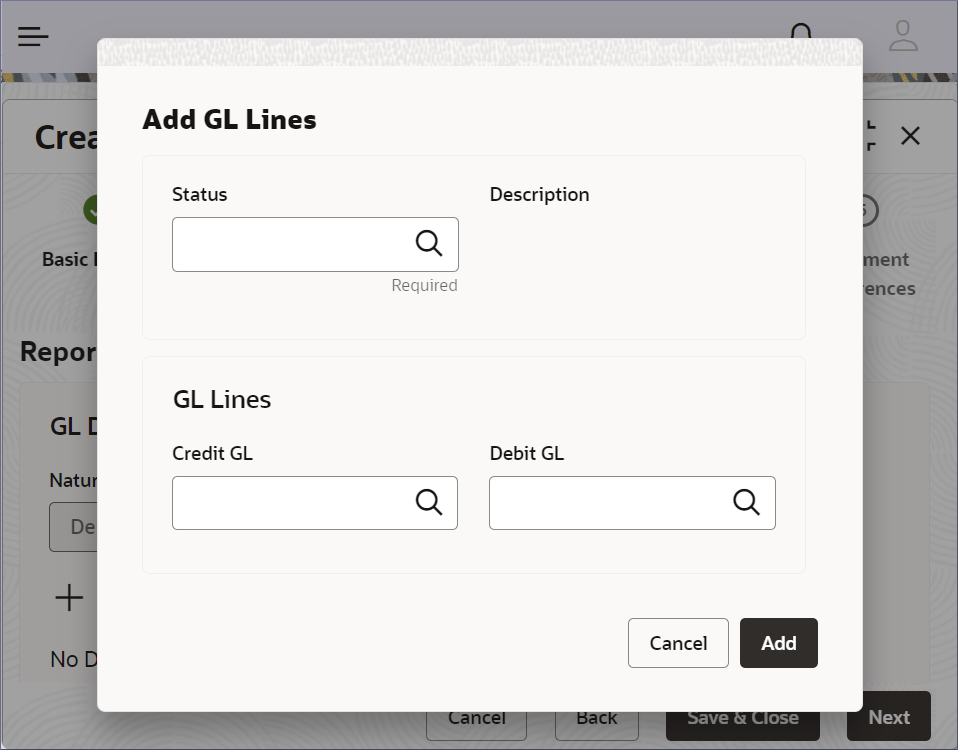
- Click + to add a general ledger line.The Add GL Lines dialog displays.
- Provide the following details:
Table 2-4 Field Description : Add GL Lines
Field Description Status Select the Status of the new GL Lines. Click the Fetch icon and retrieve the required value. Description Describes the status and this field is auto-populated. Credit GL The General Ledger code for the credit line. Debit GL The General Ledger code for the debit line.
- Click Save.The dialog closes and returns to the Reporting GL Details page. A new row is added with the specified GL Line details.
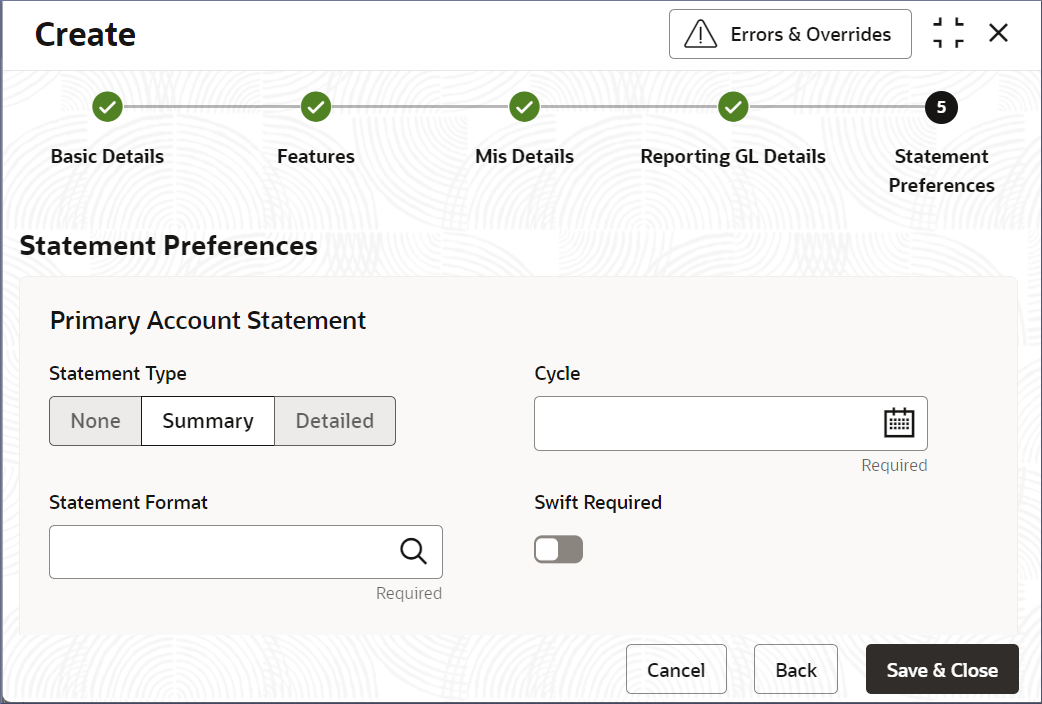
- Click Next.The Statement Preferences page displays.
Figure 2-6 Create Account Class - Statement Preferences
- Provide the statement preference details described in the following
table.
Table 2-5 Field Description : Statement Preferences
Field Description Statement Type - None: Select this option if statements are not required for this account class.
- Summary: Select this option for a statement summary. Provide the frequency of statements, statement format, and the SWIFT format type (optional).
- Detailed: Select this option for a detailed statement. Provide the frequency of statements, statement format, and the SWIFT format type (optional).
Cycle Specify the frequency of statements generated. Click the Calendar icon and select the frequency from the drop-down. Select from Daily, Weekly, Fortnightly, and Monthly. Specify the weekday or day of the month for the statement cycle. Statement Format Specify the format of the account statement. Click the Fetch icon to open the Statement Format dialog. Select the required format. This field is available only when Statement Type is Summary or Detailed. Swift Required Toggle the switch On to generate the statement in the SWIFT format. Select the SWIFT message type. This field is available only when Statement Type is Summary or Detailed. Swift Message Type Specify the SWIFT message type to generate. This field is available only when Swift Required toggle is on. - Click Save and Close.The new account class for Nostro is created.
Parent topic: Nostro Account Classes
