6.5 Create and Load Custom Views

Create a custom view of a Nostro Widget to track and monitor specific accounts and their activities. The default widgets provided on the Dashboard are generic and track all entities.

  1. Click the Filter icon on the top right of a widget and click +.
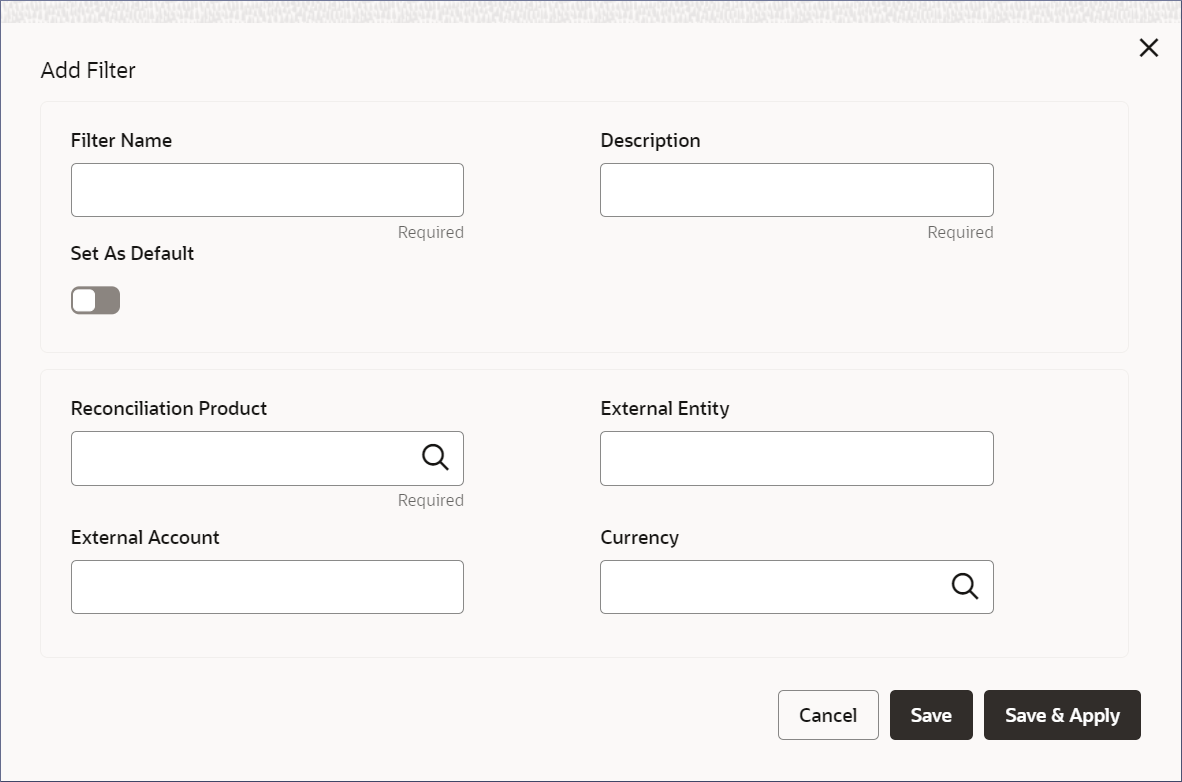
    The Add Filter dialog displays.
  2. Specify the details on the Add Filter dialog.

    Table 6-1 Field Description table

    Field Description
    Filter Name Provide a name for the custom filter.
    Description Describe the custom filter.
    Reconciliation Product Select the reconciliation product. Click the Fetch icon and select the required reconciliation product from the list.
    Set as Default Toggle it on to set the filter as the default.
    External Entity Enter the BIC ID of the external entity.
    External Account Enter the account number of the external entity.
    Currency Select the currency. Click the Fetch icon and select the required currency from the list.
  3. Click Save and Apply.
  4. Load the custom view.
    1. Click the Filter icon.
      The Filters dialog displays the custom filters.
    2. Click a custom filter.
      The custom view displays.
  5. Update a custom filter.
    1. Click the Filter icon.
      The Filters dialog displays the custom filters.
    2. Click the Edit icon on the custom filter.

      The Update Filter dialog box displays.

    3. Specify the details on the Update Filter dialog.
      The field description table is provided in Step 2.