- Retail Accounts User Guide (US Regionalization)
- Operations
- Check Book
- Stop Check Request
2.9.3 Stop Check Request
You can request the bank to stop payment on a check using the Stop Check Request screen. A stop check requests can either be for a single check, range of checks, or for a specific amount.
To stop check payment:
- On the Home sreen, from Retail Account
Services, under Check Book, click
Stop Check Request, or specify the Stop
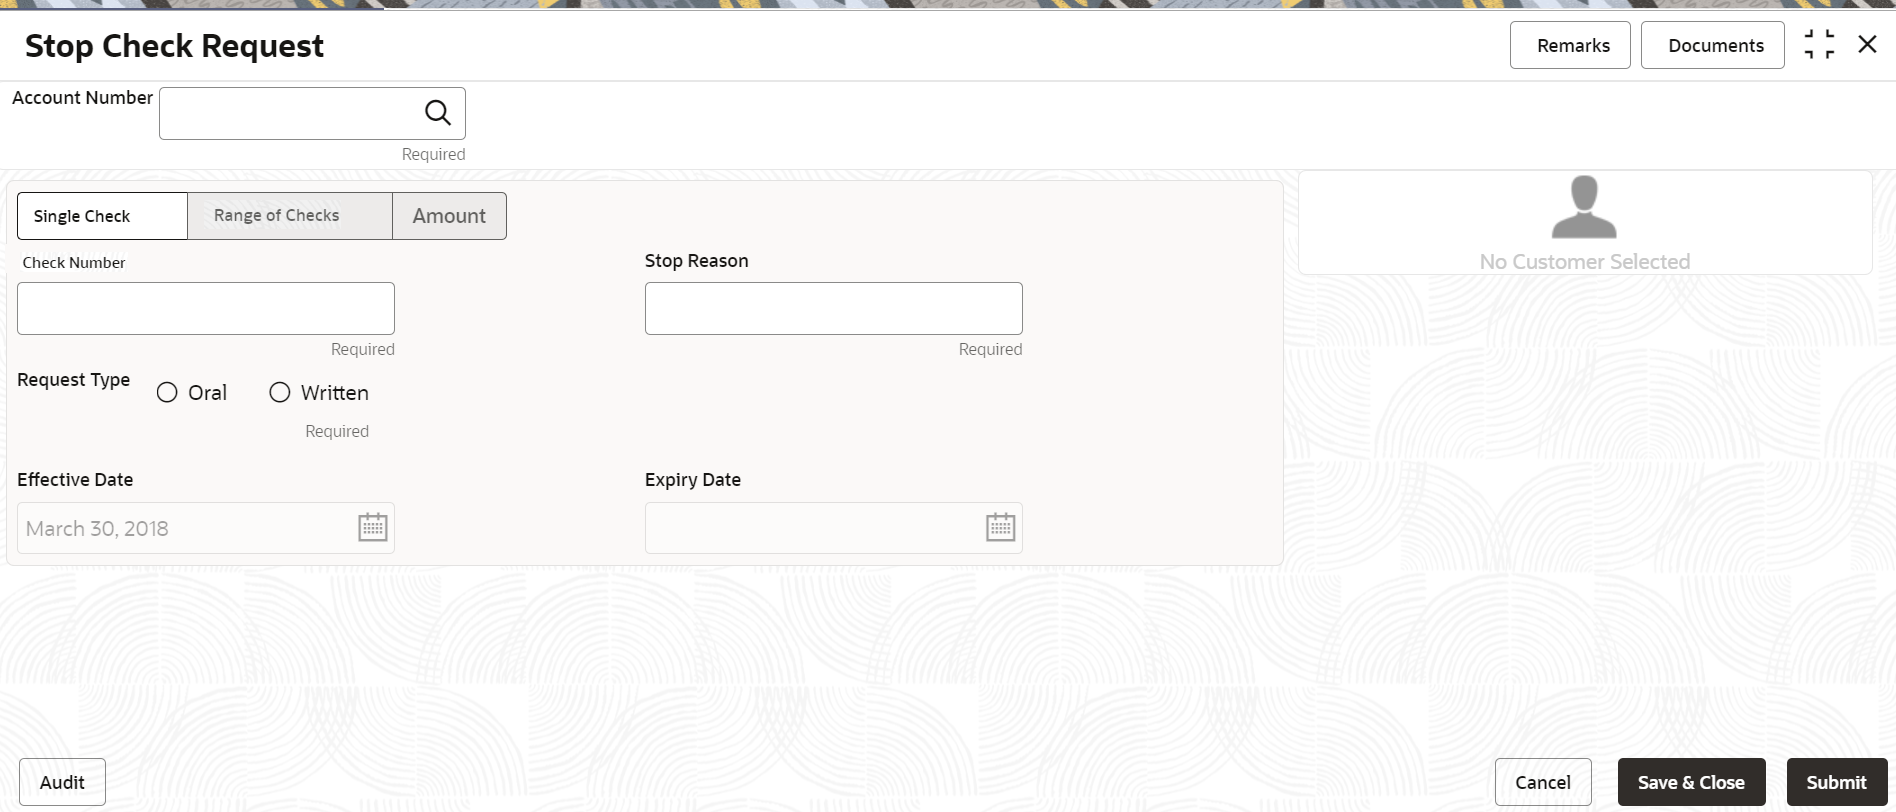
Check Request in the Search icon bar.The Stop Check Request screen is displayed.
- On the Stop Check Request screen, click the
Search icon or specify the account number in
the Account Number field, and press
Tab or Enter.The account name and customer information details are displayed.
- You can stop the check request by selecting any of the following options:
- Single Check
- Select the Single Check
option.
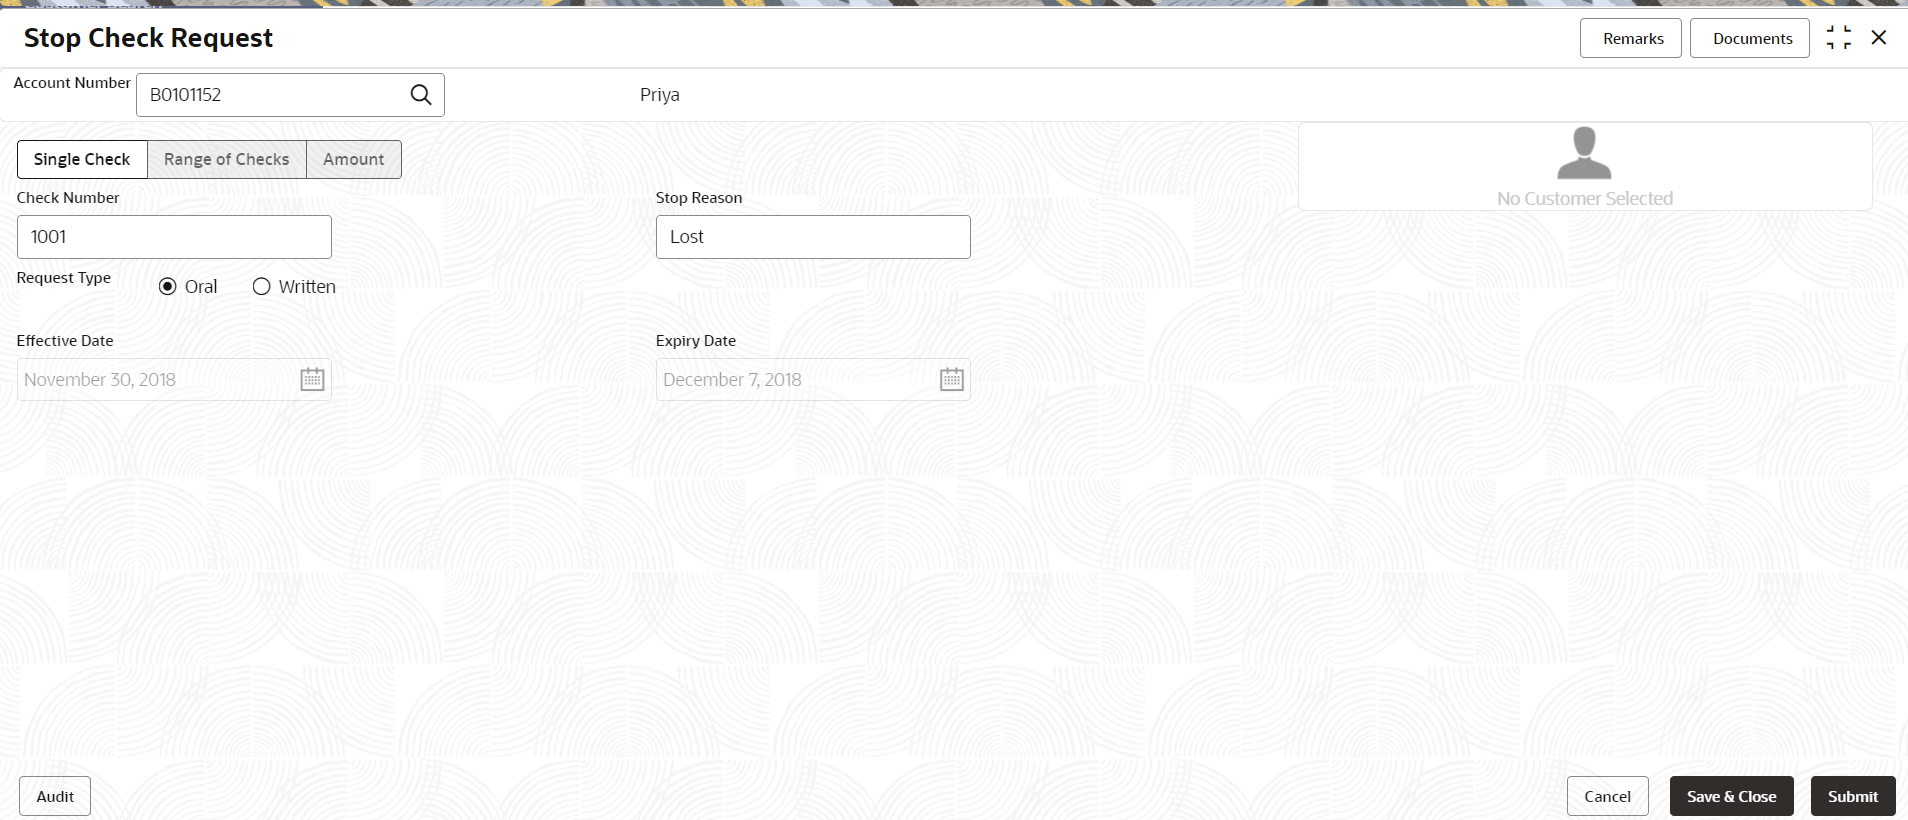
Figure 2-50 Stop Check Request - Single Check tab

Description of "Figure 2-50 Stop Check Request - Single Check tab" - Specify and select the required details to stop
check request. For more information on fields, refer to the field description
table.
Table 2-27 Stop Check Request - Single Check - Field Description
Field Description Account Number Specify the Account Number or click the search icon to view the Account Number pop-up window. By default, this window lists all the Account Numbers present in the system. You can search for a specific Account Number by providing Customer ID, Account Number, or Account Name and clicking on the Fetch button. Note:
- The Account Name is displayed adjacent to this field as the account number is selected.
- The customer information is also displayed to the left of the screen.
Check Number Specify the check number on which payment has to be stopped. Stop Reason Specify the reason for stop payment instruction. Request Type Select the type of request received from the customer. The options are: - Oral
- Written
Effective Date Displays the current business date for the stop check payment instruction based. Expiry Date Displays the end date for the stop check payment instruction. Note:
- Expiry date is populated based on the option selected from the Request Type field.
- Number of days to expiry is calculated based on configuration maintained in Account Configurations, under Branch Parameters and Check Parameters.
- Select the Single Check
option.
- Range of Checks
- Select the Range of Checks
option.
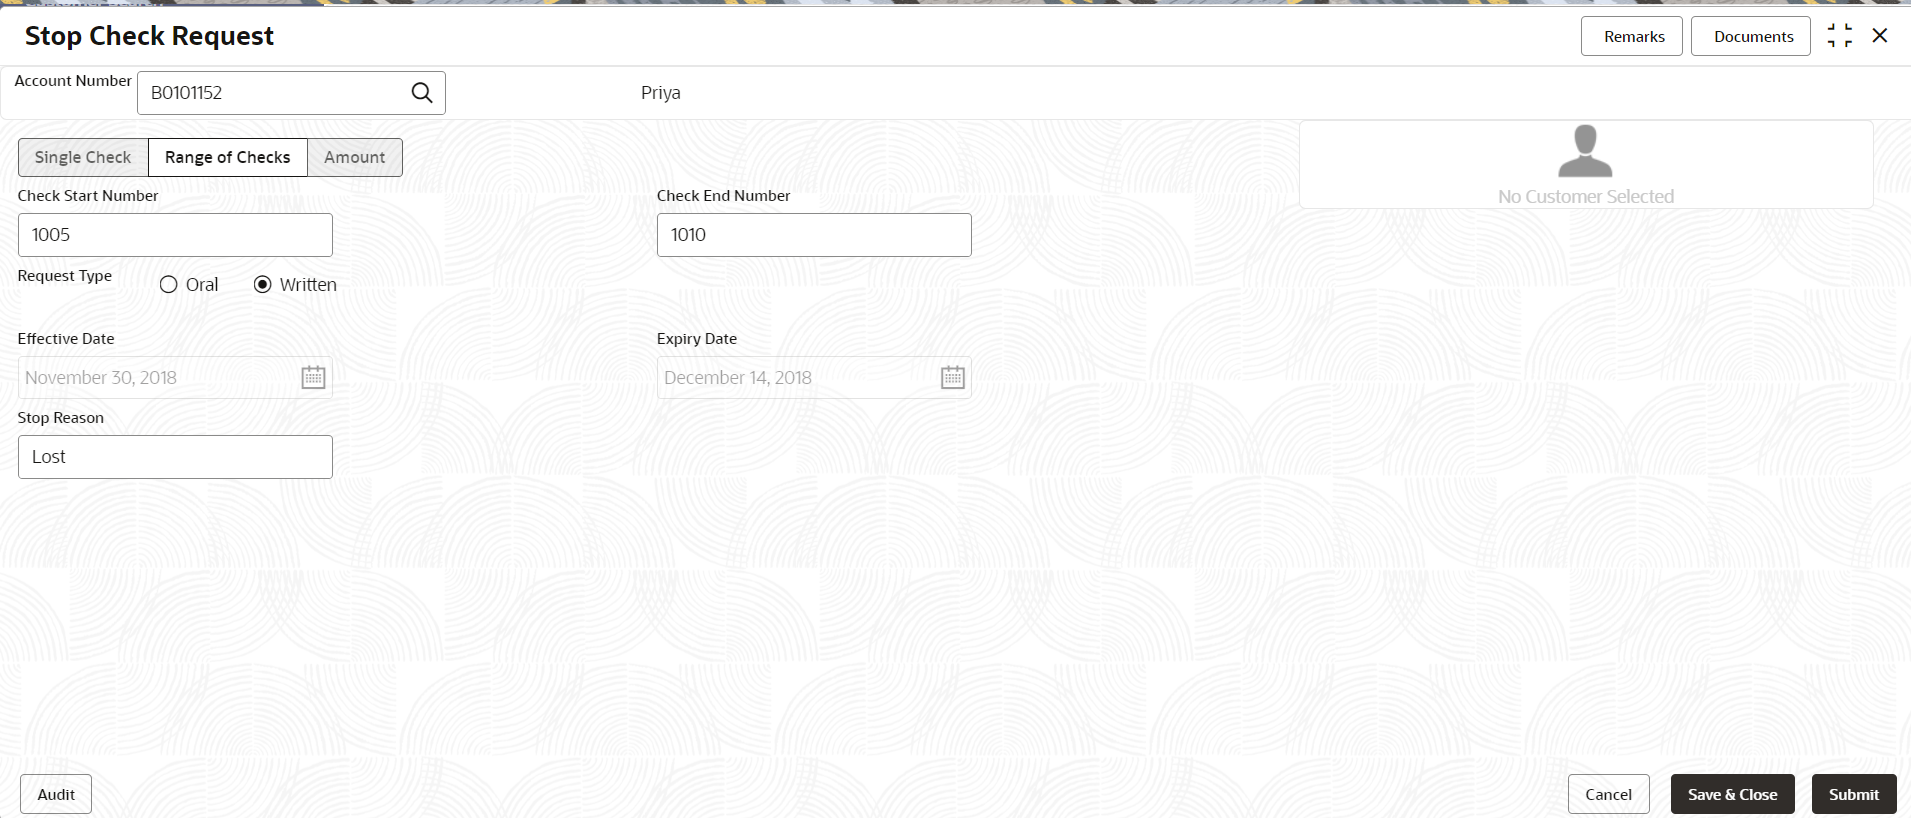
Figure 2-51 Stop Check Request - Range of Checks tab

Description of "Figure 2-51 Stop Check Request - Range of Checks tab" - Specify and select the required details to stop
check request. For more information on fields, refer to the field description
table.
Table 2-28 Stop Check Request - Range of Check - Field Description
Field Description Account Number Specify the Account Number or click the search icon to view the Account Number pop-up window. By default, this window lists all the Account Numbers present in the system. You can search for a specific Account Number by providing Customer ID, Account Number, or Account Name and clicking on the Fetch button. Note:
- The Account Name is displayed adjacent to this field as the account number is selected.
- The customer information is also displayed to the left of the screen.
Check Start Number Specify the start number of the check in the series of checks on which payment has to be stopped. Check End Number Specify the last check number in the series of checks on which payment has to be stopped. Request Type Select the type of request received from the customer. The options are: - Oral
- Written
Effective Date Displays the current business date for the stop check payment instruction based. Note:
The effective date will be of future date but not back dated.Expiry Date Displays the end date for the stop check payment instruction. Note:
- Expiry date is populated based on the option selected from the Request Type field.
- Number of days to expiry is calculated based on configuration maintained in Account Configurations, under Branch Parameters and Check Parameters.
Stop Reason Specify the reason for stop payment instruction.
- Select the Range of Checks
option.
- Amount
- Select the Amount option.
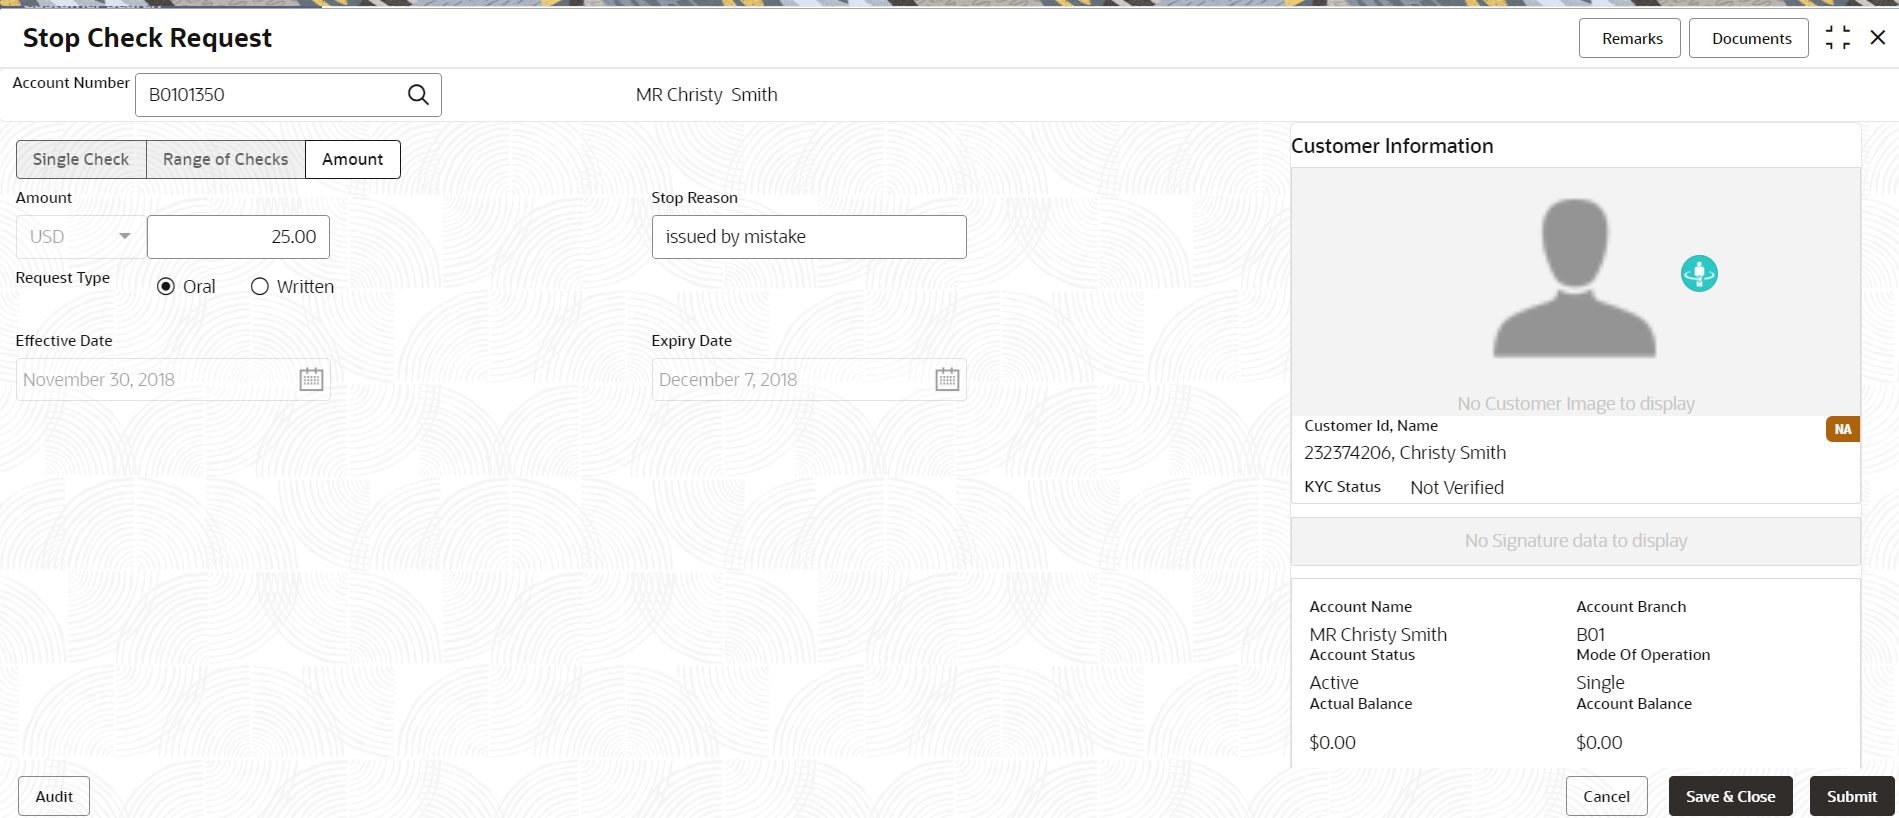
Figure 2-52 Stop Check Request - Amount tab

Description of "Figure 2-52 Stop Check Request - Amount tab" - Specify and select the required details to stop
check request. For more information on fields, refer to the field description
table.
Table 2-29 Stop Check Request - Amount - Field Description
Field Description Account Number Specify the Account Number or click the search icon to view the Account Number pop-up window. By default, this window lists all the Account Numbers present in the system. You can search for a specific Account Number by providing Customer ID, Account Number, or Account Name and clicking on the Fetch button. Note:
- The Account Name is displayed adjacent to this field as the account number is selected.
- The customer information is also displayed to the left of the screen.
Amount Specify the amount on which payment has to be stopped. Stop Reason Specify the reason for stop payment instruction. Request Type Select the type of request received from the customer. The options are: - Oral
- Written
Effective Date Displays the current business date for the stop check payment instruction based. Expiry Date Displays the end date for the stop check payment instruction. Note:
- Expiry date is populated based on the option selected from the Request Type field.
- Number of days to expiry is calculated based on configuration maintained in Account Configurations, under Branch Parameters and Check Parameters.
- Select the Amount option.
- Single Check
- Click Submit.The screen is successfully submitted for authorization.
Parent topic: Check Book
