- Core User Manual
- User Report Mapping
- User Report Mapping - Administrator User
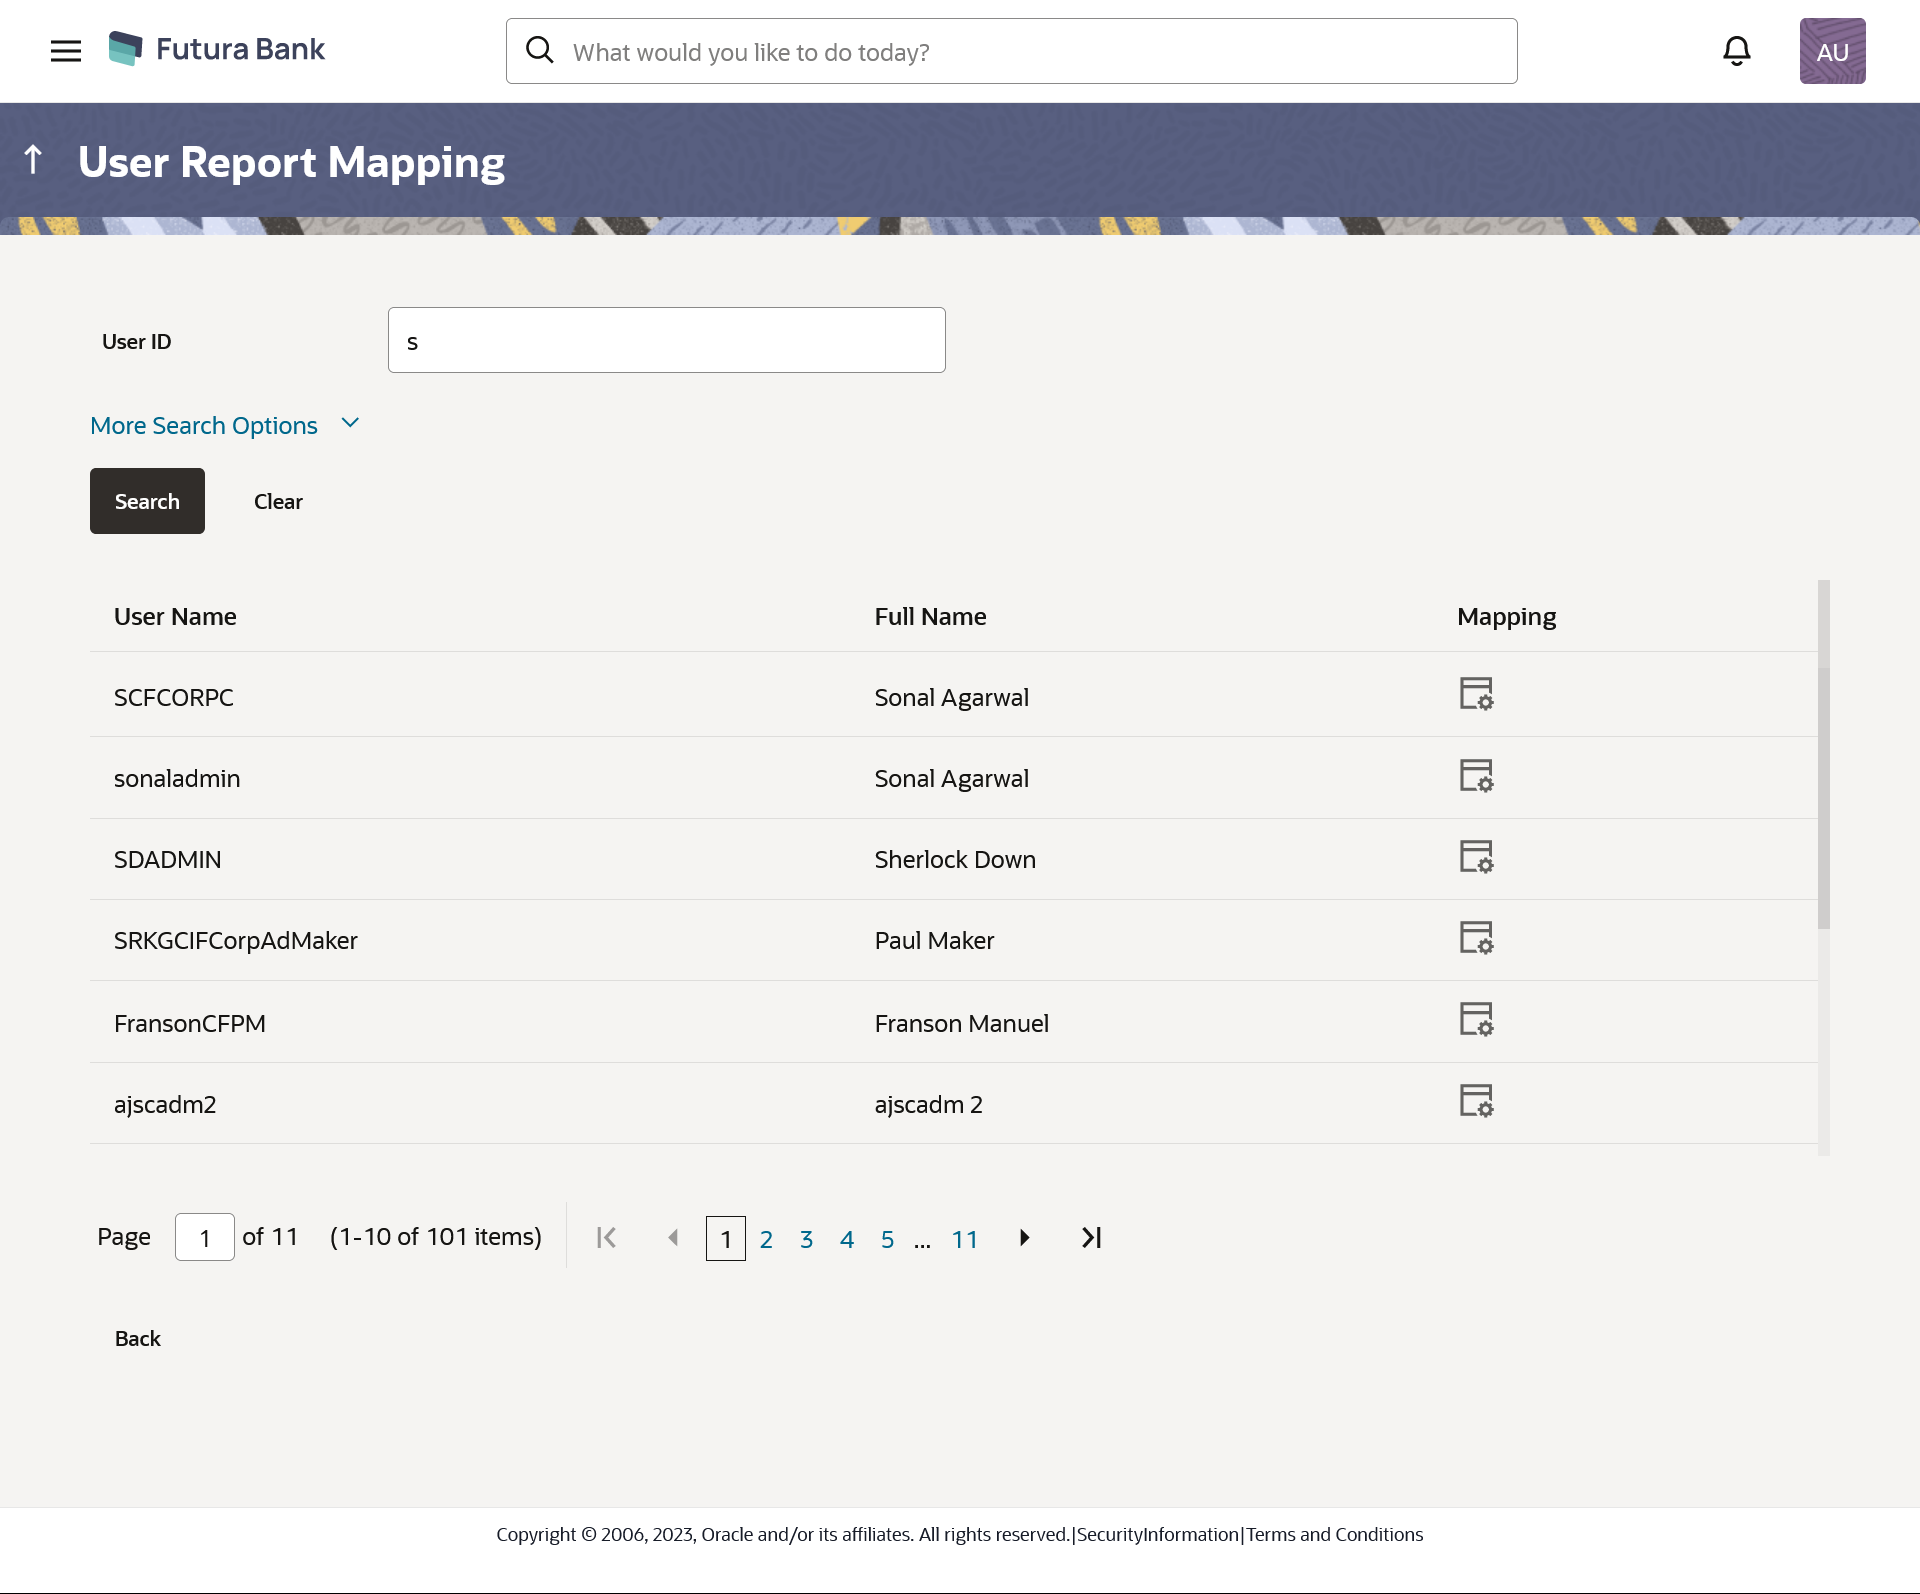
- User Report Mapping - Search
63.2.2 User Report Mapping - Search
To search and view the reports mapping:
- Navigate to the above path.The User Report Mapping screen appears.
- In the Username field, enter the username of the user
whose report mapping to be done.
OR
In the First Name field, enter the first name of the user whose report mapping to be done.
OR
In the Last Name field, enter the last name of the user whose report mapping to be done.
OR
In the Email field, enter the email of the user whose report mapping to be done.
OR
In the Mobile Number field, enter the mobile number of the user whose report mapping to be done.
Note:
Click on More Search Options to allows search based on more criteria. - Click Search.The User Report Mapping screen with search results appears.
OR
Click Clear to clear the search parameters.
OR
Click Cancel to cancel the transaction.
Table 63-2 Field Description
Field Name Description Search Filter Criteria Username Allows to search based on username of the user whose report mapping to be done. First Name Allows to search based on first name of the user whose report mapping to be done. Last Name Allows to search based on last name of the user whose report mapping to be done. Email Allows to search based on email ID by the user whose report mapping to be done. Mobile Allows to search based on mobile number of the user whose report mapping to be done. Party ID Allows to search based on party ID of the user whose report mapping to be done. Search by Party Name Click on the link to search by party name corresponding to the party ID. Search Result Initials The initials of the user. User ID The User ID of the user. User Details The details of the user like user name or user id. Mapping Displays whether the file identifier is mapped to the user.
-
 - denotes that the report is mapped to the
user
 - denotes that the report is not mapped to
the user.
-
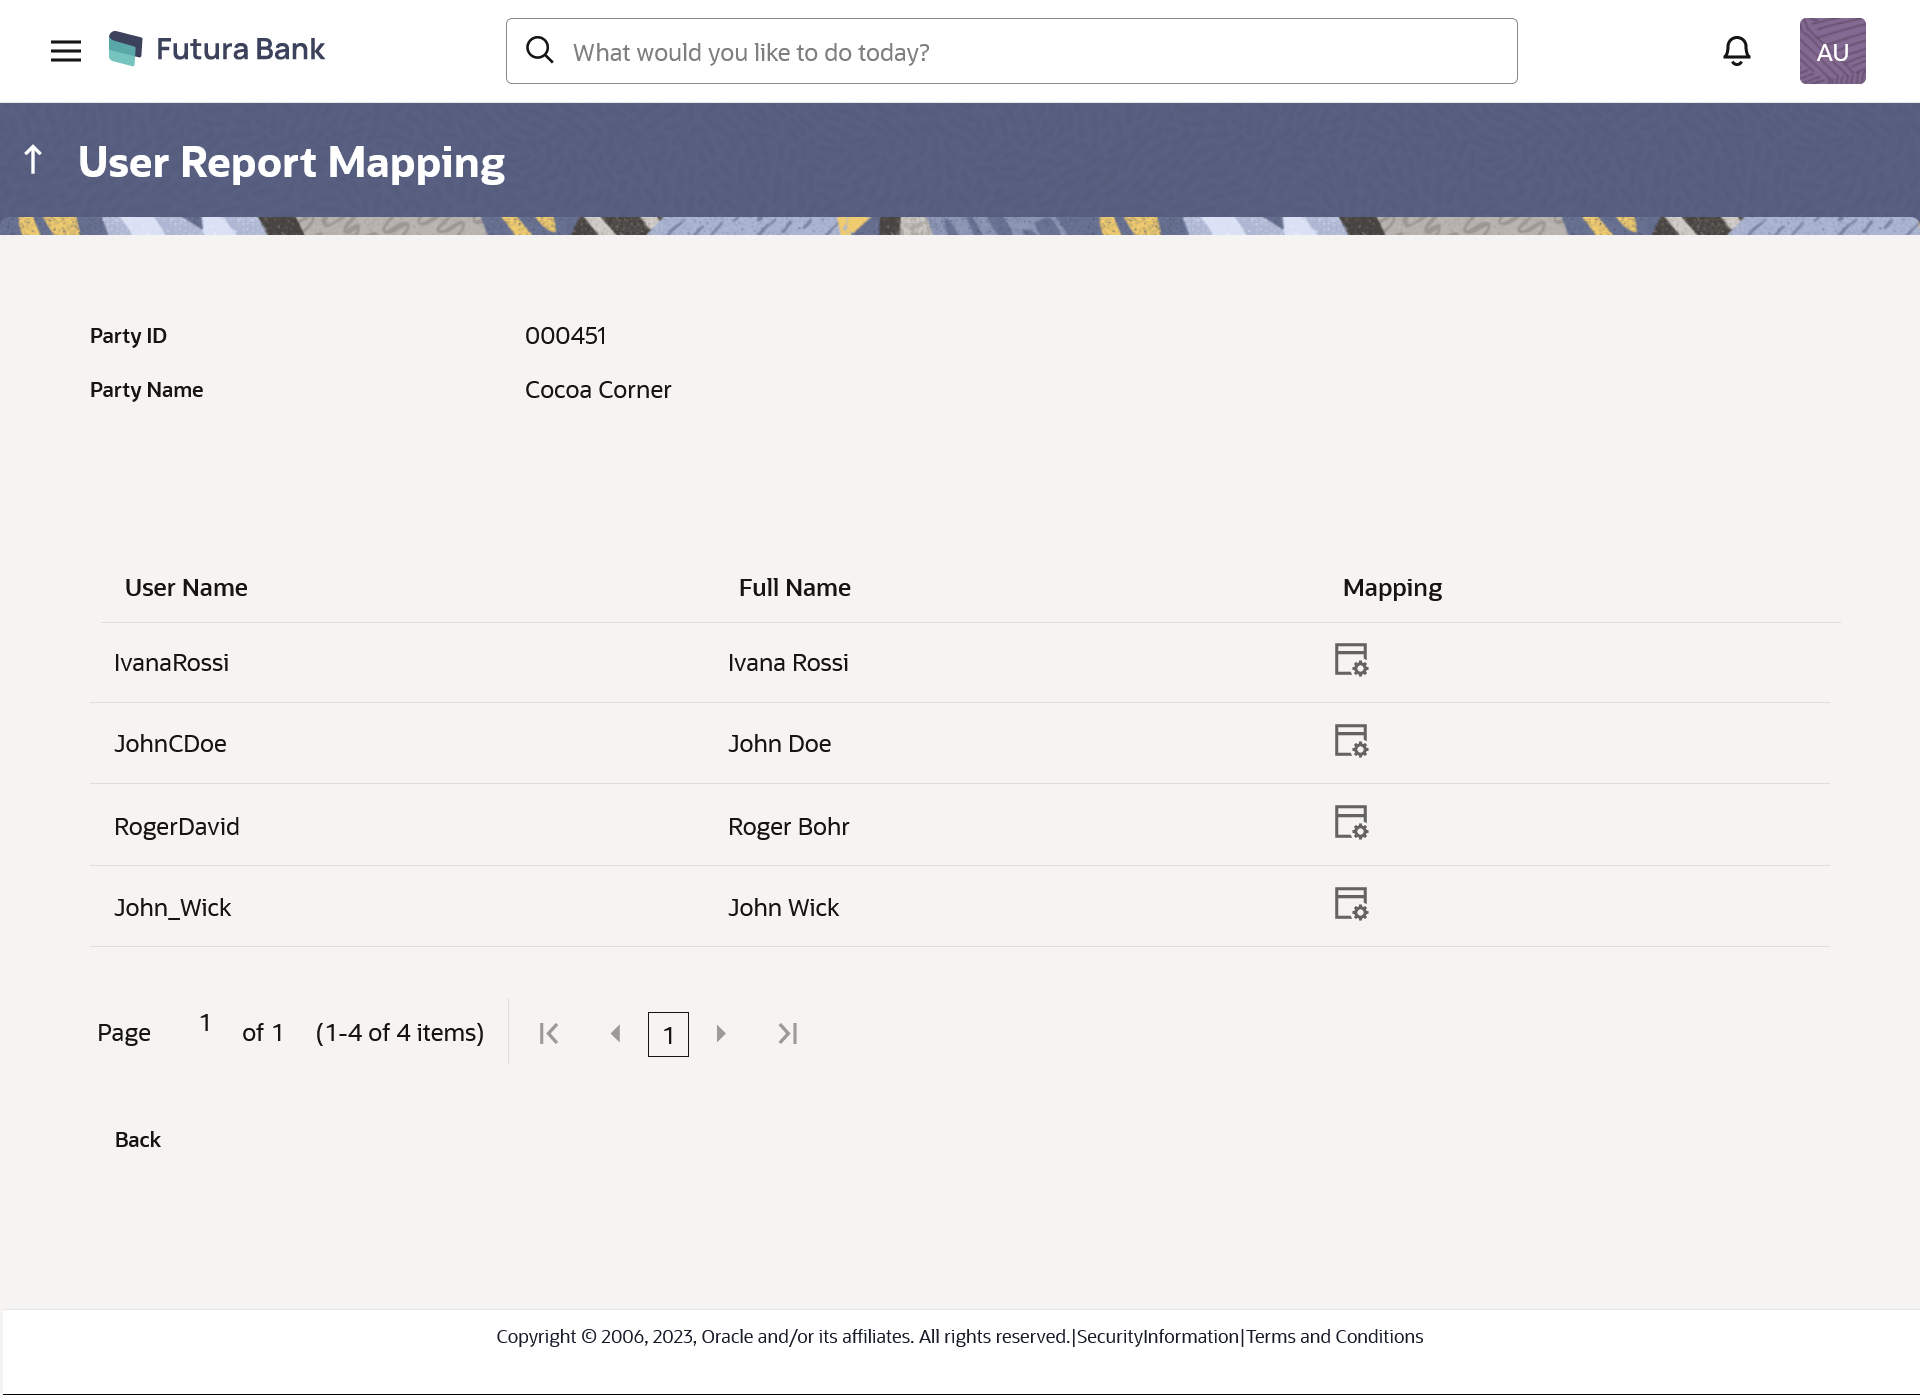
- Click on the Party ID link to view the details. The User Report Mapping - View screen appears.
Table 63-3 Field Description
Field Name Description Party ID Party Id of the admin user. Party Name Party name of the admin user. Users List Initials The initials of the user. User Details The details of the user like user name or user id. Mapping Displays whether the file identifier is mapped to the user.  - denotes that the report is mapped to the
user.
 - denotes that the report is not mapped to
the user.
- Click
 icon against the user record for which you want to view the
details.The User Report Mapping – Mapping Summary screen appears.
icon against the user record for which you want to view the
details.The User Report Mapping – Mapping Summary screen appears.OR
Click Back to navigate to the previous screen.
OR
Click Cancel to cancel the transaction.
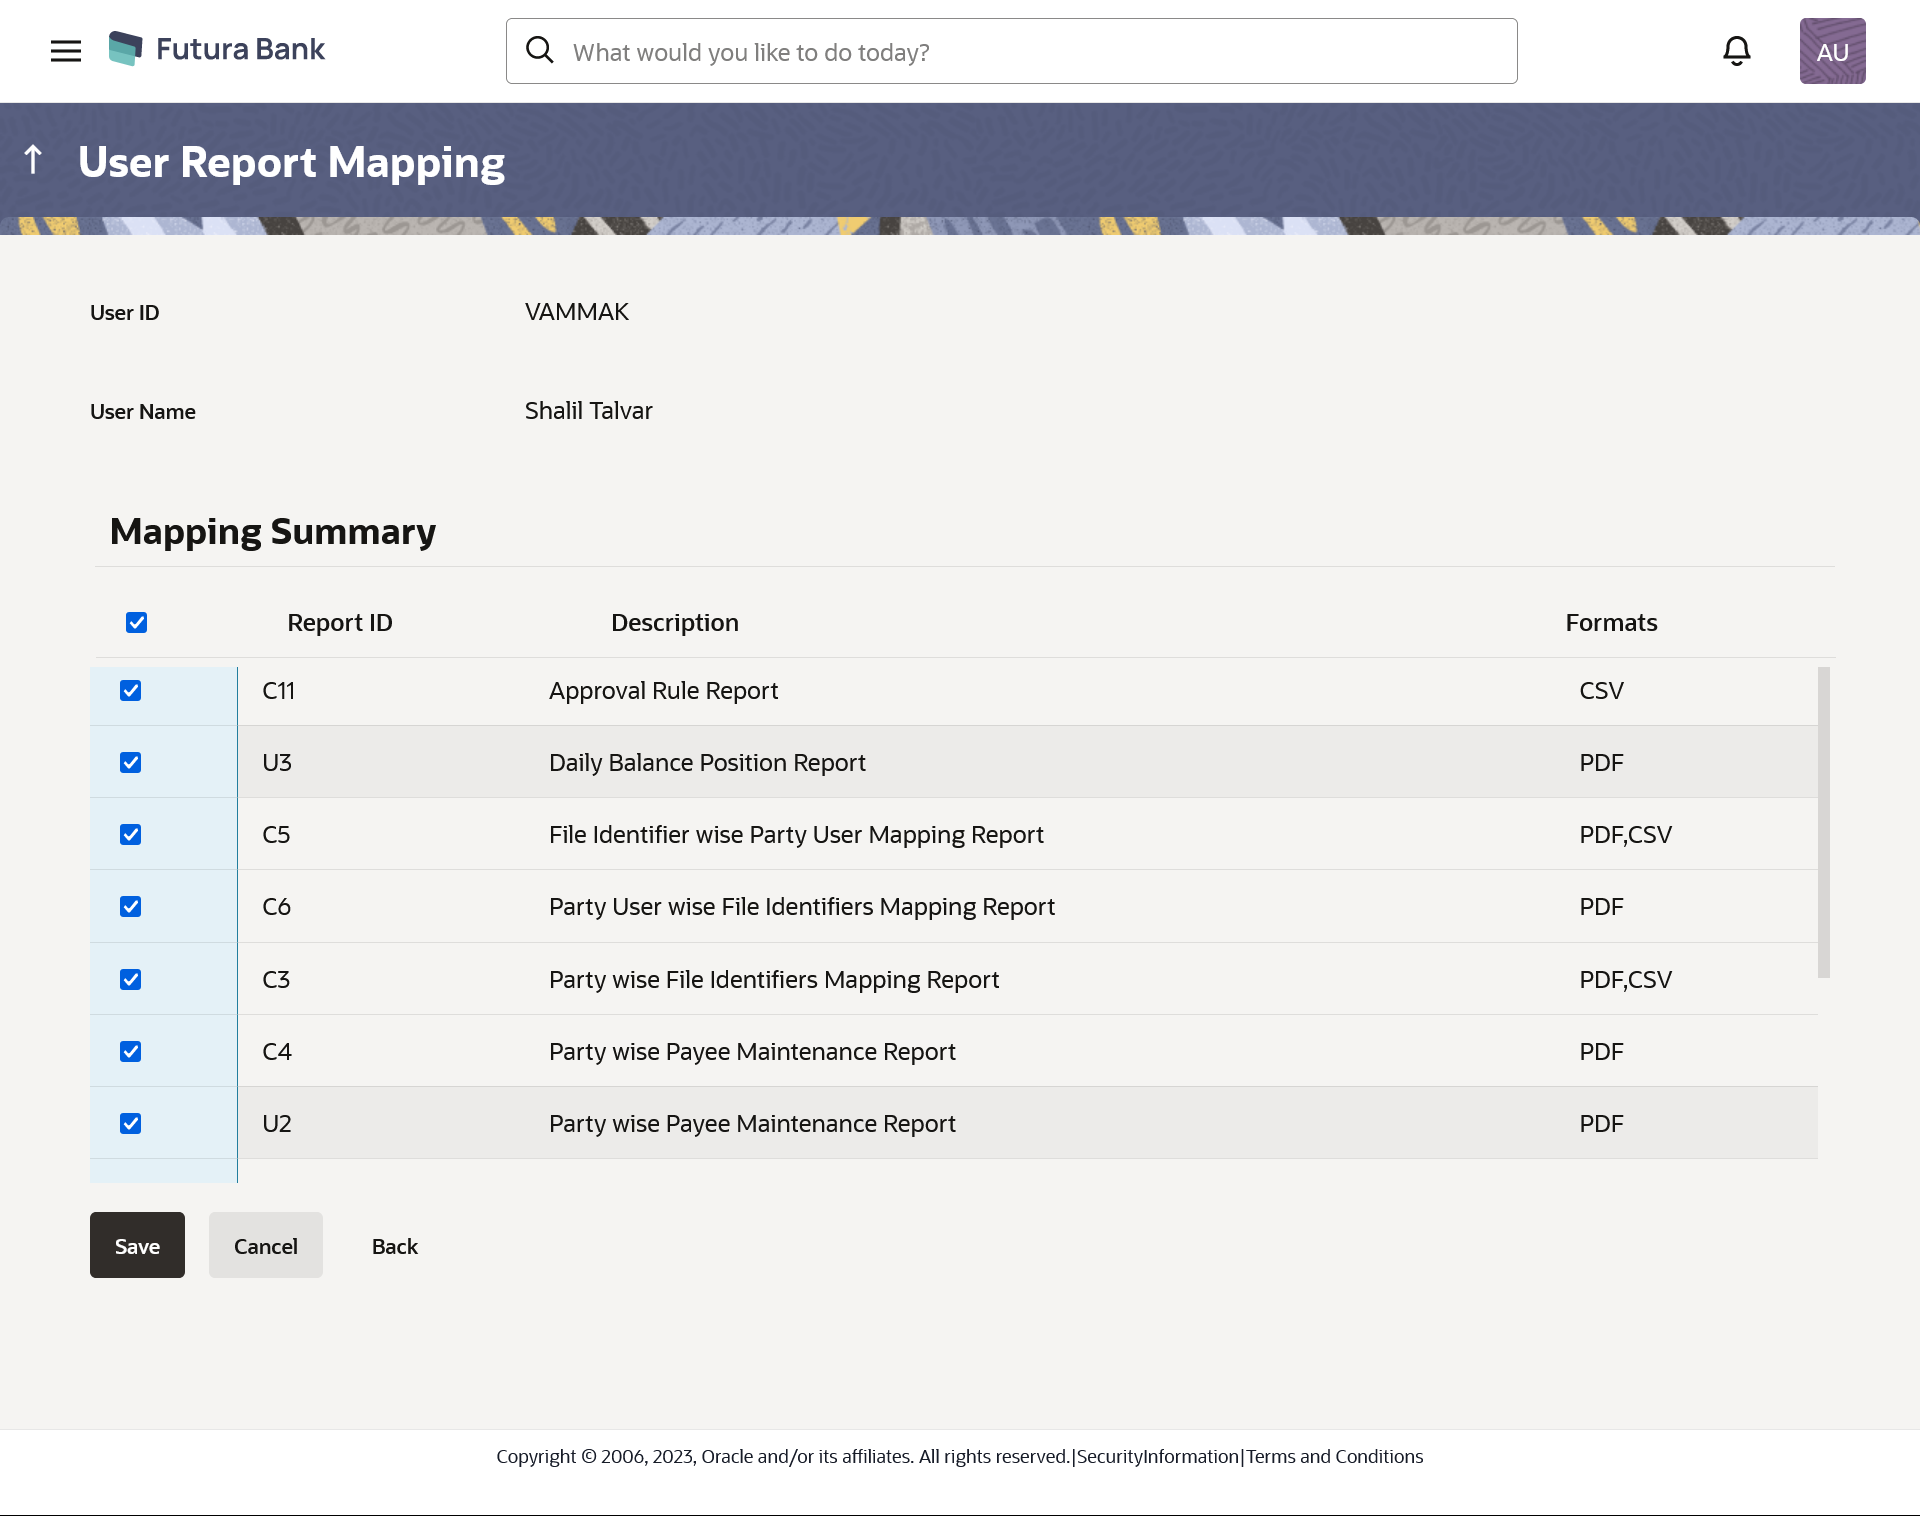
Figure 63-5 User Report Mapping – Mapping Summary
Table 63-4 Field description
Field Name Description User Name Name of the admin user. User ID User Id of the admin user. Mapping Summary Report ID Unique id assigned to the mapped report. Description Description of the report. Formats Formats in which a report can be generated. - Click Edit to modify the user report mapping.OR
Click Cancel to cancel the transaction.
OR
Click Back to navigate to previous screen.
Parent topic: User Report Mapping - Administrator User


