54.2.1 User Groups - Admin User – Create

This topic describes the systematic instruction to User Groups - Admin User – Create option.

Bank Administrator can create user groups for the Administrator users. Administrator can create multiple user groups and one user can be part of multiple user groups, whereas creating a user group without any user is not allowed.

To create a user group:

  1. Navigate to the above path.
    The Administrator User Group screen appears.
  2. From the User selection screen appears. Select the appropriate option.

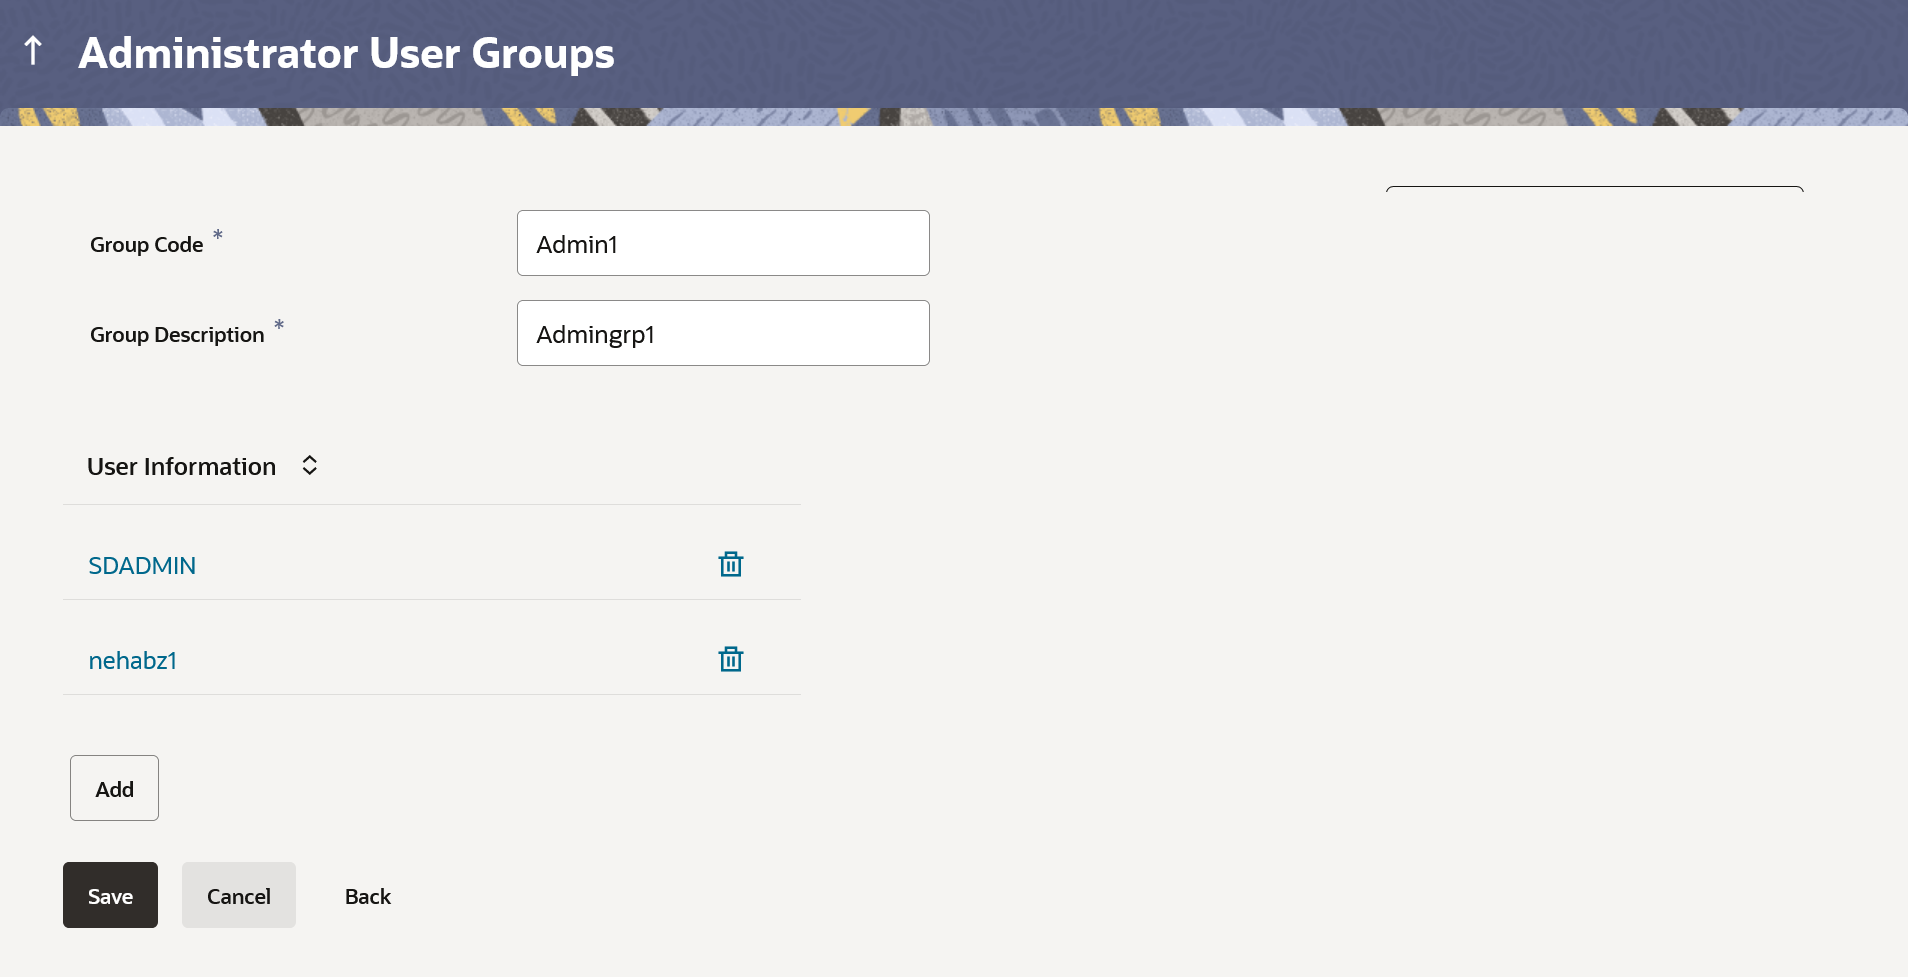
    Figure 54-3 Admin User Group -Create


    Note:

    The fields which are marked as Required are mandatory.

    For more information on fields, refer to the field description table.

    Table 54-1 Admin User Group -Create - Field Description

    Field Name Description
    Create Information specified in below fields are related to Create.
    Group Code User group code.
    Group Description Description provided to the user group.
    Search Results - User Group Information specified in below fields are related to Search Results - User Group.
    User Name User name list to select and add a user to the user group.

    All the administrator users will be listed down

    User ID User IDs of each user selected from user list are displayed.
  3. Click Create.
  4. In the Group Code field, enter the group code.
  5. In the Group Description field, enter the group name.
  6. In the User Group section, click Add to add the selected user in the User Group. Once added, the user name will be removed from the user drop-down to avoid duplication of users.
  7. Perform anyone of the following actions:
    • Click Save to create the user groups.

      The Review screen appears.

    • Click Cancel to close the maintenance creation process.
    • Click Back to navigate to the previous screen.
  8. Perform anyone of the following actions:
    • Verify the details, and click Confirm.

      The success message of user group creation appears along with the transaction reference number.

    • Click Cancel to cancel the operation.
    • Click Back to navigate to the previous screen.
  9. Click OK to complete the transaction.

    Note:

    You can click delete to delete a record.