- Teller User Guide
- Customer Transactions
- F24 Tax Payment By Account
4.15 F24 Tax Payment By Account
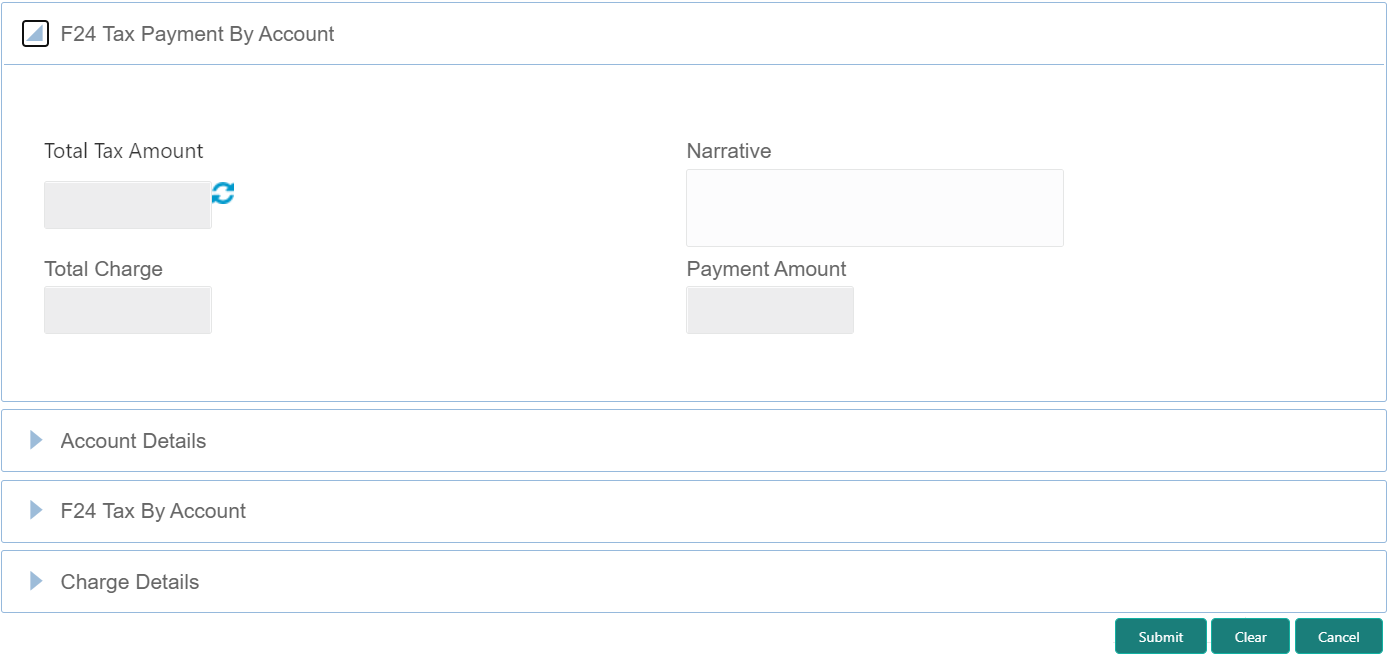
The F24 Tax Payment By Account screen is used to capture data related to the F24 tax document for a customer and collect the corresponding tax by account from the customer.
- On the Homepage, from Teller mega menu, under
Customer Transaction, click F24 Tax
Payment By Account or specify F24 Tax Payment By
Account in the search icon bar and select the screen.The F24 Tax Payment By Account screen is displayed.
- On the F24 Tax Payment By Account screen, specify the
fields. For more information on fields, refer to the field description
table.
Table 4-42 F24 Tax Payment By Account - Field Description
Field Description Total Tax Amount
Displays the total tax amount.
Narrative
Displays the default narrative as F24 Tax by Account, and it can be modified.
Total Charge
Displays the total charge.
Payment Amount
Displays the amount to pay.
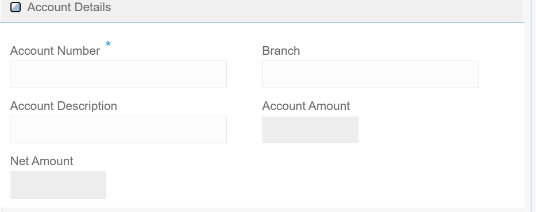
- Click on the Account Details data segment.The Account Details data segment is displayed.
- On the Account Details data segment, specify the fields.
For more information on fields, refer to the field description
table.
Note:
The fields, which are marked with an asterisk, are mandatory.Table 4-43 Account Details - Field Description
Field Description Account Number
Specify the customer account number from which the tax is being paid.
Note:
The system displays an override or error message on the tab out of Account Number based on the account dormancy parameters.Branch
Displays the branch code.
Account Description
Displays the description of the account number specified.
Account Amount
Displays the amount available in the account.
Net Amount
Displays the amount, which is the net total amount levied to the customer.
- Specify the details in the F24 Tax By Account segment.
For information on the fields based on the value selected for the
Form Type, refer to the table.
Table 4-44 F24 Tax By Account - Form Types and their References
Form Type Reference Topic Standard
Simplified
Elements Identification
Predefined
On selection of an appropriate value from the Form Type, only corresponding fields of the form will be displayed for input. For example, if you select F24 Standard as the Form Type, then only the fields of F24 Standard will be available. The Principal Fiscal Code needs to be specified.
- After entering all the form details, click Refresh in
the F24 Payment Details.
The system adds up the Amounts and defaults the sum in the Payment Amount field. The system posts the following accounting entries on save and authorization of the record.
Table 4-45 Accounting Entries Posted for Payment Amount
Dr/Cr Description Amount Dr
Cash Account
Final Section Amount of the corresponding tab, which has been entered.
Cr
Account maintained in ARC of the associated product
Final Section Amount of the corresponding tab which has been entered.
Accounting entries posted for the charge amount:
Table 4-46 Accounting Entries Posted for Charge Amount
Dr/Cr Description Amount Dr
Cash Account
Charges amount computed as per ARC maintenance
Cr
Income Account
Charges amount computed as per ARC maintenance
The system validates only the data format of the fields specified. If any of such validations fail, the system displays an appropriate error message. If you maintain more than the specified number of rows in any of the below blocks, then the system displays an appropriate error message. The following list shows the number of rows, which can be maintained for each Form Type:Table 4-47 Maintenance for Form Type
Form Type Maintenance Standard
In the F24 Standard tab, the system allows you to maintain only the following number of records:- up to a maximum of 6 rows in the Tax multi-record block.
- up to a maximum of 4 rows in the INPS multi-record block.
- up to a maximum of 4 rows in the Region multi-record block.
- up to a maximum of 4 rows in the IMU and Other Local Taxes multi-record block.
- up to a maximum of 4 rows in the Insurance multi-record block.
- up to a maximum of 3 rows in the Other Bodies multi-record block.
- up to a maximum of 7 rows in the Excise multi-record block.
Simplified
In the F24 Simplified tab, up to a maximum of 10 rows in the Tax Details multi-record block.
Elements Identification
In the F24 Elements Identification tab, up to a maximum of 28 rows in the Tax Details multi-record block.
Predefined
In the F24 Predefined tab, up to a maximum of 1 row in the Tax Details multi-record block.
If the computed value for the Payment Amount field value is less than or equal to 0, the system displays an appropriate error message. If the Principal Fiscal Code and Secondary Fiscal Code fields have a value of 16 characters that is for non-individual customers the system validates the last character in the value as per the checksum algorithm for Fiscal Code.
If the validation fails, then the system displays an appropriate error message. In the case of individual customers, where the Principal Fiscal Code and Secondary Fiscal Code field has a value of 11 characters, the system validates the last character in the value as per the checksum algorithm for a VAT number. If the validation fails, then the system displays an appropriate error message.
- Once Pickup is completed, click Submit.A teller sequence number is generated, and the Transaction Completed Successfully information message is displayed.
Note:
The transaction is moved to authorization in case of any approval warning raised when the transaction saves. On transaction submission, the deposit of tax amount is completed successfully.
- Add Standard Details
You can add the F24 standard details in the F24 Tax By Account data segment. - Add Simplified Details
You can add the F24 simplified details in the F24 Tax By Account data segment. - Add Element Identification Details
You can add the details of the element identification in the F24 Tax By Account data segment. - Add Predefined Details
You can add the F24 predefined details in the F24 Tax By Account data segment.
Parent topic: Customer Transactions

