- Teller User Guide
- Clearing Transactions
- Inward Clearing Data Entry
7.3 Inward Clearing Data Entry
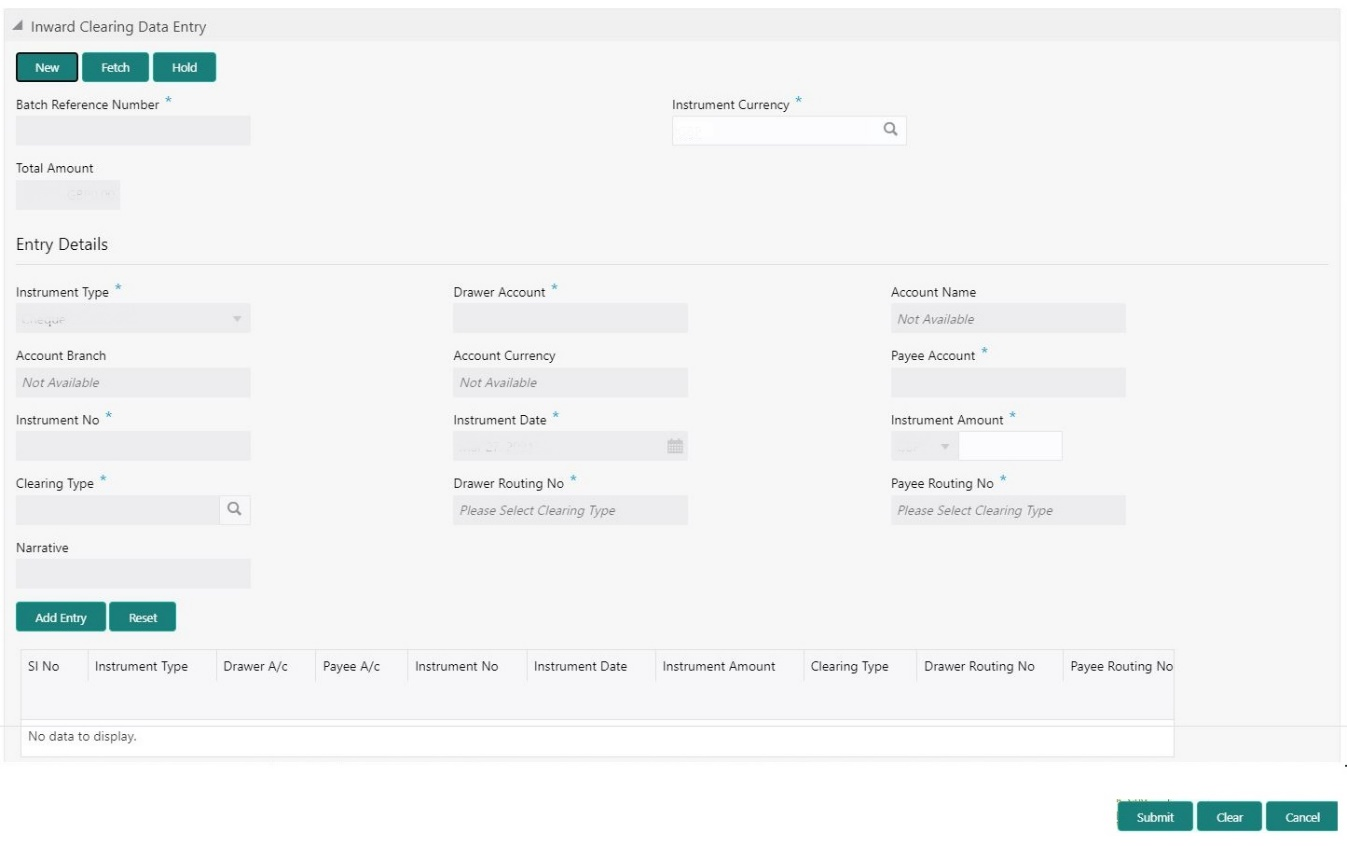
The Teller can use the Inward Clearing Data Entry screen to initiate the inward processing of bulk instruments.
This screen supports to capture of bulk input of inward clearing transactions for multiple instrument types – Cheque, Bankers Cheque, and Demand Draft. It also supports bulk data entry of inward clearing transactions for single and multiple customer accounts.
To initiate the inward processing of bulk instruments:
- On the Homepage, from Teller mega menu, under
Clearing, click Inward Clearing Data
Entry or specify Inward Clearing Data
Entry in the search icon bar and select the screen.The Inward Clearing Data Entry screen is displayed.
Note:
Charges are not supported for this screen. - On the Inward Clearing Data Entry screen, specify the
fields. For more information on fields, refer to the field description
table.
Note:
The fields, which are marked with an asterisk, are mandatory.Table 7-4 Inward Clearing Data Entry - Field Description
Field Description New
Click New to create a new clearing transaction and generate the batch reference number.
Fetch
Click Fetch to enable the field Batch Reference Number and input or select from the list of values. The list of values fetches only the batches that are saved and not submitted.
Hold
Click Hold to save the data entry made as part of the specified batch number.
Batch Reference Number
Displays the unique batch number, which is system generated.
Instrument Currency
Displays the current logged branch currency.Note:
You can also select the instrument currency from the drop-down values.Total Amount
Displays the total batch amount in instrument currency.
Entry Details
Specify the fields.
Instrument Type
Select the instrument type from the drop-down values.
Drawer Account
Specify the drawer account number.
Account Name
Displays the name of the account number specified.
Account Branch
Displays the branch code of the account number specified.
Account Currency
Displays the currency of the account number specified.
Payee Account
Specify the payee account number.Note:
You can also select from the list of values.Instrument No
Specify the instrument number.
Instrument Date
Specify the date of the instrument.
Instrument Amount
Specify the amount of the instrument.
Clearing Type
Specify the clearing type.Note:
You can also select from the list of values.Drawer Routing No
Specify the routing number.Note:
You can also select from the list of values.Payee Routing Number
Specify the routing number of the cheque.Note:
You can also select from the list of values.Narrative
Displays the default narrative as Inward Clearing Data Entry, and it can be modified.
Add Entry
Click Add Entry to add multiple records in the table and allow modifying or deleting if required.
Reset
Click Reset to clear the inputted entry details before you add the entries.
- Click Submit.
A teller sequence number is generated, and the Transaction Completed Successfully information message is displayed.
Note:
The transaction is moved to authorization in case of any warning raised when the transaction saves.On submission of data entry, the individual instrument details will be handed off to Oracle Banking Payments using Inward Clearing Service.
In case of reject notification of any transaction from Oracle Banking Payments, the teller can either modify the data and resubmit the transaction or discard the data entry.
Parent topic: Clearing Transactions
