- Current Account and Saving Account User Guide
- Maintenance
- Account Documents Update
3.2 Account Documents Update
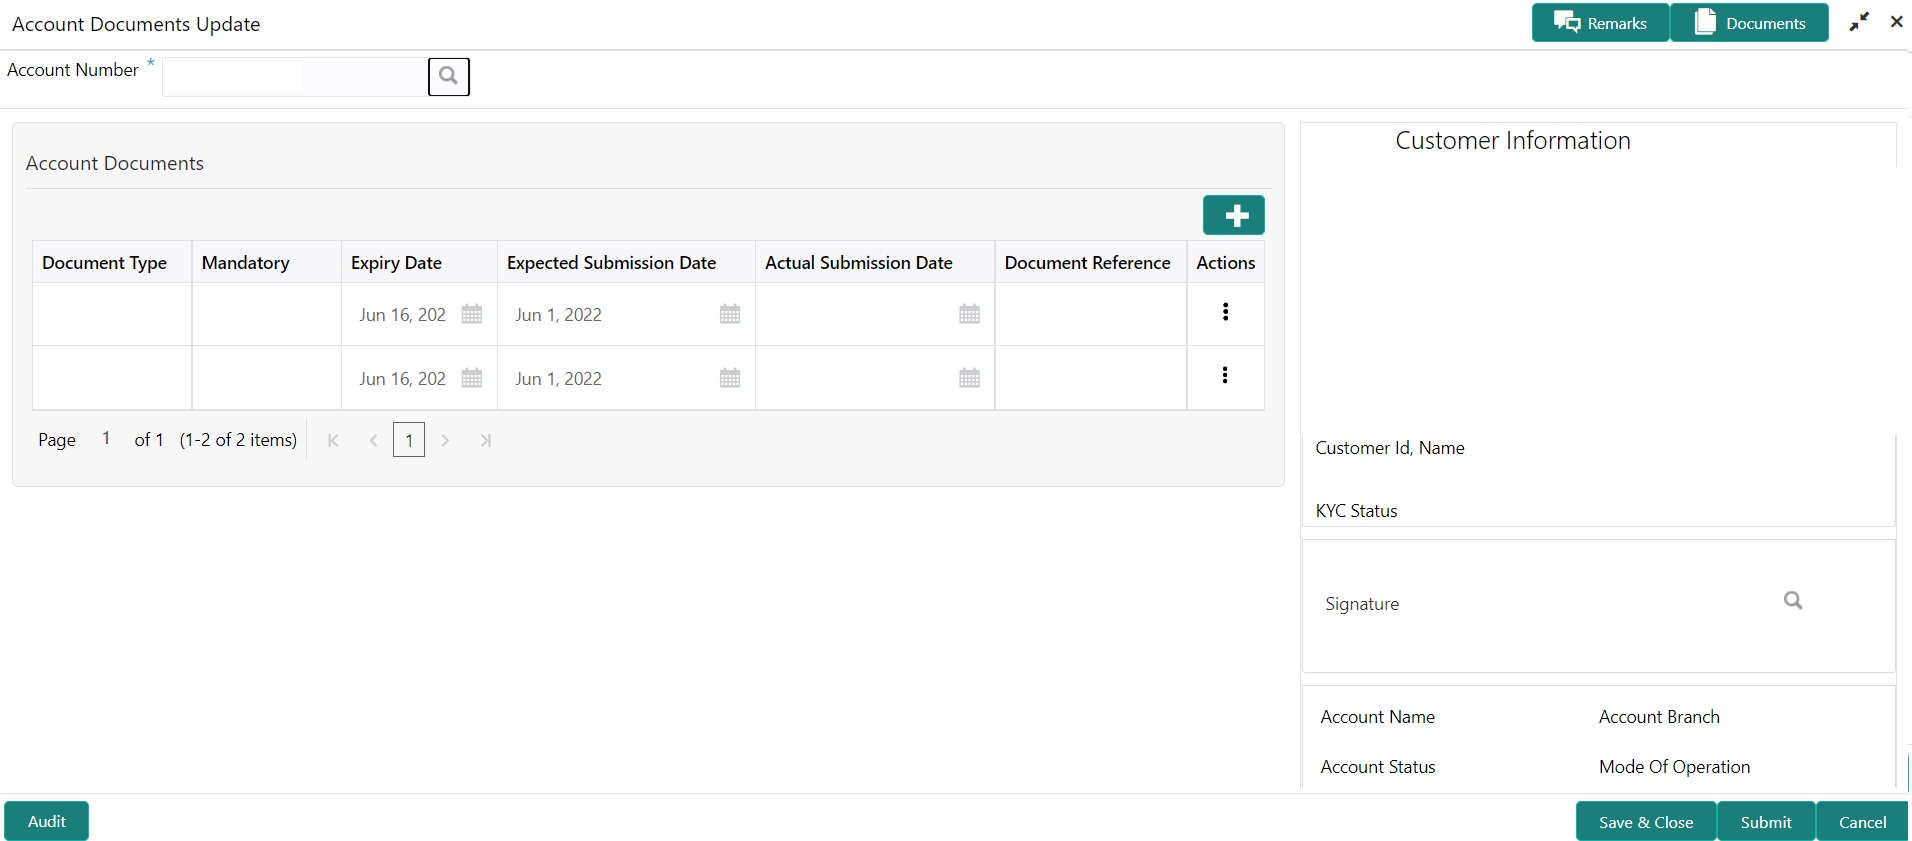
This topic describes the systematic instructions about Account Documents Update. This screen helps you view, update, or delete documents submitted by the customer against document types specified for the account class.
The documents in the screen are displayed in the following order:
- Expected Date of Submission
- Expiry Date
- Actual Submission Date
- On the Homepage, from Account
Services, under Other Services, click
Account Documents Update, or specify the
Account Documents Update in the Search icon
bar.Account Documents Updatescreen is displayed.
Note:
The fields which are marked in asterisk blue are mandatory.Note:
After the Account Number is selected, the system displays the available documents in the Account Documents table. - On Account Documents Update screen, specify the fields. For more information on fields, refer to the field description table.
Table 3-2 Account Documents Update - Field Description
Field Description Account Number Enter the Account Number or click the search icon to view the Account Number pop-up window. By default, this window lists all the Account Numbers present in the system. You can search for a specific Account Number by providing Customer ID, Account Number, or Account Name and clicking on the Fetch button. Note:
- The Account Name is displayed adjacent to this field as the account number is selected.
- The customer information is also displayed to the left of the screen.
- By default, the system displays all documents attached to the account.To add a
new document, click
 icon on the Account Documents. On
Account Documents, specify the fields.For more information on fields, refer to the field description table.
icon on the Account Documents. On
Account Documents, specify the fields.For more information on fields, refer to the field description table.Table 3-3 Account Documents - Field Description
Field Description Document Type Click the search icon to view the Document Type pop-up window. By default, this window lists all the Document Types present in the system. You can search for a specific Document Type and click on the Fetch button. Mandatory Displays Yes or No against each document type, which conveys whether a document is mandatory or optional. Expiry Date Displays the expiry date for the document. Note:
The expiry date cannot be the current business date or lesser than the current business date.If any document does not have an expiry date, then the expiry date is not displayed.
Expected Submission Date You can click the calendar icon to update the expected date of document submission if the document is not submitted on the current business date. This field is optional by default.
Note:
- The expected submission date cannot be the current business date or lesser than the current business date.
- If a mandatory document is deleted, the user cannot submit the transaction until a new document is uploaded or the Expected Submission Date is updated.
Actual Submission Date The Actual Submission Date field is automatically updated with the current business date whenever a document is uploaded. Document Reference Displays the document name created by the Document Management System when a document is uploaded. Actions Click  icon to display the following options:
- View Document
- Upload Document
- Delete Document
- Delete Document Type
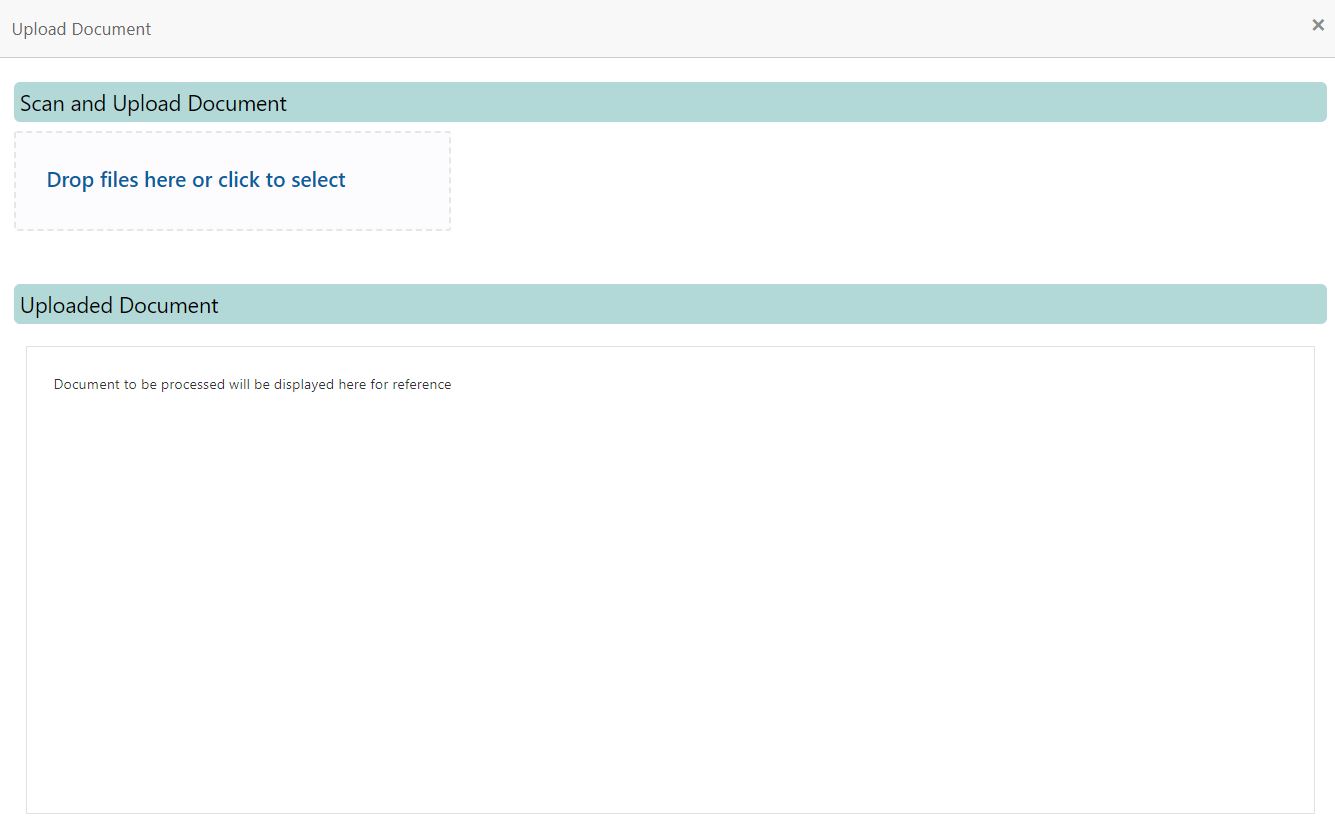
- To upload the document, click the Upload Document option
from the Actions icon.Upload Document pop up window is displayed.
Note:
The document preview is available only to those document types that support the preview feature by default. Where the preview feature is not supported, click on the Download button to download the attached document before viewing. - On the Upload Document screen, drag and drop the files
directly or click to select link and browse the file from the local drive.
Note:
- If there is an existing document already, the uploaded document will overwrite the existing document.
- The screen supports only one document upload against one Document type.
- The system will not allow to proceed with document upload, if the document is of 0 KB and have a long name.
- To view the document, click the View Document option
from the
 icon.
icon. - To delete the document, click the Delete Document option
from
 icon. For document types marked as Yes, either the document reference
number or the Expected date of submission must be present.A message Document will be deleted. Do you want to continue? is displayed. The uploaded document, Document Reference is deleted from the from the Document Management System.
 - To delete the Document Type, click the Delete Document
Type option from
 icon.The Document Type is deleted from the Account Documents list.
 - For the documents that are expired, for such rows, the Expiry Date is highlighted in red.
Parent topic: Maintenance

