- Current Account and Saving Account User Guide
- Others
- Account Product Transfer
13.5 Account Product Transfer
This topic describes the systematic instructions for Account Product Transfer where the user can change the existing product of the account to a different product. Customers request the account product transfer for enhanced banking features or better facilities and offers without changing the existing account number.
- On the Homepage, from Account
Services, under Others, click
Account Product Transfer, or specify the
Account Product Transfer in the Search icon
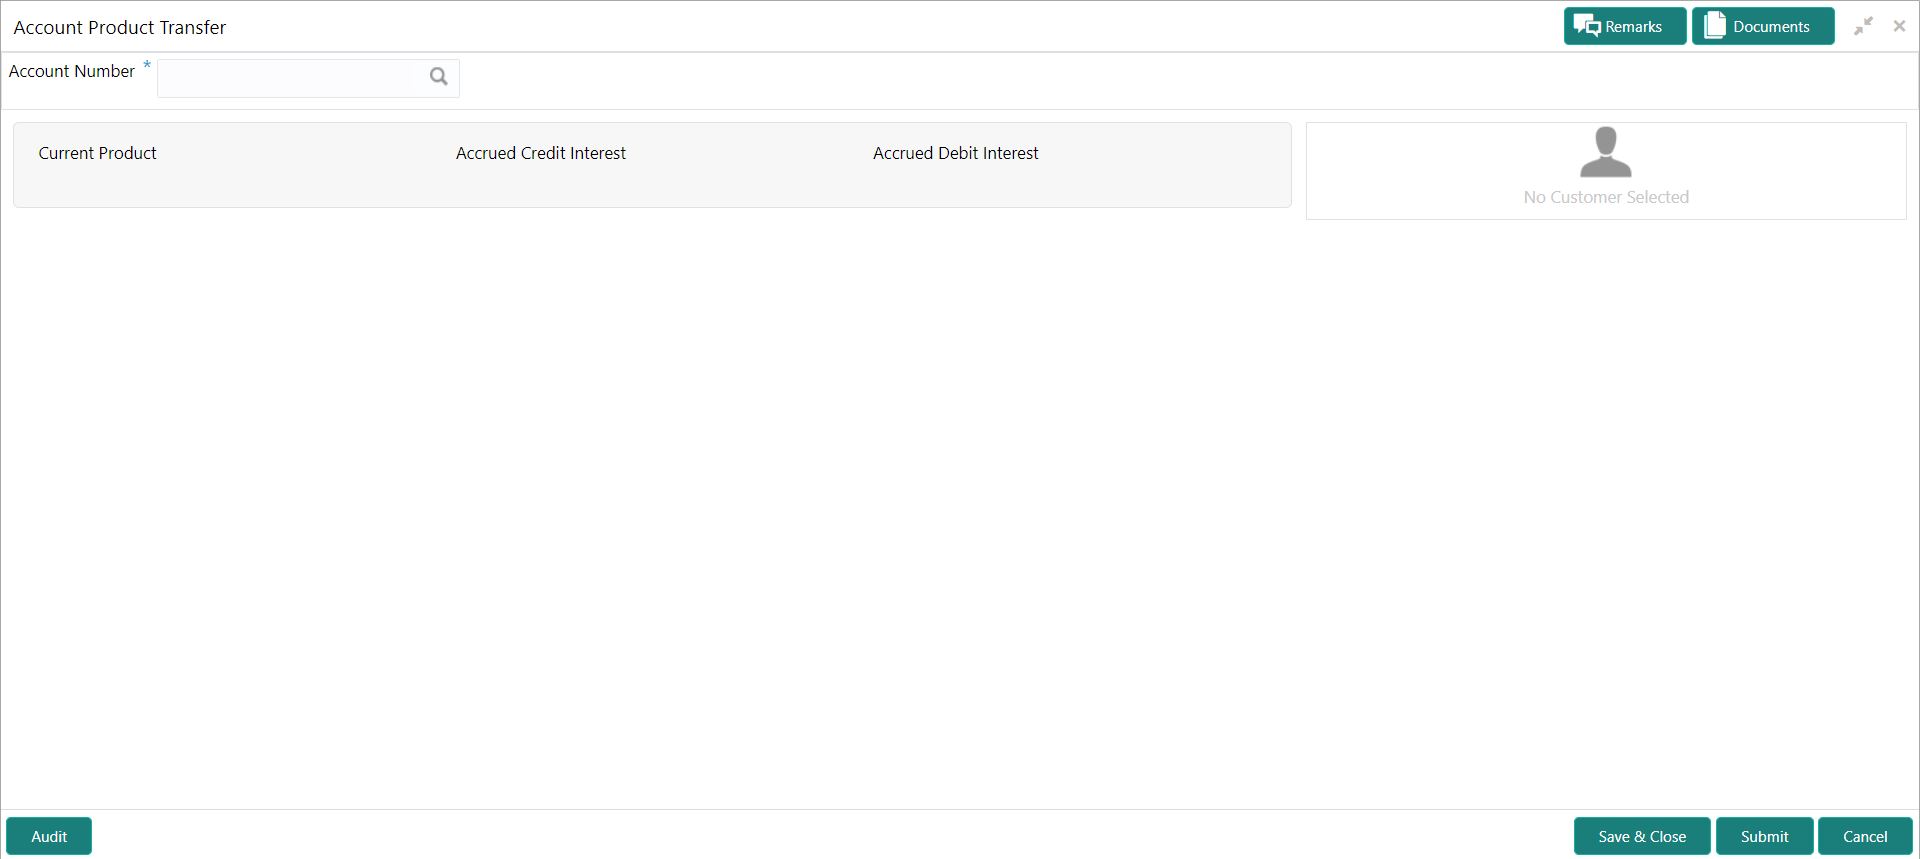
bar.Account Product Transferscreen is displayed.
Note:
The fields which are marked in asterisk blue are mandatory. - Enter the Account Number.Account Product Transfer details are displayed.
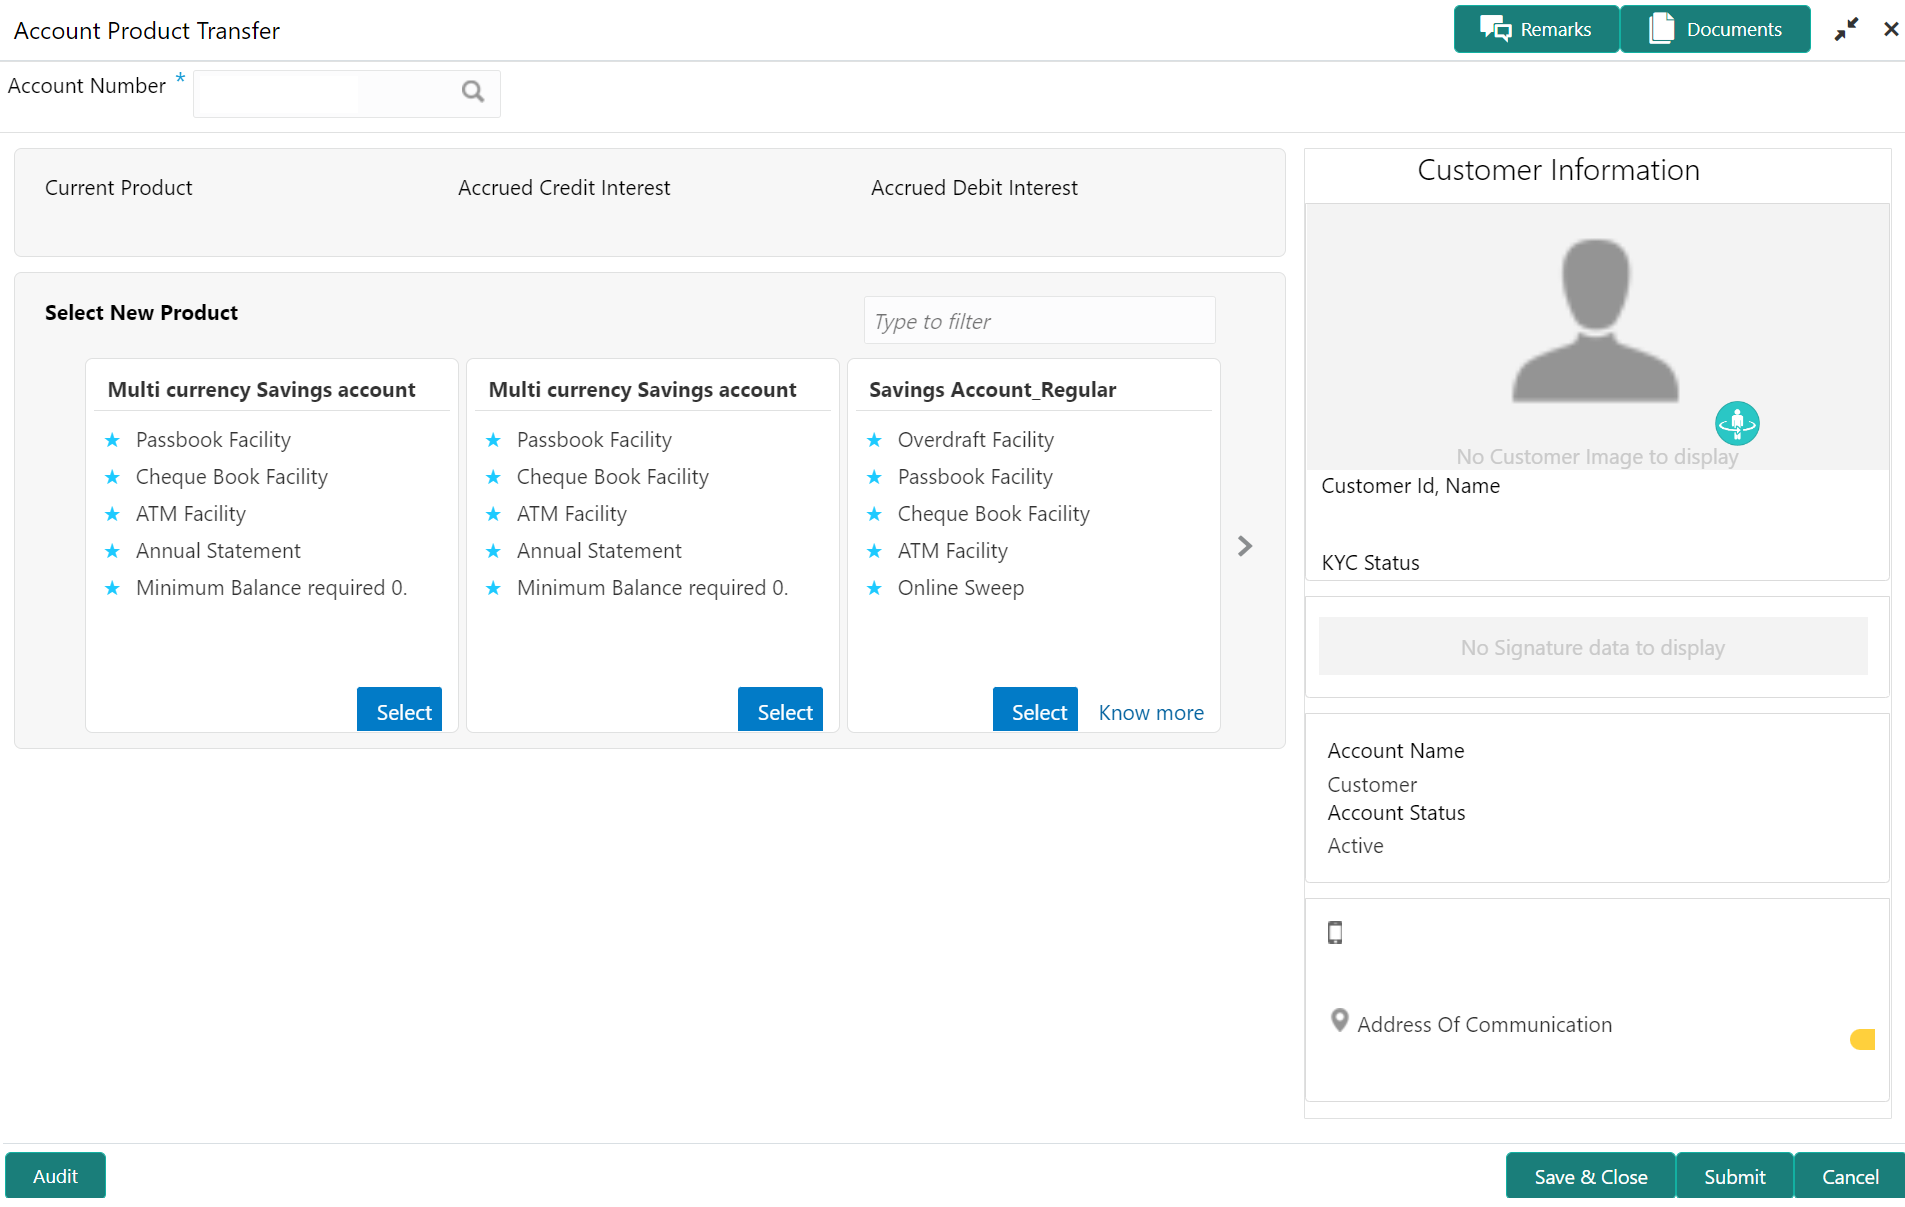
Figure 13-13 Account Product Transfer Details for Account

Description of "Figure 13-13 Account Product Transfer Details for Account"Note:
If more than 2 products are available click on or
on or  icons to navigate for other products.
- On Account Product Transfer screen, specify the fields. For more information on fields, refer to the field description table.
Table 13-8 Account Product Transfer - Field Description
Field Description Account Number Enter the Account Number or click the search icon to view the Account Number pop-up window. By default, this window lists all the Account Numbers present in the system. You can search for a specific Account Number by providing Customer ID, Account Number, or Account Name and clicking on the Fetch button. Note:
- The Account Name is displayed adjacent to this field as the account number is selected.
- The customer information is also displayed to the left of the screen.
Current Product The system displays the existing product name for the selected account number. Accrued Credit Interest The system displays the accrued credit interest details if any accrued interest is available for the account. Accrued Debit Interest The system displays the accrued debit interest details if any accrued debit interest available for the account. Filter User can search the product by using this search filter. The system displays all eligible products for the account under the Select New Product section. The following details are displayed in this section:- Product Name
- Product Facilities
Note:
- The above details are displayed when the data is fetched from Oracle Banking Onboarding and this can be configured on OBRH.
- When the data is fetched from Oracle FLEXCUBE Universal Banking,
the system displays the following product details:
- Product Name
- Product Facilities
- Select the product for account product transfer and to know more about the product click on know more.
- Click Know more hyperlink to view full product
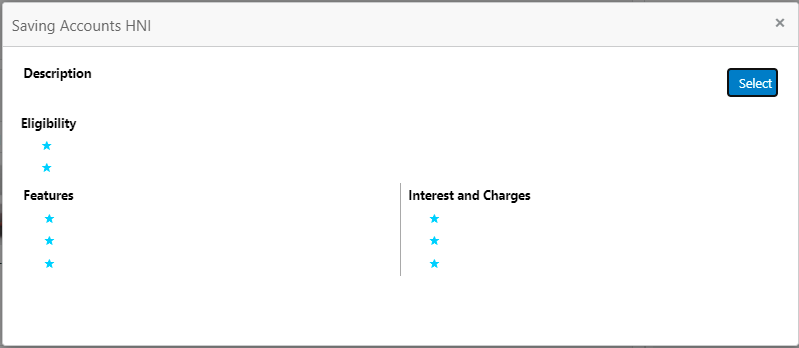
details.Product Details pop-up screen is displayed.
- On the Product Details pop-up screen, the system
displays the following details:
- Product Name
- Product Description
- Eligibility
- Features
- Interest and Charges
- Click on the Select button to which the customer account
has to be transferred.Selected product details are defaulted.
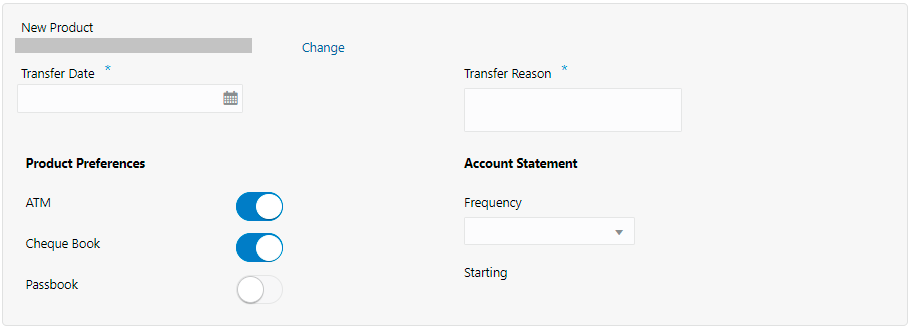
- User can specify the product transfer details and modify the defaulted
details.For more information on fields, refer to the field description table.
Table 13-9 Select New Product - Field Description
Field Description Select New Product This section displays the product and details in each widget. Change Click the Change button, and the system displays the account product selection screen where the user can select the product. Effective Date By default, the system displays the effective date as next working day and user can modify to any future date. The Effective Date cannot be current date or backdated.Note:
If the effective date is specified as Holiday, the system displays an error as Transfer date cannot be a holiday.Transfer Reason Enter the transfer reason. Note:
The Transfer Reason cannot be blank.ATM The user can enable or disable the defaulted ATM facility by clicking the toggle button. Cheque Book The user can enable or disable the defaulted Cheque Book facility by clicking the toggle button. Passbook The user can enable or disable the defaulted Passbook facility by clicking the toggle button. Frequency Users can modify the defaulted frequency for generating the account statements from the drop-down. The drop-down lists the below values: - Annual
- Semi Annual
- Quarterly
- Monthly
- Fortnightly
- Weekly
- Daily
- Blank
By default, the Frequency is displayed as Blank from selected product.
Starting Users can modify the defaulted starting details from the drop-down based on the selected frequency. The value gets defaulted from the selected product. The drop-down lists the below values: - January to December - If the user selects statement frequency as Annual or Semi Annual or Quarterly.
- 1 to 31 - If the user selects statement frequency as monthly.
- Sunday to Saturday - If the user selects statement frequency as weekly or fortnightly.
- Blank - The system defaults the blank value if the user selects statement frequency as daily.
- Click the Submit button to submit the transfer request for authorization.
Parent topic: Others


