- Current Account and Saving Account User Guide
- Maintenance
- Nominee Details Update
3.4 Nominee Details Update
This topic describes the systematic instruction to update nominee details.
- On the Homepage, from Account
Services, under Maintenance, click
Nominee Details Update, or specify the
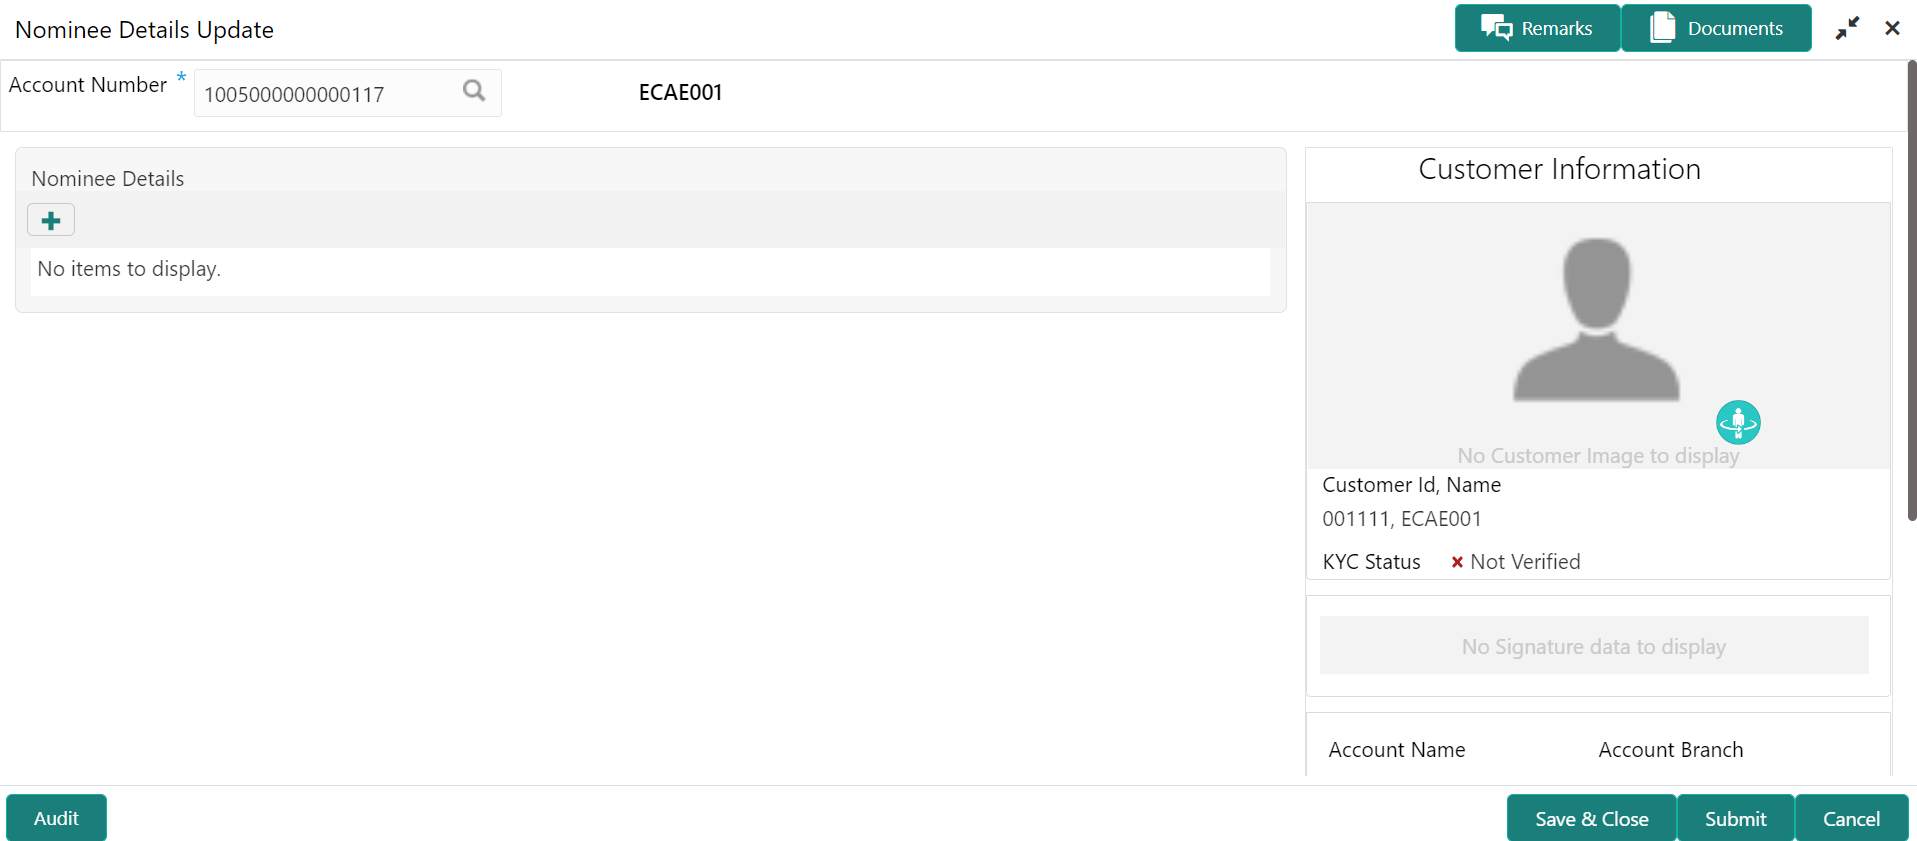
Nominee Details Update in the Search icon bar.Nominee Details Updatescreen is displayed.
Note:
The fields which are marked in asterisk blue are mandatory. - On Update Nominee Details screen, specify the
fieldsFor more information on fields, refer to the field description table.
Table 3-5 Update Nominee Details - Field Description
Field Description Account Number Enter the Account Number or click the search icon to view the Account Number pop-up window. By default, this window lists all the Account Numbers present in the system. You can search for a specific Account Number by providing Customer ID, Account Number, or Account Name and clicking on the Fetch button. When users enter the account number, the customer information is displayed.
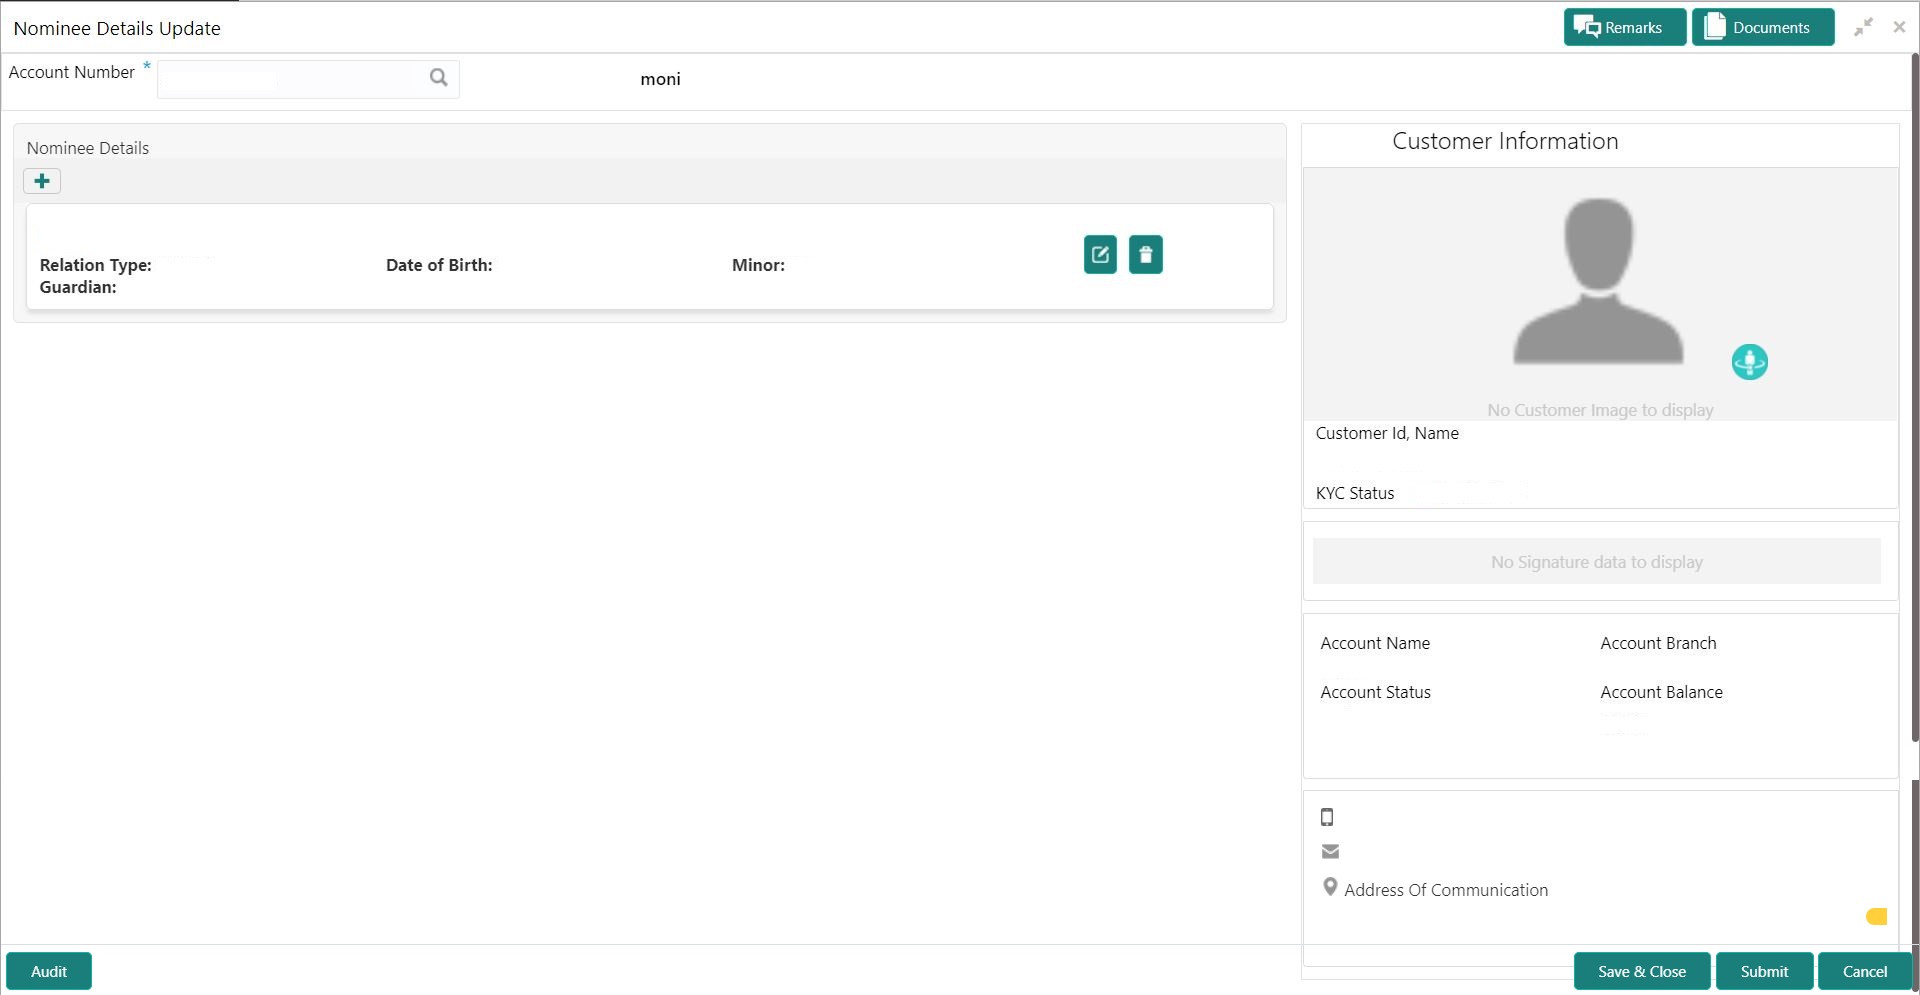
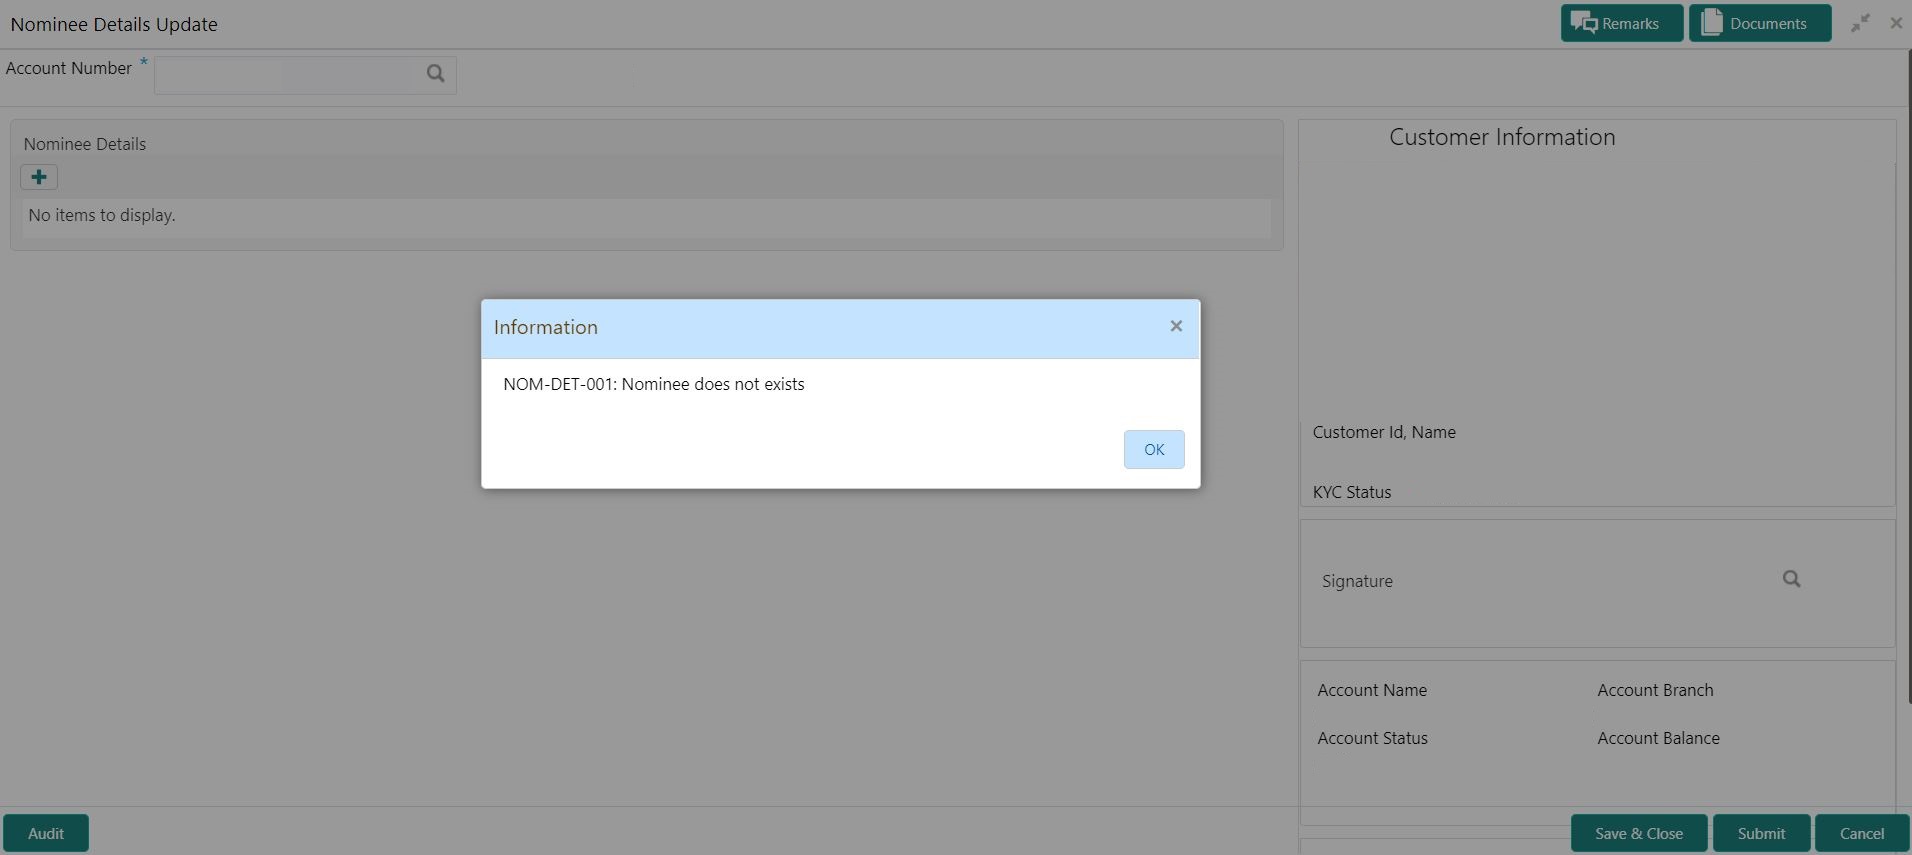
Account Name Account Name is displayed by default based on the account selected. - When user input account number, the system displays existing nominee details if
any or the system displays an information message as Nominee does not
exists.Nominee Details screen is displayed.
- After the input of account number, the existing nominee are displayed in list
view format and the below nominee details are displayed:
- Nominee Name
- Relation Type
- Date of Birth
- Minor
- Guardian
- To create a new nominee details, click
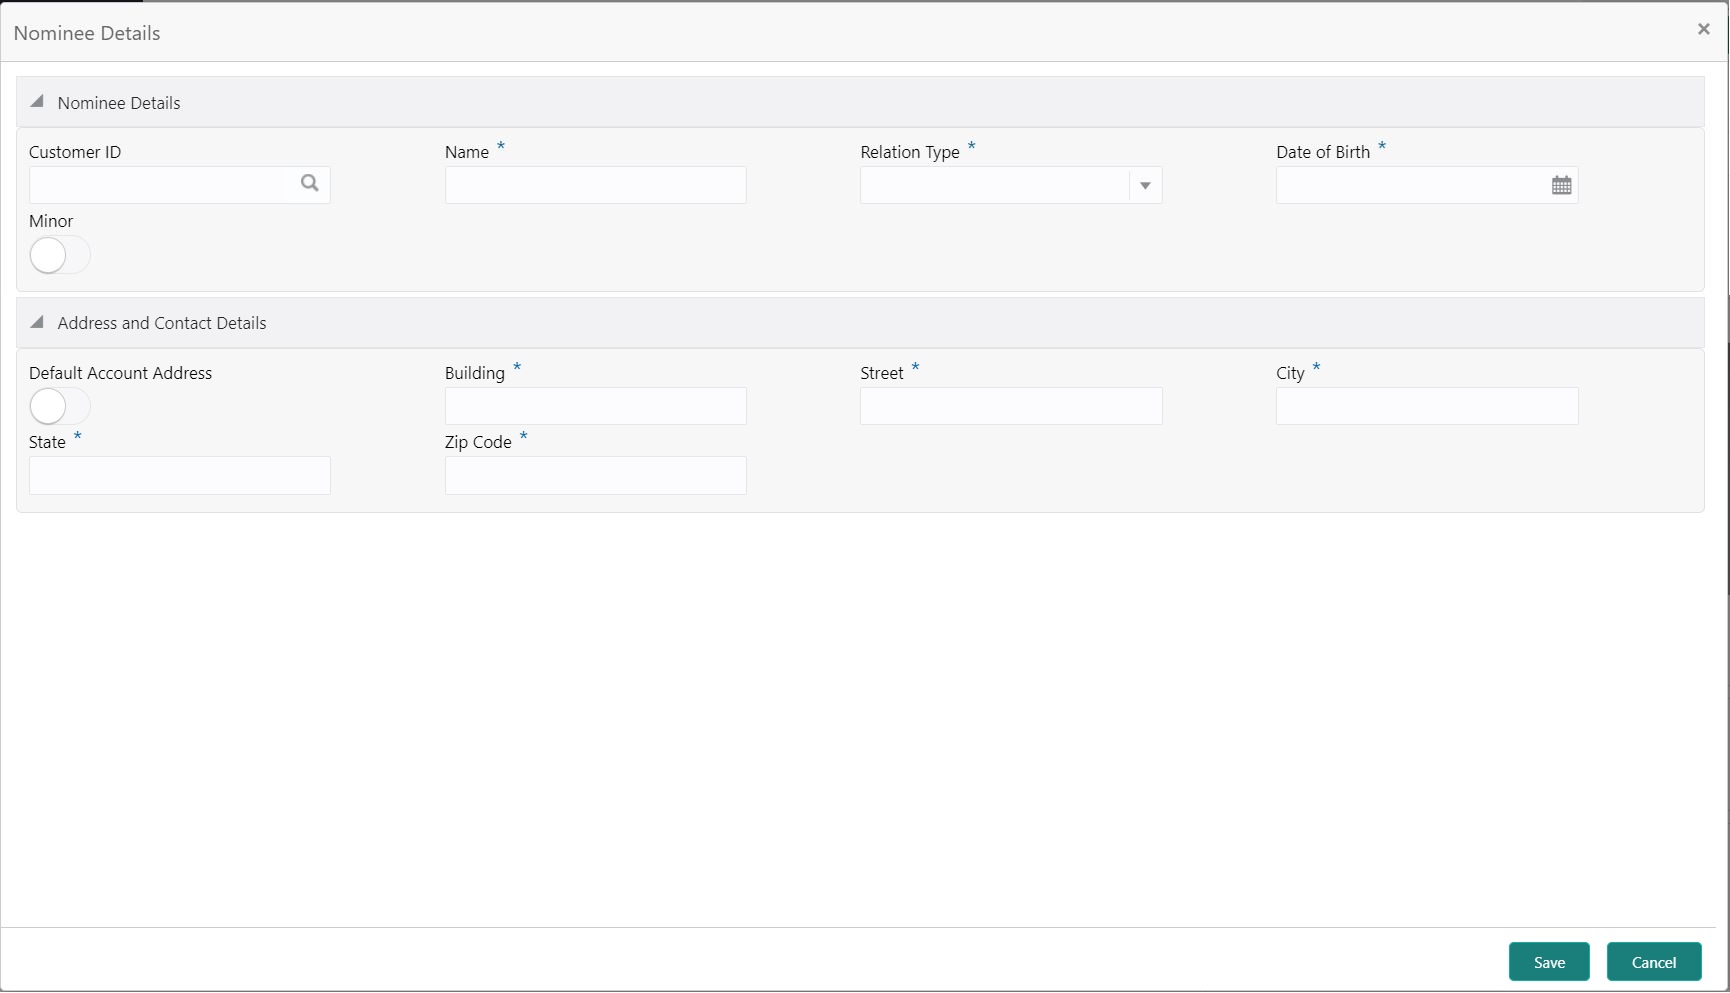
 icon.Nominee Details pop-up window is displayed.
 - On Nominee Details pop up window, specify the
fields.For more information on fields, refer to the field description table.
Table 3-6 Nominee Details - Field Description
Field Description Customer ID When the nominee is an existing customer, the below details are defaulted by selecting the customer ID. - Title
- Name
- Date of Birth
- Address Details
Enter the Customer ID or click the search icon to view the Customer ID pop-up window. By default, this window lists all the Customer ID’s present in the system. You can search for a specific Customer ID by providing Customer ID or Customer Name and click on the Fetch button.
Nominee Details Users can capture the nominee details: - Name - Specify the First Name.
- Relation Type - Specify the Relation Type from the drop-down list.
- Date of Birth - Specify the Date of birth
- Minor - Based on the date of birth, the system derives whether the customer is minor or major.
- Default Account Address - If the Account address and nominee address is the same, the user can default the account address nominee address by enabling the 'Default Account Address' toggle button.
- Building - Specify the Nominee building
- Street - Specify the Nominee Street
- City - Specify the nominee city.
- State - Specify the nominee State.
- Zip Code - Specify the nominee Zip Code
Edit Icon Users can edit the existing nominee details by a click on the Edit icon. A pop-up window displays with existing nominee details, and the user can edit the details. Delete Icon Users can remove the existing nominee by a click on the Delete icon, while removing the existing nominee system will get a confirmation from the user Do you want to remove this nominee? - Guardian details are enabled if the nominee is a minor.For more information on fields, refer to the field description table.
Table 3-7 Guardian Details - Field Description
Field Description Name Specify the Name. Relation Type Specify the Relation Type from the drop-down list. Building Specify the Guardian building Street Specify the Guardian Street City Specify the Guardian city. State Specify the Guardian State. Zip Code Specify the Guardian Zip Code.
Parent topic: Maintenance


