- Teller User Guide
- Customer Transactions
- Cash Deposit
4.1 Cash Deposit
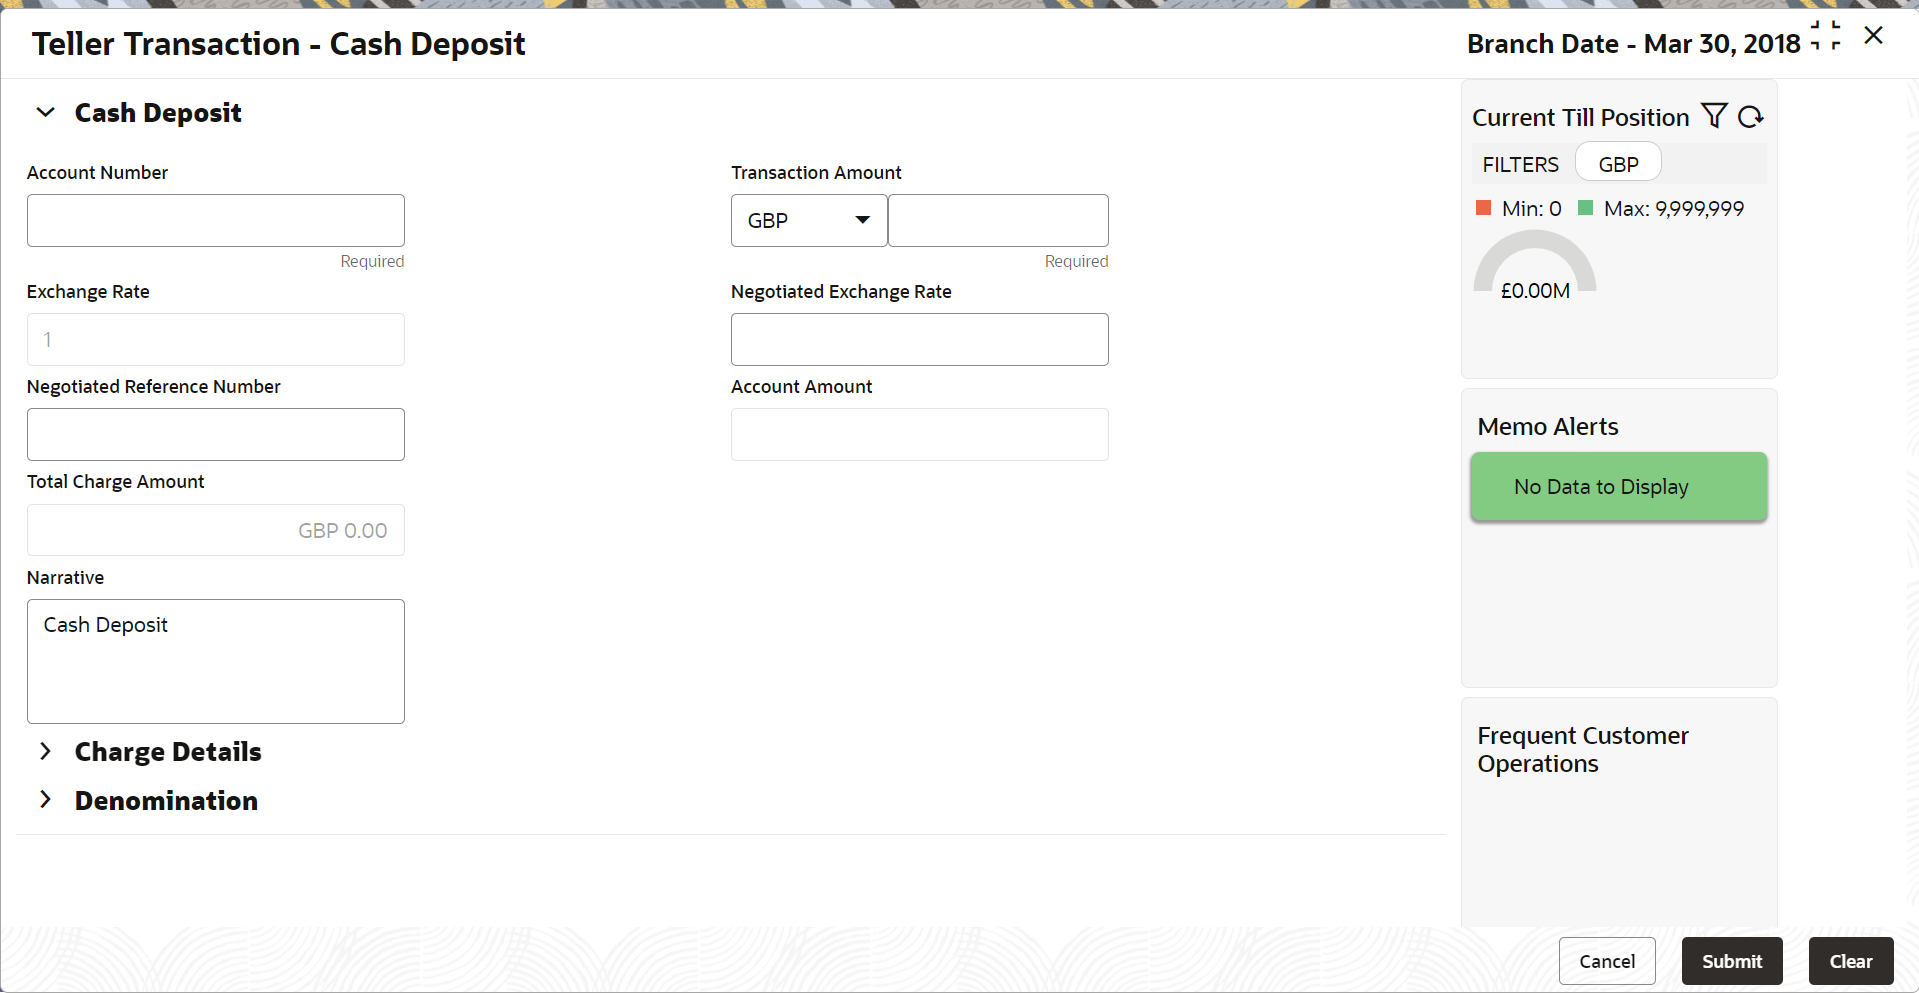
The Cash Deposit screen is used to deposit the cash in a CASA. Cash can be deposited in either account currency or any foreign currency that is allowed.
Whenever any transaction in foreign currency is posted to the account, it is converted to the account currency based on the maintained exchange rate for the transaction.
To deposit cash:
- On the Homepage, click Teller. On the Teller Mega Menu,
under Customer Transaction, click Cash
Deposit or specify the Cash Deposit in
the search icon bar.The Cash Deposit screen is displayed.
- On the Cash Deposit screen, specify the fields. For more information on fields, refer to the field description
table.
Note:
The fields marked as Required are mandatory.Table 4-1 Cash Deposit - Field Description
Field Description Account Number Specify a valid account number for the customer. When you press the Tab key, the corresponding account information will be displayed in the Customer Information widget. Note:
In addition, you can use Oracle Banking Virtual Accounts. These Virtual Accounts are used as a routing account to credit the underlying physical account.The system displays an override or error message on the tab out of Account Number based on the account dormancy parameters.
Transaction Amount Displays the local currency of the branch. You can also select other transaction currencies from the drop-down values.
Specify the transaction amount that needs to be credited to the customer account.
Exchange Rate Displays the exchange rate used to convert the transaction currency into account currency and it can be modified.Note:
If the transaction currency is the same as the account currency, the system displays the exchange rate as 1. This field is displayed only ifMulti-Currency Configurationat Function Code Indicator level is set as Y.Negotiated Exchange Rate Specify the negotiated exchange rate that should be used for foreign currency transactions between the treasury and the branch. You need to specify the negotiated exchange rate only when the currencies involved in the transaction are different.Note:
This field is applicable only if the transaction involves cross currency and only if cross currency enabled andNegotiated_Rate_Enabled Configurationat Function Code Indicator level is set as Y.Negotiated Reference Number Specify the unique reference number that should be used for negotiation of cost rate, in foreign currency transaction. If you have specified the negotiated cost rate, then you need to specify the negotiated reference number also.Note:
Accounting system books the online revaluation entries based on the difference in exchange rate between the negotiated cost rate and transaction rate.Account Amount Displays the transaction amount converted in terms of account amount based on the exchange rate.Note:
This field is displayed only ifMulti-Currency Configurationat Function Code Indicator level is set as Y.Total Charge Amount Displays the total charge amount, which is computed by the system in the local currency of the branch.Note:
This field is displayed only ifTotal Charges Configurationat Function Code Indicator level is set as Y.Narrative Displays the default narrative as Cash Deposit, and it can be modified. - Specify the charge details. For information on the fields in the Charge Details segment, refer to Charge Details.
- Specify the denomination details. For information on the fields in the Denomination Details segment, refer to Add Denomination Details.
- Click Submit.
Once you submit the transaction, the system validates the following:
-
Mandatory fields
-
Allowed minimum/maximum limit amount for the user ID
-
Allowed currency for Teller user ID
-
Till balance and branch breaching limit
-
Function code preferences
If any of the validation fails, the system will prompt appropriate information, warning, or error message. For more information, refer to the following steps:
-
If an information message is prompted, click OK to confirm and complete the transaction.
-
If a warning message is prompted, the system will move the transaction for authorization. Once approved, the transaction is moved to Teller Electronic Journal for completion. Refer to authorization procedures to know more about authorization processing.
-
If any validation error is prompted, you need to update the details to fix the error and re-submit the transaction.
-
If any other error message is prompted, the transaction is discarded and does not get saved.
-
If you click Close or Cancel after specifying the transaction details, then the data will not persist.
When the Teller completes the transaction, the corresponding Teller's cash position is updated.
The Transaction Completed Successfully information message is displayed. -
- Charge Details
The Charge Details segment is used to view the computed charge details based on the charge maintenance defined for the function code.
Parent topic: Customer Transactions
