- Teller User Guide
- Customer Service
- Cheque Book Request
18.3 Cheque Book Request
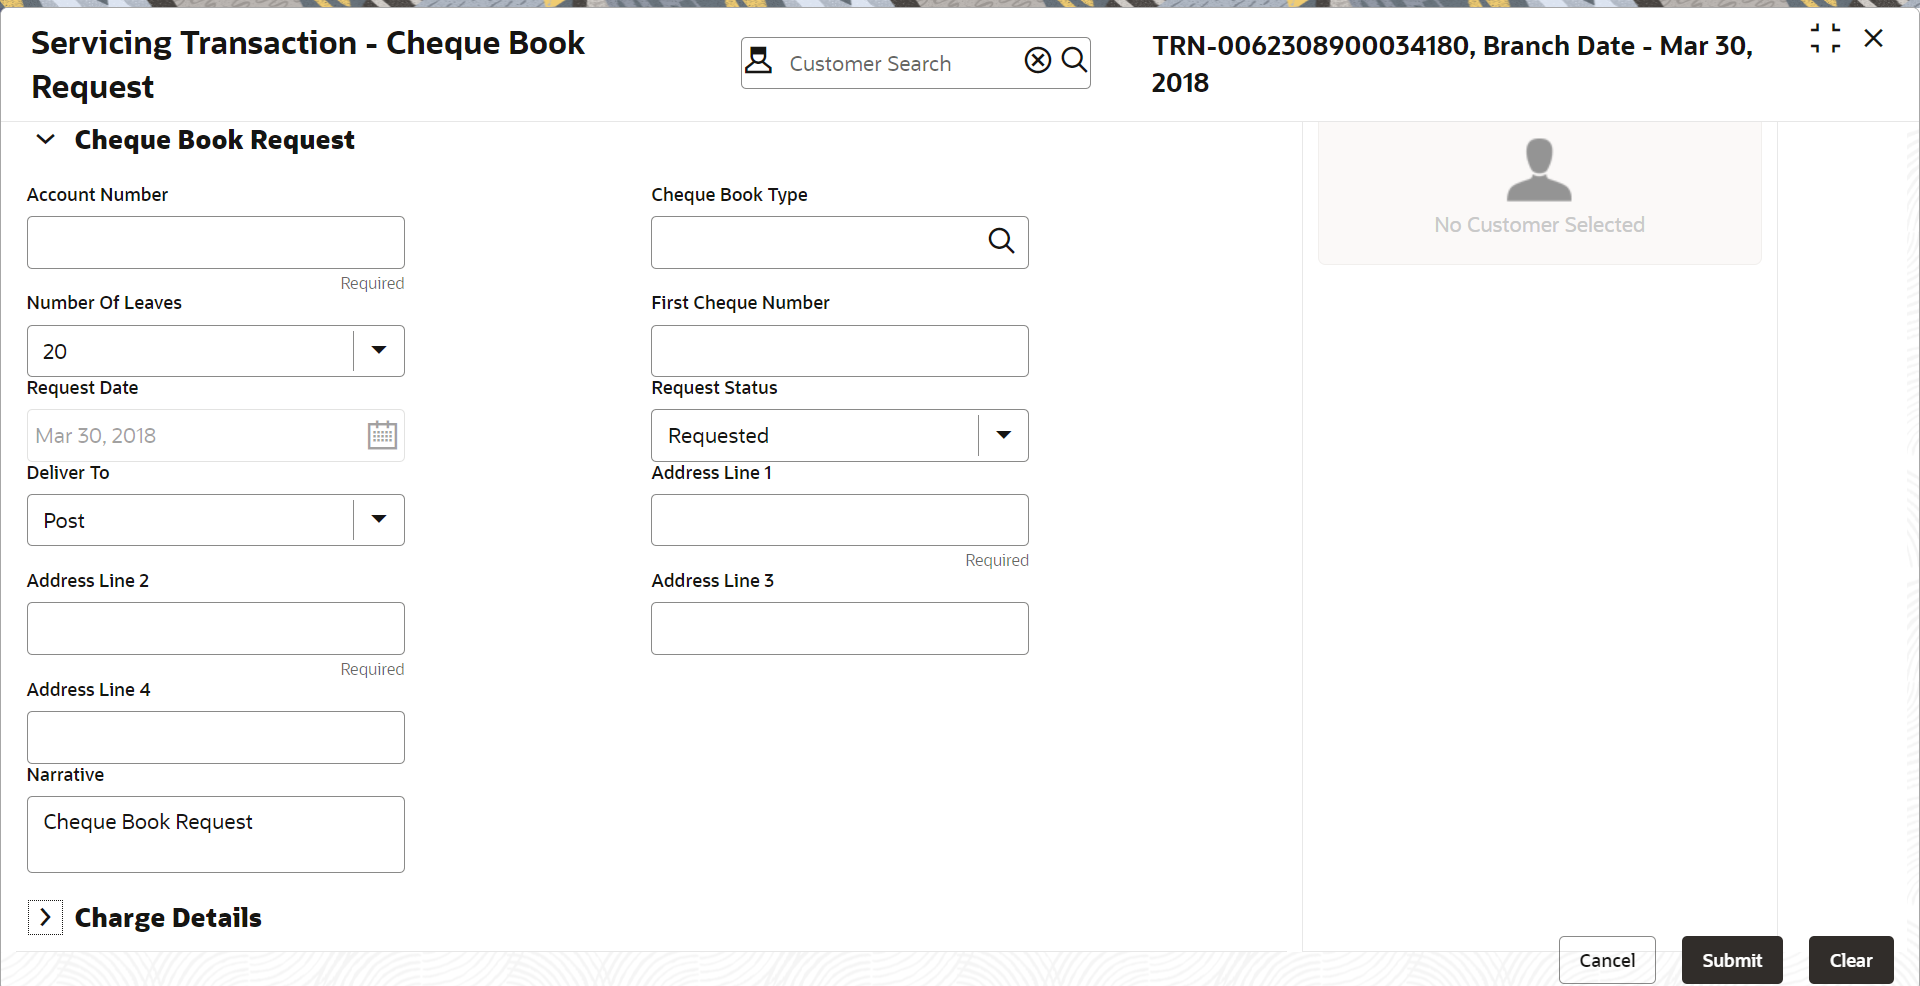
The Cheque Book Request screen is used to initiate the cheque book request for a customer account.
To initiate the cheque book request:
- On the Homepage, from Teller mega menu, under
Customer Service, click Cheque Book
Request or specify Cheque Book Request in
the search icon bar and select the screen.The Cheque Book Request screen is displayed.
- On the Cheque Book Request screen, specify the fields.
For more information on fields, refer to the field description
table.
Note:
The fields marked as Required are mandatory.Table 18-3 Cheque Book Request - Field Description
Field Description Account Number
Specify the account number for which the cheque book request is to be initiated.
Cheque Book Type
Click the search icon, and select the checkbook type from the list of values.
Number of Leaves
Select the number of leaves from the following drop-down values:-
10
-
25
-
50
-
100
First Cheque Number
Specify the number of the first cheque. Request Date
By default, the current posting date is displayed as the request date. Request Status
Select the request status from the drop-down values (Requested or Delivered). Deliver To
Specify the mode of delivery (Branch or Post). Address Line 1 to Address Line 4
Specify the address of the Customer if the delivery mode is selected as Post. Note:
By default, the address of the customer account is displayed, and it can be modified.Narrative
Displays the default narrative as Cheque Book Request, and it can be modified. -
- Specify the charge details. For information on the fields in the Charge Details segment, refer to Charge Details.
- Click Submit.The request is handed off to the core FLEXCUBE Universal Banking system for the cheque book issuance of the customer account.
Parent topic: Customer Service
