- Receivables and Payables User Guide
- Maintenance for Receivables and Payables
- Reconciliation Rules Maintenance
- Reconciliation Rule Definition
- Create Exact Reconciliation Rule Definition
3.5.1.1 Create Exact Reconciliation Rule Definition
This topic describes the systematic instruction for setting up recon rule for Exact reconciliation category.
Specify User ID and Password, and login to Home screen.
- On Home screen, click Cash Management. Under Cash Management, click Receivables & Payables.
- Under Receivables & Payables, click Maintenance. Under Maintenance, click Reconciliation Rule Definition.
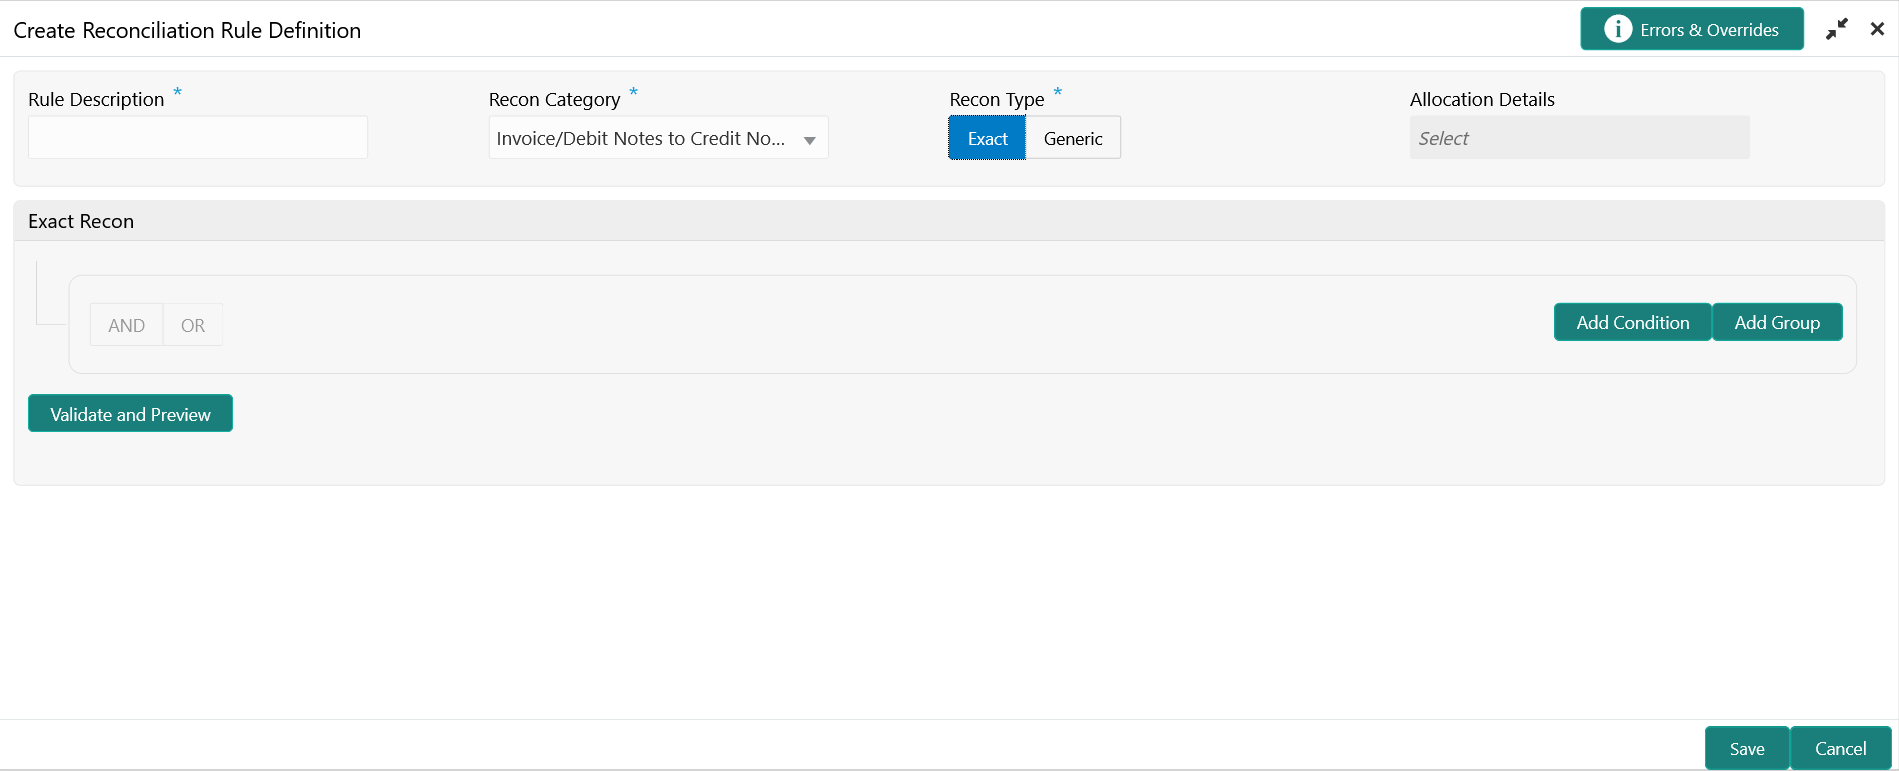
- Under Reconciliation Rule Definition, click Create Reconciliation Rule Definition.The Create Reconciliation Rule Definition screen displays.
Figure 3-37 Create Exact Reconciliation Rule Definition
- Specify the fields on Create Exact Reconciliation Rule Definition screen.For more information on fields, refer to the field description table.
Note:
The fields, which are marked with an asterisk, are mandatory.Table 3-13 Create Exact Reconciliation Rule Definition - Field Description
Field Description Rule Description Specify the description of recon rule. Recon Category Select any one of the below categories of recon for which rule is defined. - Invoice/Debit Notes to Credit Notes Recon
- Invoice/Debit Notes to Payment Recon
- Expected Cashflow To Payment Recon
- Allocation of Payment to Virtual Accounts
Recon Type Select Exact as the category of the Recon definition. Allocation Details If allocation required, then select the appropriate value to specify whether the allocation should be done based on the account or attribute of entity like cashflow/payment/invoice. - In the Exact Recon section, perform the following steps to create conditions or group of conditions:
- Click Add Condition to add a single line of condition. Or, click Add Group to add a group of conditions.
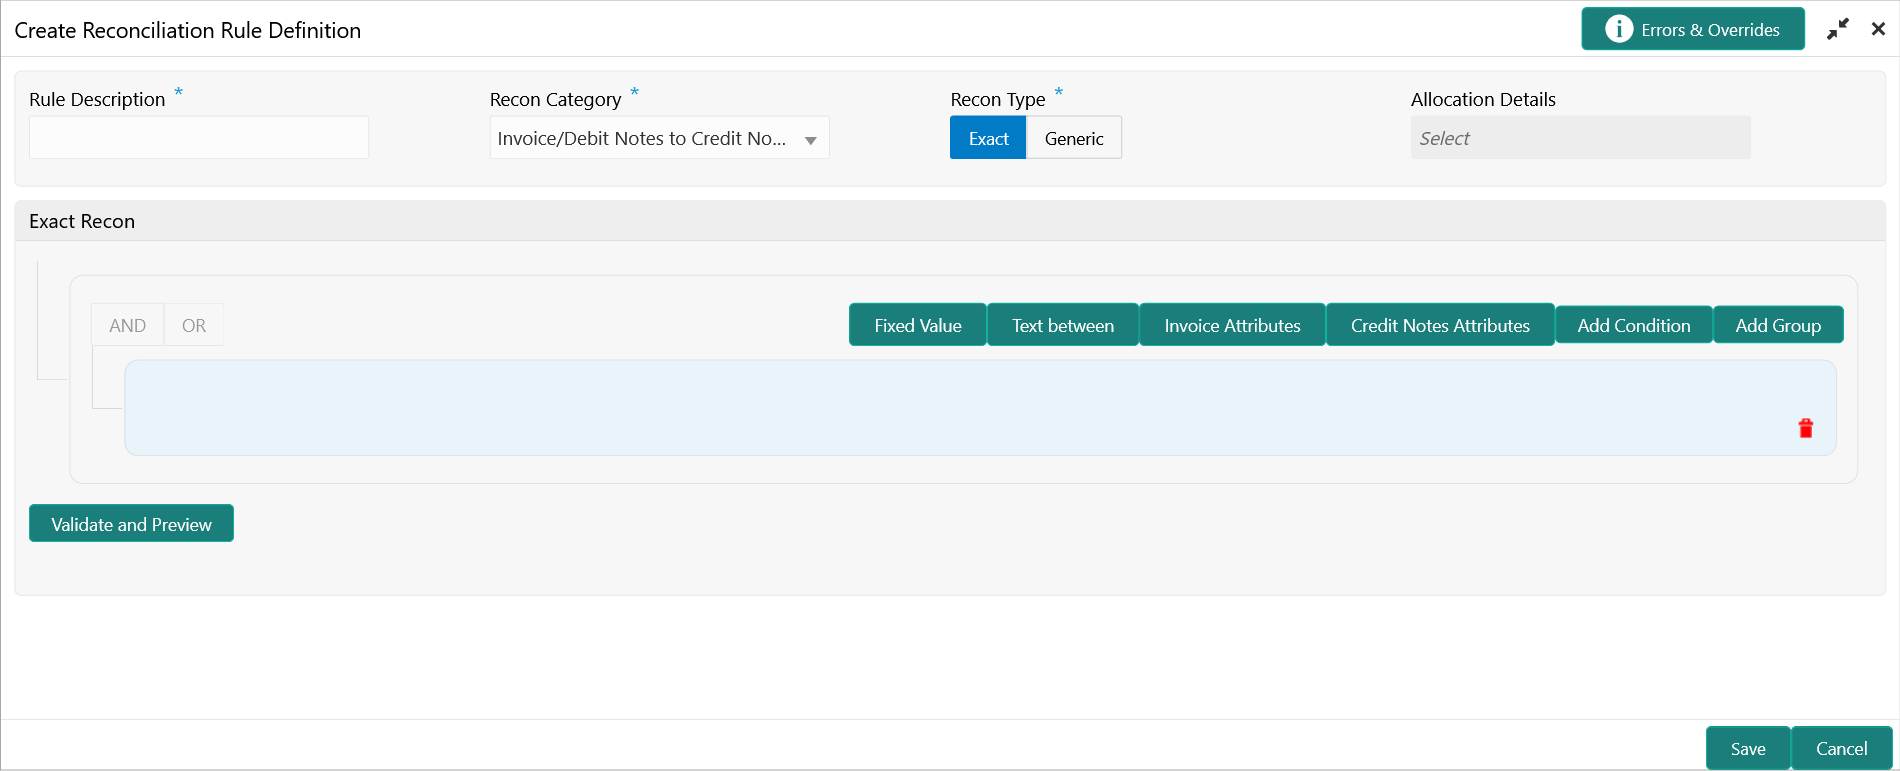
- Click inside the added container to view buttons for adding condition details.The Exact Recon - Condition/Group Details screen displays with the Fixed Value, Text between, Invoice/Payment Attributes, Payment Attributes, or Cashflow/Payment Attributes (depending on the selected recon category).
Figure 3-38 Exact Recon - Condition/Group Details
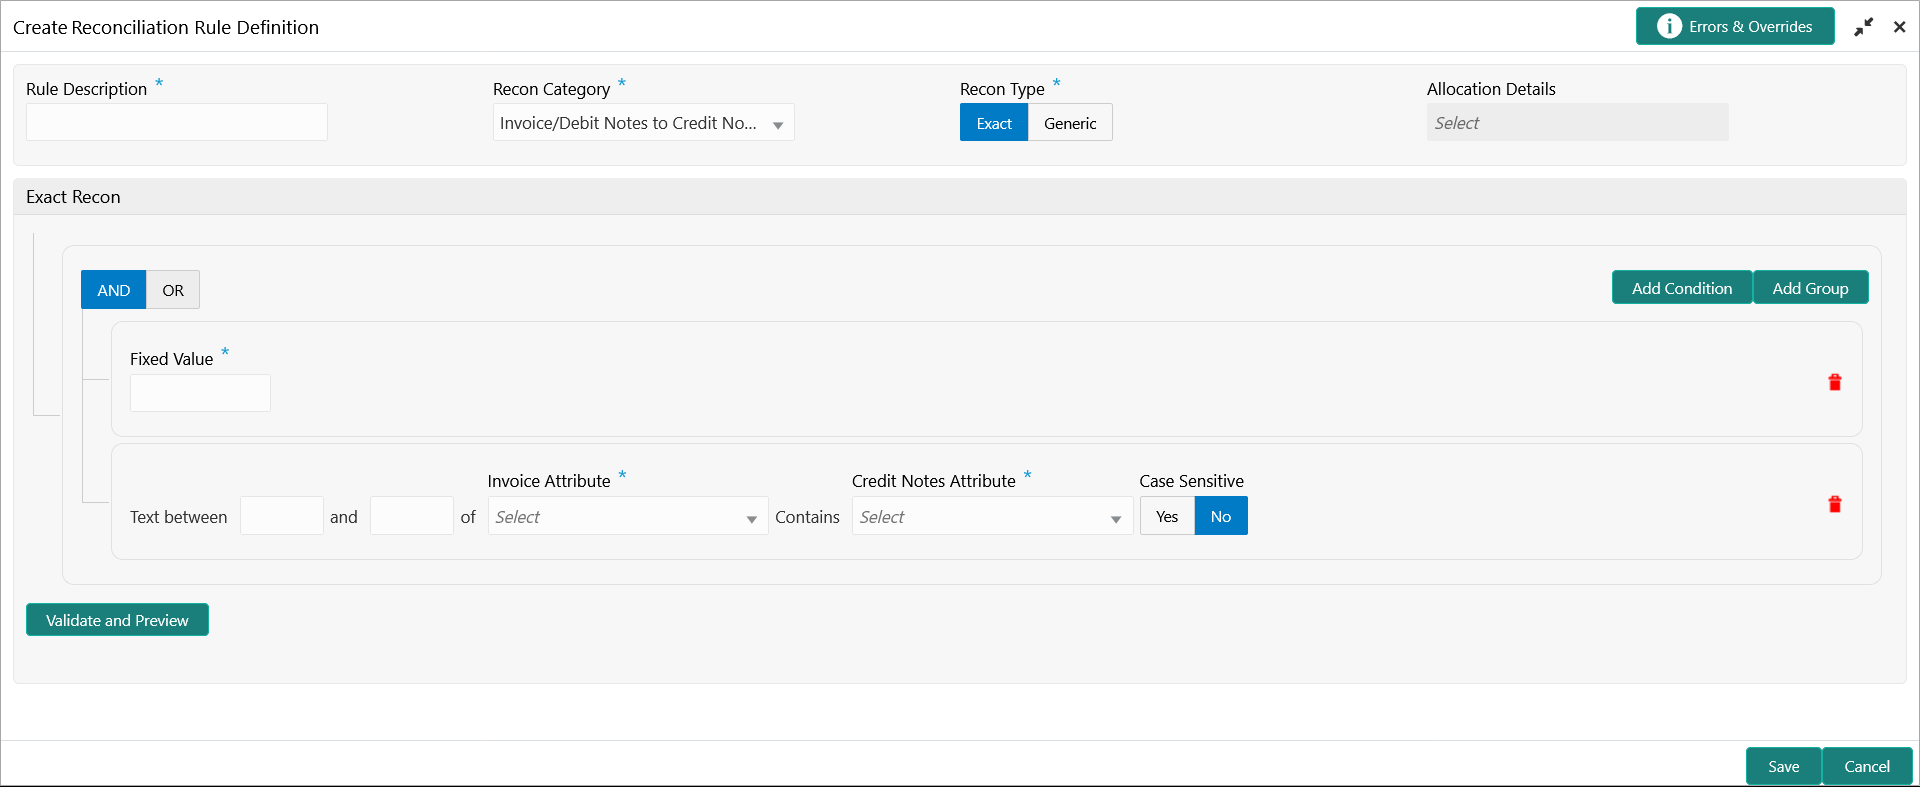
- Click Fixed Values to define the value to be validated.
- Click Text between to define the range of text to be validated.The Exact Recon - Text Between screen displays.
- Select the Case Sensitive as Yes or No to check the case sensitivity of the field value while recon execution.
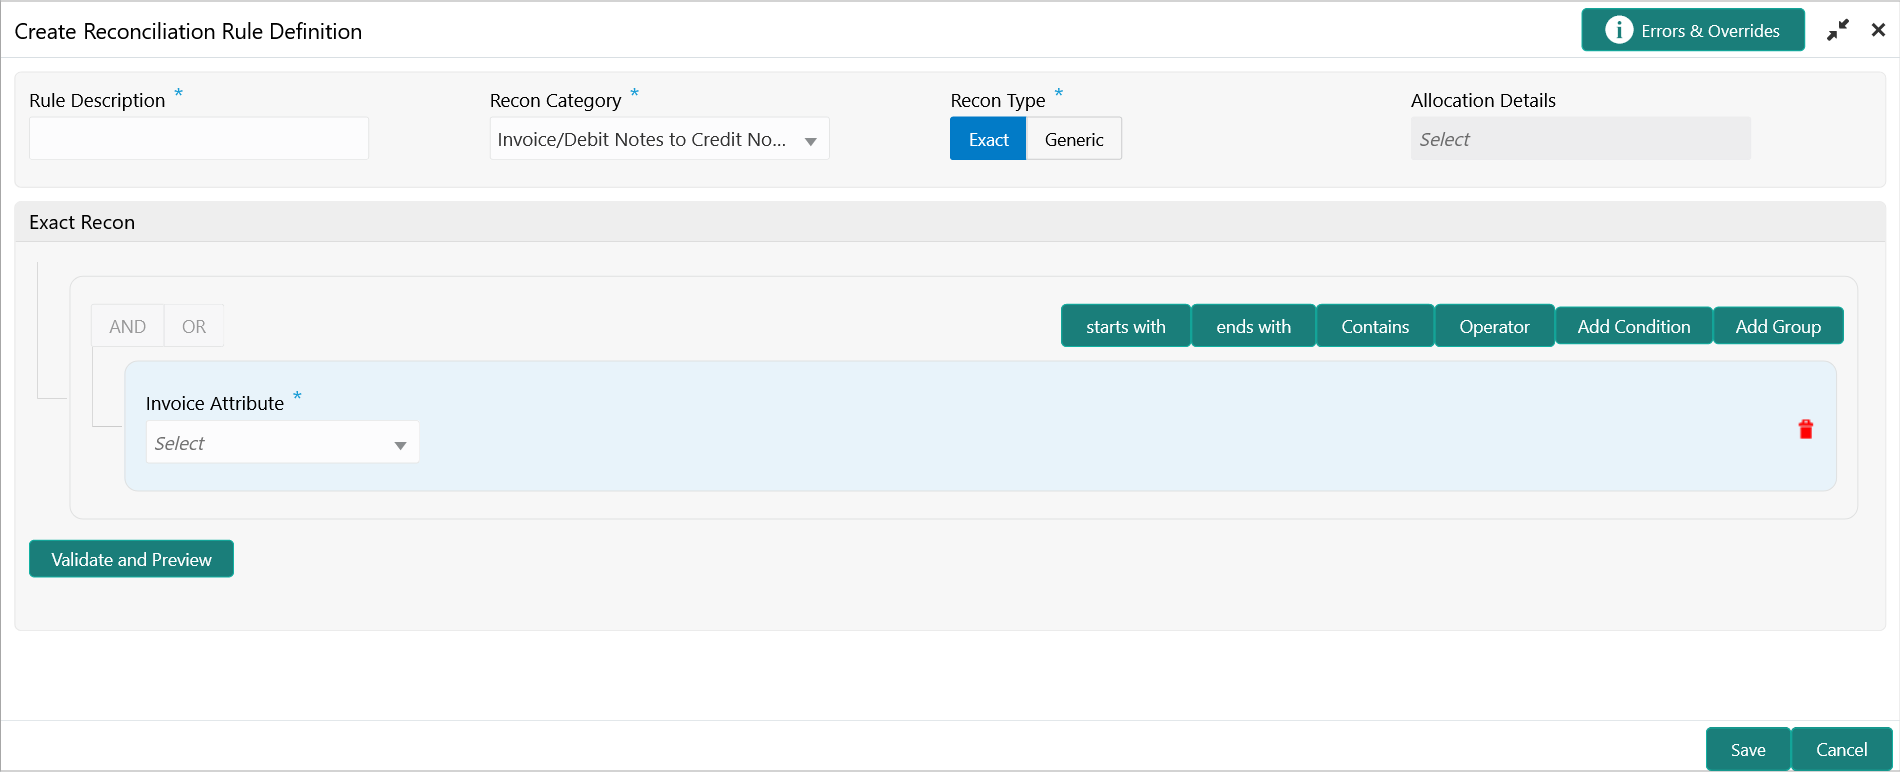
- Click Invoice/Expected Cashflow Attributes to define condition for invoice/cashflow details. Or click Payment Attributes to define condition for payment details.The Exact Recon - Attributes screen displays.
For more information on the attributes, refer the following attributes table.
Table 3-14 Exact Recon - Attributes
Invoice Credit Note Expected Cashflow Payment Base Invoice Amount Credit Note Number External Reference No Payment Date Buyer Name Supplier Code Cashflow Type Credit Account No. Net Invoice Amt. Credit Note Base Amount Revised Expected Date Bank Supplier Division Code Buyer Name Narration/Remarks Relationship Code Bank Credit Note Date Corporate ID Virtual Account Owner Invoice CCY Buyer Id Bank Account Number Entity Ref No. Payment Due Date Net Credit Note Amount Counterparty Name Branch Supplier ID Supplier Name Free Field (10 Attributes) Filler (10 Attributes) Branch Credit Note Number Code Payment Mode Filler (4 attributes) Supplier Code Amount Payment Party Id PO No. Credit Note Base Amount Counterparty Id Instrument Date Supplier Name Buyer Name Customer Reference No Virtual Account Flag Buyer Code Credit Note Expiry Date Description Payment Party Code Invoice Date Supplier Id Expected Date Counterparty Id Repayment Account No. Buyer Division Code Virtual Account Number Remarks Buyer Division Code Filler (10 Attributes) - Payment Reference No Invoice Due Date Buyer Code - Counterparty Code BIC/Routing Code Currency - Beneficiary Id Buyer ID Supplier Division Code - Payment Currency Invoice No. Remarks - Debit-Credit Indicator Supplier Code - - Remitter Account No - - - Payment Amount - - - Interest Refund - - - Margin Refund - Click starts with, ends with and Contains to define the text to be validated based on each selection.
- Click Operator to specify how to compare defined values.
- Repeat the above steps to add more conditions and/or group of conditions.
- Click Delete icon to delete the condition located at the right-bottom of the condition container.
- Click AND / OR to define how many conditions or combination of conditions should be matched to execute the recon rule.
- Click Validate and Preview to check if the added conditions are valid or not.The Allocation Basis Grid displays.
- In the Allocation Basis Grid section, perform the following steps to define percentage of account/attribute allocation:
- Click Add to add a new row.
- Double click the row to add/edit attribute and percentage.
- Repeat the above steps to add more attributes.
- Click Delete icon under Action column to remove the allocation row.
- Click Save to save the record and send it for authorization.
Parent topic: Reconciliation Rule Definition


