2 System Parameters

This topic describes the information to view and modify the day-zero system parameters for Receivables and Payables module.

The day-zero parameters are segregated into the following data segments.
  • Workflow Parameters
  • Dashboard Parameters
  • Integration Parameters

2.1 View System Parameters

This topic describes the systematic instruction to view, modify, or authorize the day zero system parameters for Receivables and Payables module.

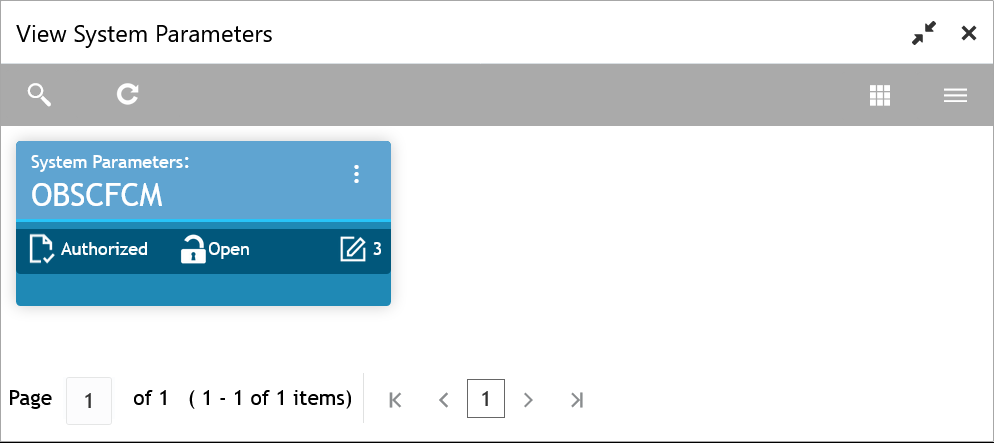
A tile is present for each record that has been created. The bottom portion of each record-tile displays the following:
  • The status, whether Authorized, Unauthorized, or Rejected
  • Open or Closed
  • The number of times the record has been submitted by the Maker added.
Specify User ID and Password, and login to Home screen.
  1. On Home screen, click Receivables & Payables. Under Receivables & Payables, click System Parameters.
  2. Under System Parameters, click View System Parameters.
    The View System Parameters screen displays.

    Figure 2-1 View System Parameters


  3. Click Options icon and select Unlock to modify the records.
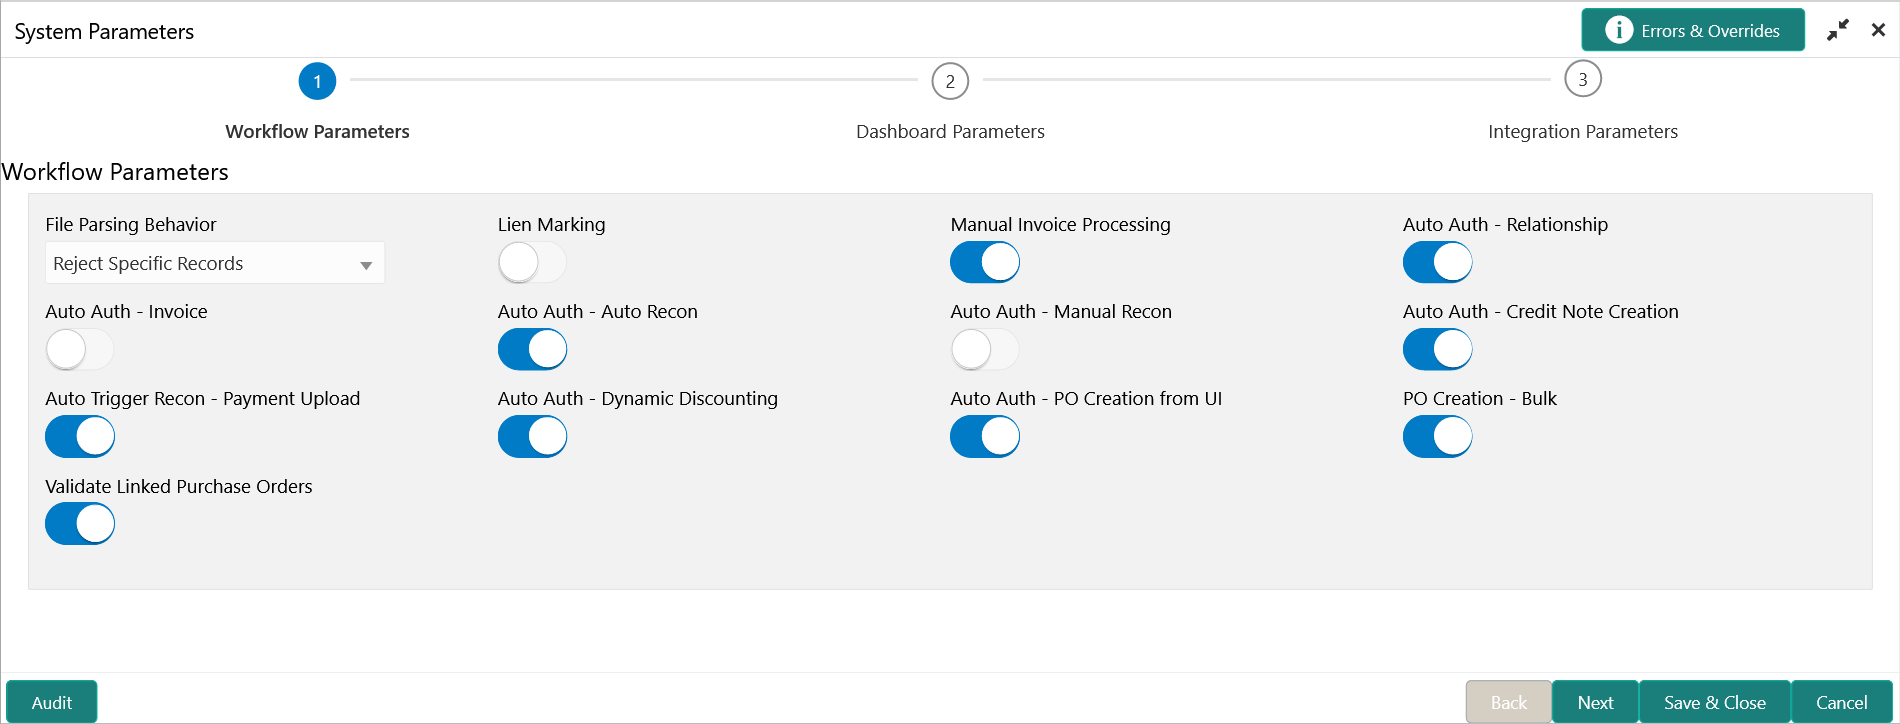
    The System Parameters - Workflow Parameters screen displays.

    Figure 2-2 System Parameters - Workflow Parameters


  4. On Workflow Parameters tab, select the toggles to configure the workflow parameters.
    For more information on fields, refer to the field description table.

    Table 2-1 Workflow Parameters - Field Description

    Field Description
    File Parsing Behavior Select the type of file parsing behavior. The available options are:
    • Reject All Records - If one record in a file fails, all records should be marked as fail and the entire file should be rejected.
    • Reject Specific Records - If one record in a file fails, the system should move on to the other records and mark the file processing as success with relevant records failed /passed.
    Lien Marking Select the toggle switch to enable or disable the Lien Marking in the host application.
    Manual Invoice Processing Select the toggle switch to enable or disable the manual enrichment required for invoice processing.
    Auto Auth - Relationship Select the toggle switch to enable or disable the auto authorization for the relationship management.
    Auto Auth - Invoice Select the toggle switch to enable or disable the auto authorization for invoice transactions.
    Auto Auth - Auto Recon Select the toggle switch to enable or disable the auto authorization for automatic reconciliation.
    Auto Auth - Manual Recon Select the toggle switch to enable or disable the auto authorization for manual reconciliation.
    Auto Auth - Credit Note Creation Select the toggle switch to enable or disable the auto authorization for credit note creation.
    Auto Trigger Recon - Payment Upload Select the toggle switch to enable or disable the auto trigger of Recon when the payment file/record is uploaded.
    Auto Auth - Dynamic Discounting Select the toggle switch to enable or disable the auto authorization for dynamic discounting.
    Auto Auth - PO Creation from UI Select the toggle switch to enable or disable the auto authorization for PO creation from UI.
    PO Creation - Bulk Select the toggle switch to enable or disable the auto authorization for bulk PO creation.
    Validate Linked Purchase Orders Select the toggle switch to enable or disable the validation of the purchase orders linked with invoice during creation or upload.
  5. Click Next button.
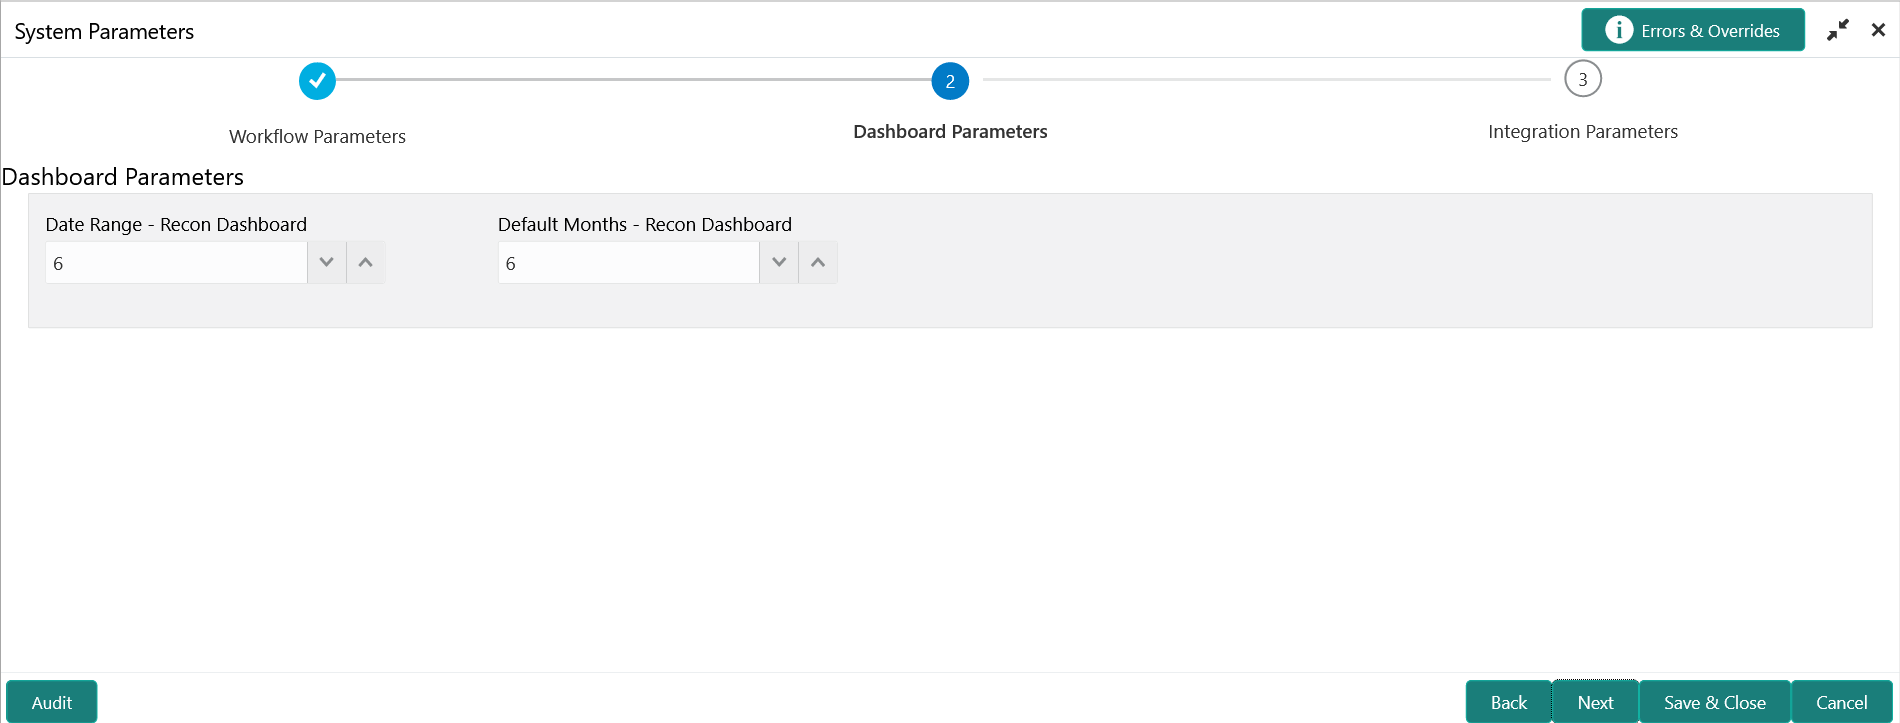
    The System Parameters - Dashboard Parameters screen displays.

    Figure 2-3 System Parameters - Dashboard Parameters


  6. On Dashboard Parameters tab, select the toggles to configure the dashboard parameters.
    For more information on fields, refer to the field description table.

    Table 2-2 Dashboard Parameters - Field Description

    Field Description
    Date Range - Recon Dashboard Specify the number of days for which the reconciliation details has to be displayed on the dashboard.
    Default Months - Recon Dashboard Specify the number of months for which the reconciliation details has to be displayed on the dashboard.
  7. Click Next button.
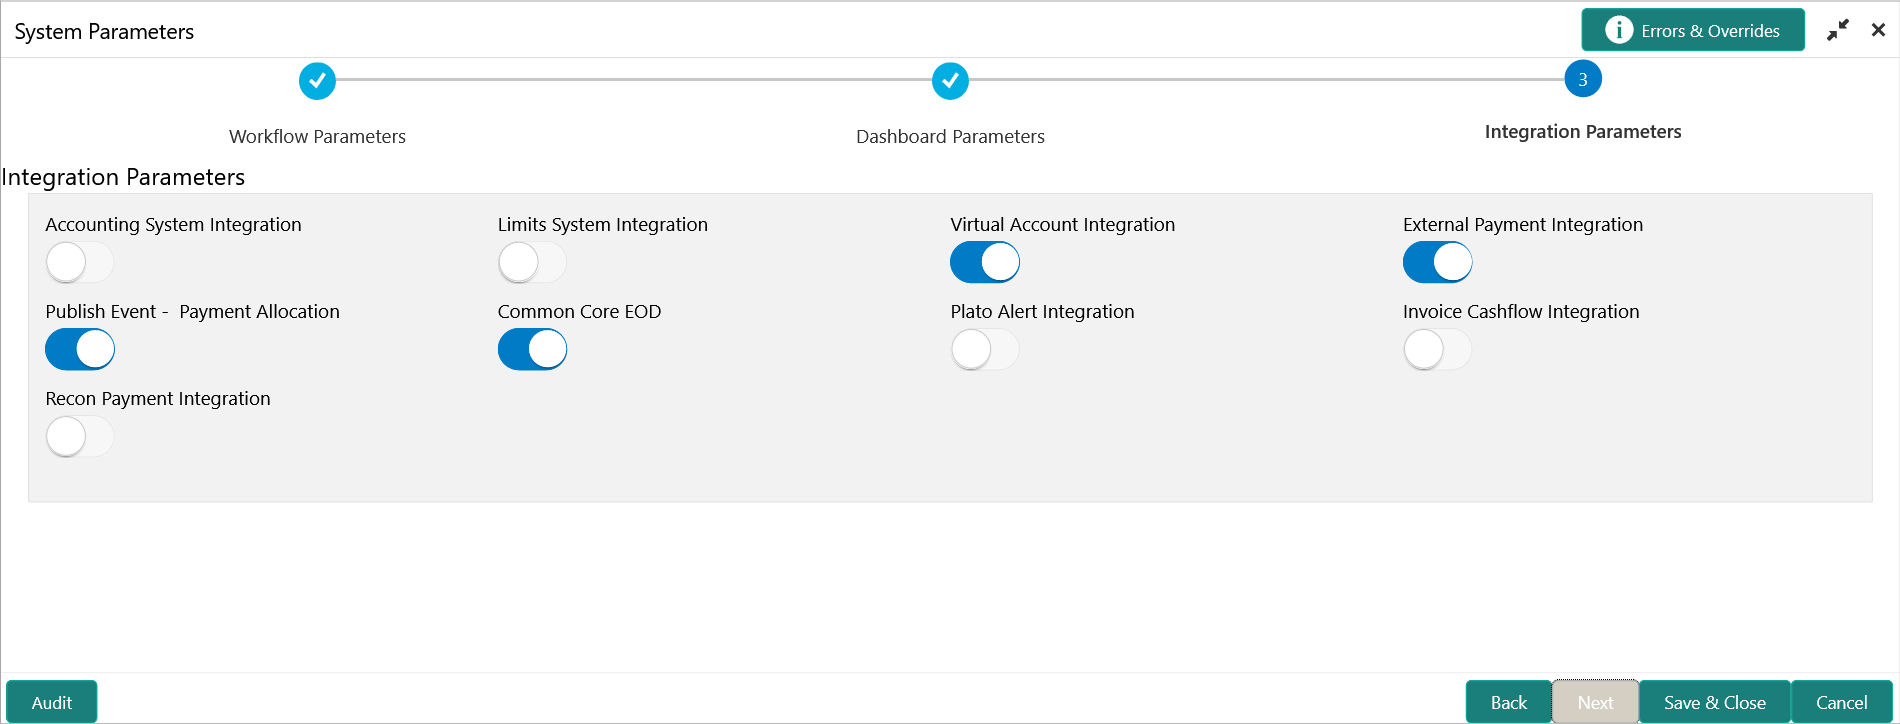
    The System Parameters - Integration Parameters screen displays.

    Figure 2-4 System Parameters - Integration Parameters


  8. On Integration Parameters tab, select the toggles to configure the integration parameters.
    For more information on fields, refer to the field description table.

    Table 2-3 Integration Parameters - Field Description

    Field Description
    Accounting System Integration Select the toggle switch to enable or disable the integration with accounting system.
    Limits System Integration Select the toggle switch to enable or disable the integration with limits system.
    Virtual Account Integration Select the toggle switch to enable or disable the integration with Virtual Account Management system.
    External Payment Integration Select the toggle switch to enable or disable the integration with the external payment system.
    Publish Event - Payment Allocation Select the toggle switch to enable or disable the publishing event for payment allocation to external applications.
    Common Core EOD Select the toggle switch to enable or disable the common core integration for EOD.
    Plato Alert Integration Select the toggle switch to enable or disable the integration with plato alerts system.
    Invoice Cashflow Integration Select the toggle switch to enable or disable the invoice integration with cashflow system.
    Recon Payment Integration Select the toggle switch to enable or disable the integration with payment system for reconciliation.
  9. Click Save and Close to save the record and send for authorization (if applicable).

    Note:

    If any flag in the system parameters is changed, the system promptly updates it upon authorization. However, processing the impact of the flag takes approximately 1-2 hours.
  10. On the View System Parameters screen, click Options icon and then select any of the following options:
    1. Authorize – To authorize or reject the record. Authorizing/Rejecting requires necessary access rights.
      • Optional: Click View to view the record details.
      • Select the record and click Approve to approve the record.
      • Select the record and click Reject to reject the record. Specify the relevant comments in the pop-up window that appears, and click Confirm.
    2. View – To view the record details.