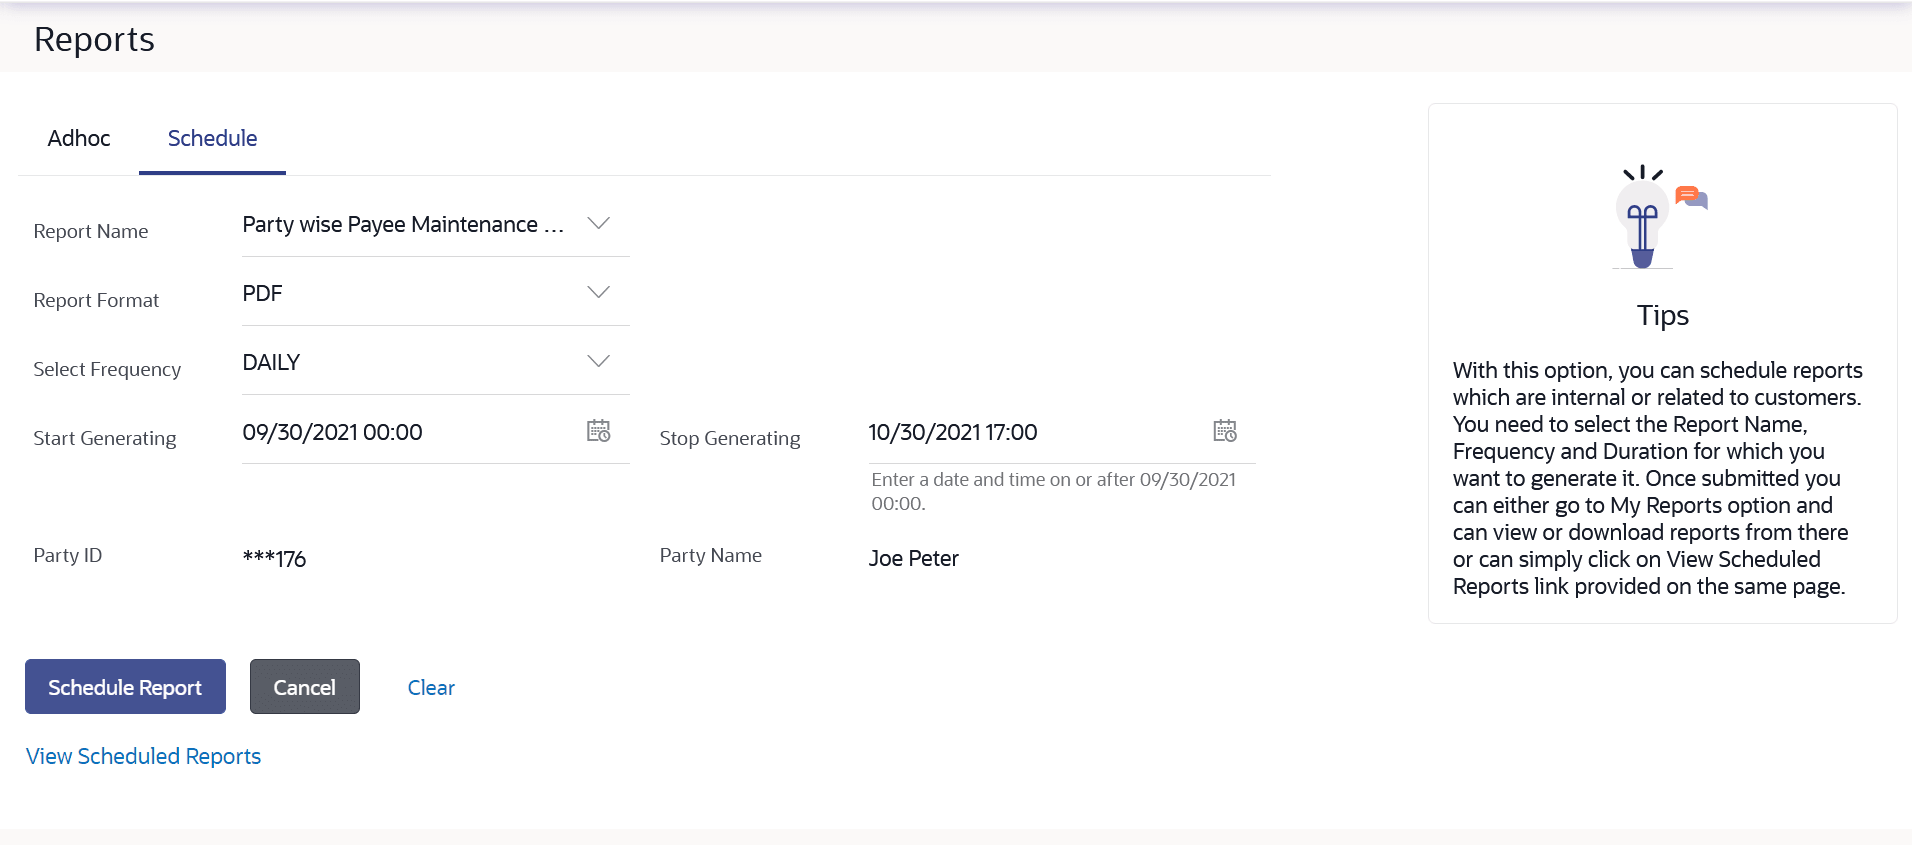
22.4.2 Party wise Payee Maintenance Report – Schedule Reports
This topic provides the systematic instructions to the user for the scheduled reports, which are generated at predetermined intervals, including daily, weekly, monthly, quarterly, and annual frequencies.
To generate the Party wise Payee Maintenance schedule report:
- In the Report Generation screen, click the Schedule tab. The schedule report generation screen appears.
- From the Report Name list, select the desired report which is to
be generated. The receptive report generation screen appears.
- From the Report Format list, select the desired report format for generated report.
- From the Select Frequency list, select the appropriate option.
- From the Start Generating and Stop Generating list, select the appropriate duration.
- From the Duration - From and Duration - To list, specify the period for which the report is to be generated.
- Perform one of the following actions:
- Click Schedule Report to view and generate the report.
- Click Cancel to cancel the transaction.
- Click Clear to reset the search parameters.
- Click the View Scheduled Reports link to view all the scheduled reports. The Scheduled Reports screen appears.
Figure 22-15 Party wise Payee Maintenance - Scheduled Reports
Note:
The fields which are marked as Required are mandatory.For more information on fields, refer to the field description table.
Table 22-12 Party wise Payee Maintenance- Field Description
Field Name Description Report Name The report type selected to generate the report. Report Format The format in which report is to be generated. The options with Oracle Business Intelligence (BI) Publisher are:
The options with Internal Reporting Application are:
Select Frequency The frequency at which the reports are generated. The options are:
- Once
- Daily
- Weekly
- Monthly
Start Generating Start date of the date range from which you want to generate the report. Stop Generating End date of the date range up-to which you want to generate the report. Party ID The party id of the user for whom report is to be generated. Party Name The name of party for whom the report is to be generated. View Scheduled Reports Link to view all the reports that are scheduled. The success message along with the reference number, status and Report Request Id appears.
- Perform one of the following actions:
- Click OK to close the screen and navigate to the dashboard.
- Click on the View Reports link to download the
report.
The user is directed to the My Reports screen. The list of reports appears.
- Click Schedule another Report to generate another report.
Note:
You can also download the requested report from Corporate Dashboard, click Toggle Menu, click Menu, then click Reports, and then click My Reports
Parent topic: Party wise Payee Maintenance Report
