- Common Core - Gateway User Guide
- Gateway Maintenance
- Process Incoming Message Details
2.9 Process Incoming Message Details
This topic explains systematic instructions to process incoming message details.
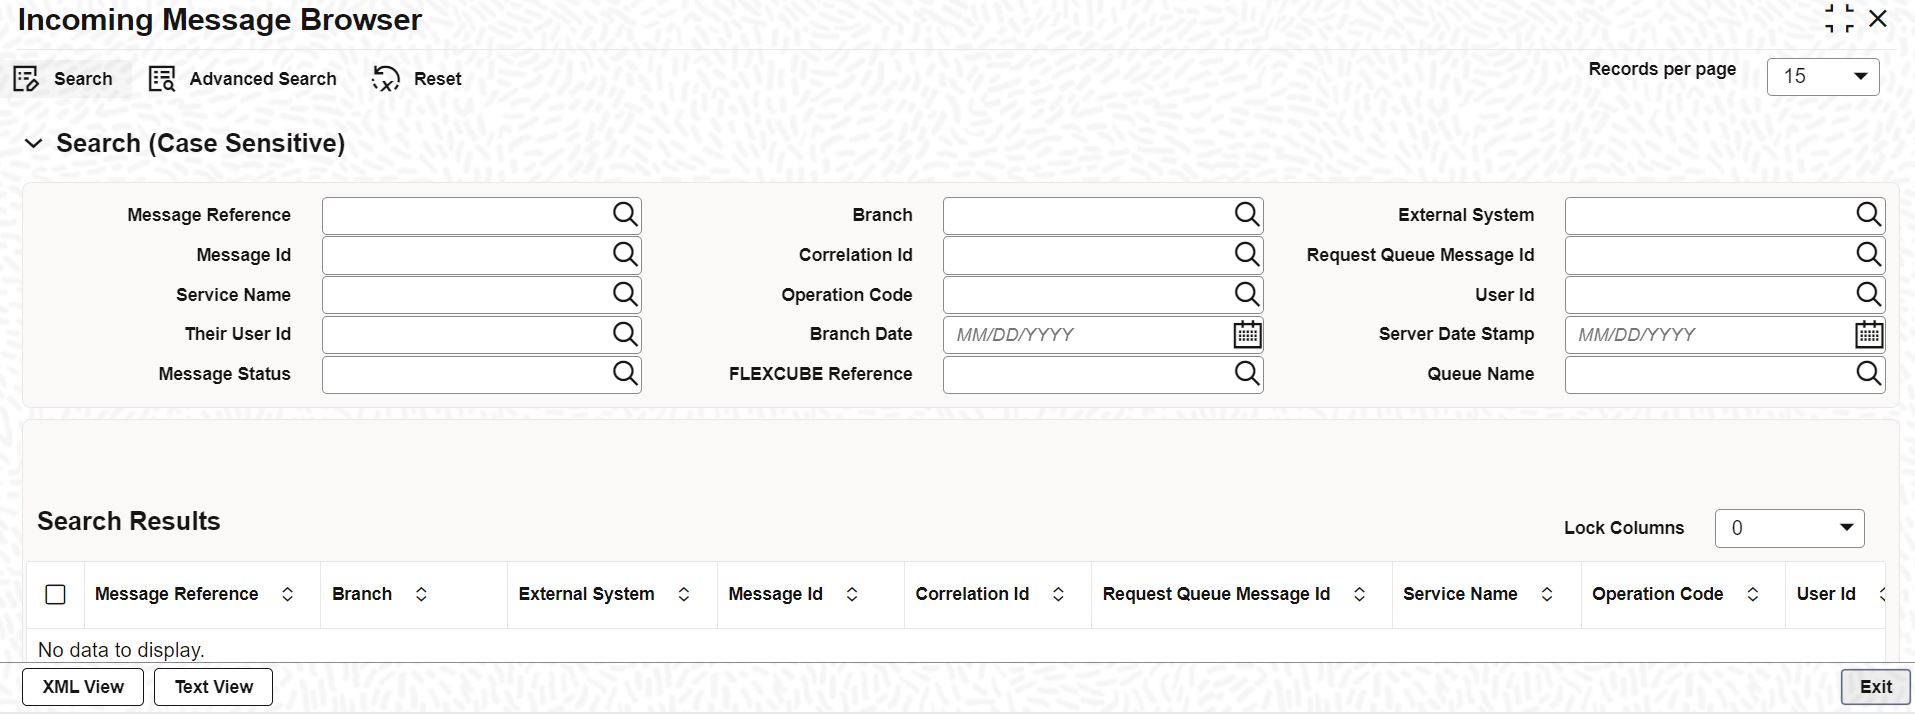
The summary of all messages received from the external system can be viewed using the Incoming Message Browser screen.
Note:
The fields which are marked in asterisk are mandatory.- On Homescreen, type GWSINBRW in the text box, and click Next.The Incoming Message Browser screen displays.
- On the Incoming Message Browser screen, specify the fields.
For more information on fields, refer to the field description table.
Table 2-9 Incoming Message Browser - Field Description
Field Description Message Reference Click Search and specify the Message Reference. Branch Click Search and specify the Branch. External System Click Search and specify the External System. Message ID Click Search and specify the Message ID. Correlation ID Click Search and specify the Correlation ID. Request Queue Message ID Click Search and specify the Request Queue Message ID. Service Name Click Search and specify the Service Name. Operation Code Click Search and specify the Operation Code. User ID Click Search and specify the User ID. Their User ID Click Search and specify the Their User ID. Branch Date Click Calendar and select the Branch Date. Server Date Stamp Click Calendar and select the Server Date Stamp. Message Status Click Search and specify the Message Status. FLEXCUBE Reference Click Search and specify the Oracle FLEXCUBE Universal Banking reference number. - Click Search after specifying the search parameters.The system displays the records that match the search criteria for the following:
- Message Reference
- Branch
- External System
- Message ID
- Correlation ID
- Request Queue Message ID
- Service Name
- Operation Code
- User Id
- Their User ID
- Branch Date
- Server Date Stamp
- Message Status
- FLEXCUBE Reference
- Queue Name
- Click Advanced to specify queries with logical operators such as AND, OR, and NOT.
- Click Reset to empty the values in the criteria fields, so that a new search can begin.
- Click Query after specifying search details to view the list of results that match the search criteria.
- Click Refresh to refresh the list of results.
- Click Exit to end the transaction.
Parent topic: Gateway Maintenance
