- User Guide
- Structure Maintenance
- Account Structure
- Create Structure
- Link Account
6.1.1.2 Link Account
This topic describes the systematic instruction to link the accounts and form a structure.
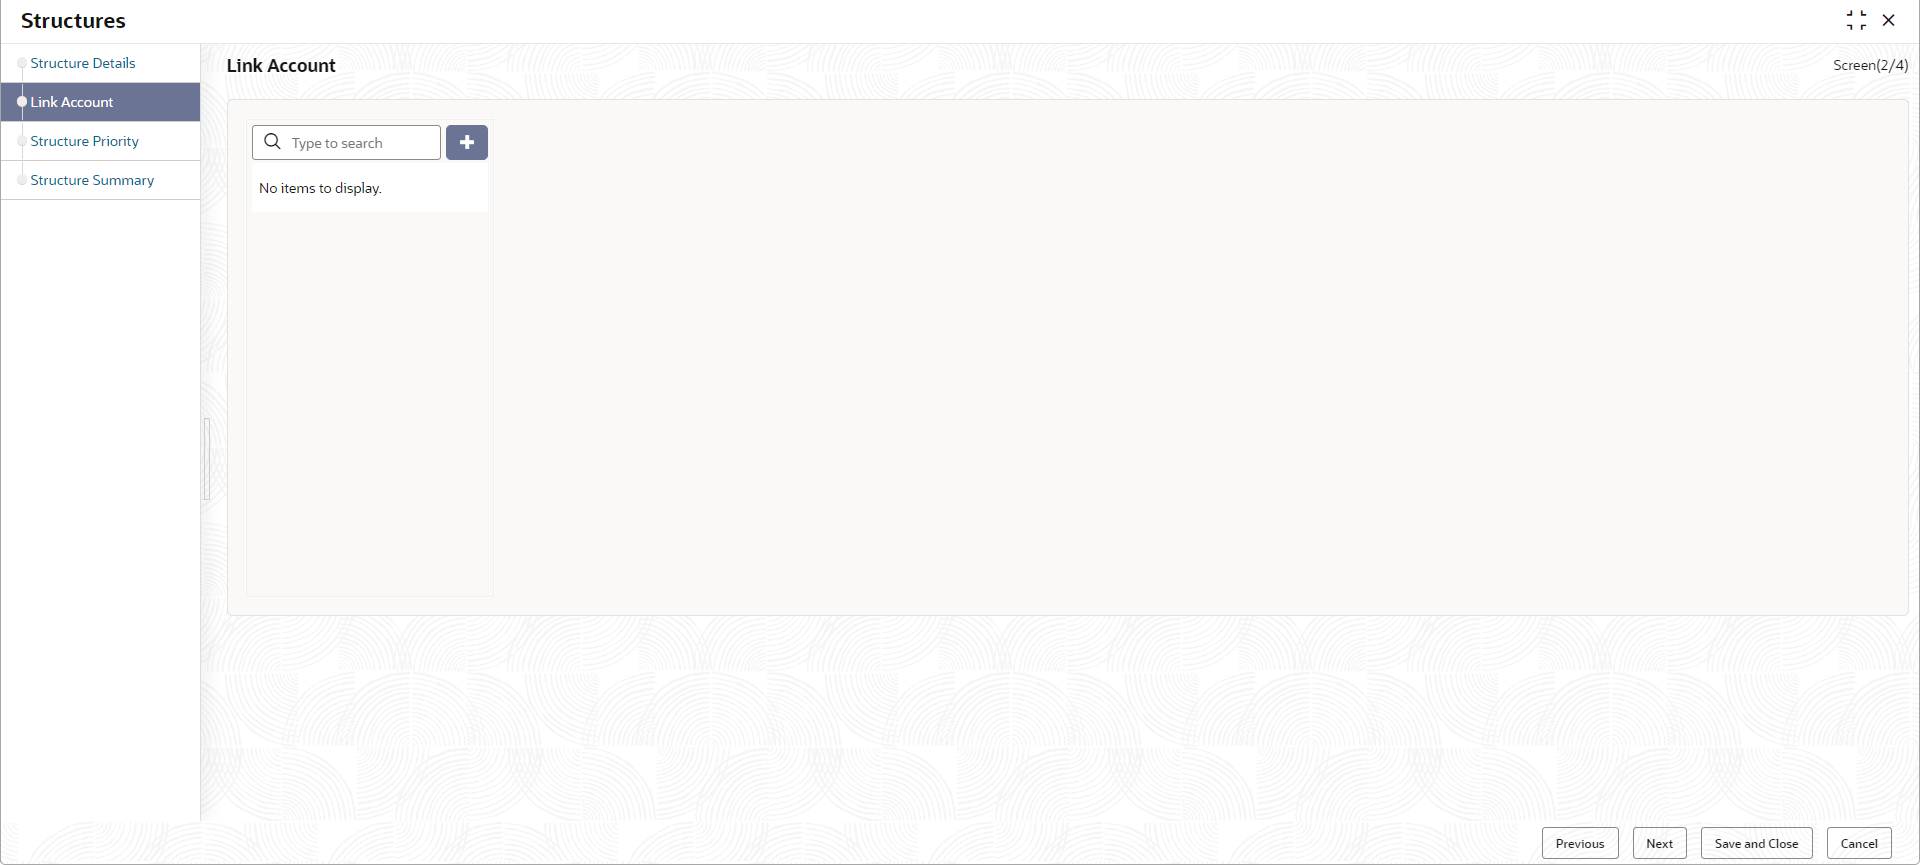
- Click Next in the Structure
Details screen to link the accounts.The Link Account screen displays.
- Click Add icon to add the required accounts for
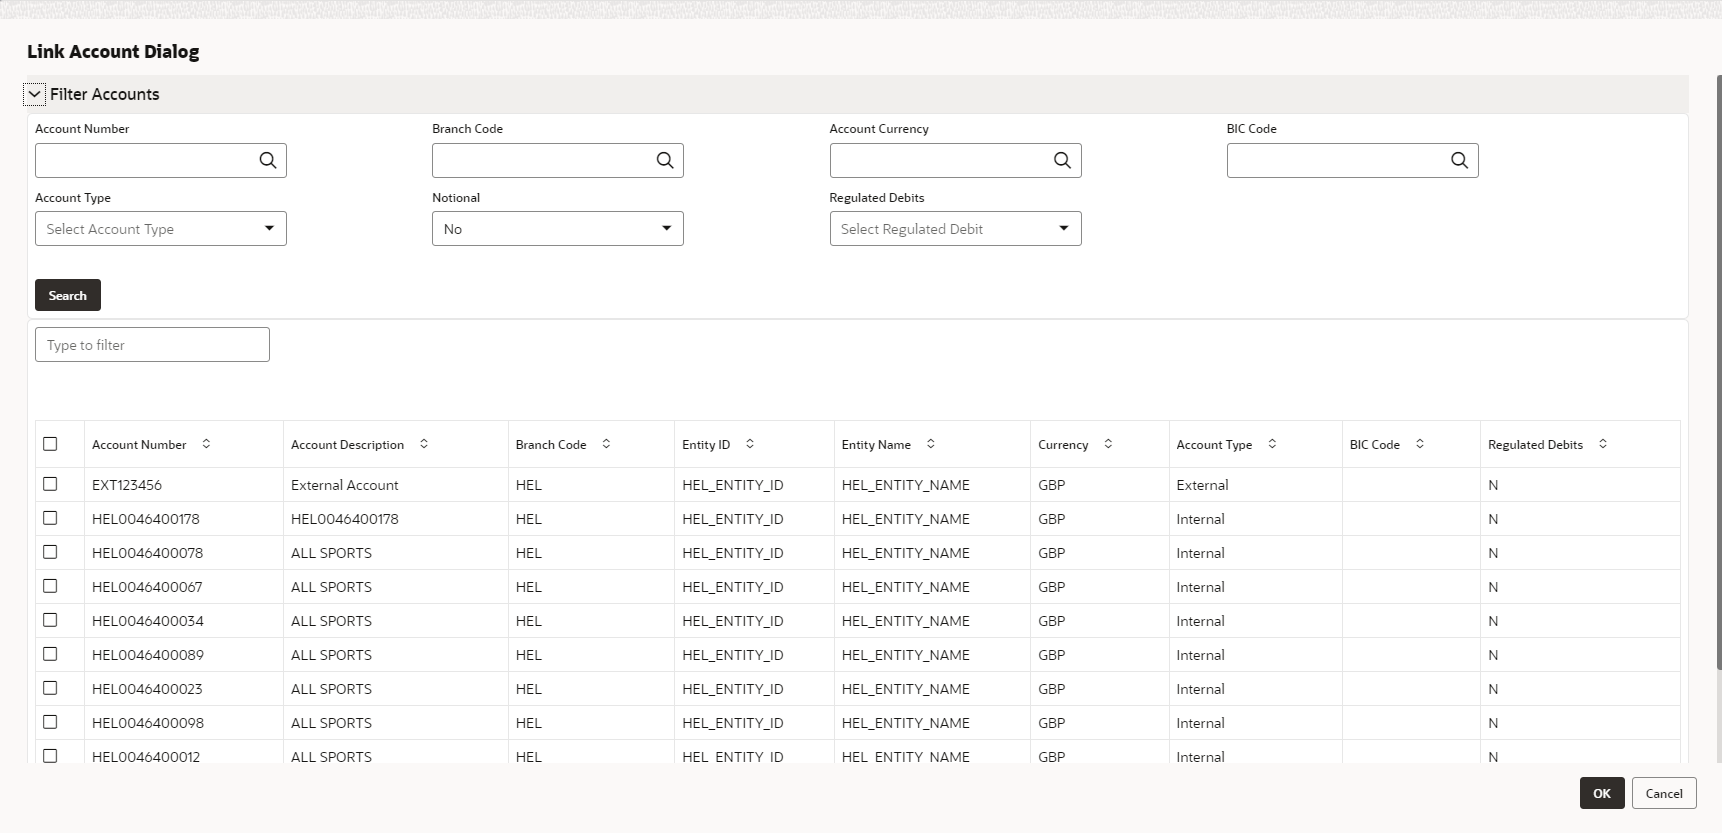
structure creation.The Link Account Dialog displays.
- On the Link Account Dialog screen, specify the filter
criteria to filter the accounts.For more information on fields, refer to the field description table.
Table 6-3 Link Account Dialog – Field Description
Field Description Account Number Click Search icon to view and select the account number to add the structure. If the customer hierarchy is maintained at the customer level and the parent customer is selected for structure creation, then all the accounts of parent and child customers will be displayed for selection.
Branch Code Click Search icon to view and select the branch code to filter the accounts. Account Currency Click Search icon to view and select the account currency to filter the accounts. BIC Code Click Search icon to view and select the BIC code to filter the accounts. Account Type Select the account type to filter the accounts. The available options are- External Account
- Internal Account
Notional Select the required option whether the account is notional or not. The available options are- Yes
- No
The user can select the required option to filter the accounts.
Regulated Debits Select the required option whether the account is regulated for debits or not. The available options are- Yes
- No
The user can select the required option to filter the accounts.
Account Number Displays the account number for the structure creation. Account Description Displays the description of the account. Branch Code Displays the branch code for the account. Entity ID Displays the Entity ID for the account. Entity Name Displays the name of the Entity ID. Currency Displays the currency of the account. Account Type Displays the account type. The available options are- External
- Internal
BIC Code Displays the BIC code for the account. Regulated Debits Displays whether the account is regulated for debits or not. The available options are- Yes
- No
- Click Search button to filter the accounts which need to be added to the structure.
- Select the required accounts from the list.The Warning Message - Regulated Debit screen displays if the selected account is marked Regulated Debits as Y.
Figure 6-5 Warning Message - Regulated Debit
- Click OK to add the selected accounts to the
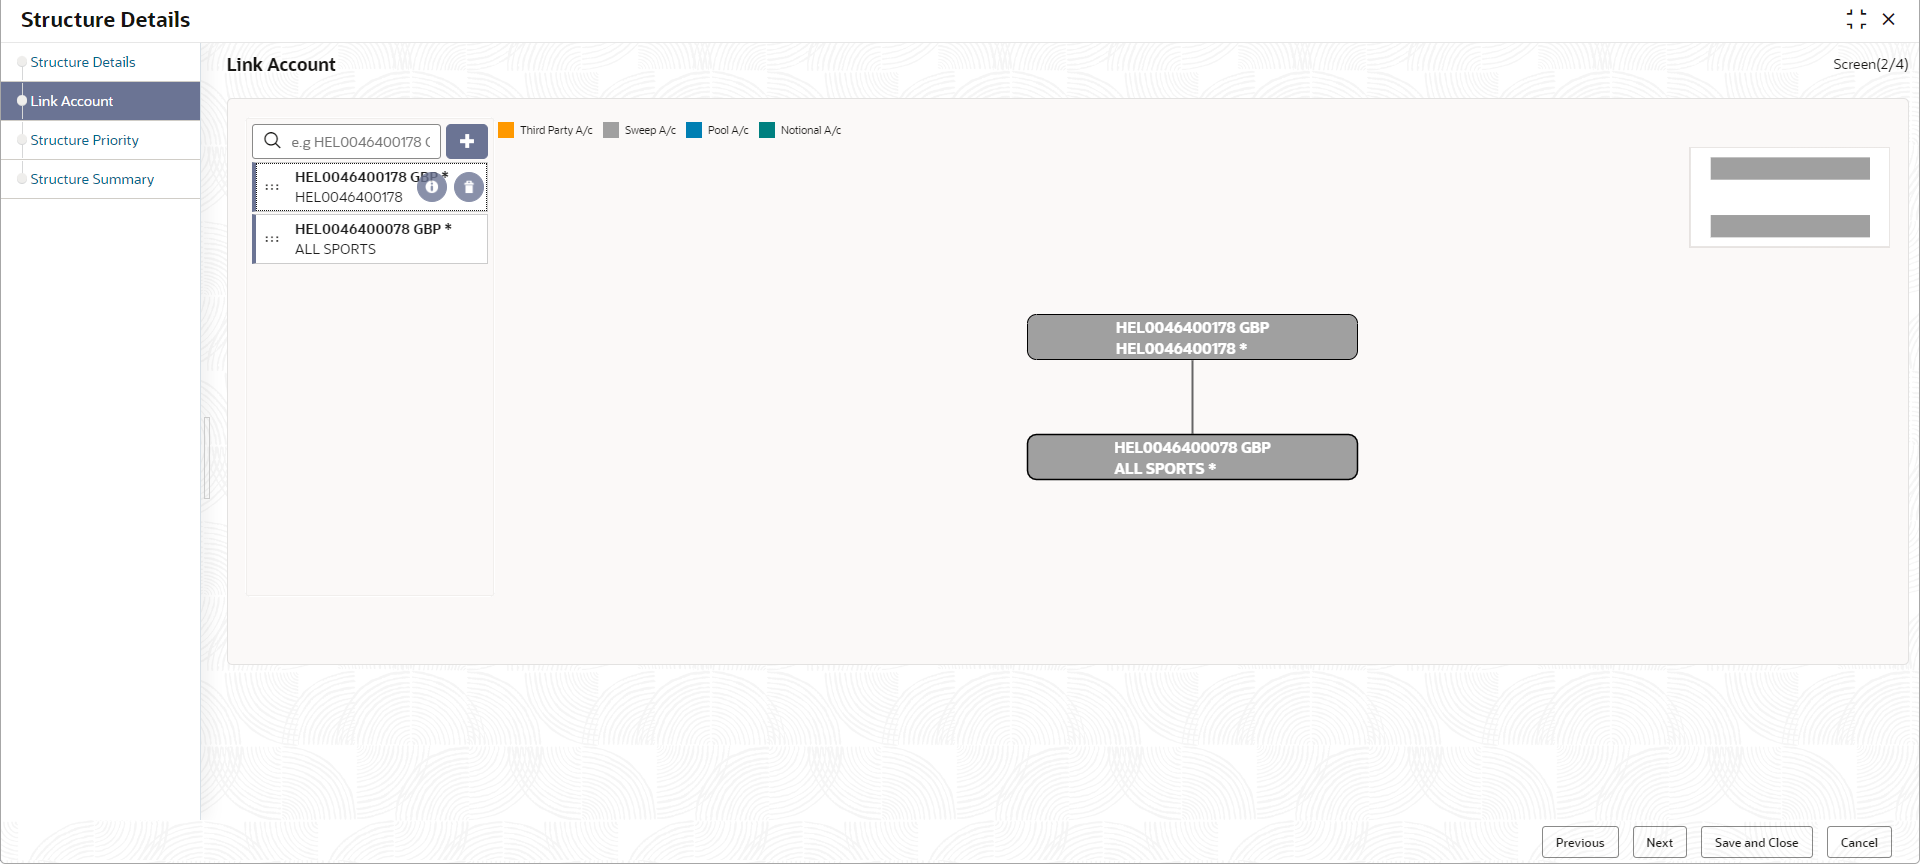
Link Account screen.The Link Account screen displays with the accounts added in the left pane.
- Drag and Drop the accounts into the drawing pane in the required hierarchy and
create the structure.The Link Account - View displays with the accounts added in the tree hierarchy. For more information on fields, refer to the field description table.
Table 6-4 Account List/Capsule - Field Description
Field Description Account Number Displays the account number. Account Description Displays the description of the particular account. Note:
If the account description is long, the graph will show three dots at the end of the description. The user can view the complete description in Account Details tooltip.Currency Displays the currency of the particular account. Note:
If an account added is already a part of another structure, the account capsule will be displayed with an asterisk (*) mark. - Point to an account on Account List and click the info
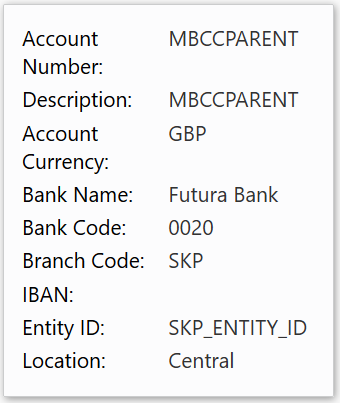
icon, as well as Point to an account on the tree hierarchy.The Account Details tooltip displays. For more information on fields, refer to the field description table.
Table 6-5 Account Details - Field Description
Field Description Account Number Displays the account number. Account Description Displays the description of the particular account. Account Number Displays the account number. Description Displays the description of the account. Account Currency Displays the currency of the account. Bank Name Displays the bank name of the account. Note:
This field appears only for External Accounts.Bank Code Displays the bank code of the account. Branch Code Displays the branch code of the account. IBAN Displays the IBAN number of the account. Entity ID Displays the Entity ID of the account. Note:
This field appears only on the Account List.Location Displays the location of the account. - Point to an account on the Account List and click the
Delete icon to remove the account from the account
list.
Note:
- Only the newly added account can be deleted.
- Accounts currently available within the account structure cannot be removed. Remove the account from the structure before removing it from the Account List.
- Right click on an account in structure.
- Click Edit to edit the account pair level parameters.
- Click Delete Account to delete the account from the structure.
- Click Delete Hierarchy to delete a hierarchy of the selected account from the structure.
- Click Replace to replace the account from the Account List.
- Click Previous to navigate to the previous screen (Structure Details).
- Click Next to save and navigate to the next screen
(Structure Priority).The Alert Message - Accounts in Multiple Structure popup screen displays. If an account added is already a part of another structure.
Figure 6-8 Alert Message - Accounts in Multiple Structure
- Click Confirm to confirm and proceed to next datasegment.
- Click Cancel to cancel the action and stay on the same datasegment.
- Click Save and Close to save and close the Structure screen. In such case, the structure gets saved and available in Summary screen.
- Click Cancel to discard the updated details and close the Structure screen. In such case, the structure will not get saved.
The following account pair parameters needs to be maintained:
- Account Details
This topic describes the systematic instruction to view and update the account details. - Parent Account Details
This topic describes the systematic instruction to view the parent account details. - Instruction Details
This topic describes the systematic instruction to setup the instruction details for the account pair. - Reverse Sweep Details
This topic describes the systematic instruction to set the reverse sweep frequency for the account pair. - Payment Instructions
This topic describes the systematic instruction to maintain the payment instructions for the account pair. - Reallocation
This topic describes the systematic instructions to maintain the reallocation parameter. - ICL Details
This topic describes the systematic instruction to enable ICL for the account pair.
Parent topic: Create Structure


