- User Guide
- Real Time Liquidity Management
- RTL Structure Maintenance
- Create RTL Structure
- Group Account
14.1.1.3 Group Account
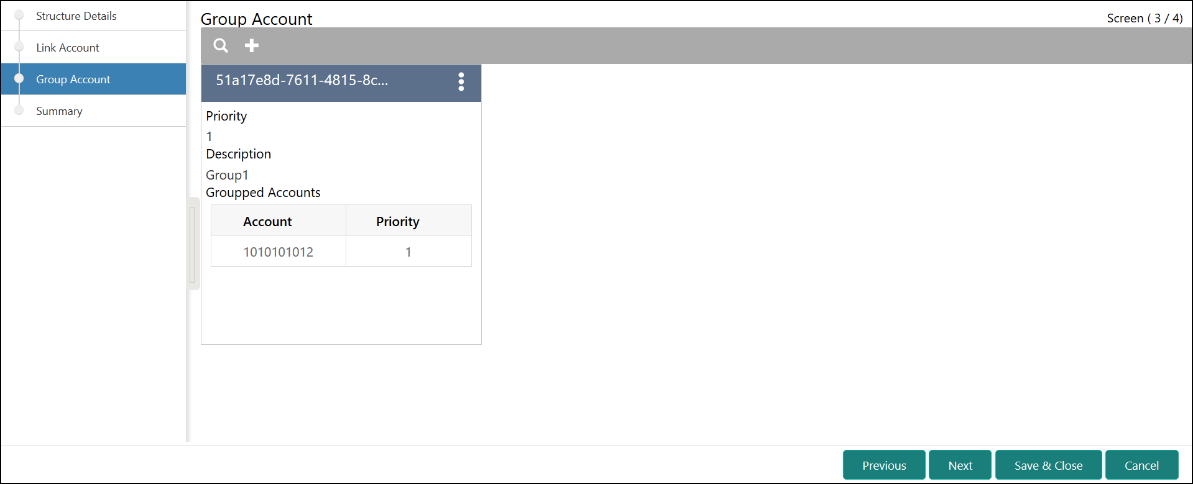
This topic describes the systematic instructions to group these accounts.
- Click Next on Link Account
screen.The Group Account screen displays.
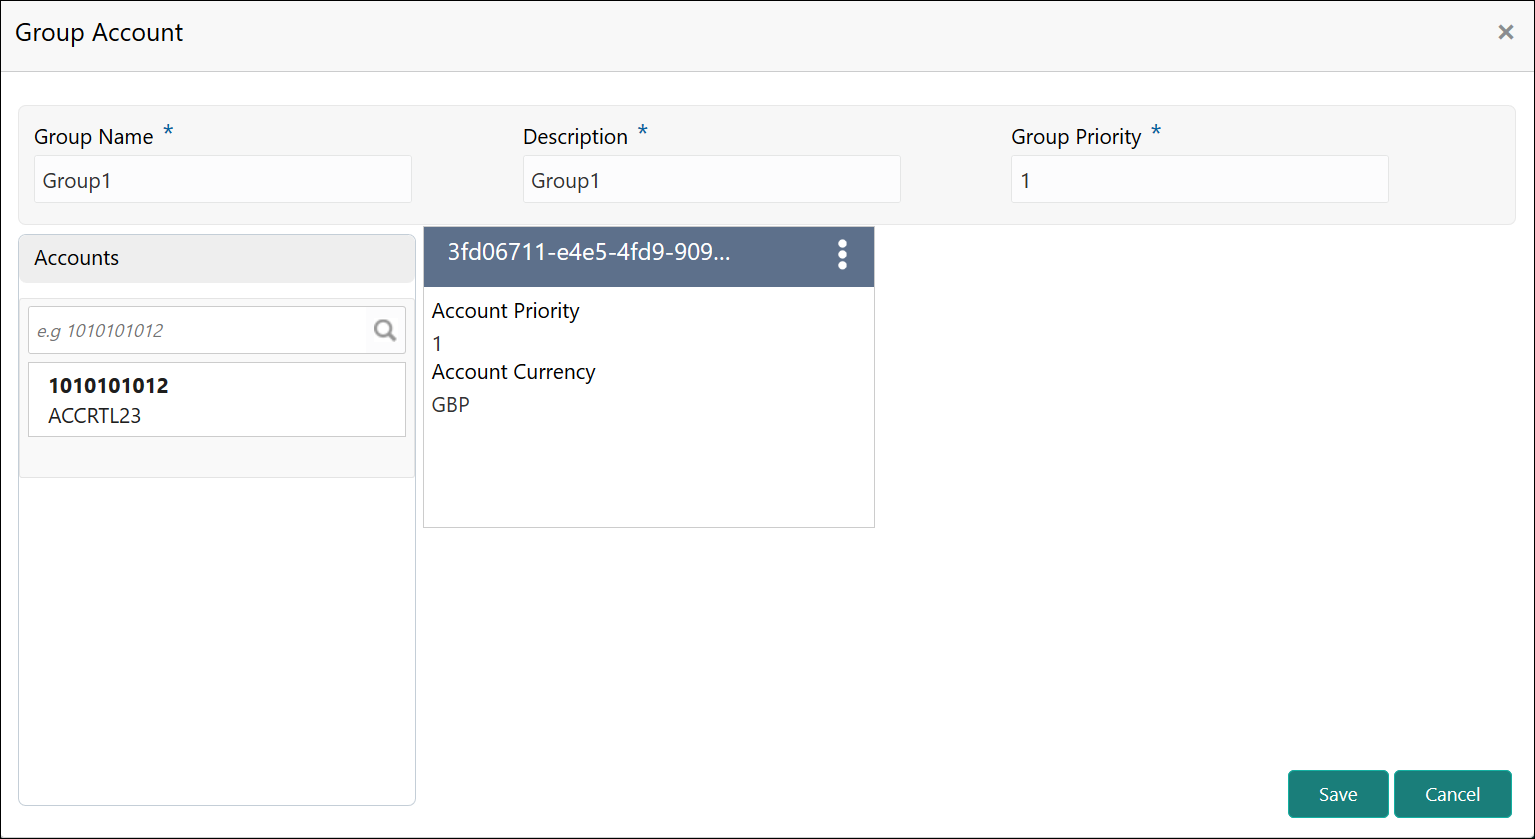
- Click + to add an account into the structure.The Group Account screen displays. For more information on fields, refer to the field description table.
Table 14-5 Group Account – Field Description
Field Description Group Name Specify the name of the group. Description Specify the description of the group. Group Priority Specify the group priority. The RTL process is executed based on the given priority. Lower the number, higher is the priority.
Accounts Select the account to be added into the group. While adding the account into the group, the priority of the account (within the group) can be specified. Once the account is added into the group, the same cannot be added in the same or any other group again within that structure.
- Select the account which has to be added into the group from the left pane of
the screen.
Note:
The same account cannot be added in the same or any other group again within that structure. - Specify the priority of the account (within the group) added into the group.
- Click Save to add the group details.
- Click Cancel to cancel the group details without saving.
- Click Previous to navigate to the previous screen (Link Account).
- Click Next to save and navigate to the next screen (Summary).
- Click Save and Close to save and close the Structure screen. In such case, the structure gets saved and available in Summary screen.
- Click Cancel to close the details without saving.
Parent topic: Create RTL Structure

