- Retail Loans Origination User Guide
- Retail Loans Account Origination Process
- Post Offer Amendment Stage
- Loan Repayment Details
2.12.3 Loan Repayment Details
This topic describes systematic instructions to enables the user to capture the loan repayment details.
Loan Repayment Details will enable the user to capture the repayment details.
To capture the loan repayment details:
- Click Next in the previous data segment to proceed with the next data
segment, after successfully capturing the data.
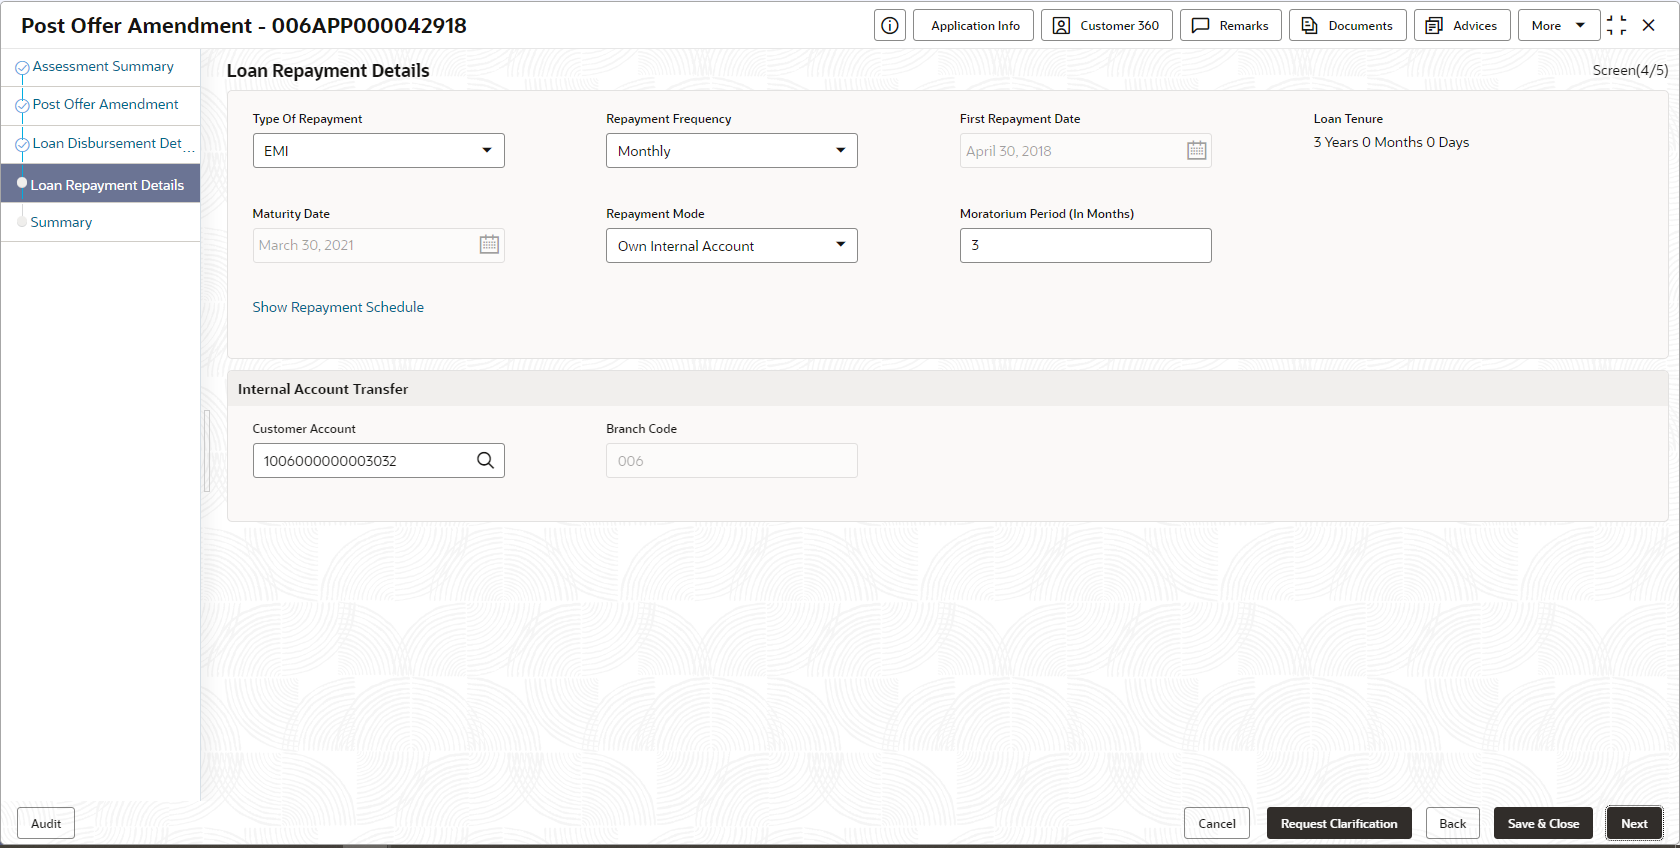
If Account Type is selected as Own Internal Account in Loan Details data segment.
The Loan Repayment Details - Own Internal Account screen displays.Figure 2-68 Loan Repayment Details – Own Internal Account
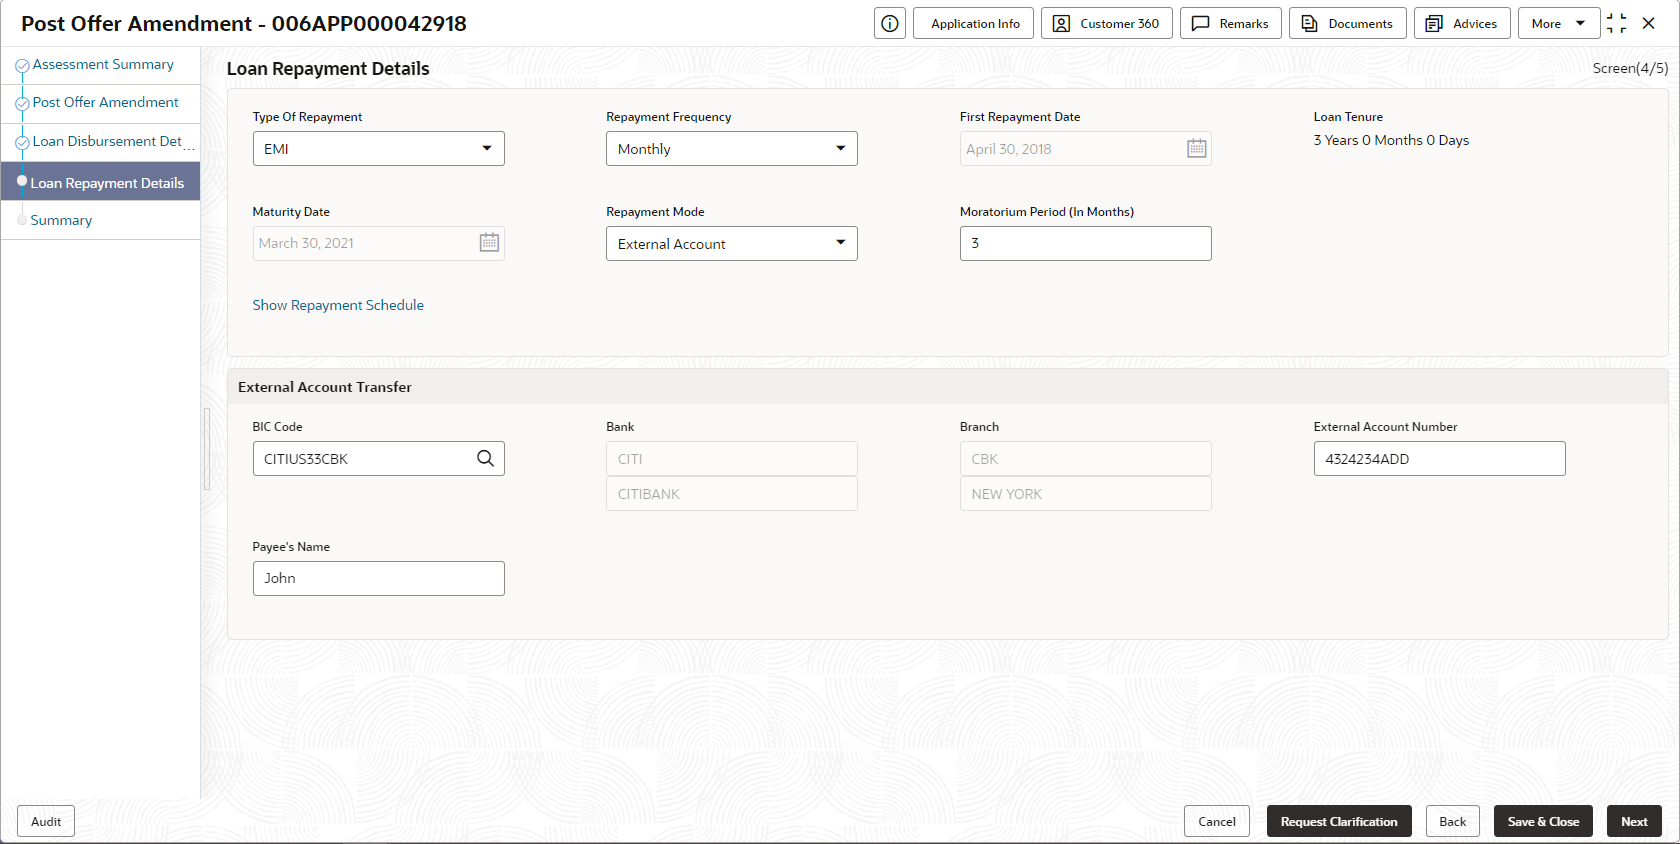
If Account Type is selected as External Account in Loan Details data segment.
The Loan Repayment Details - External Account screen displays.
Figure 2-69 Loan Repayment Details – External Account
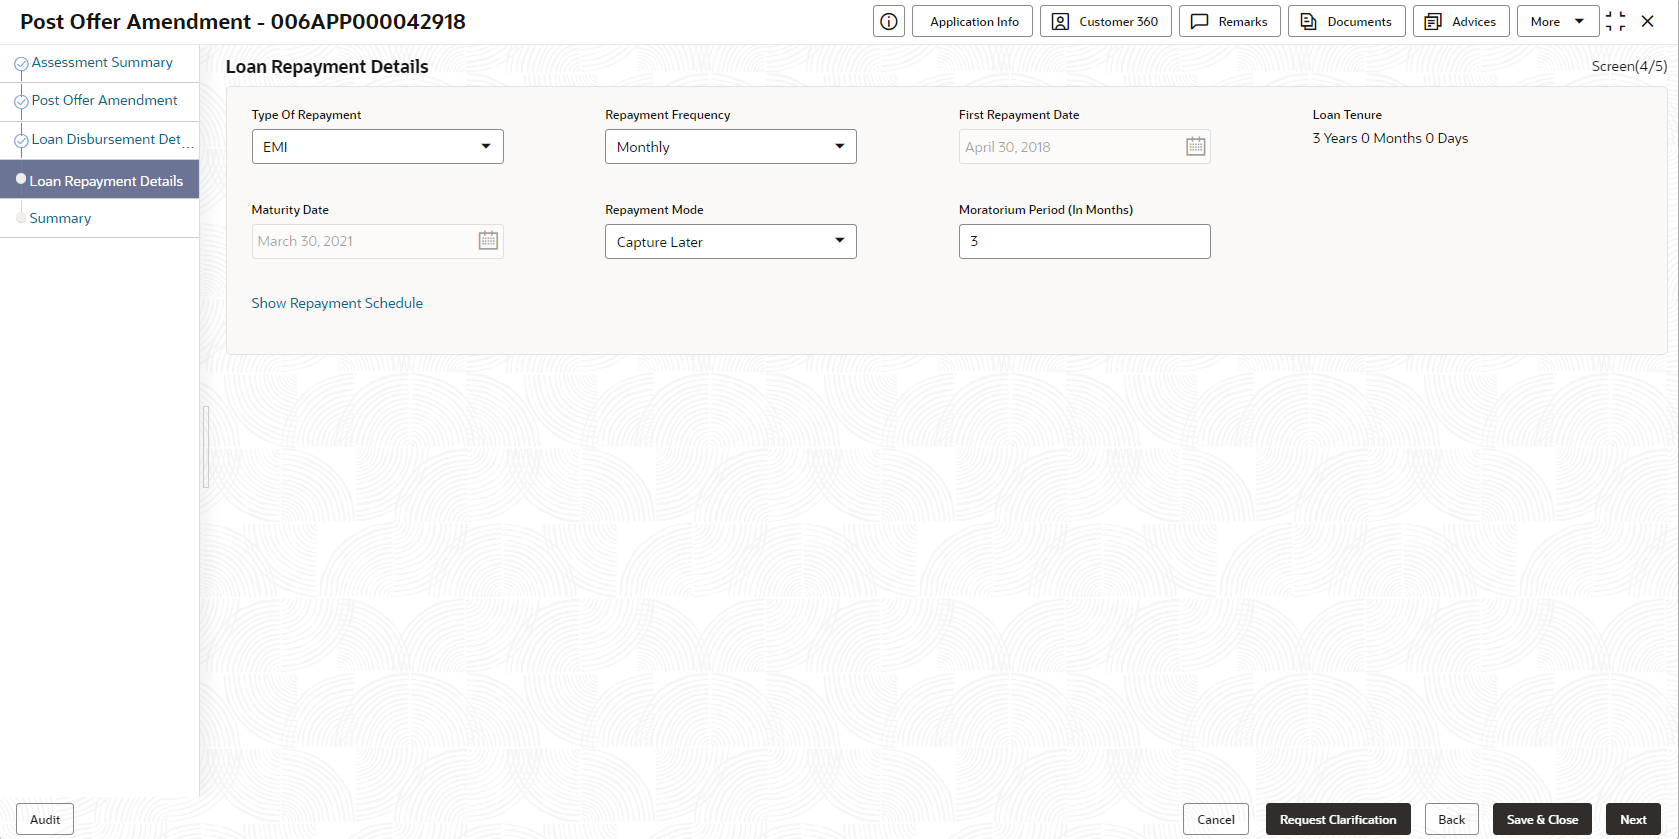
If Account Type is selected as Capture Later in Loan Details data segment.
The Loan Repayment Details - Capture Later screen displays.
Figure 2-70 Loan Repayment Details – Capture Later
- Specify the details in the relevant data fields. For more information on
fields, refer to the field description table below.
Table 2-54 Loan Repayment Details – Field Description
Field Description Type of Repayment Select the type of repayment. All type of repayment methods supported in the Host will be available in the drop-down list.
Repayment Frequency Select the repayment frequency from the drop-down list. The available options are:- Daily
- Weekly
- Bi-Monthly
- Monthly
- Quarterly
- Half Yearly
- Yearly
First Repayment Date Displays the first repayment date defaulted from the Loan Details screen of Loan Application Entry stage. Loan Tenure The system calculated based on First Repayment Date and Loan Tenure. Maturity Date The system calculated based on First Repayment Date and Loan Tenure. Repayment Mode User can select repayment mode from the drop-down list. The available options are:- Own Internal
Account- If the mode selected as
Internal Account, then the system enables the
fields for Customer Account and Branch.
By default, the system populates the internal account selected in Disbursement data segment. However, if user wishes to have a different account, he/she can select another customer account of the CIF and account branch displays in the branch field.
- External Account - If the mode selected is external account, the system creates a Periodic Instruction Maintenance, at host as a part of Loan Account opening process.
- Capture Later - If the mode selected is Capture Later, the system will allow to proceed with the loan origination flow without capturing the repayment details.
Note:
The system defaults to the GL account in the absence of the repayment account.Moratorium Period (in months) Specify the moratorium period. It will be enabled when Moratorium is selected in Business Product.
Customer Account Click Search icon and select the customer account number. This field displays if Repayment Mode is selected as Internal Account.
Branch Code Specify the branch code associated with customer account number. This field displays if Repayment Mode is selected as Internal Account.
BIC Code Specify the BIC Code. This field displays if Repayment Mode is selected as External Account.
Bank Specify the bank name. This field displays if Repayment Mode is selected as External Account.
Branch Specify the branch name. This field displays if Repayment Mode is selected as External Account.
External Account Number Specify the external account number. This field displays if Repayment Mode is selected as External Account.
Beneficiary Name Specify the beneficiary name. This field displays if Repayment Mode is selected as External Account.
Show Repayment Schedule This link enables to user to generate the repayment schedule which displays the details of installment amount with the principal and interest break up for the given tenure. If moratorium period is provided, then the system generates repayment schedule based on the moratorium period.
- Click Next to navigate to the next data segment, after successfully capturing the data. The system validates for all mandatory data segments and data fields. If mandatory details are not provided, the system displays an error message for the user to take an action. The User cannot to proceed to the next data segment, without capturing the mandatory data.
- Repayment Schedule
(Required) This topic decribes the loan repayment schedule.
Parent topic: Post Offer Amendment Stage


