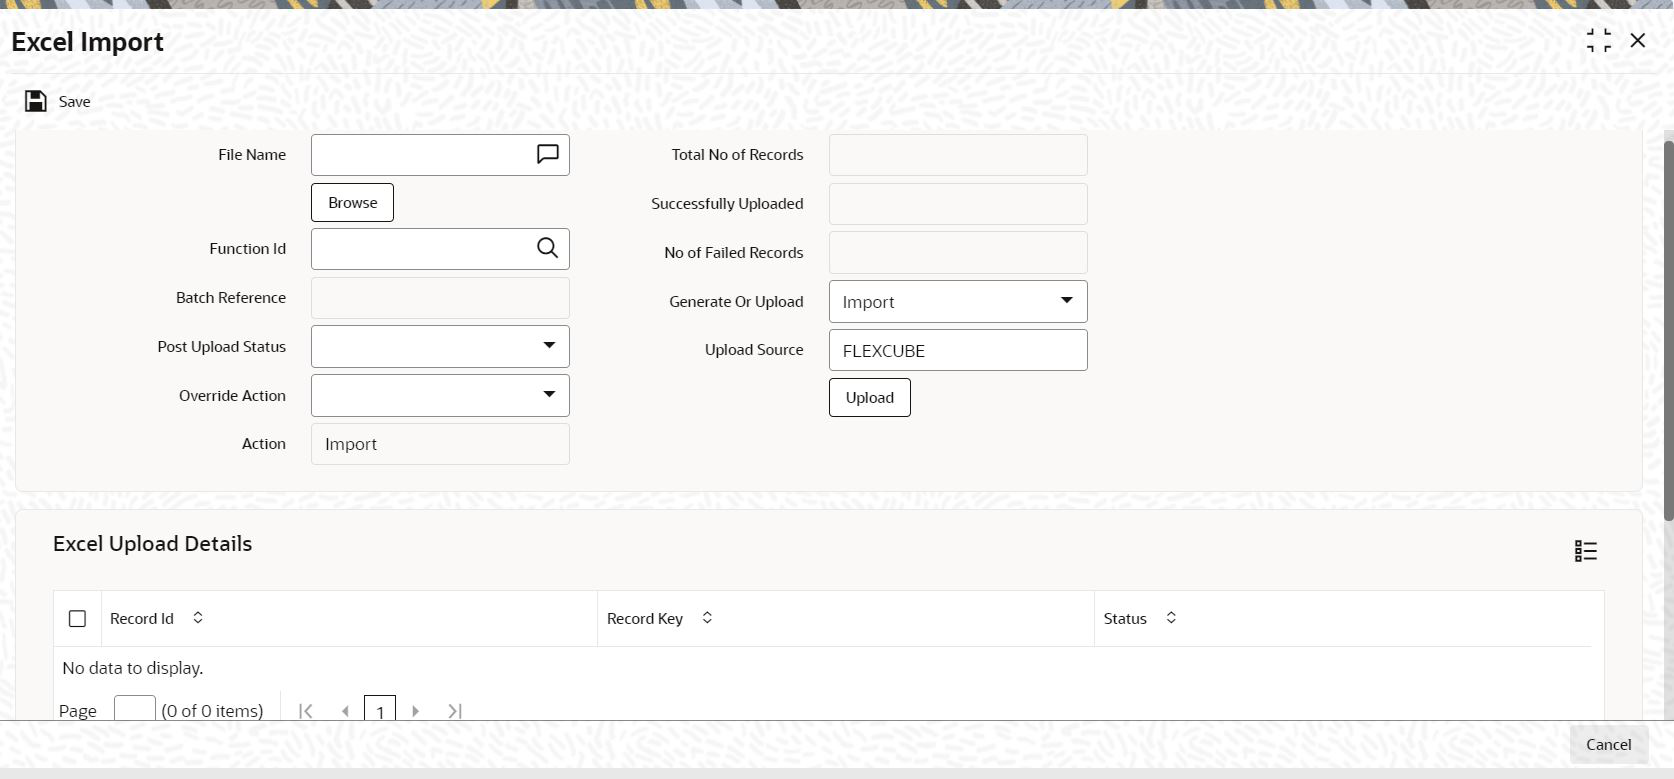
4.5.1 Excel Import
This topic describes the systematic instructions to import excel.
- On Home screen, type CSDXLUPD in
the text box, and click Next.The Excel Import screen is displayed.
- Specify any or all of the details corresponding to the message you want to
retrieve.The system uses your specifications to as search criteria to query the database and retrieve the record as specified.
- On Excel Import screen, click New
and specify the details.For more information on fields, refer to the field description table.
Table 4-8 Excel Import - Field Description
Field Description Attributes File Name Select the excel file to be imported by clicking Browse button.
Click Browse button to browse the file name.
Alphanumeric; 4000; Optional
Total No of Records Displays the total number of records to be uploaded.
Display
Successfully Uploaded Displays the number of records uploaded successfully.
Display
No of Failed Records Displays the number of failed record which are failed to upload.
Display
Function ID Displays the function ID mentioned in the excel sheet.
Alphanumeric; 8 Characters; Optional
Batch Reference Displays the unique reference number generated for an upload.
Display
Post Upload Status Select the status to be set for the file post upload, from the drop-down list. The available options are:- Authorized
- Unauthorized
- Hold
Display
Override Action Select the action to be taken if an override message is encountered, from the drop-down list. The available option are:- Ignore
- Error
Optional
Action Displays the action.
Display
Generate or Upload Select the action to be taken for importing the file, from the drop-down list. The available option are:- Generate - Select this option if an XML has to be generated from the imported file. This will be stored in the path maintained in CSBT_PARAM parameter
- Upload - Select this option if the data has to be uploaded as an excel file itself.
Note: To start the upload process click Upload button. Once you click this button system starts importing the data from the excel file.
Optional
Upload Source Specify the source code of the file to be used for generating the XML file. You need to specify the source if you have chosen Generate option in the Generate or Upload field.
Alphanumeric; 50 Characters; Optional
Upload Click this button to upload the attached file. NA Excel Upload Details Specify the details under this section. NA Record ID Display the unique number of the record uploaded.
Display
Record Key Displays the record key.
Display
Status Displays the status of the record.
Display
Excel Upload Errors Specify the details under this section. NA Record Id Specify the unique number of the record, which encountered error while uploading.
Alphanumeric; 255 Characters; Optional
Error Code Specify the error code corresponding to the error encountered during upload.
Alphanumeric; 40 Characters; Optional
Error Message Specify the error message corresponding to the error code displayed.
Alphanumeric; 4000 Characters; Optional
- Click Upload button, the system uploads the records
maintained.The system uploads the records maintained.
Parent topic: Online Interface Execution
