1.2.6 Configure JMS Adapter
This topic explains to configure JMS Adapter.
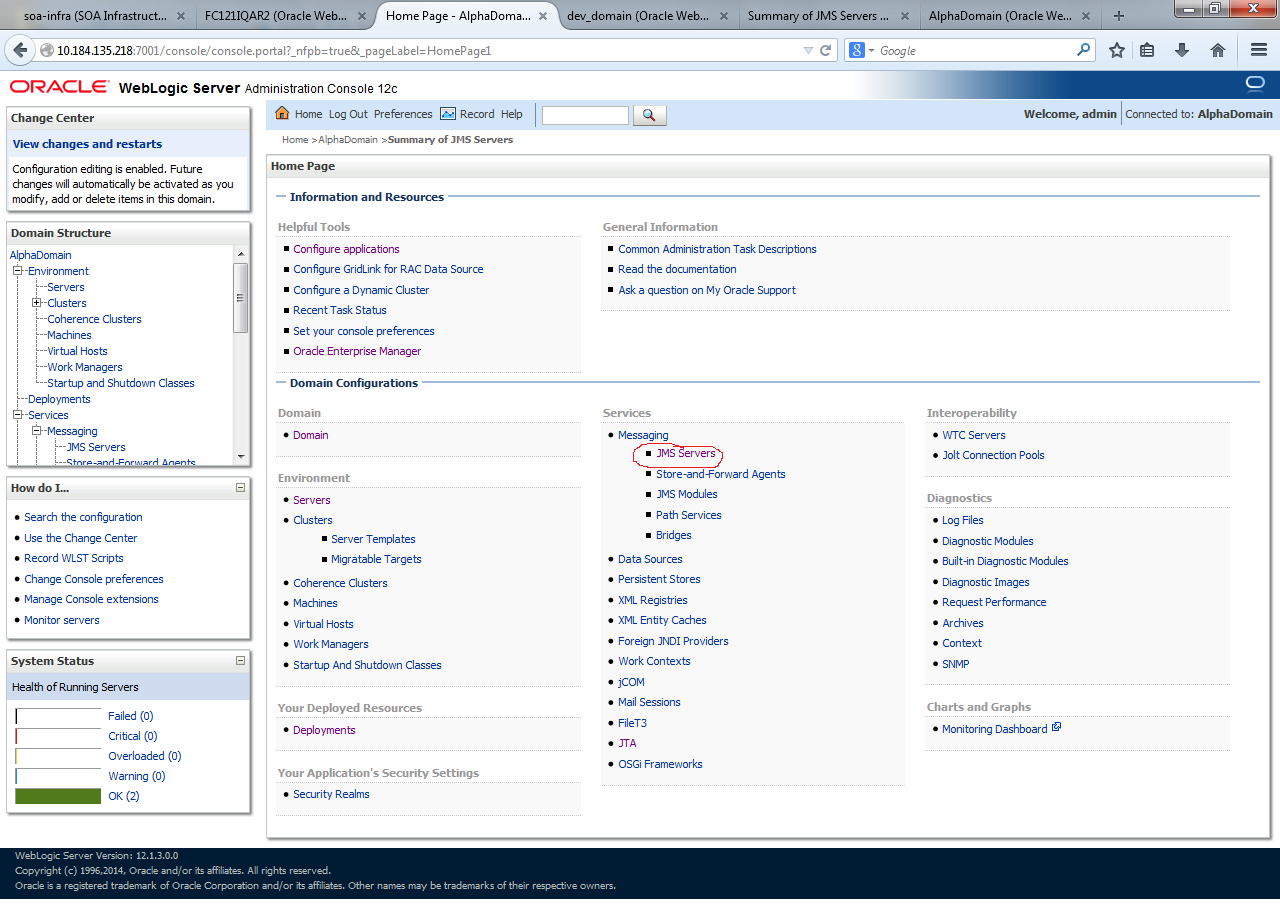
- Log in to Weblogic Console and click on JMS Servers under Domain Configurations - Services.The Weblogic Console Home Page is displayed.
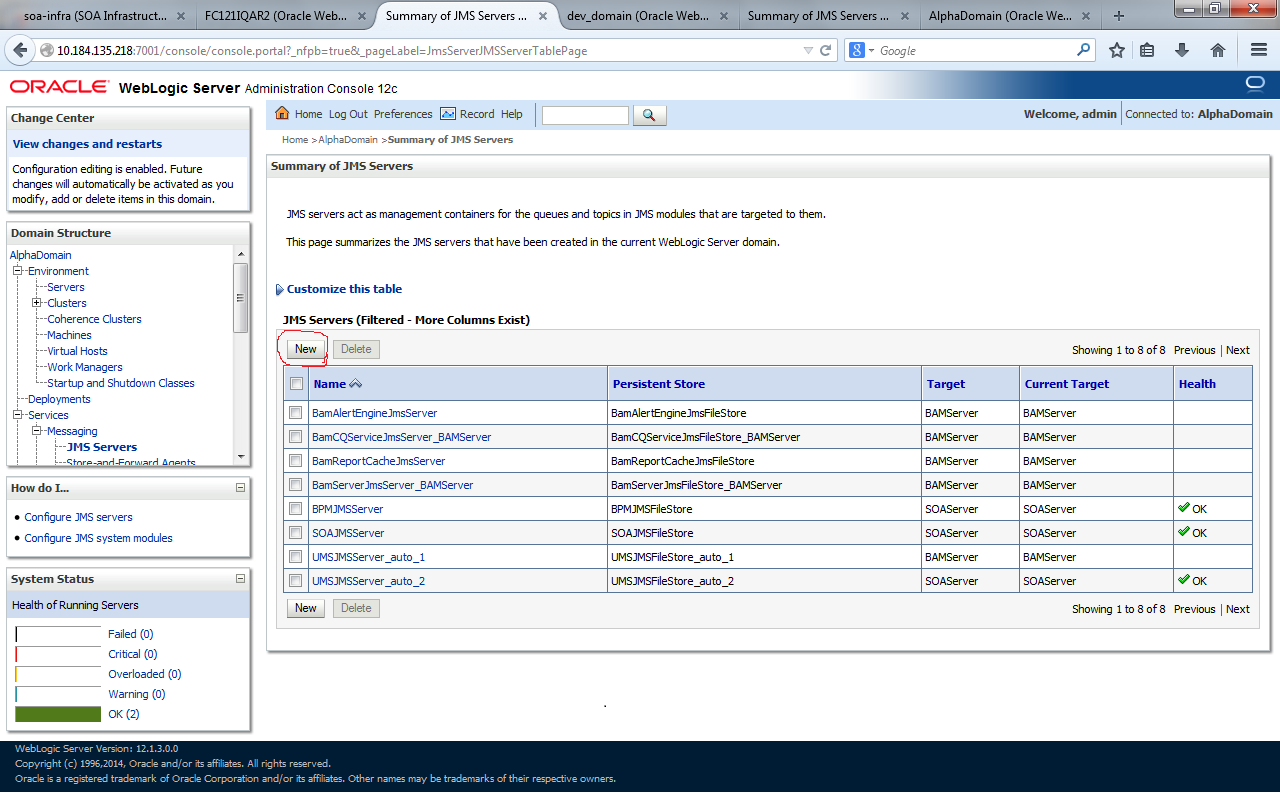
- Click on New.The Summary of JMS Servers screen is displayed.
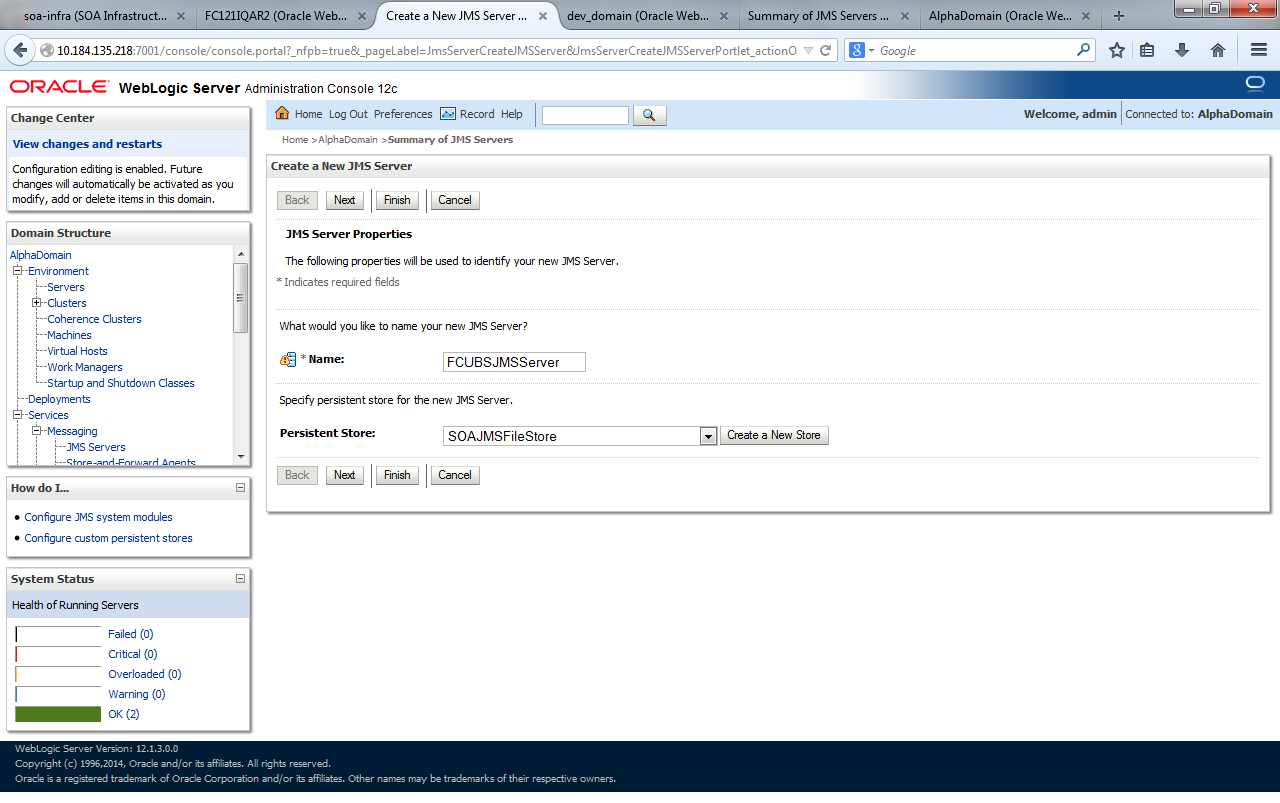
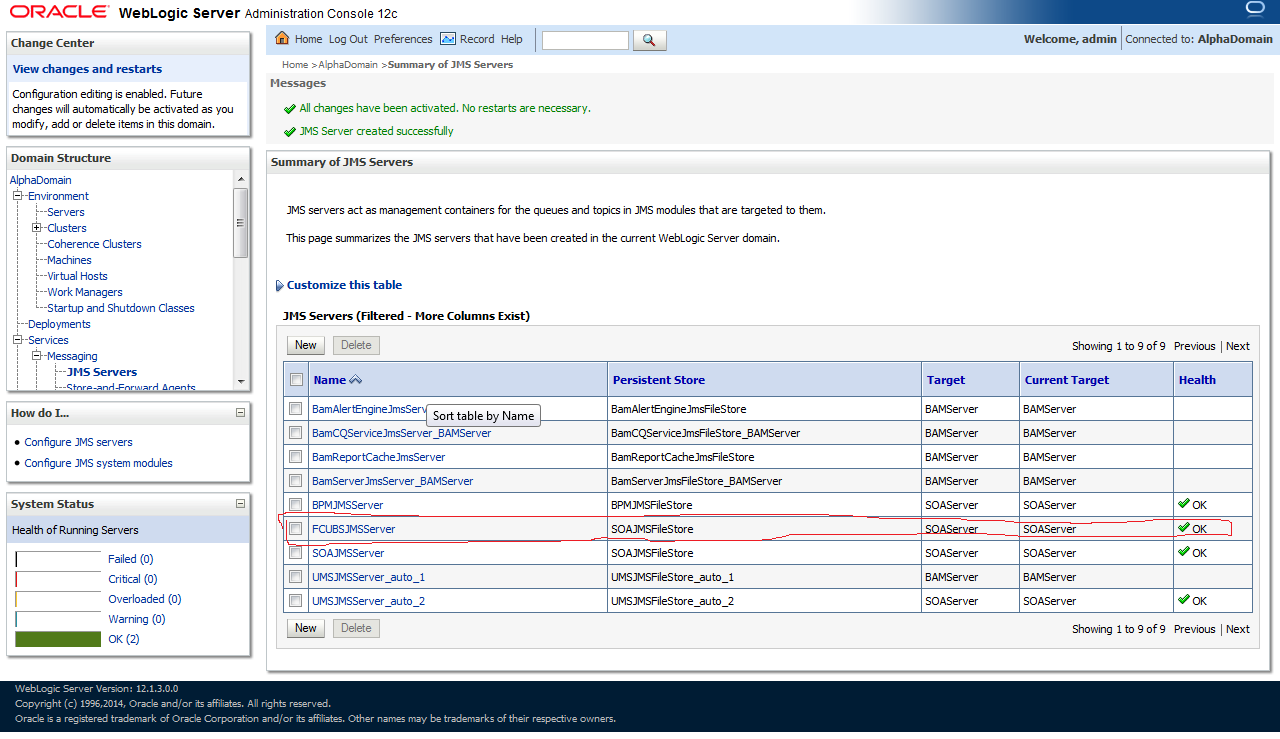
- Provide the Name for JMS Server as FCUBSJMSServer, select the file Persistent Store as SOAJMSFileStore from the dropdown list and click Next.The Create a New JMS Server screen is displayed.
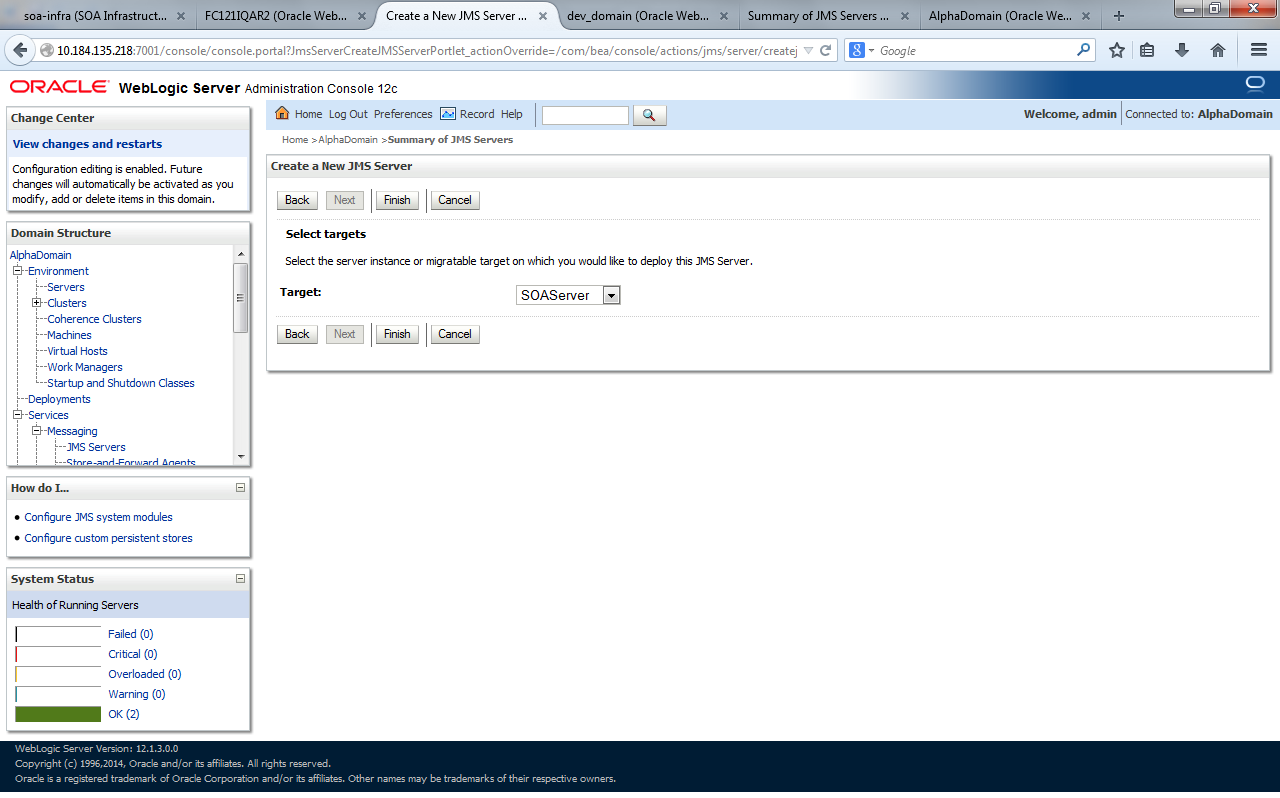
- Select the Target as SOAServer from the dropdown list and click Finish.The Create a New JMS Server - Select Target screen is displayed.
Figure 1-25 Create a New JMS Server - Select Target
Figure 1-26 Summary of JMS Servers - Filtered
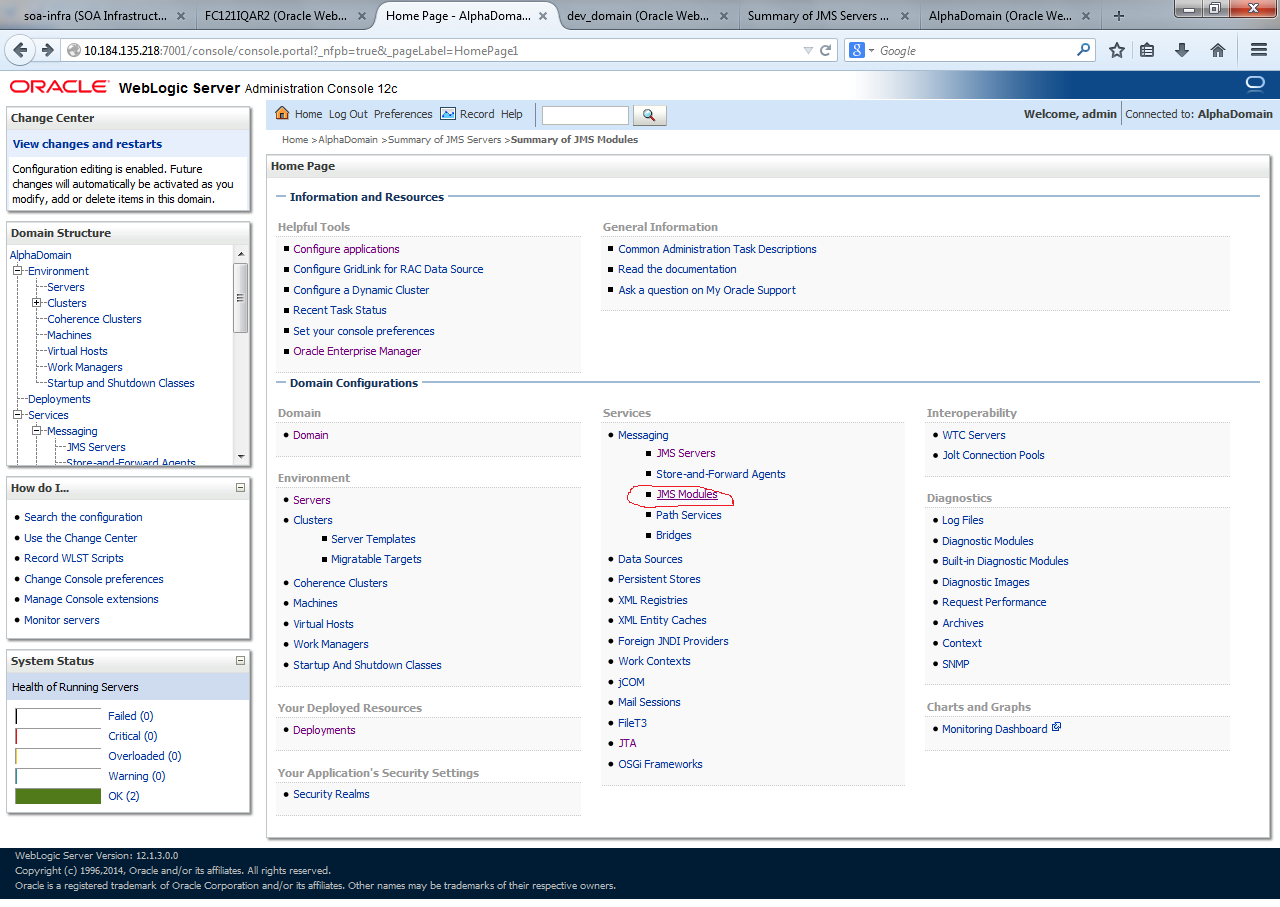
- Go back to Weblogic Console and click on JMS Modules under Domain Configurations - Services.
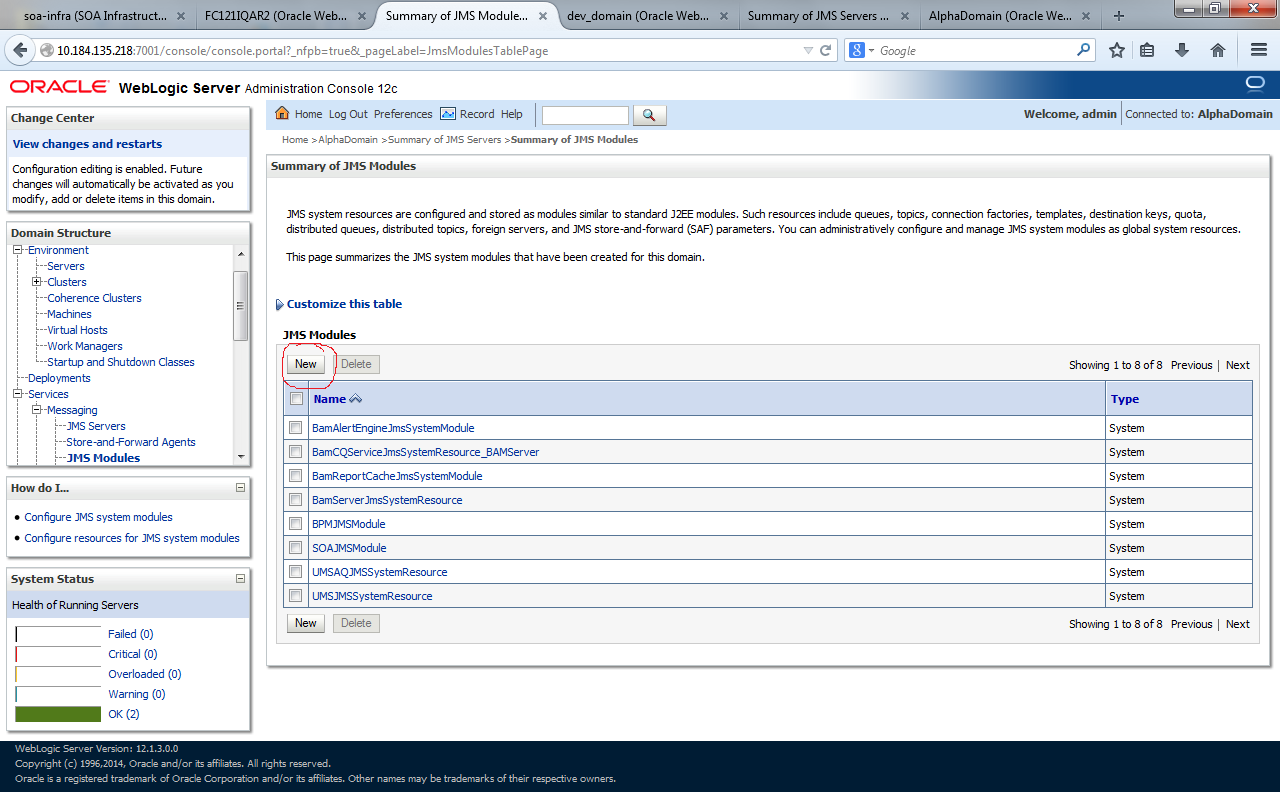
- Click on New.The Summary of JMS Modules screen is displayed.
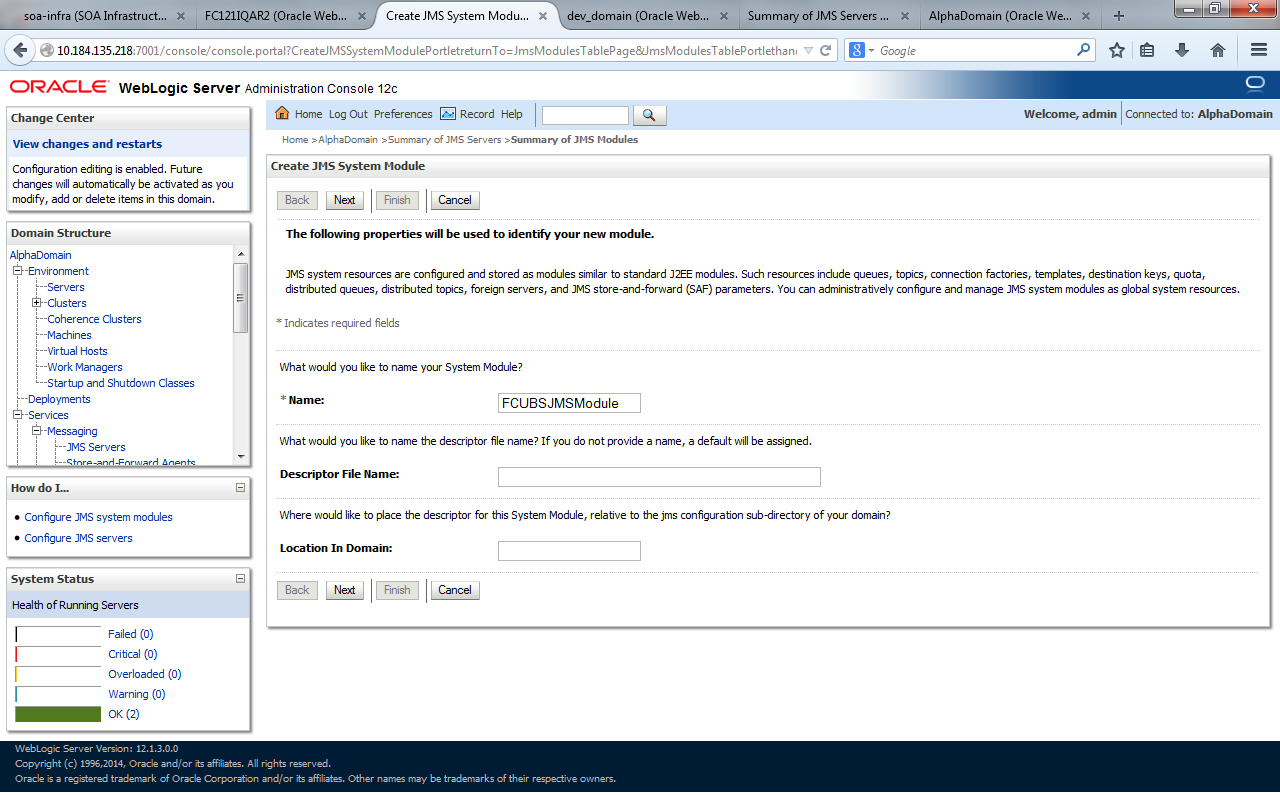
- Create a JMS Module with the name FCUBSJMSModule. Click on Next.The Create JMS System Module screen is displayed.
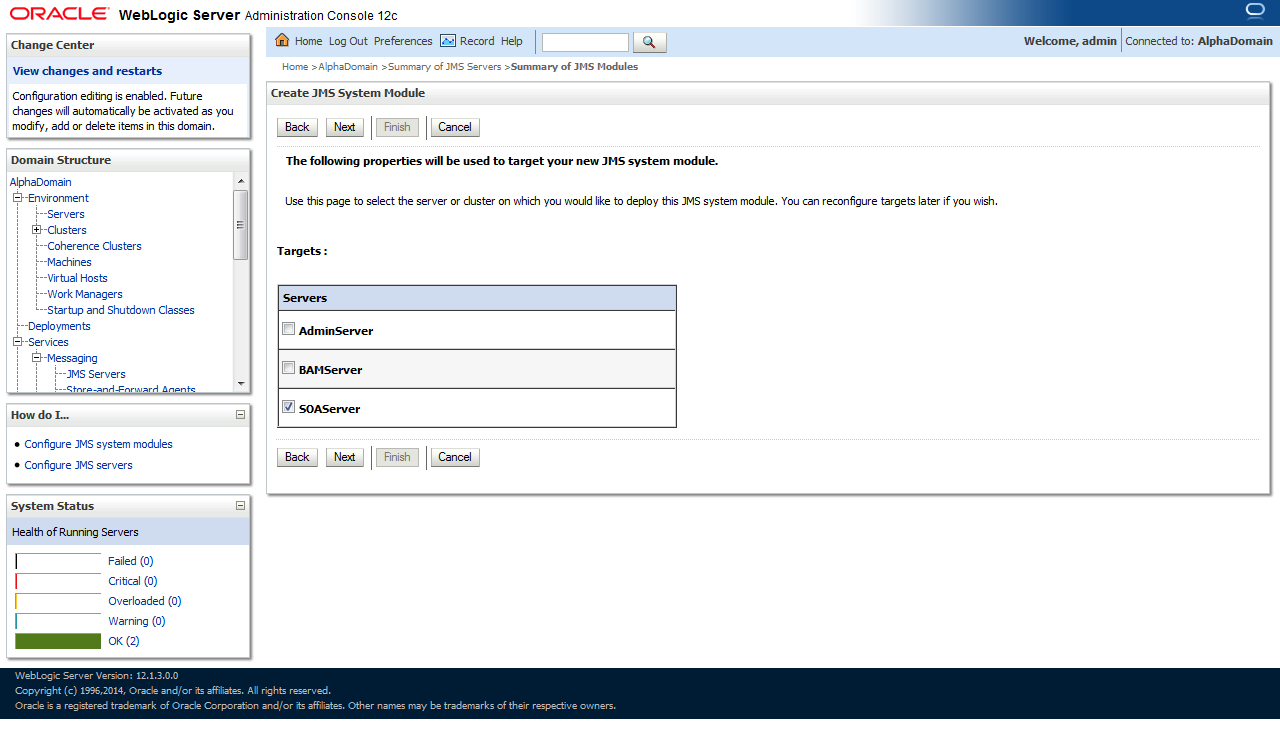
- Select the Target as SOAServer and click on Finish.The Create JMS System Module - Select Target screen is displayed.
Figure 1-30 Create JMS System Module - Select Target
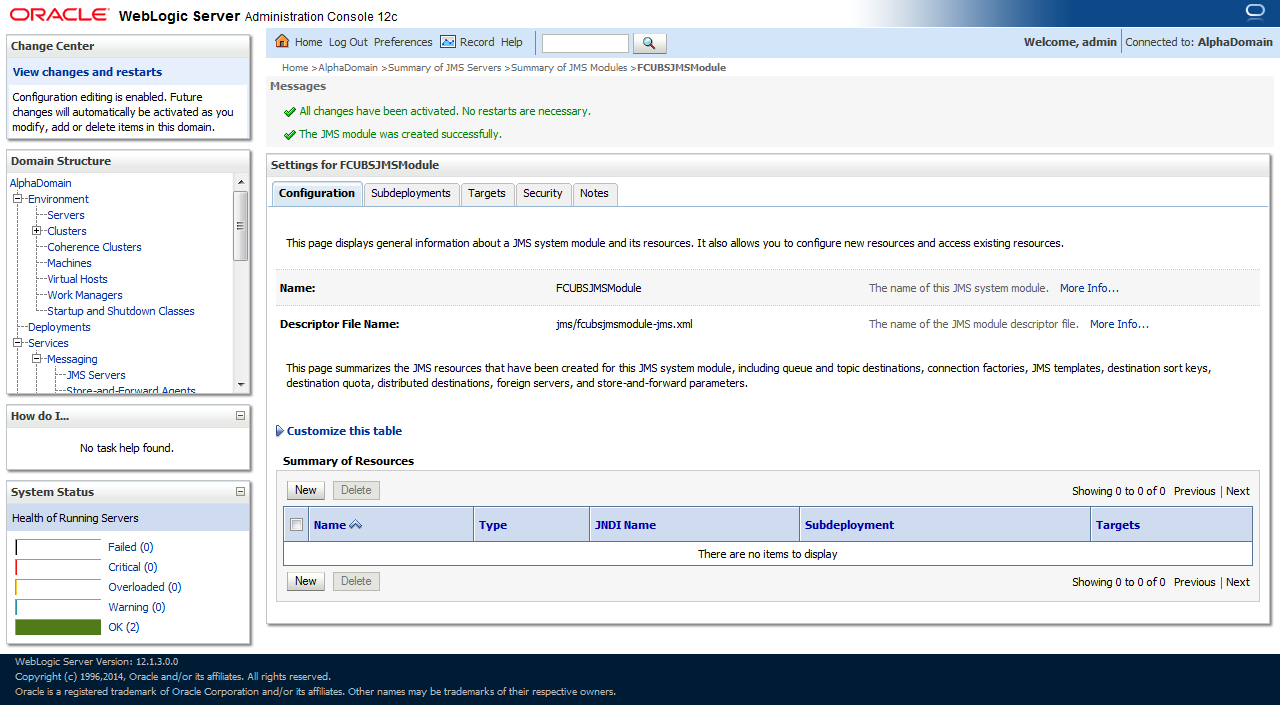
- After the click on Finish, two messages are displayed on the Summary of JMS Modules screen.The Summary of JMS Modules - Messages screen is displayed.
Figure 1-31 Summary of JMS Modules - Messages
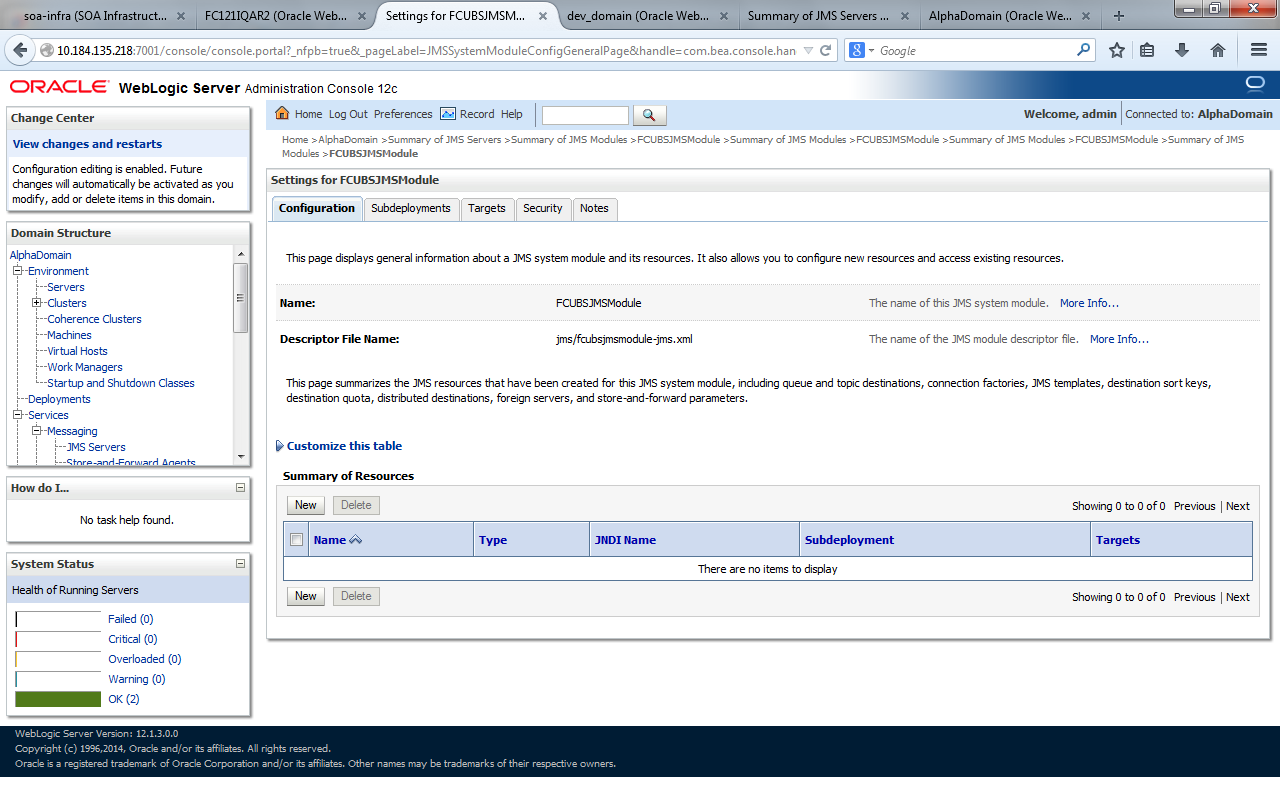
- Go back to JMS Modules, click on FCUBSJMSModule and click New.The Settings for FCUBSJMSModule screen is displayed.
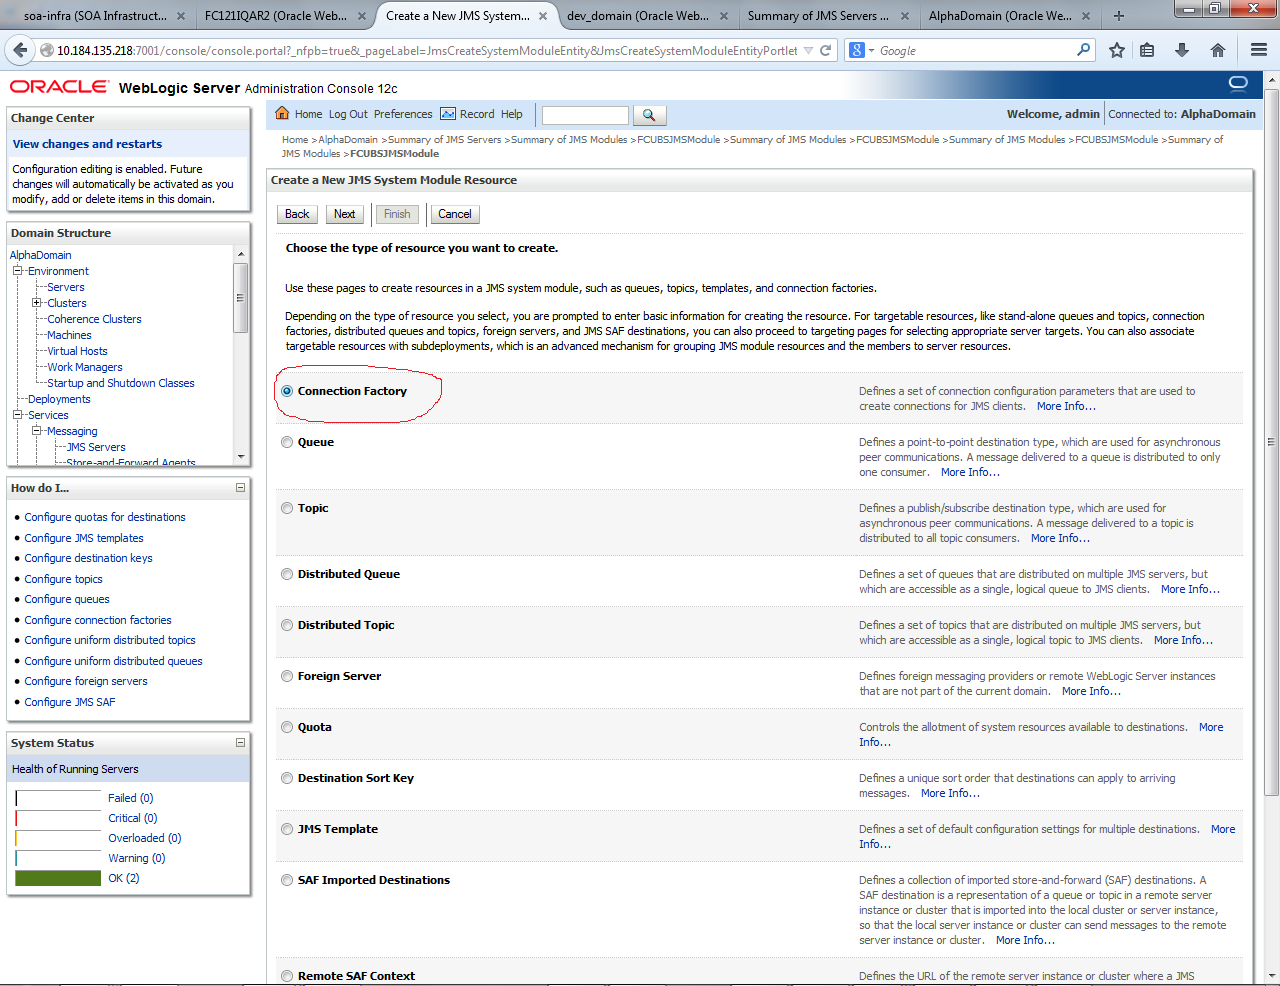
- On the Create a New JMS System Module Resource screen, select Connection Factory and click Next.The Create a New JMS System Module Resource screen is displayed.
Figure 1-33 Create a New JMS System Module Resource
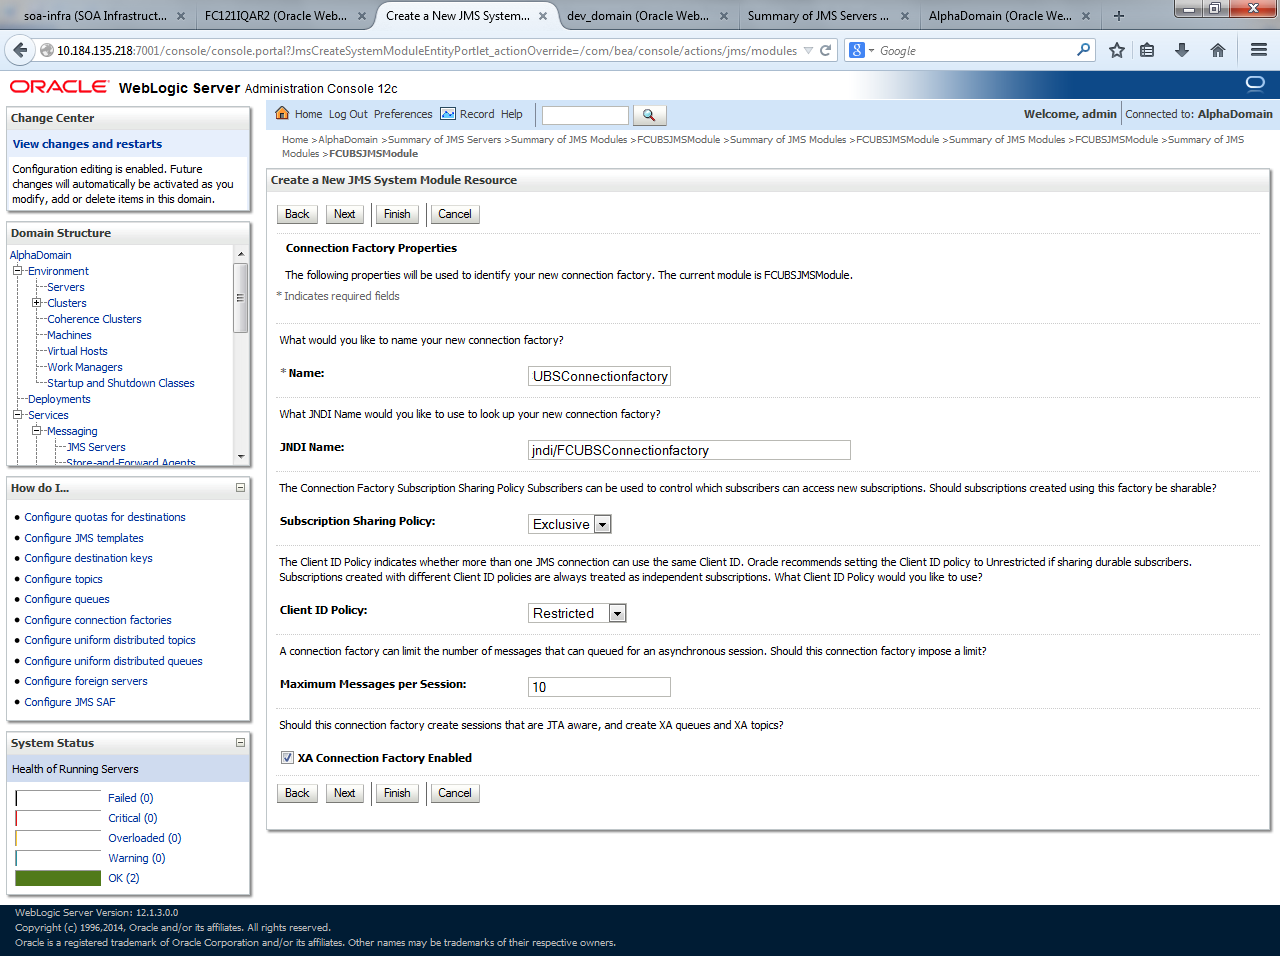
- Create the the connection factory with the below Names and click Next.The Connection Properties screen is displayed.
Figure 1-34 Create a New JMS System Module Resource - Connection Properties
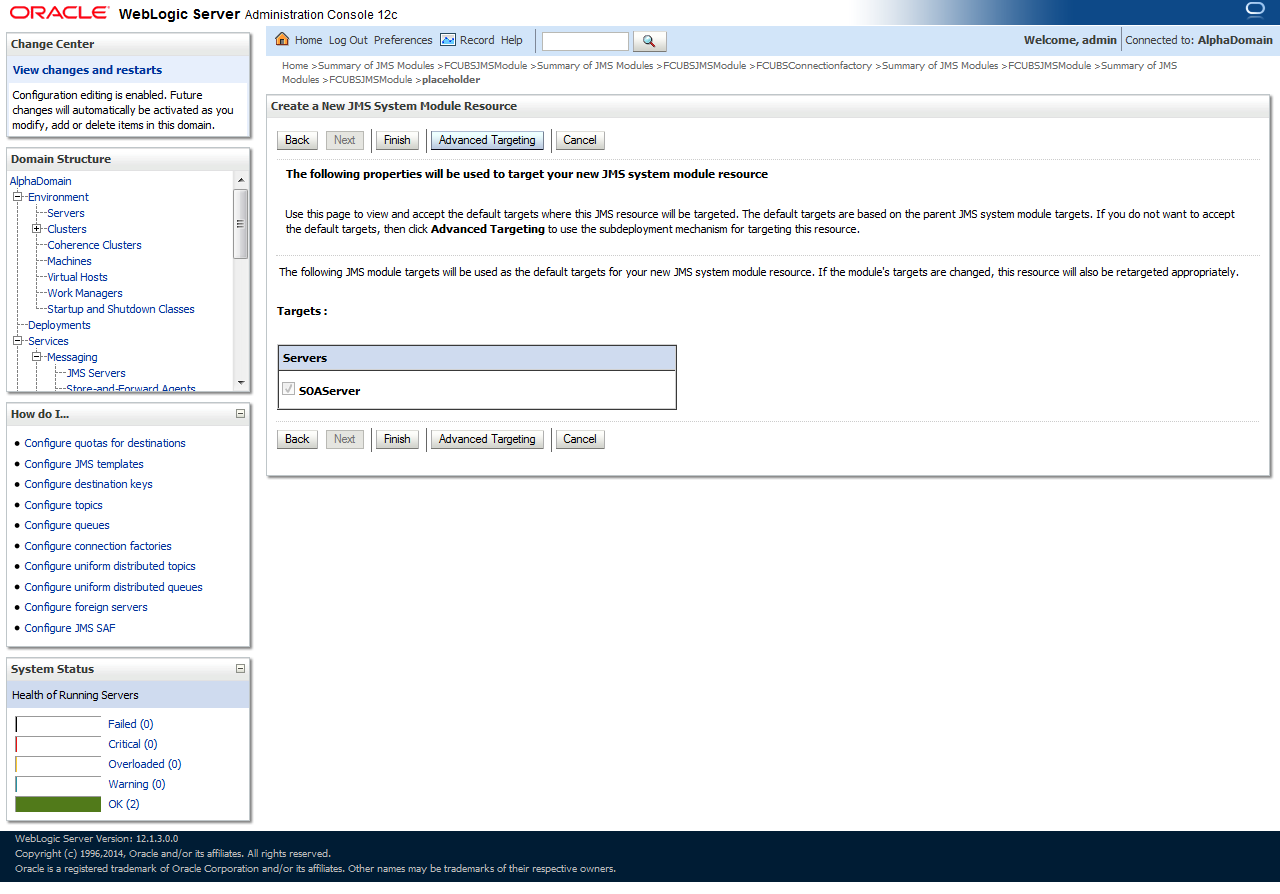
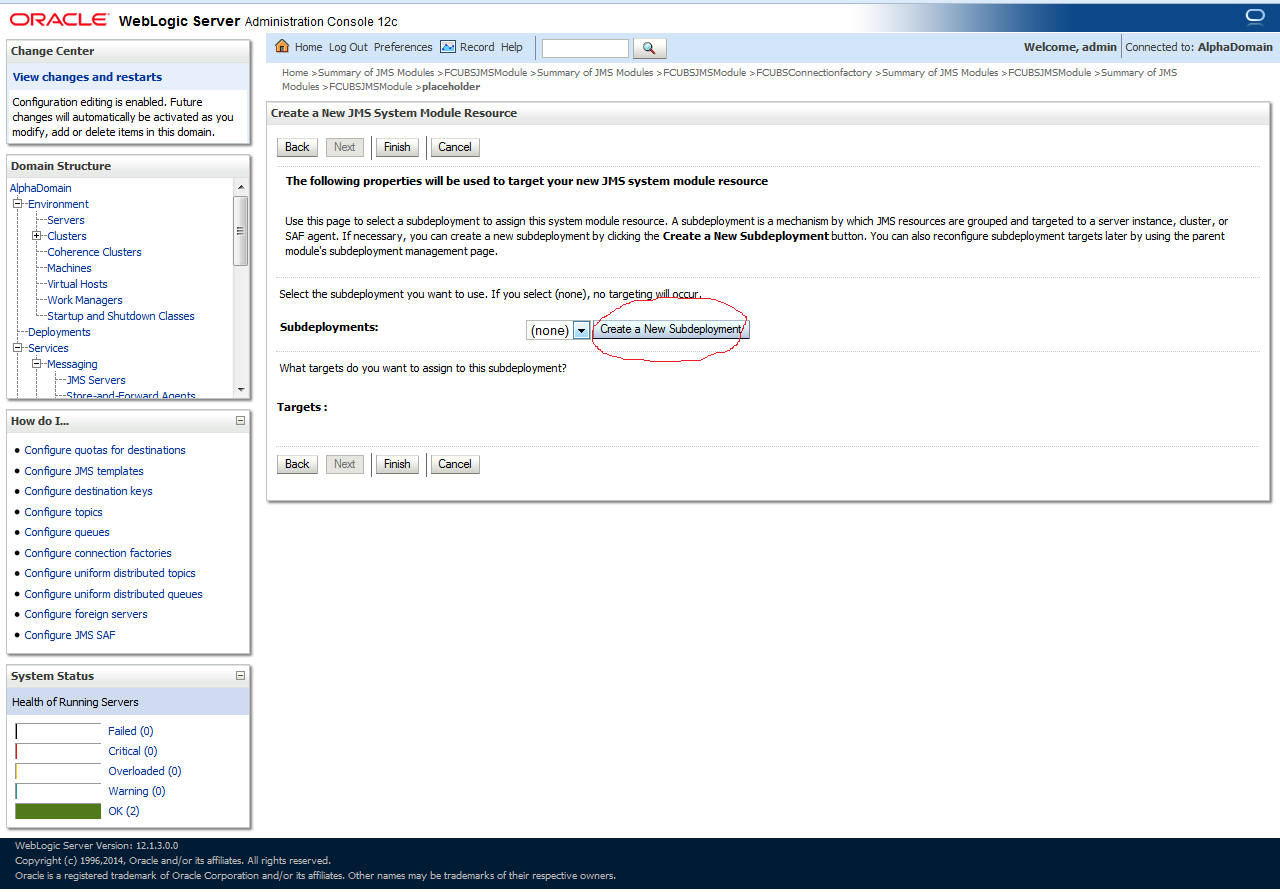
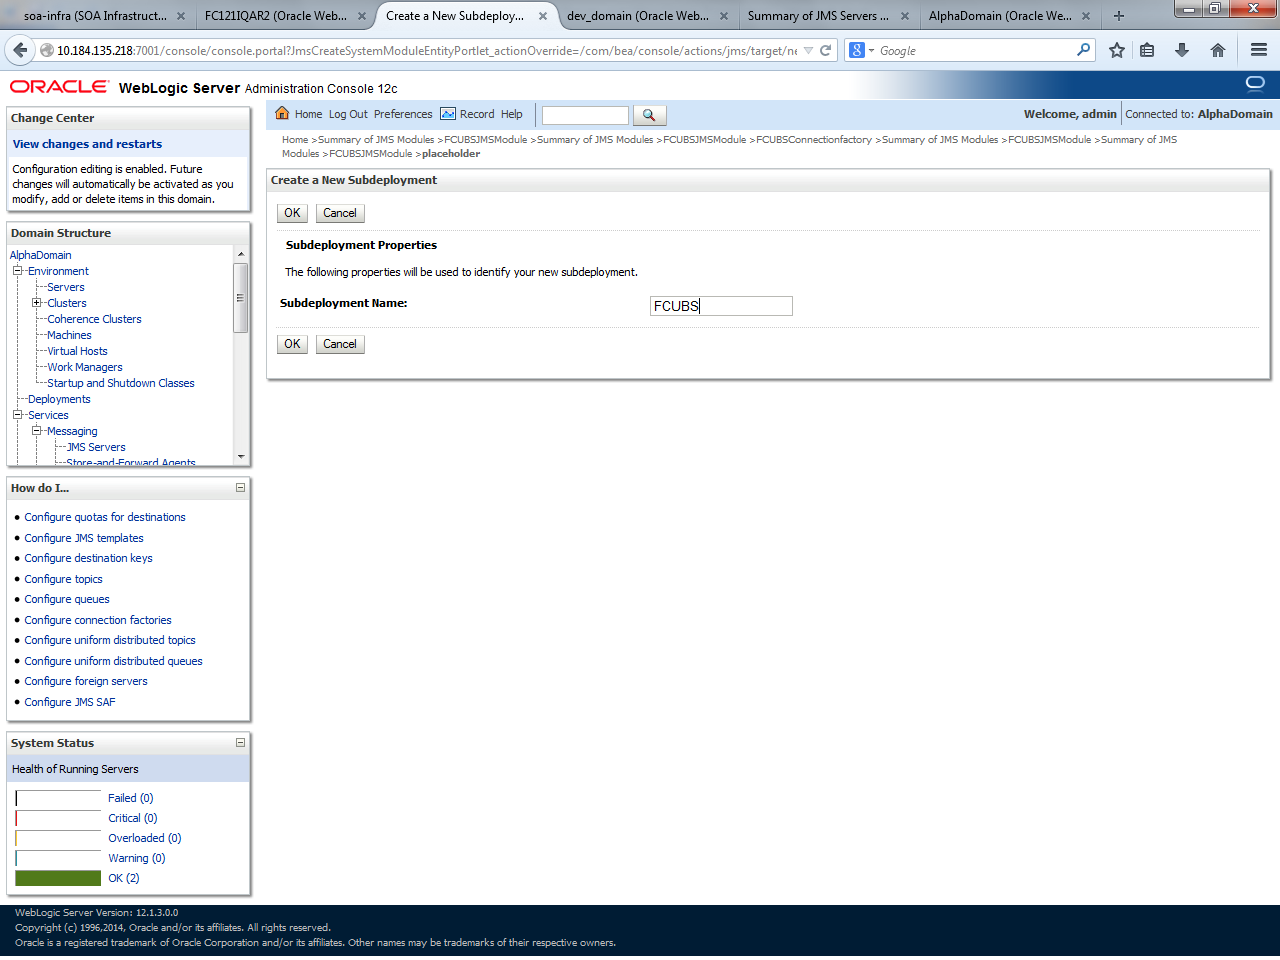
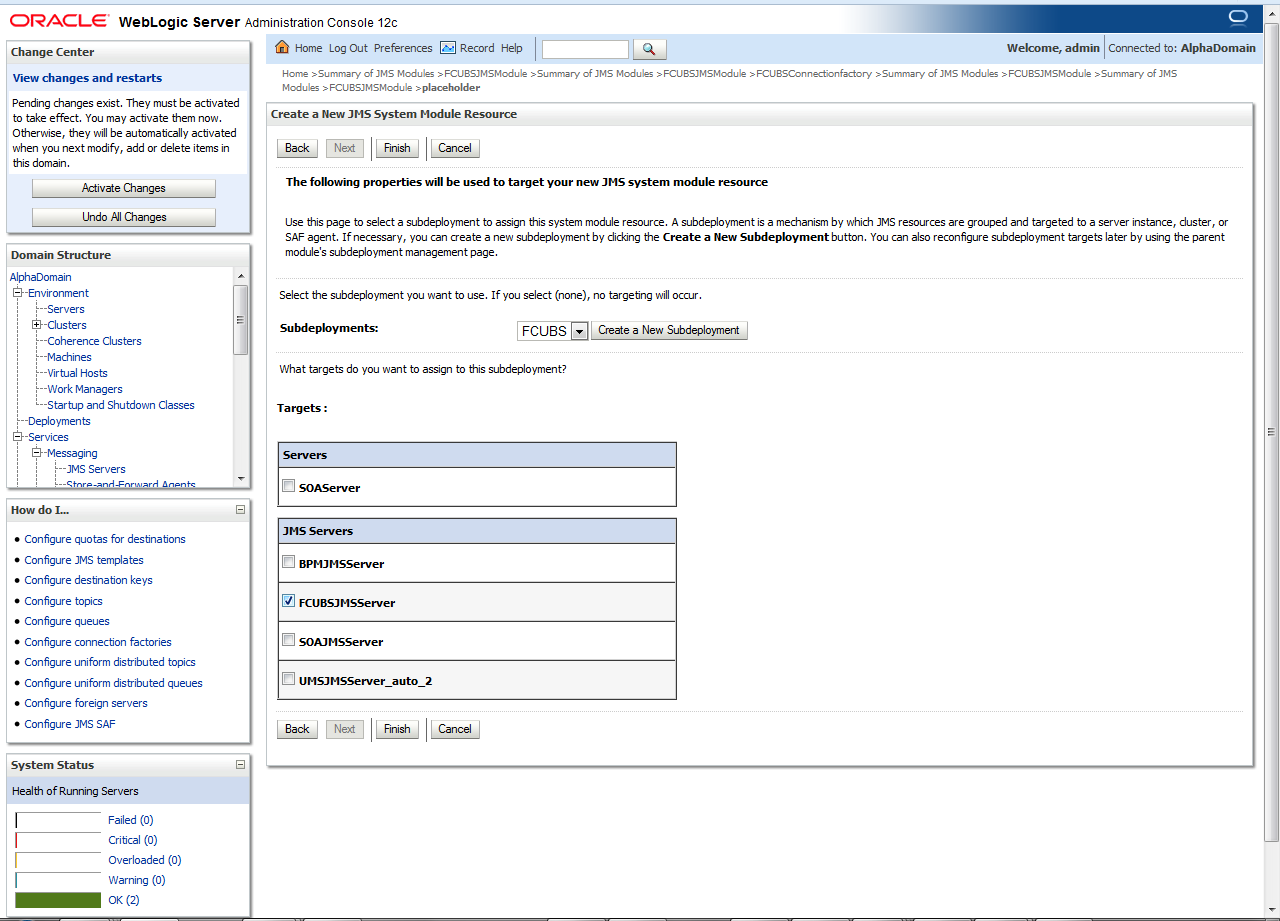
- Select Advanced Targeting, click on Create New Sub Deployment with the below Name, and click OK.The Create a New JMS System Module Resource - Advanced Targeting screen is displayed.
Figure 1-35 Create a New JMS System Module Resource - Advanced Targeting
Figure 1-37 Create a New Subdeployment - Subdeployment Properties
Figure 1-38 Create a New Subdeployment - Targets
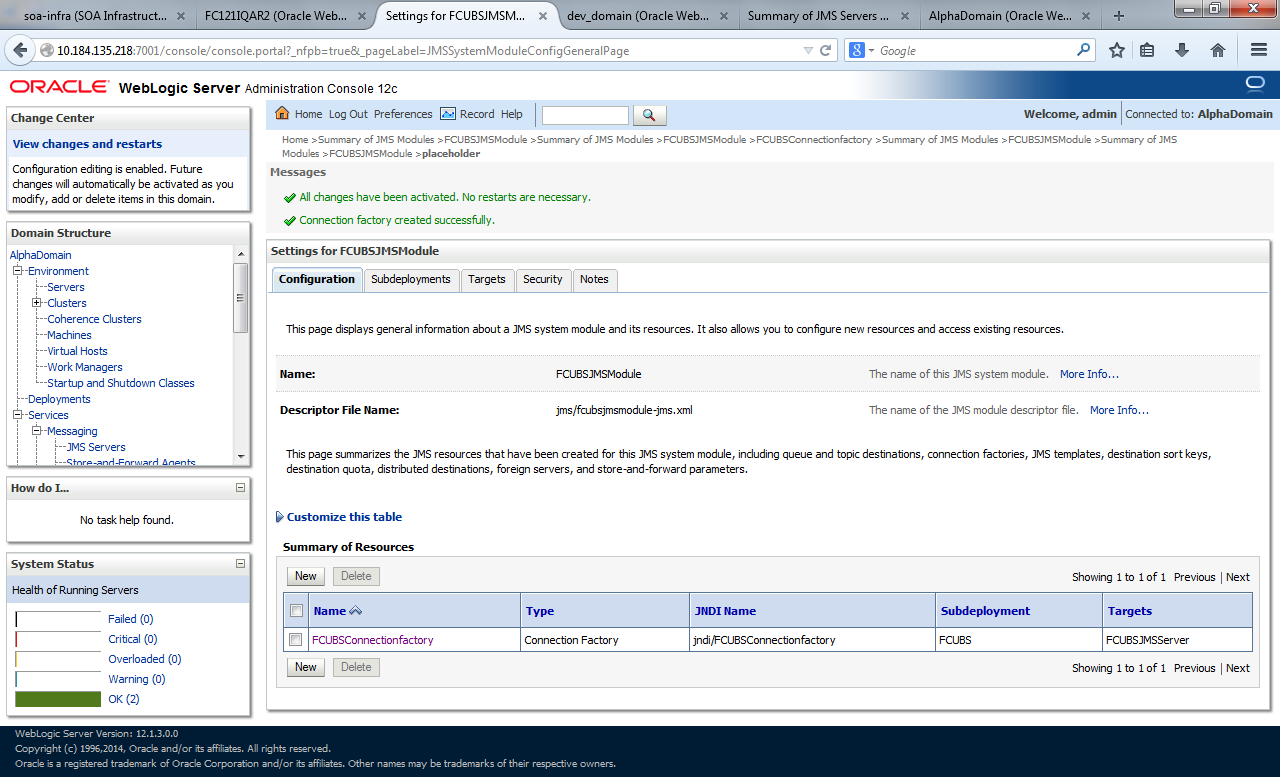
- After the click on Finish, two messages are displayed on the Settings for FCUBSJMSModule screen.Settings for FCUBSJMSModule - Messages screen is displayed.
Figure 1-39 Settings for FCUBSJMSModule - Messages
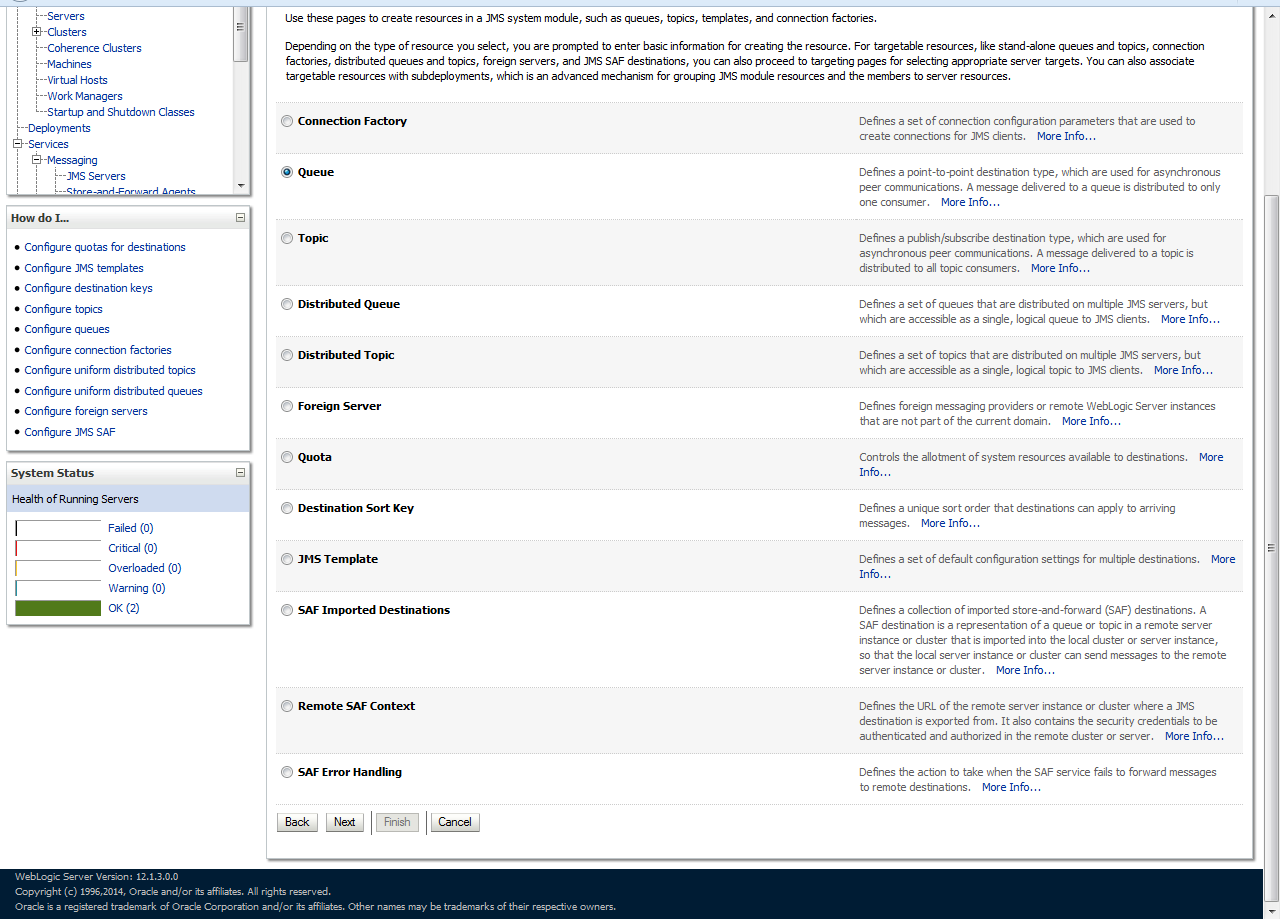
- Go back to Weblogic Console, click on JMS Modules, click New, then select Queue, and click on Next.The Create Resources in JMS System Module - Queue screen is displayed.
Figure 1-40 Create Resources in JMS System Module - Queue
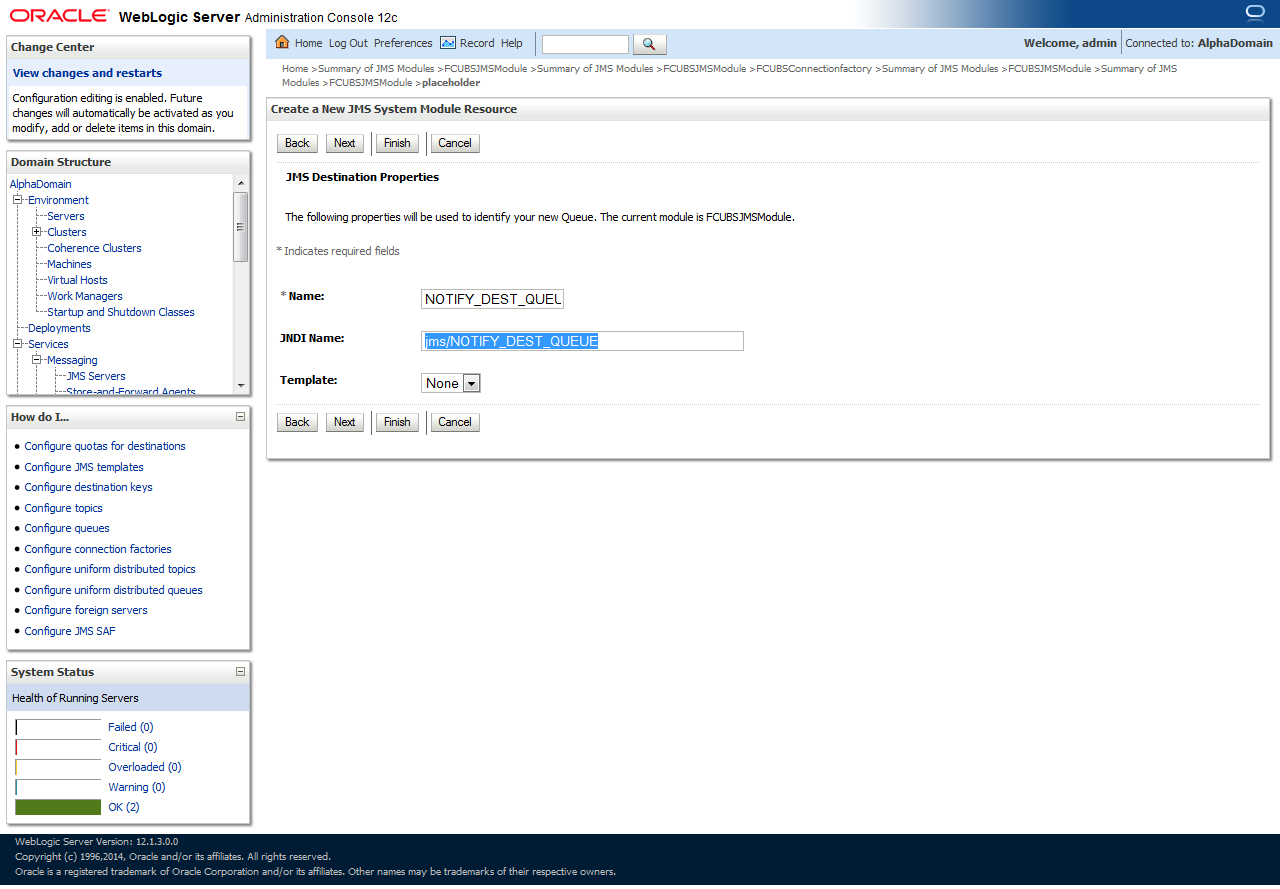
- Create Queue with Name as NOTIFY_DEST_QUEUE, JNDI name as jms/NOTIFY_DEST_QUEUE and click Next.The JMS Destination Properties screen is displayed.
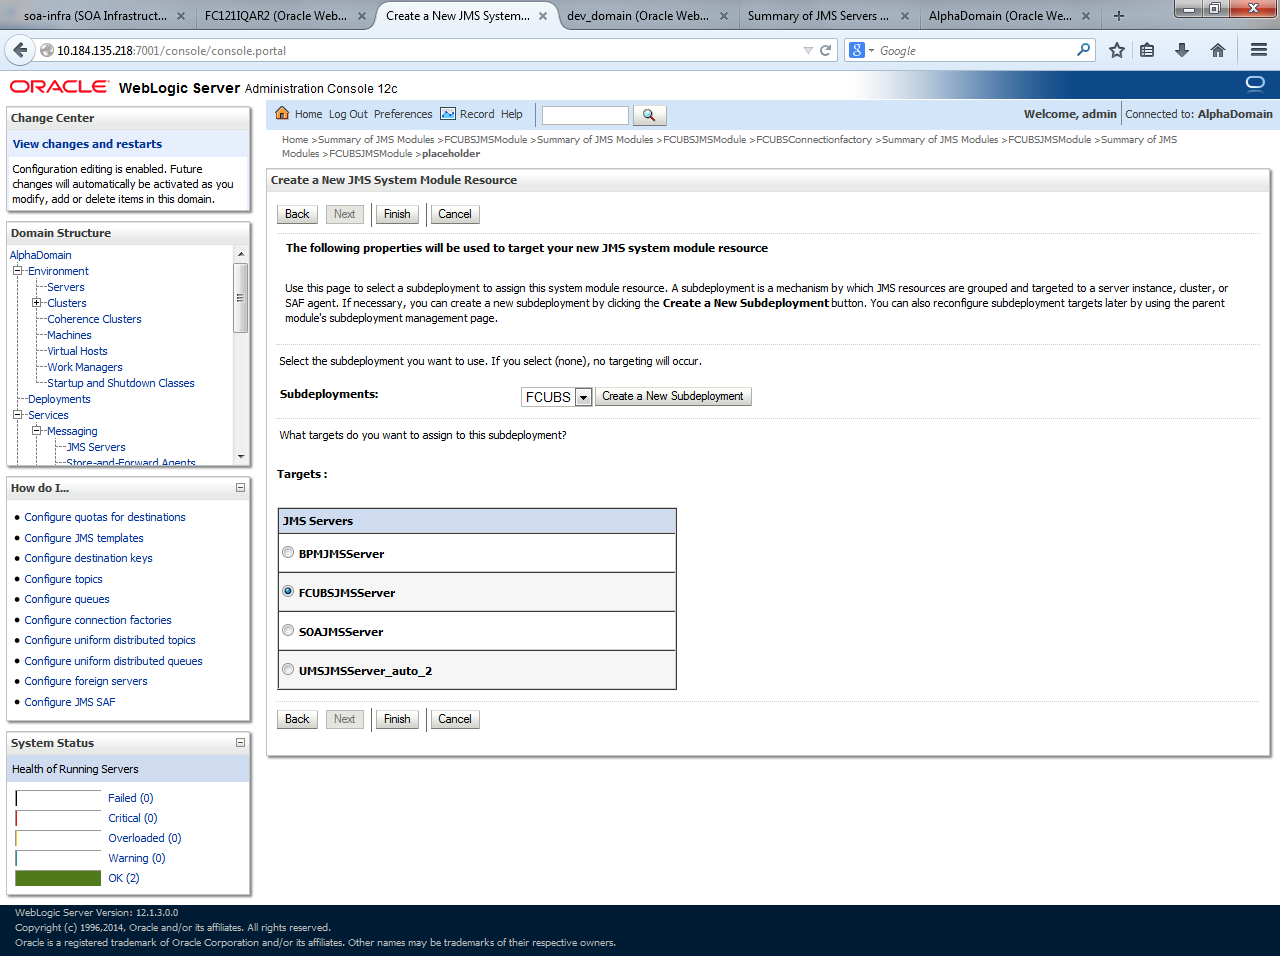
- Select the Subdeployments from the dropdown list we created earlier, select the Targets as JMS Servers, and click on Finish.The Subdeployments and Select Targets screen is displayed.
Figure 1-42 Subdeployments and Select Targets
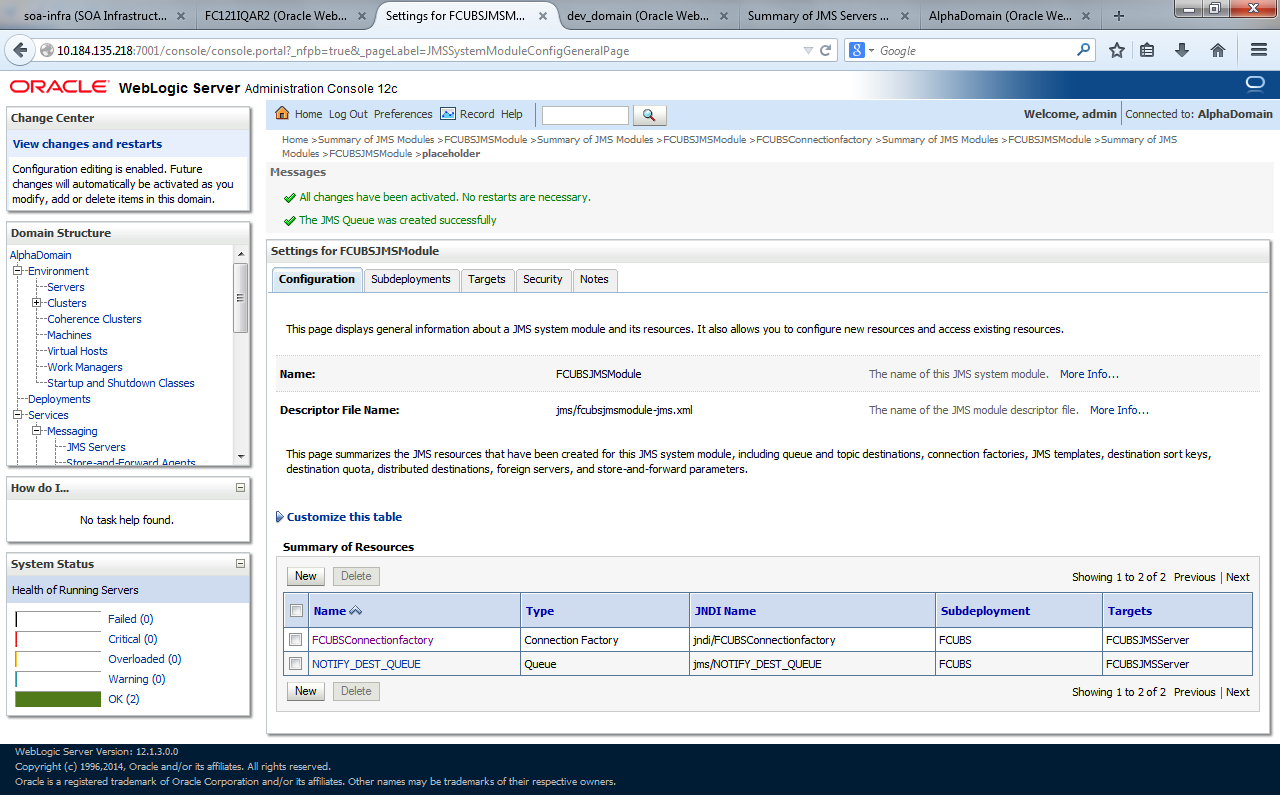
- After the click on Finish, two messages are displayed on the Settings for FCUBSJMSModule screen.Settings for FCUBSJMSModule - Messages screen is displayed.
Figure 1-43 Summary of Resources - Messages
- Create queue MDB_QUEUE_RESPONSE with JNDI name as jms/MDB_QUEUE_RESPONSE, queue eis/jms/ORGateway with JNDI name as eis/jms/ORGateway, and queue FAULT_QUEUE_RESPONSE with JNDI name as jms/FAULT_QUEUE_RESPONSE as above in console within FCUBSJMSModule.(Follow steps 8-9)
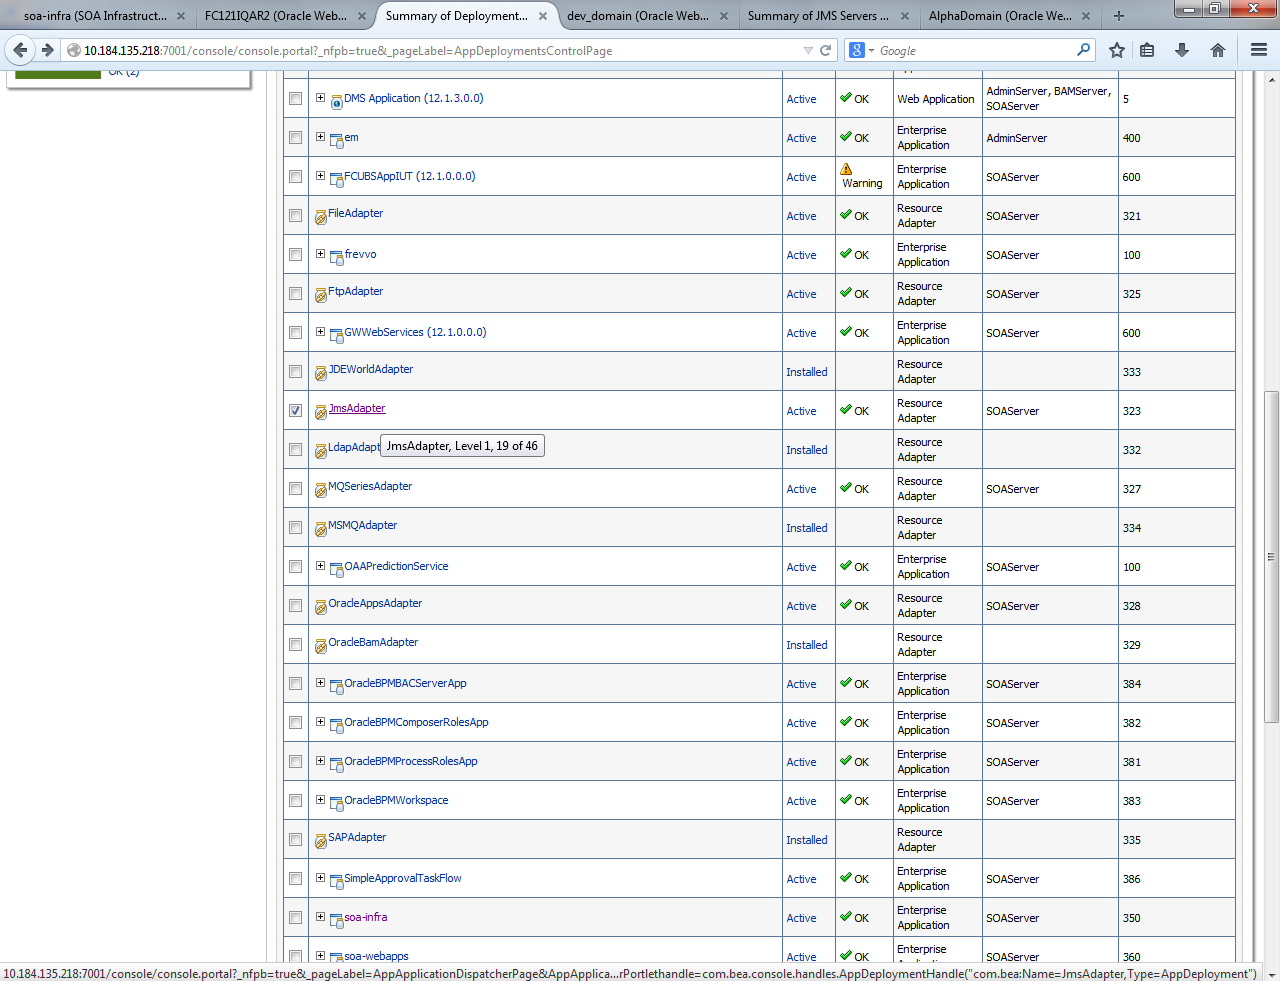
- Go to Weblogic Console, click Deployment, and select JMS Adapter.
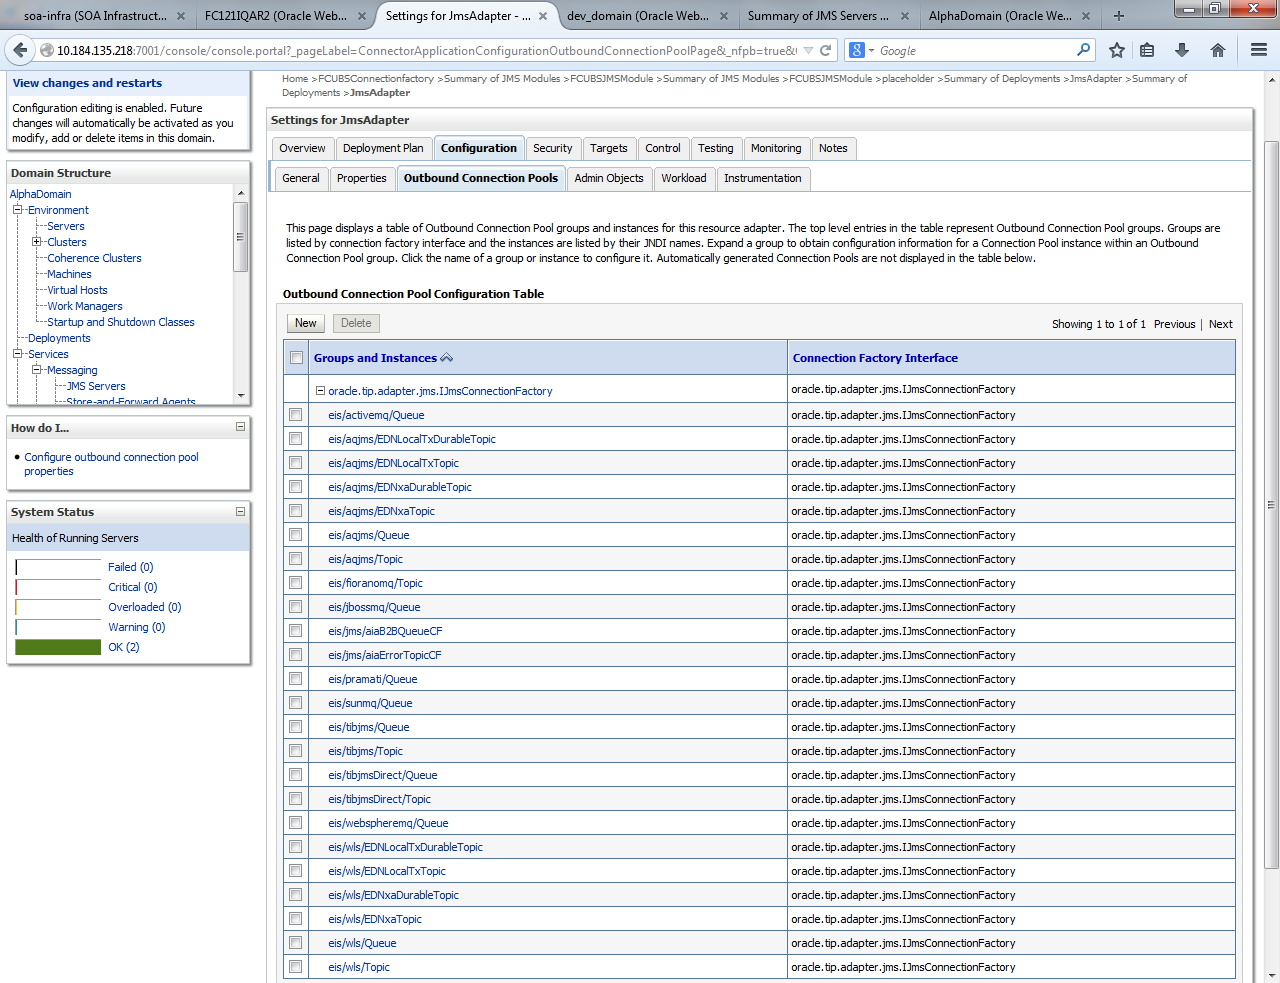
- Click Configuration tab, select Outbound Connection Pools.The Settings for JMSAdapter screen is displayed.
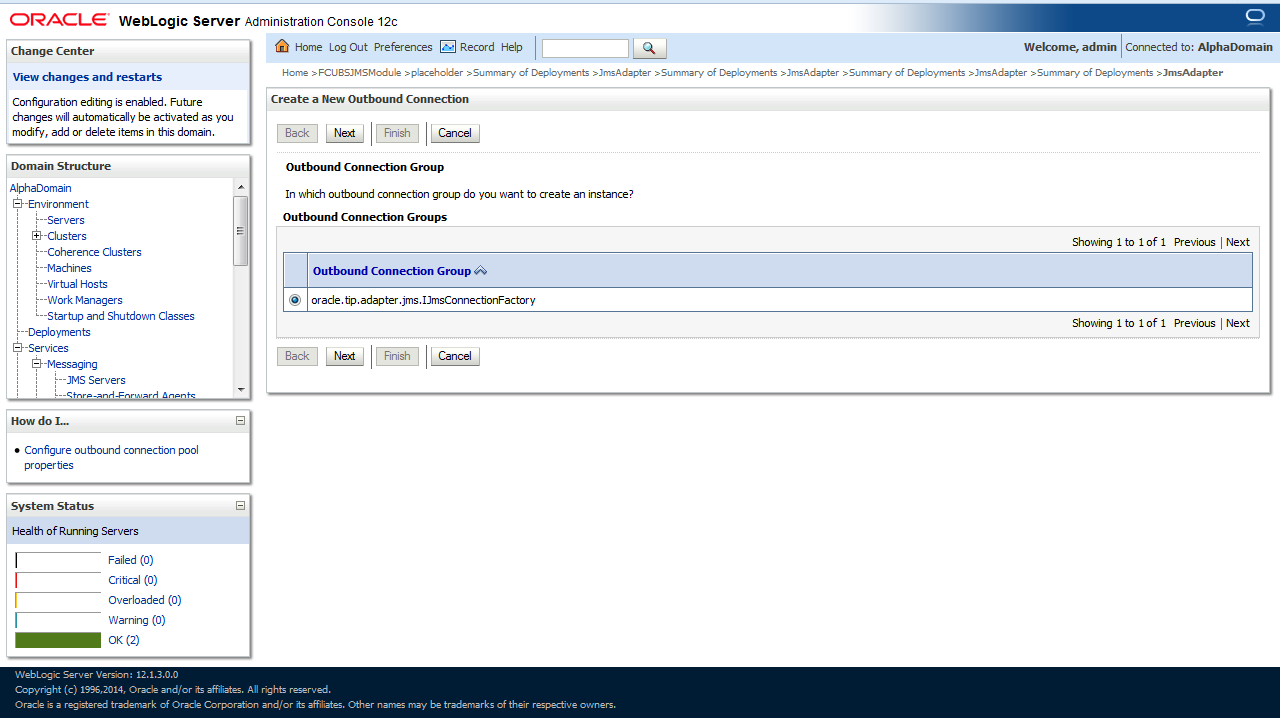
- Click on New.The Create a New Outbound Connection screen is displayed.
Figure 1-45 Create a New Outbound Connection
- Select the Outbound Connection Group and click Next.
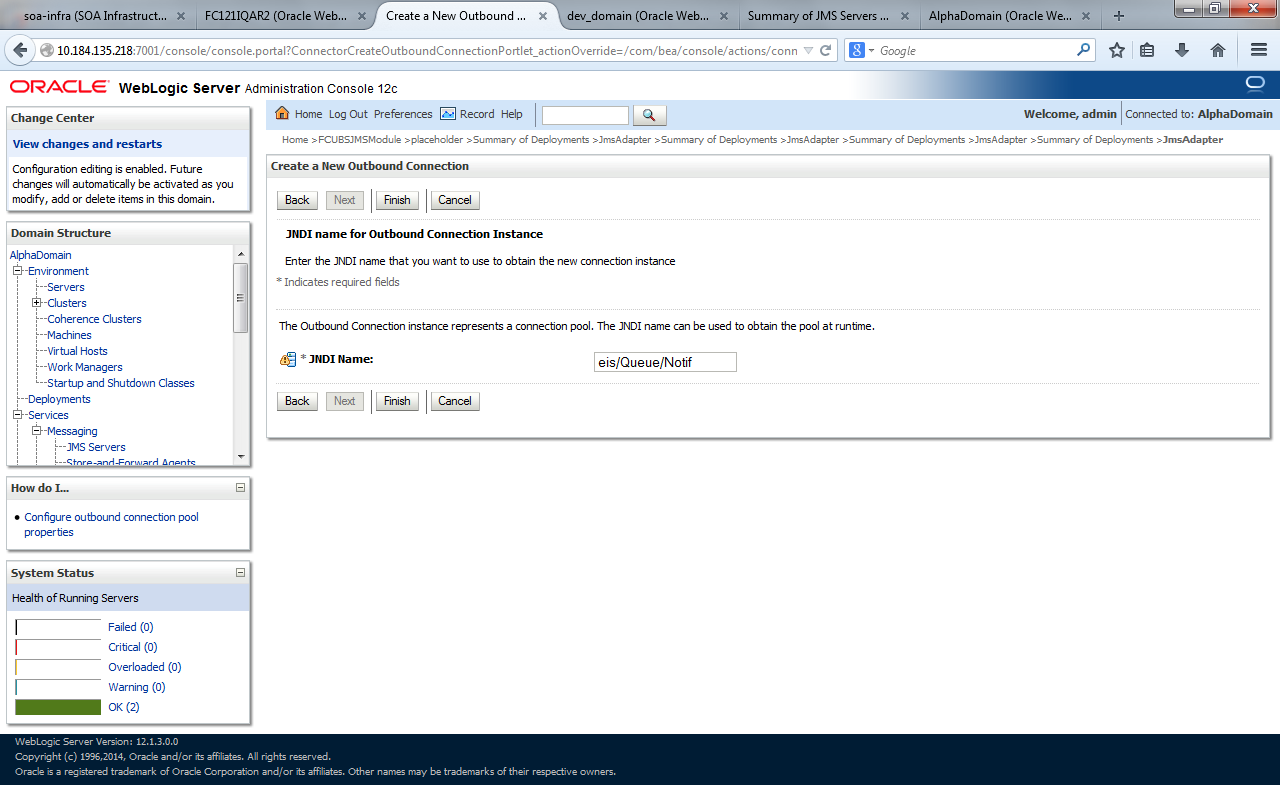
- Provide the JNDI name as eis/Queue/Notif and click Finish.The Create a New Outbound Connection - JNDI Name screen is displayed.
Figure 1-47 Create a New Outbound Connection - JNDI Name
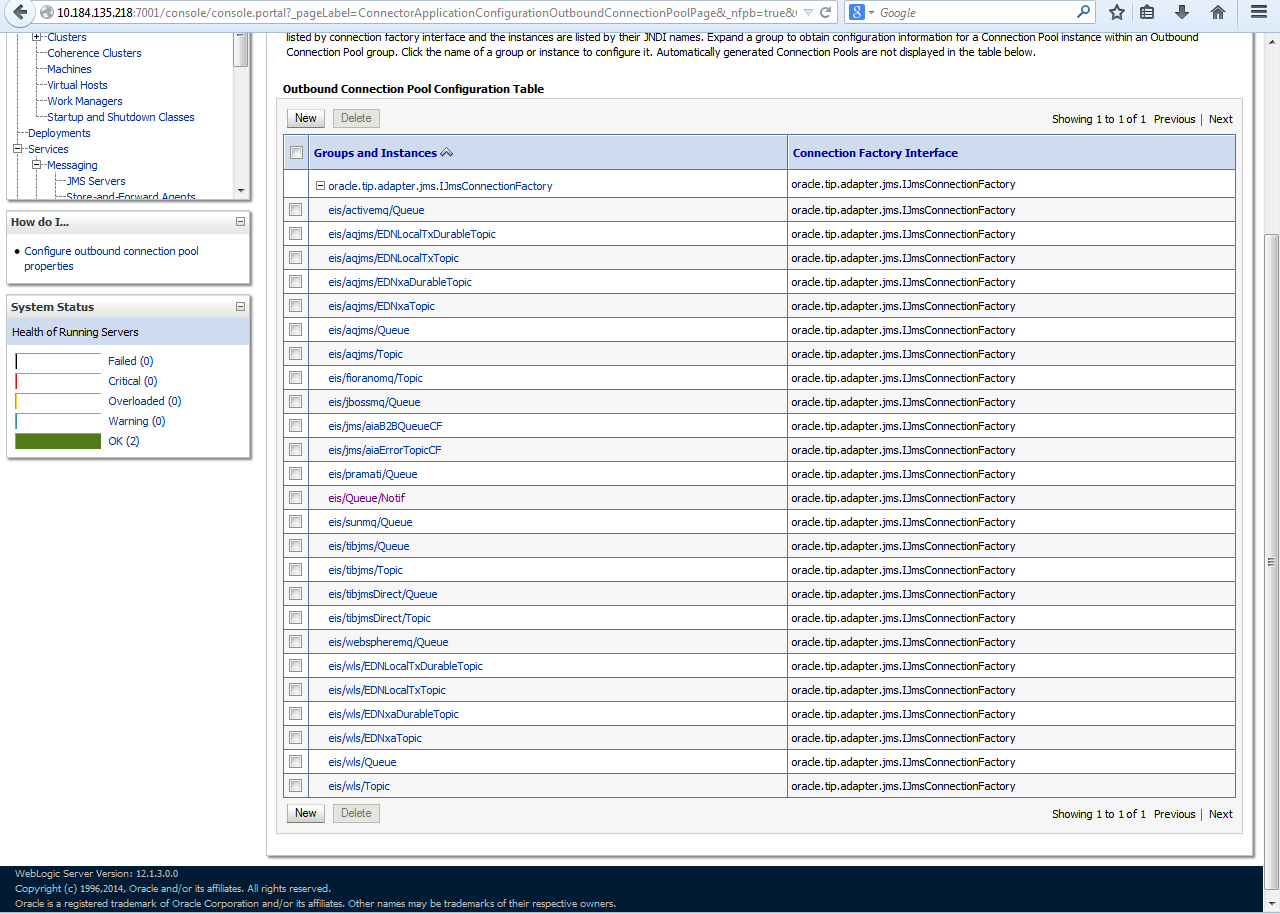
Figure 1-48 Outbound Connection Pool Configuration Table
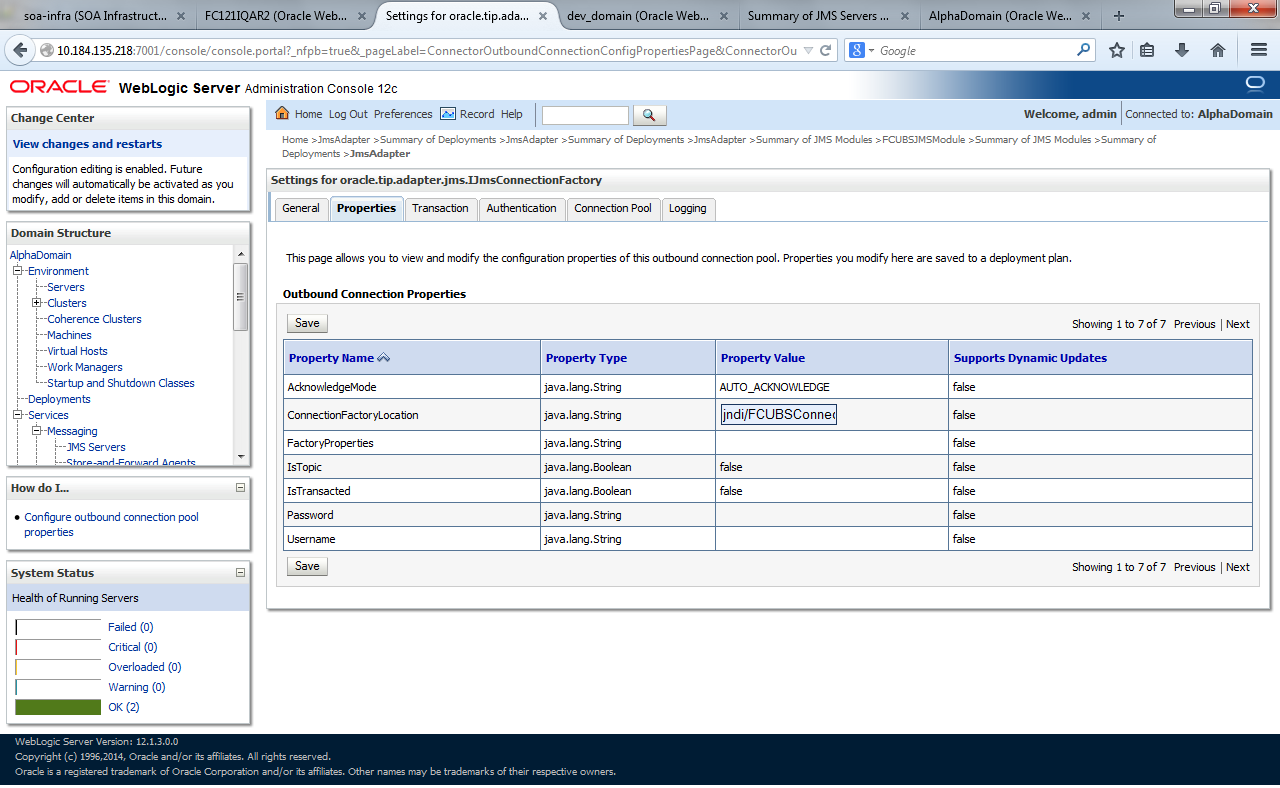
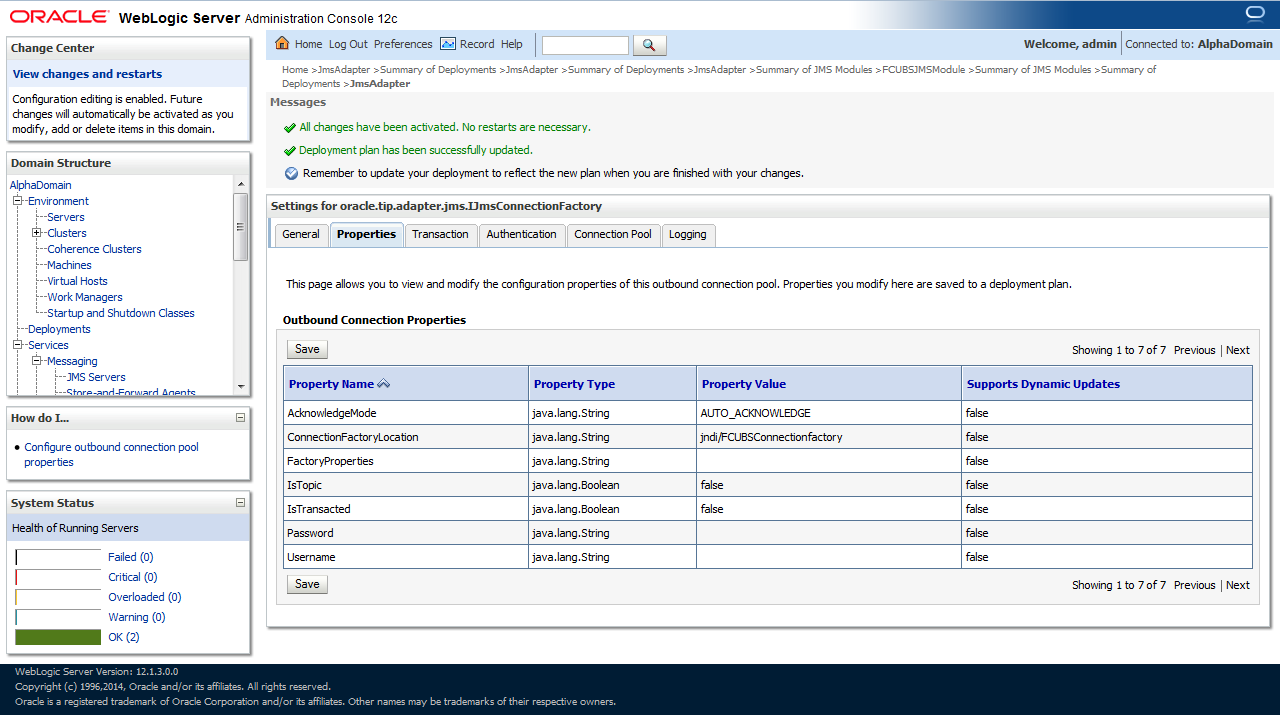
- Click on the Outbound connection pool with eis/Queue/Notif and enter the connection factory location as jndi/FCUBSConnectionfactory, and press enter.The Settings for oracle.tip.adapter.jms.IJmsConnectionFactory screen is displayed.
Figure 1-49 Settings for oracle.tip.adapter.jms.IJmsConnectionFactory
- Click on Save.
- After the click on Save, two messages are displayed on the Settings for oracle.tip.adapter.jms.IJmsConnectionFactory screen.Settings for oracle.tip.adapter.jms.IJmsConnectionFactory - Messages screen is displayed.
Figure 1-50 Settings for oracle.tip.adapter.jms.IJmsConnectionFactory - Messages
- Go to Weblogic Console, click Deployment, and select JMS Adapter.
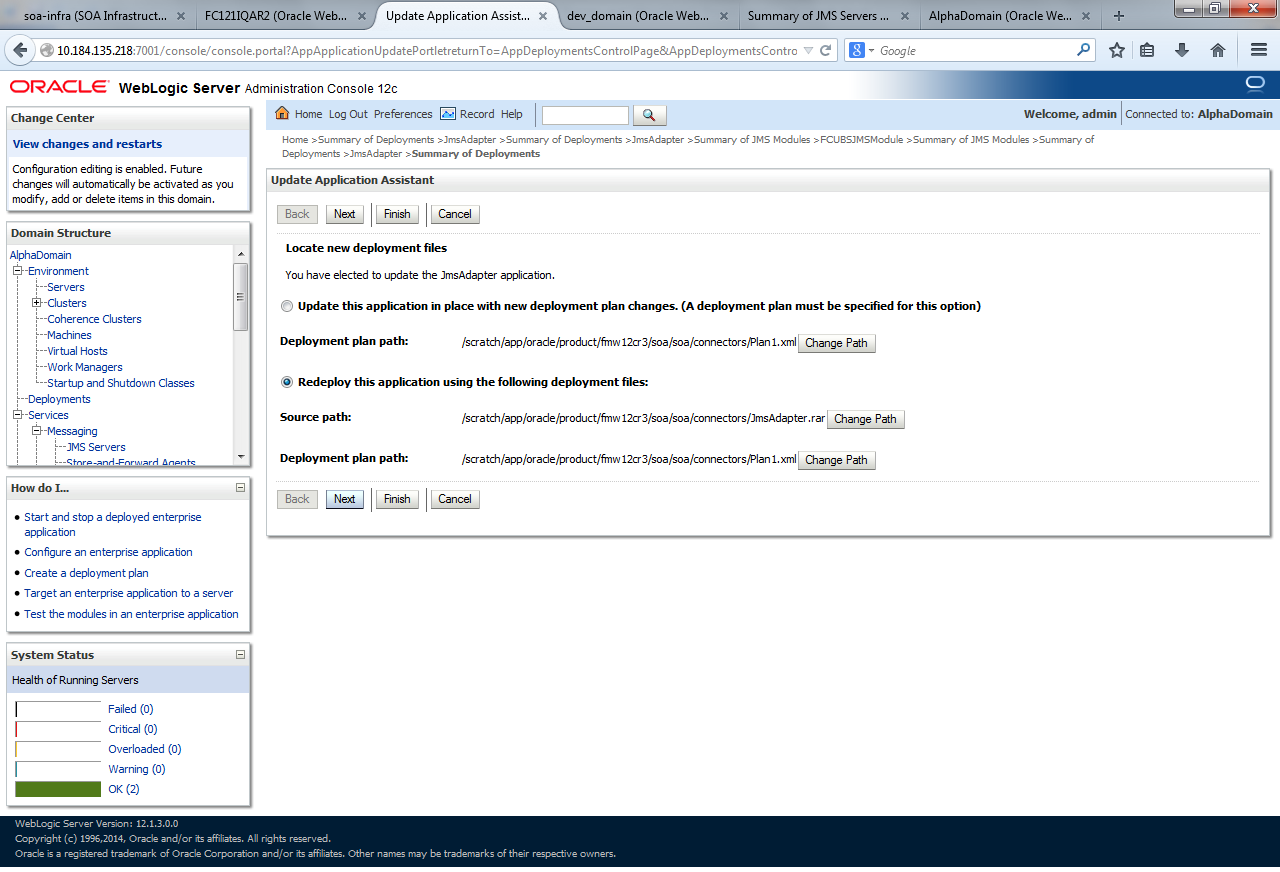
- Click on Update.Update Application Assistant screen is displayed.
- Click on Next and Finish.
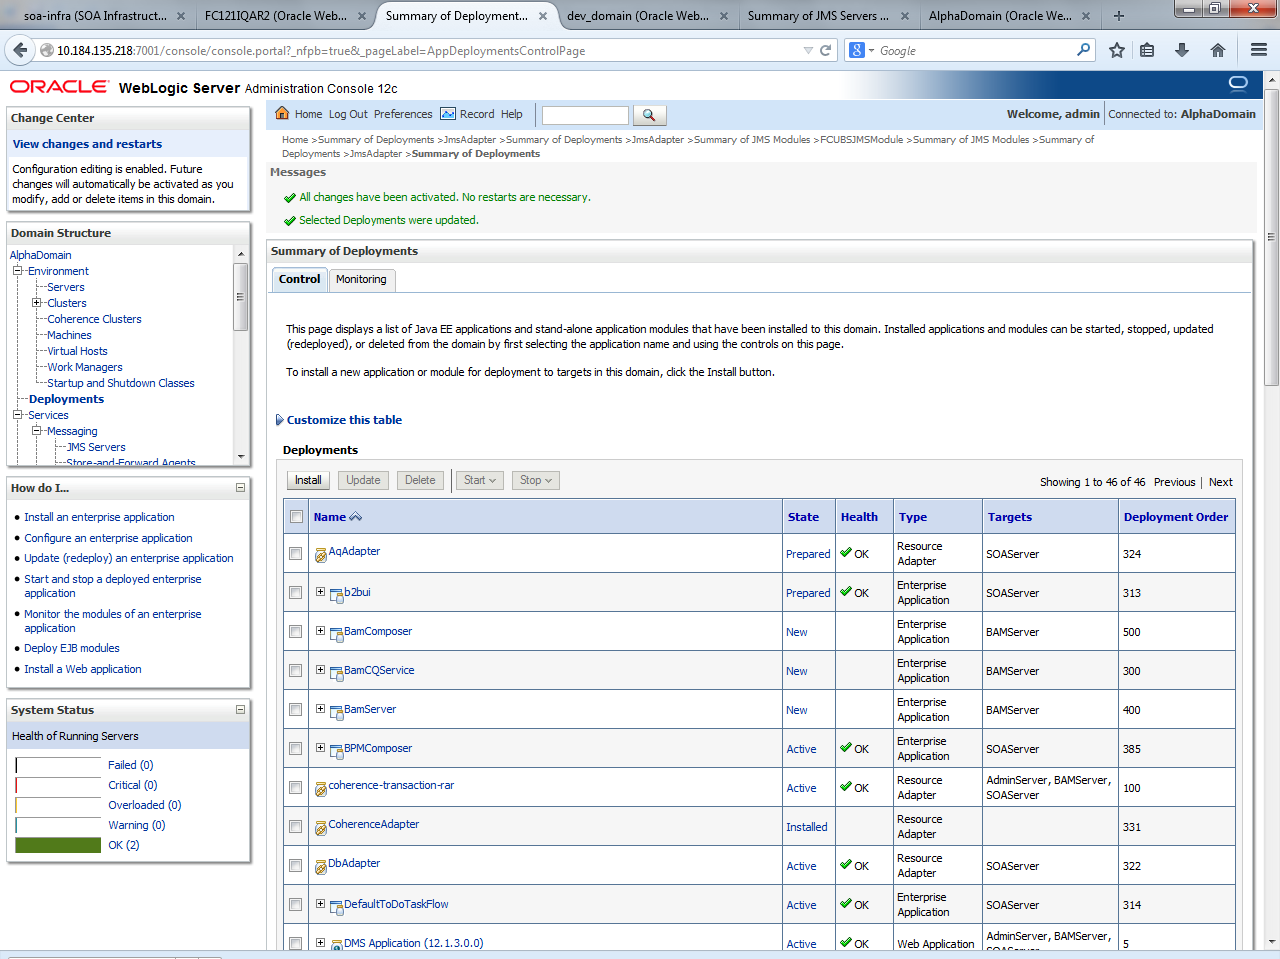
- After the click on Finish, two messages are displayed on the Summary of Deployments screen.Summary of Deployments - Messages screen is displayed.
Figure 1-53 Summary of Deployments - Messages
- Create the Outbound Connection Ppool with the eis/wls/Queue name in the Deployments using Connection Factory jndi/FCUBSConnectionfactory.
Parent topic: Integrating Oracle FLEXCUBE IS and BPEL
