7.6 Create JMS Connection Factory

This topic explains the systematic instructions to create the JMS Connection Factory in the Weblogic application server.

You need to create the connection factory after creating the queues. To create the JMS Connection Factory, follow the steps given below:
  1. Start the Administration Console of WebLogic Application server.
    You can start the Application by opening the Oracle Weblogic Remote Console application post installing the application from the link https://github.com/oracle/weblogic-remote-console/releases.
    The WebLogic Remote Console screen is displayed.
  2. Click Providers and select Add Admin server Connection Provider.
    The user must enter the required URL, username, and password to establish a connection to the Admin Console.
    The Edit Admin Server Connection Provider popup window is displayed.
  3. Click Edit Tree icon after logging into the WebLogic Console.
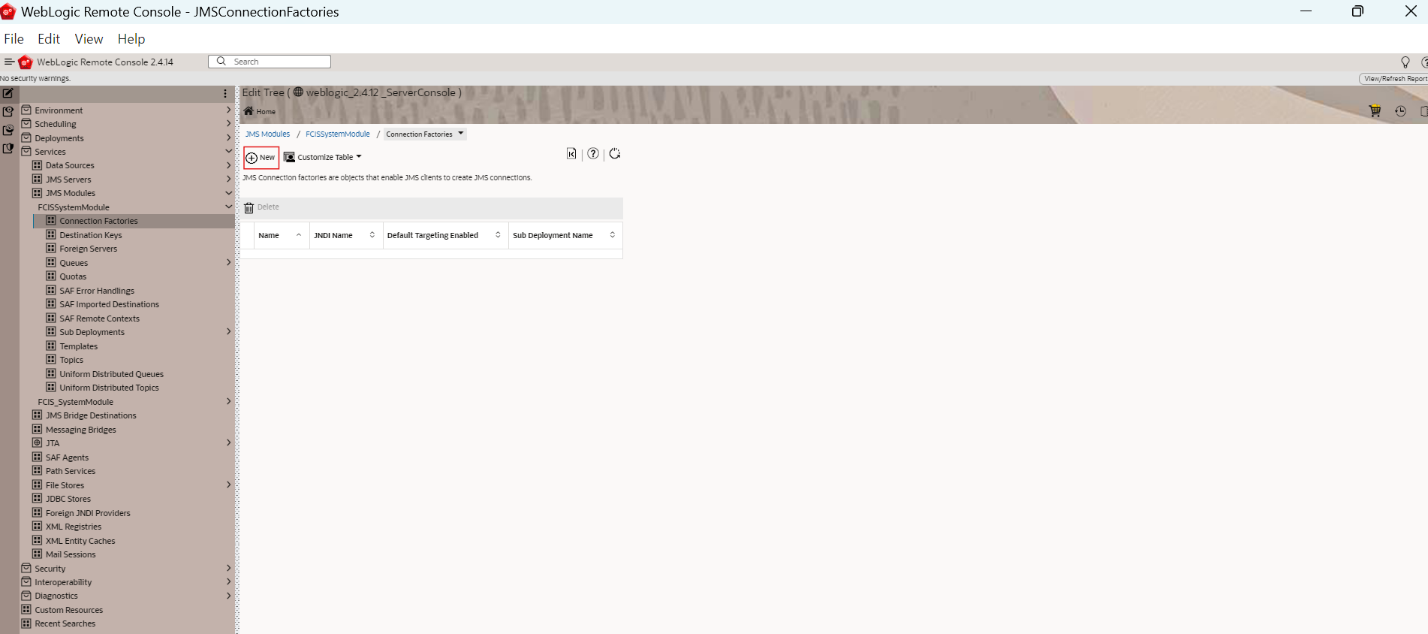
  4. Go to Services and then select JMS Module created earlier.
    The Connection Factory option is displayed.
  5. Click New to create a new Connection Factory.
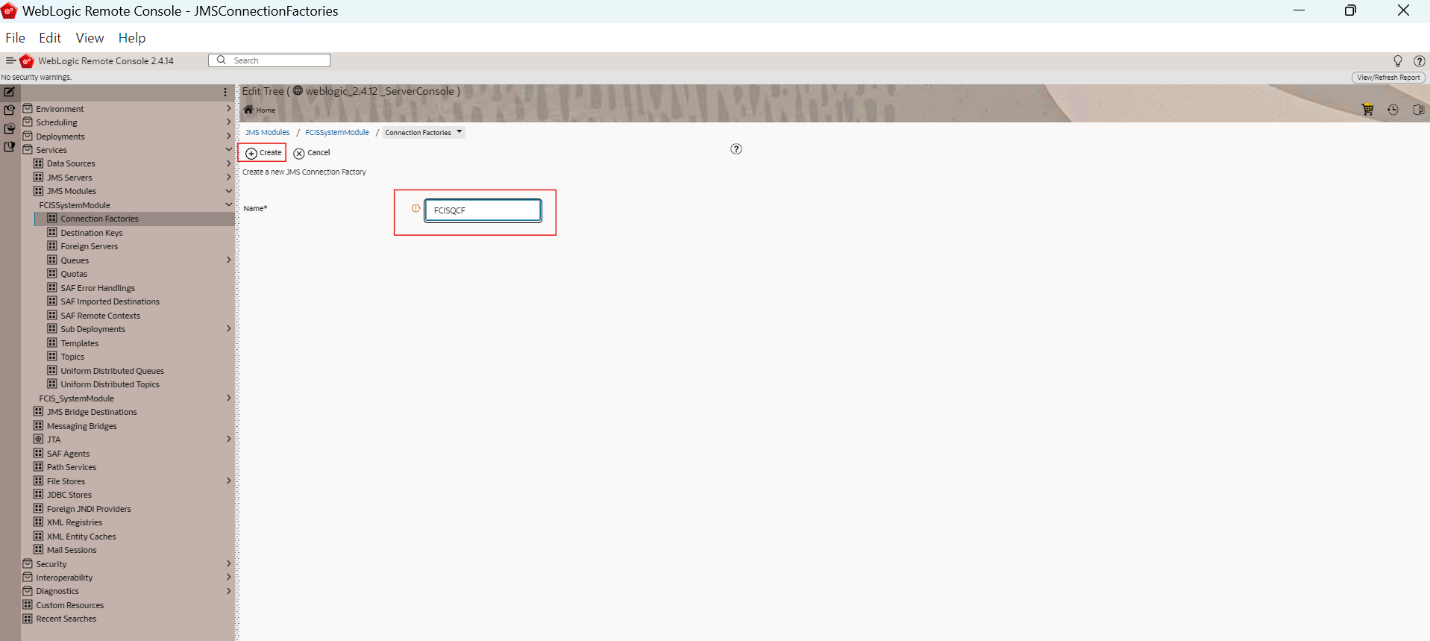
  6. On the Create a new Connection Factory screen, specify the fields.
    For more information on fields, refer to the field description table.

    Table 7-8 Create a new Connection Factory

    Field Description
    Name

    Connection Factory Name

  7. Click Create.
    The following screen is displayed.

    Figure 7-50 Create a new Connection Factory


  8. Specify the JNDI Name as FCISQCF. Click Save.
  9. Click the Transaction Tab. Select the XA Connection Factory Enabled.
    The following screen is displayed.

    Figure 7-51 Connection Factories_Transaction Tab


  10. On the General tab, select the Sub Deployment Name as FCIS.

    Figure 7-52 Connection Factories_General Tab


  11. Click the Cart icon to view, commit or discard the changes and select Commit Changes to apply the changes.
    The Changes were successfully committed is displayed on committing the changes.
  12. You can view the new Connection Factory created in the Connection Factory screen.
    The new Connection Factory created is displayed.

    Figure 7-54 New Connection Factory created