2.7 List Of Values
This topic provides systematic instructions to define LOVs.
- To add LOV, right-click the List Of
Values node and select Add option from
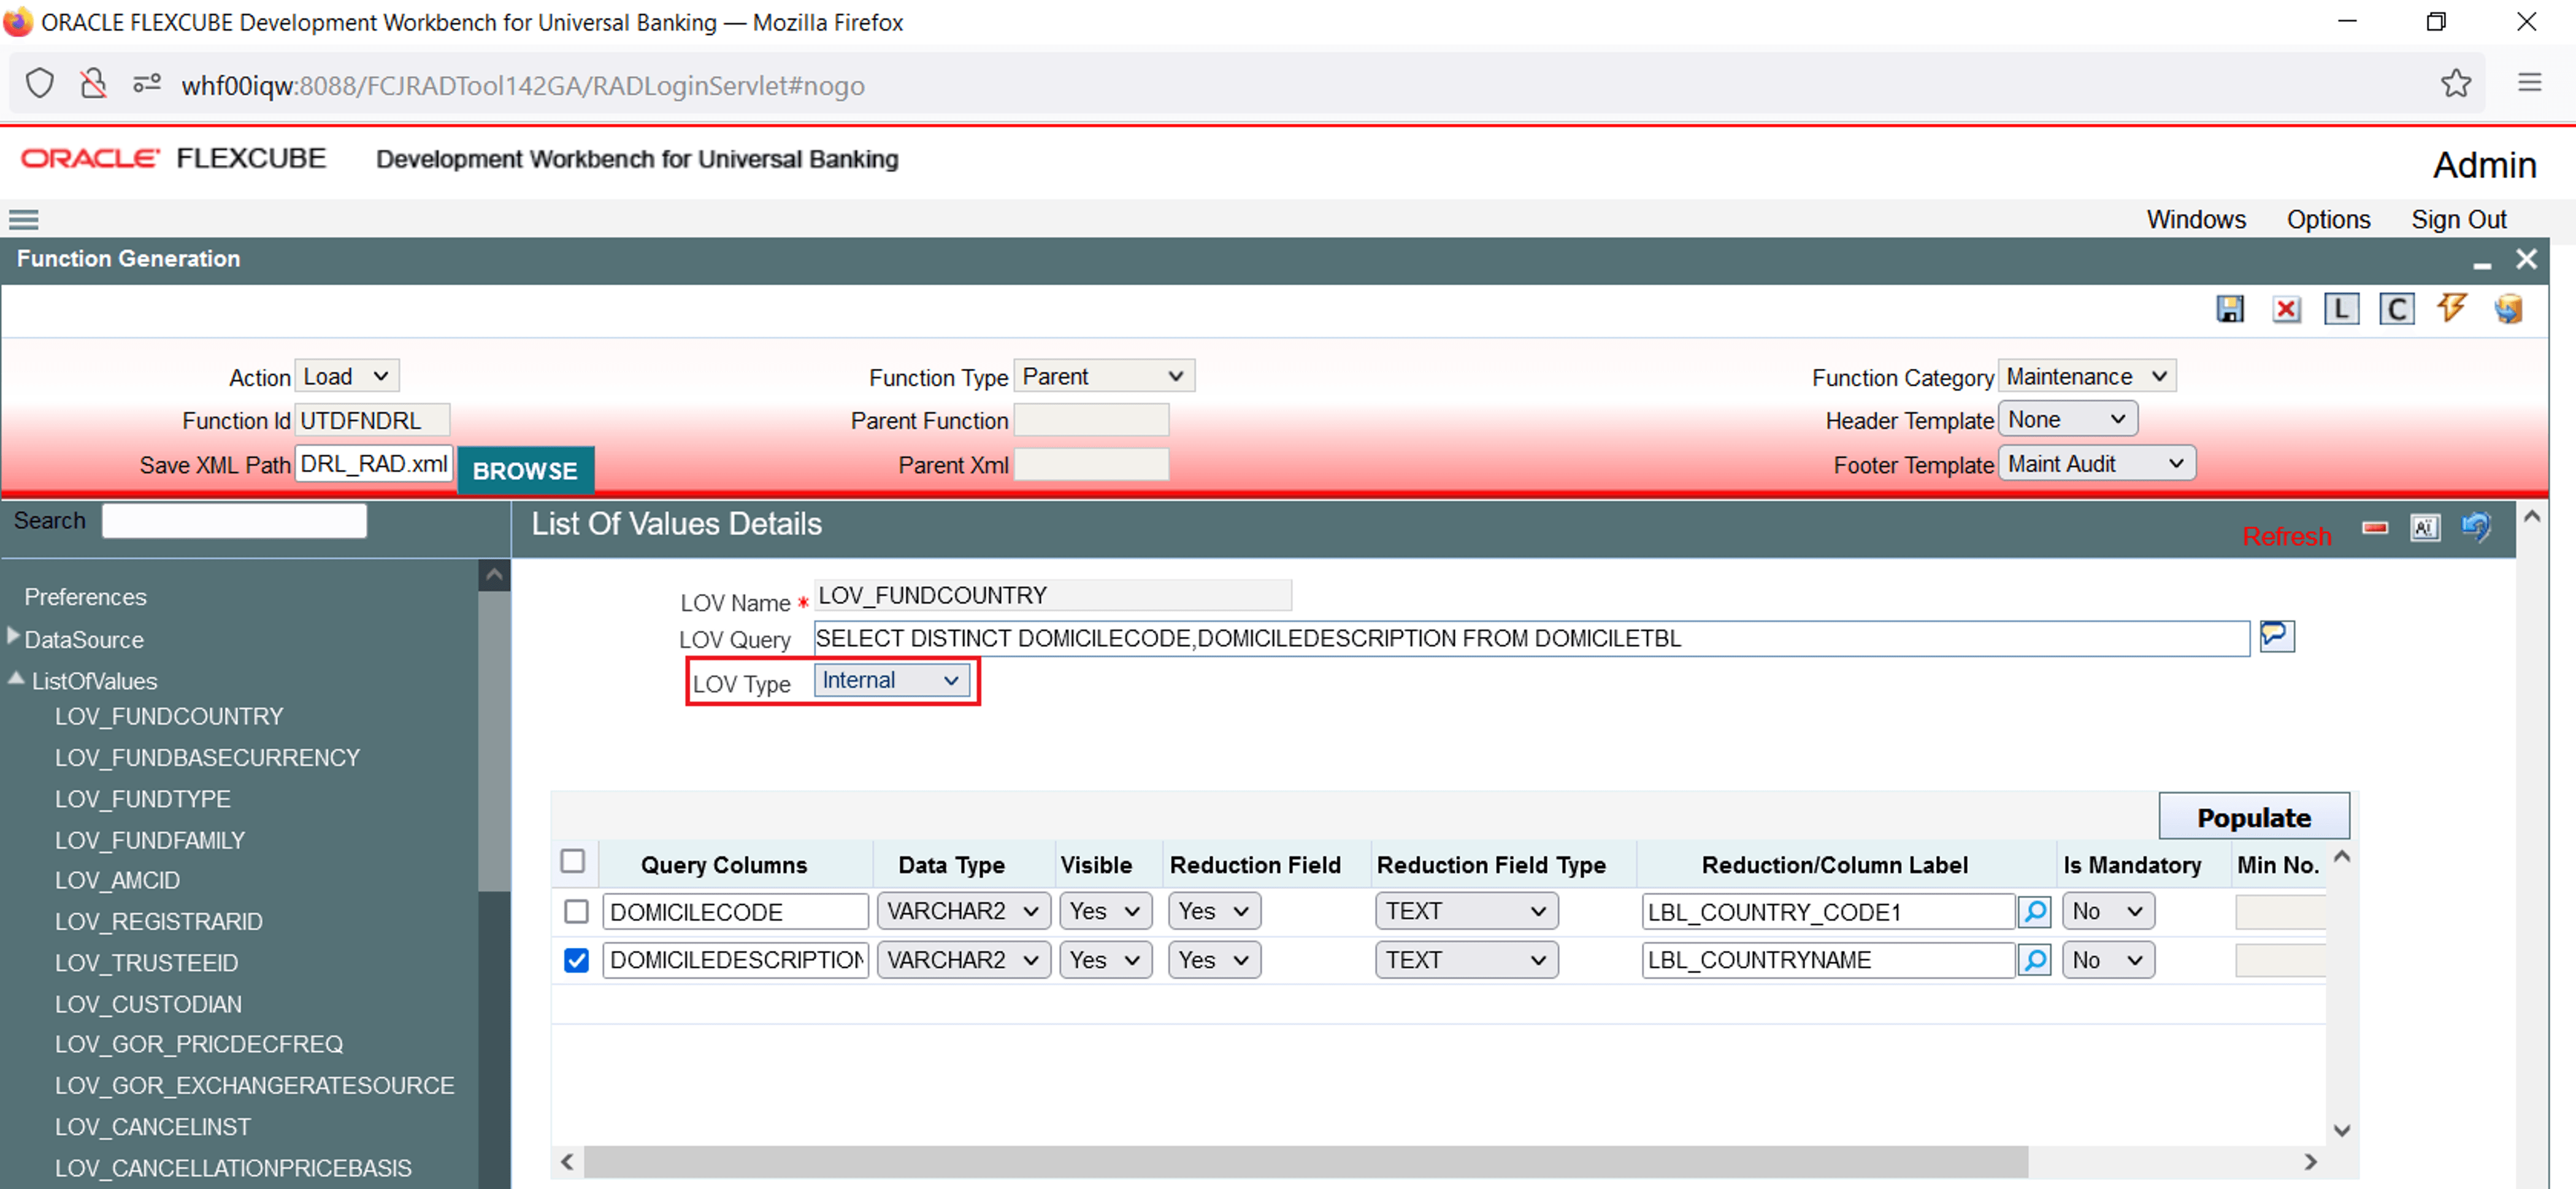
the right-click menu.List Of values can be defined for the function id using LOV nodeLOV window displays.
- Specify the LOV Name field and then click
Ok button.LOV name should start with LOV_<name>.For Example: LOV_COUNTRYThe List Of Values Details screen displays.
- Specify the fields in the List Of Values Details screen.
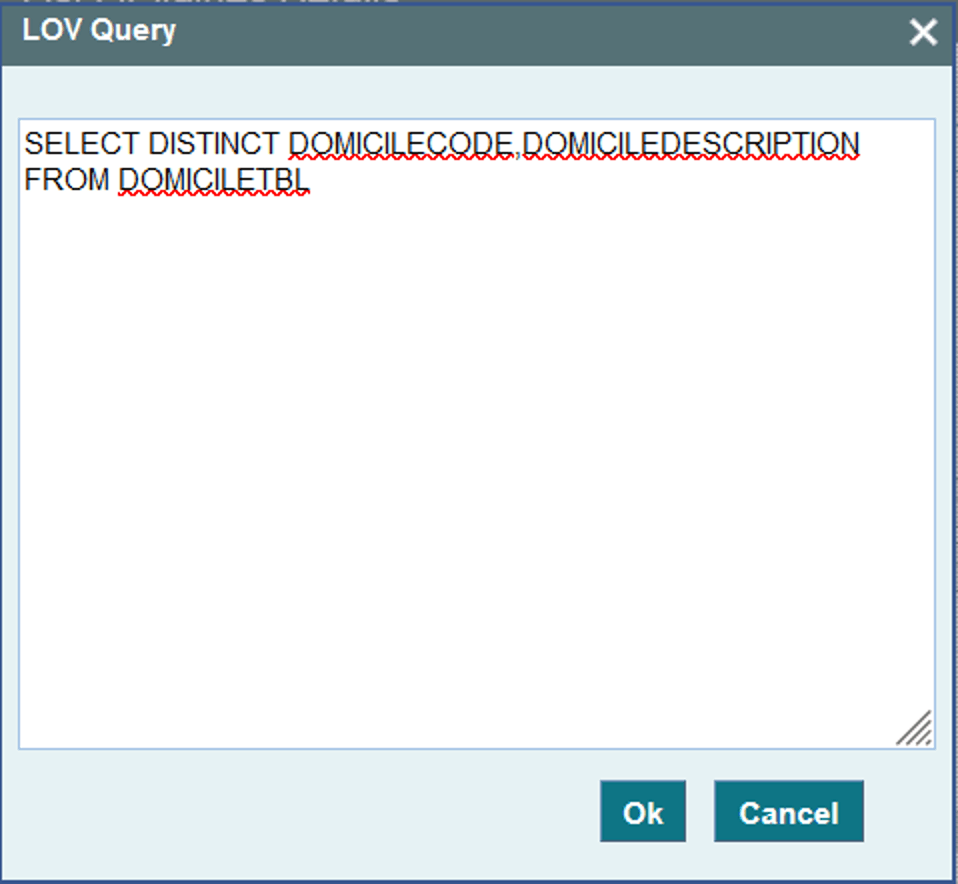
- Enter a valid query and click the Populate button.The LOV Query window displays.
- Click the OK button.
Note:
Reduction/Column Label are mandatory. If the user won’t provide Reduction/Column Label field, an error displays on click of the LOV button after deployment in FLEXCUBE. - After defining LOV, go to block and the corresponding field where the LOV has to be attached.
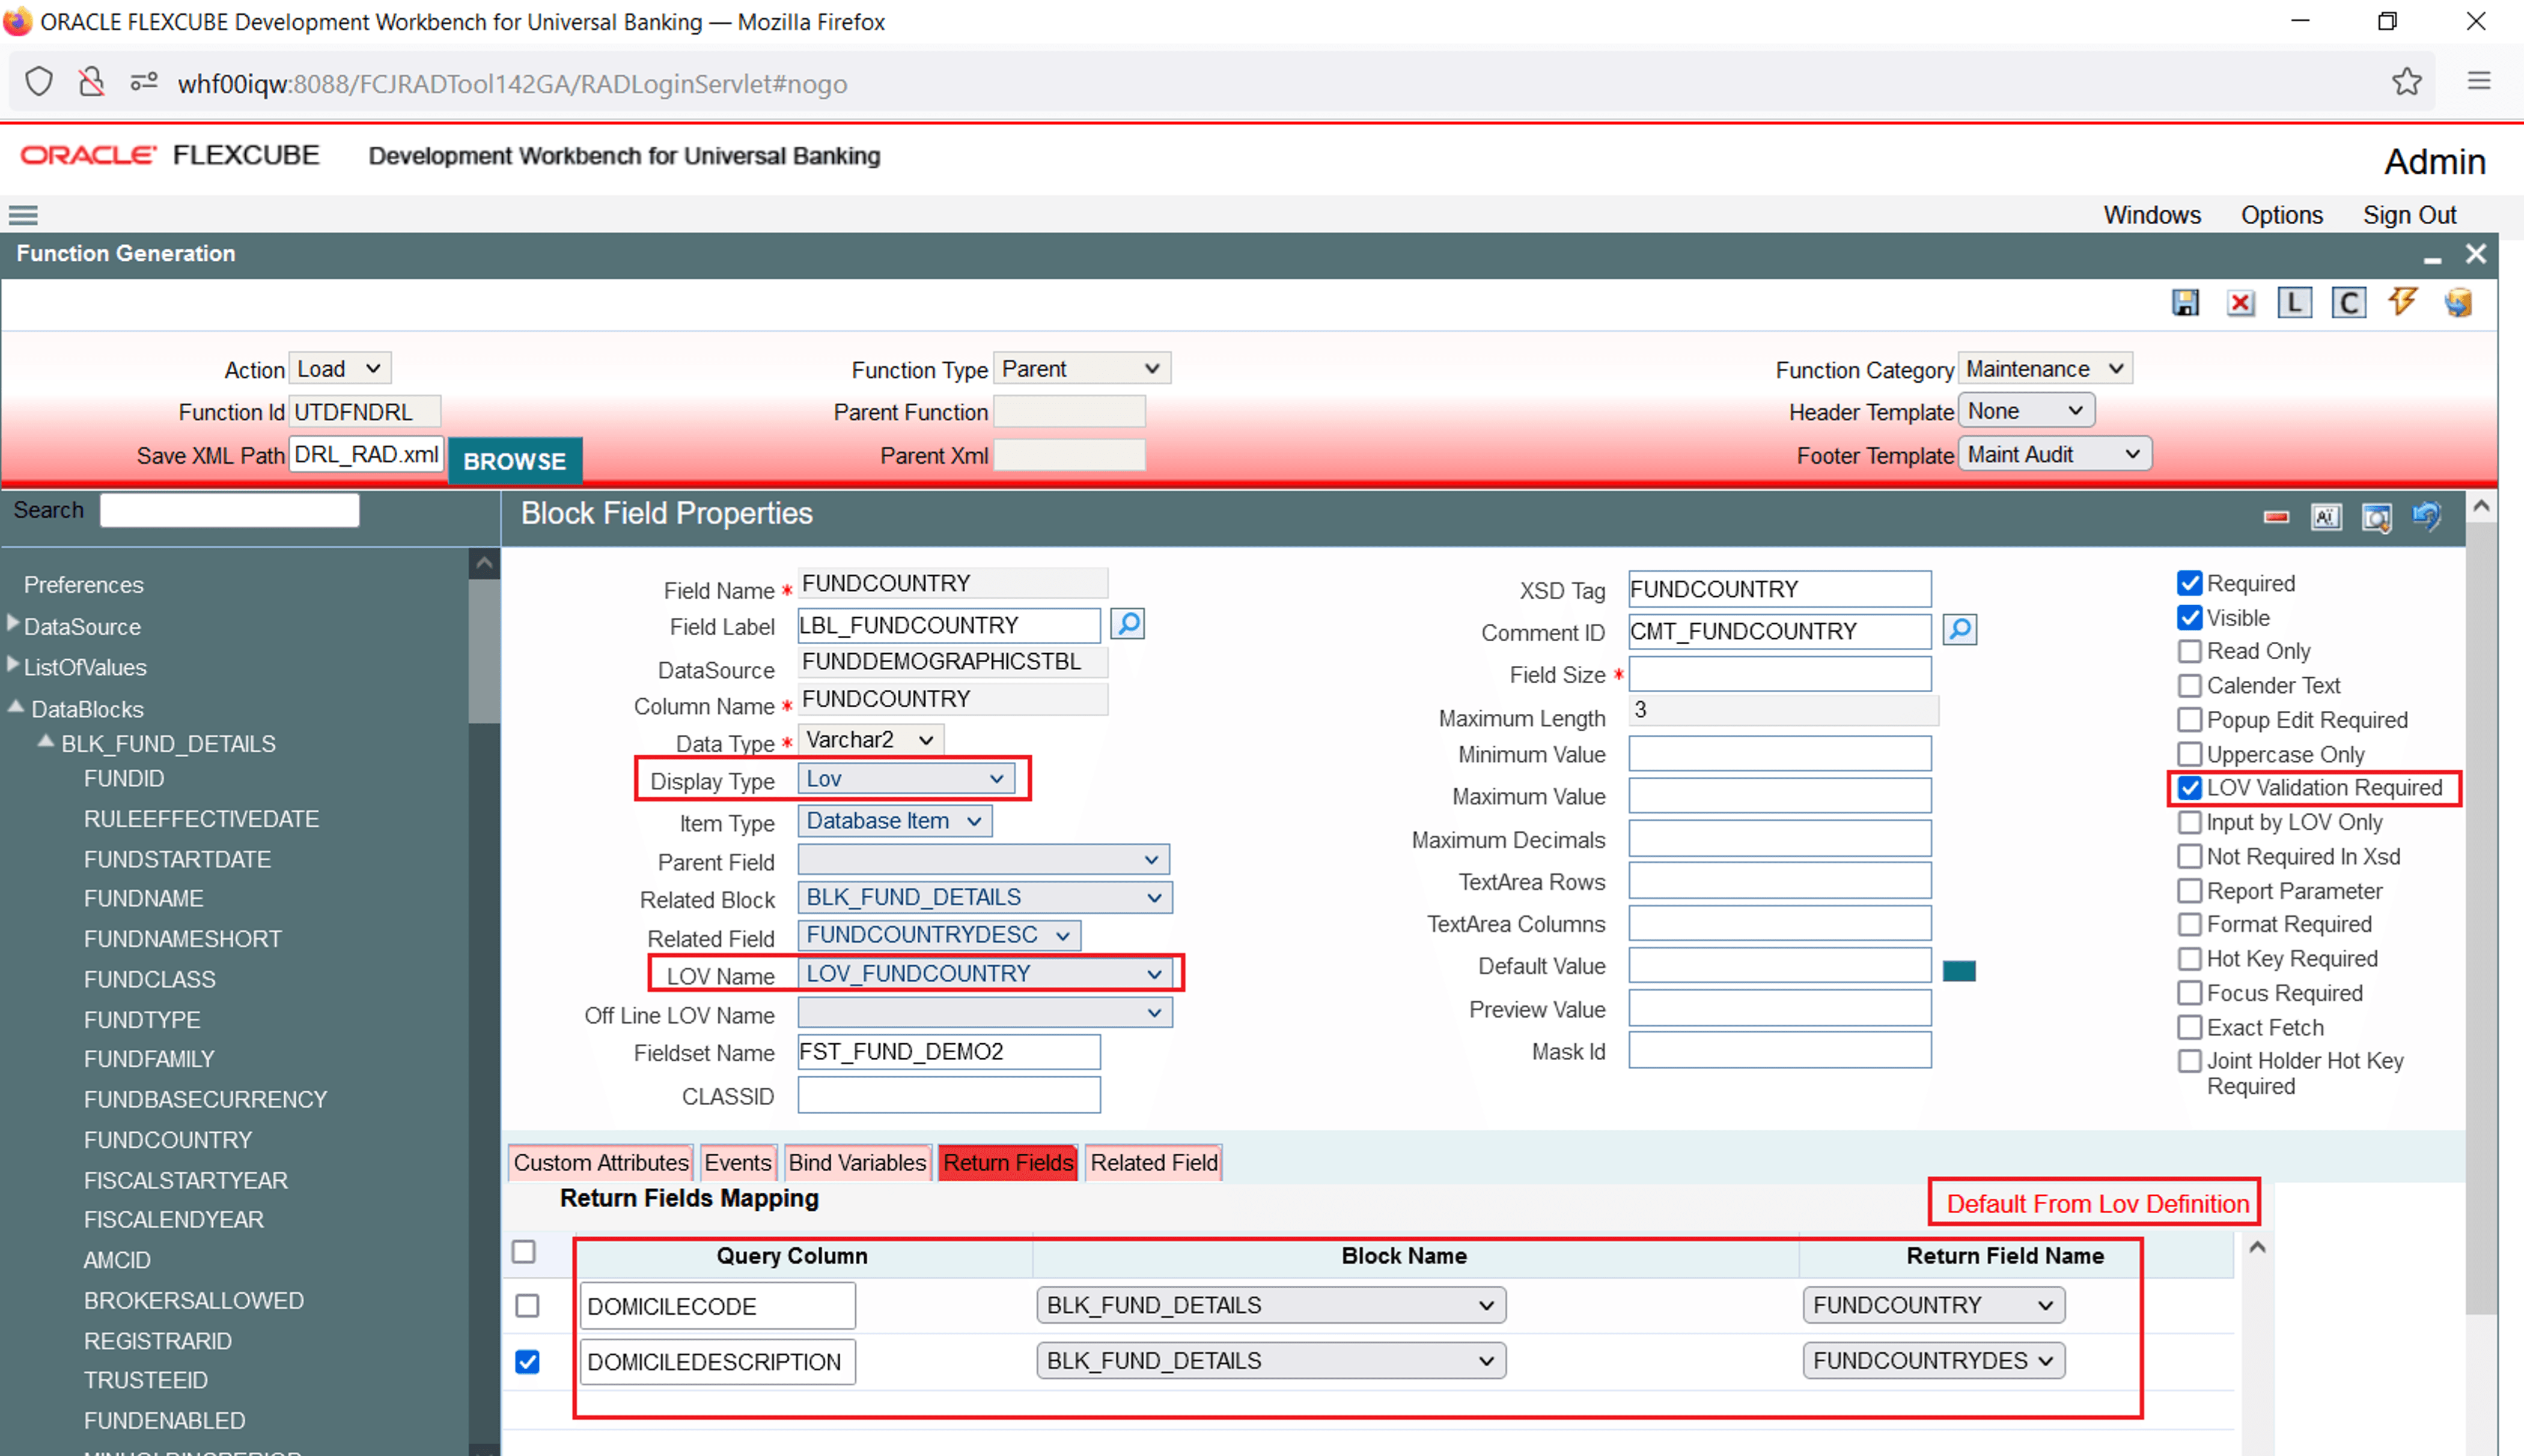
- For Block Field Properties to attach LOV to the field, follow the steps as
follows:
- Select Display Type as LOV.
- Select the required LOV Name from the list of all defined LOV’s.
- Click the Return Fields tab.Return Fields Mapping tab opens.
- Click on Default from Lov Definition
button.The result fields maintained in the LOV query gets populated.
- Select the desired field (and its block) to which the result of the LOV
query should have defaulted.If the return field is not required to have defaulted to any field in the screen, the return field value can be left blank.
Figure 2-28 Attaching LOV to a block Field
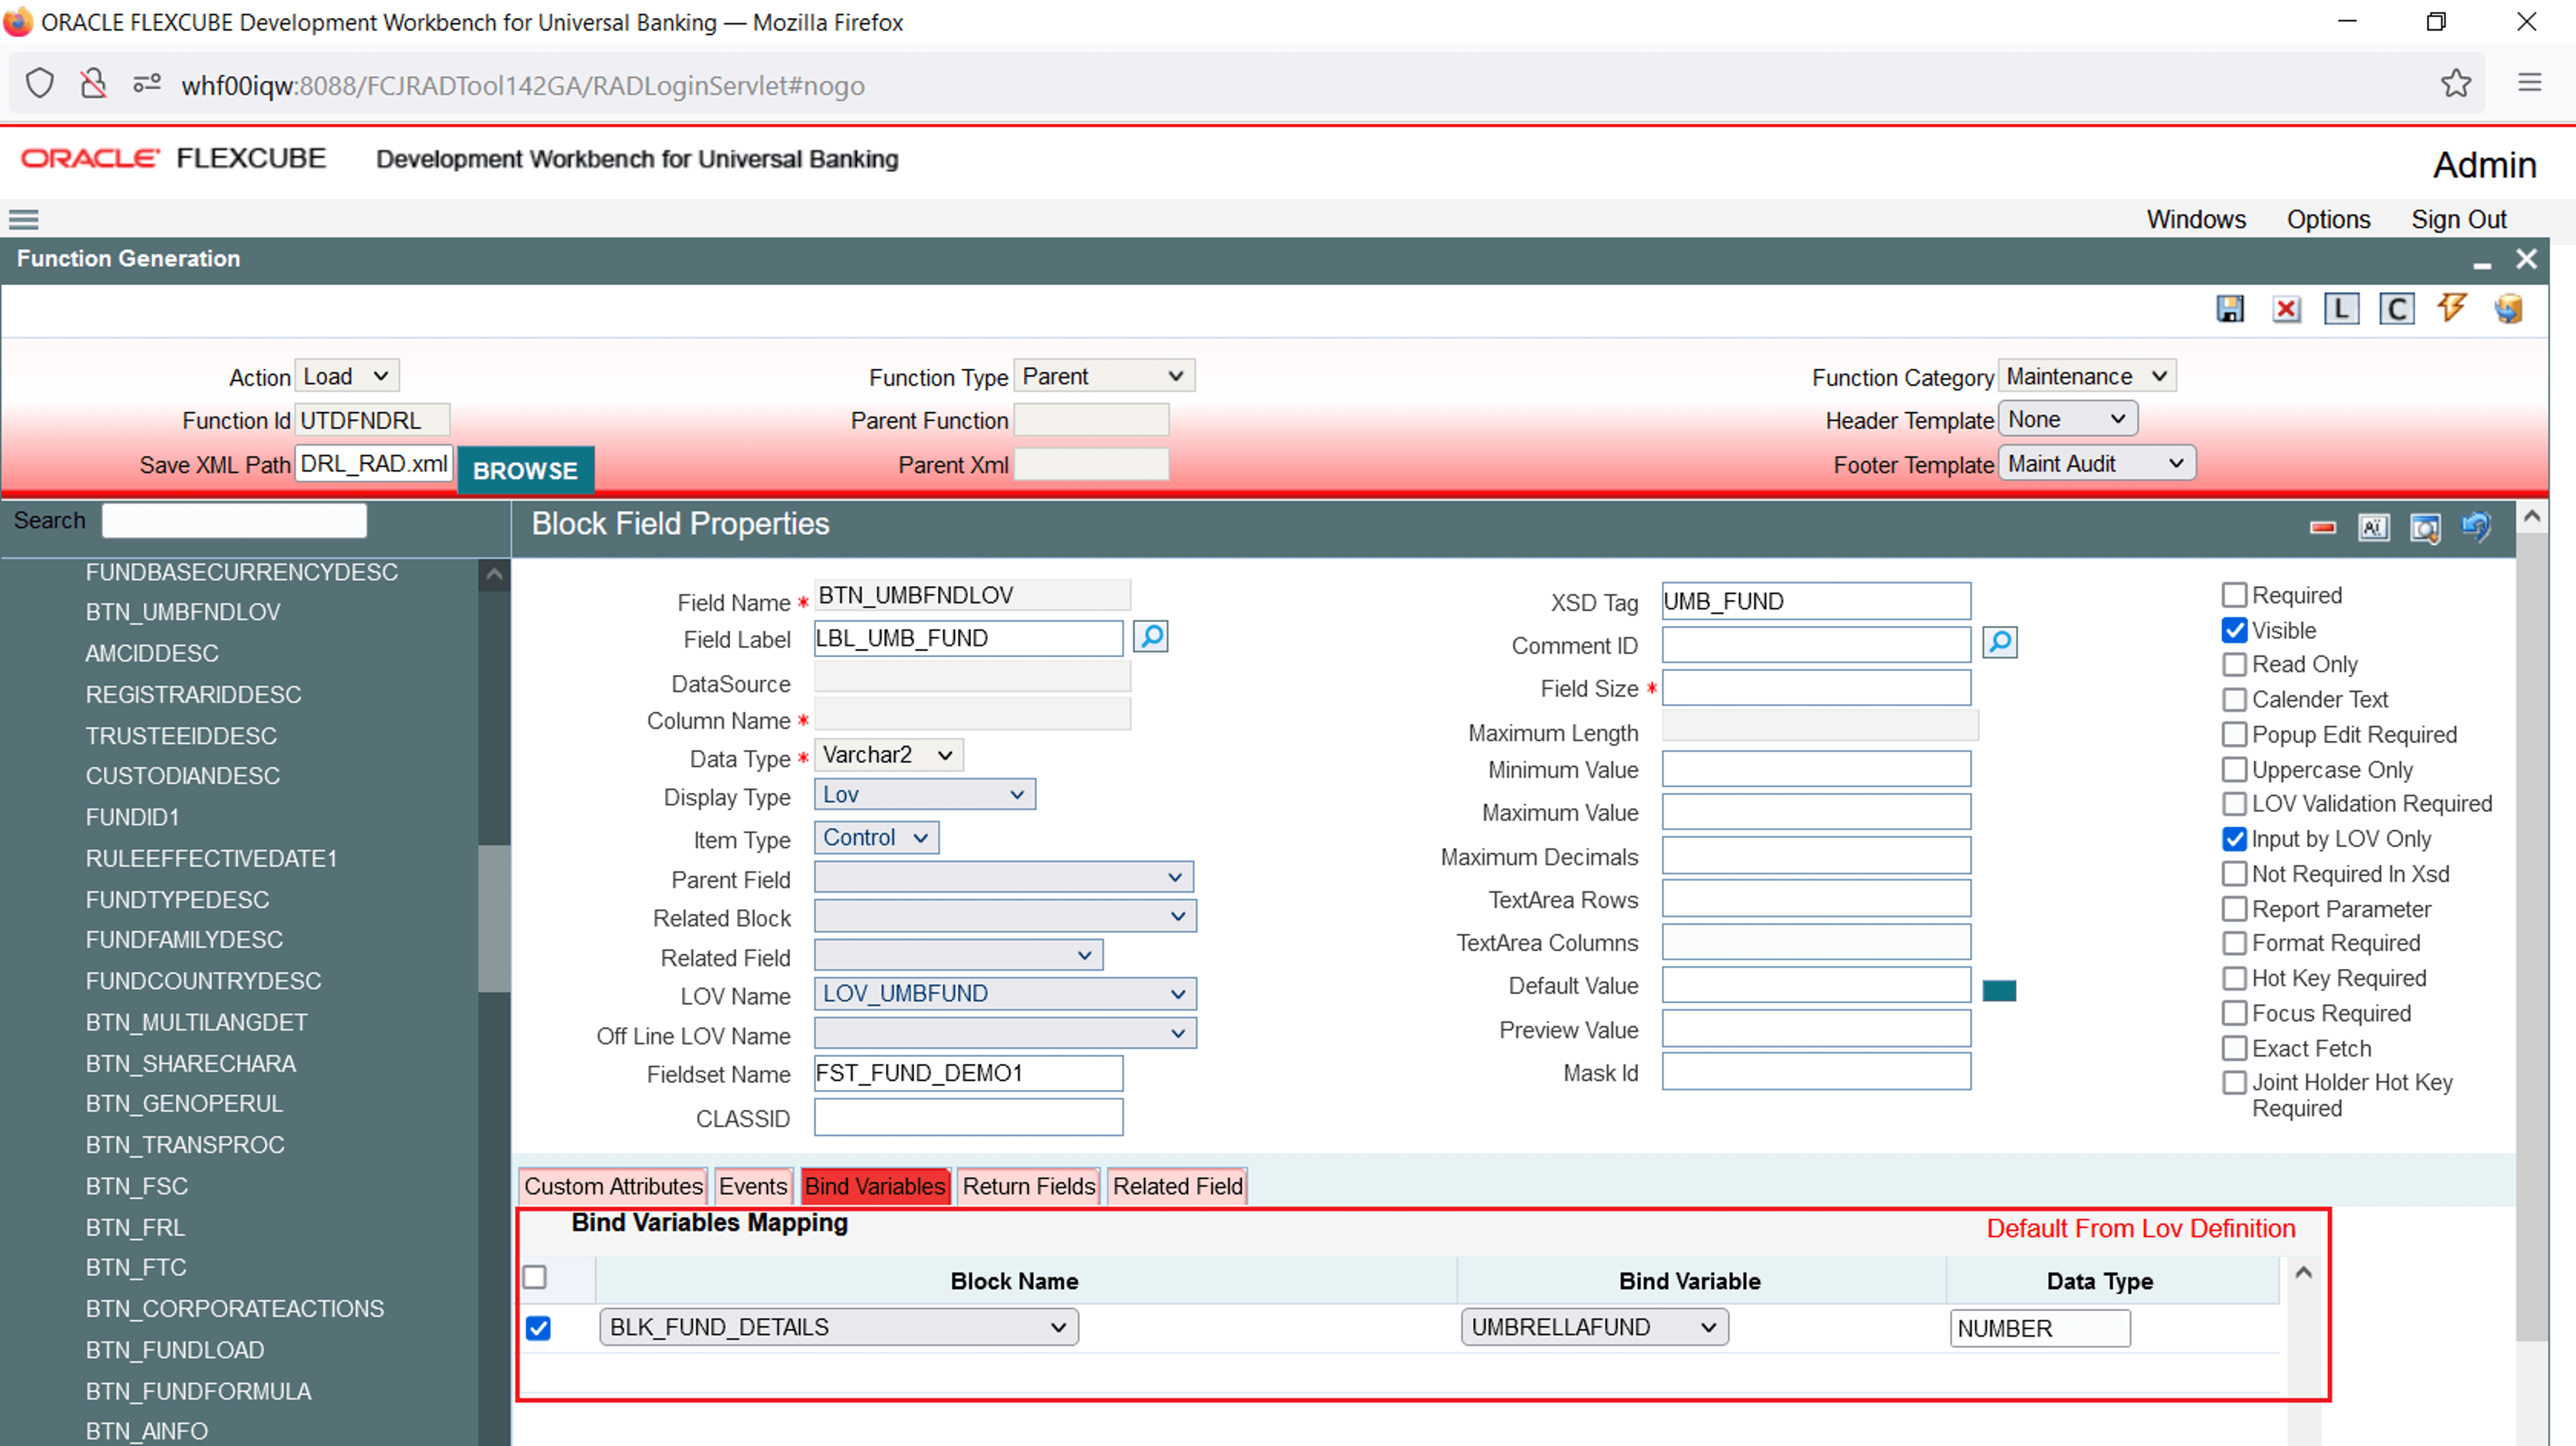
Use of Bind Variable: If the list of values should be based on any other field value from the screen, bind variables can be used.For Example: Define Lov as shown in below query; where clause should contain condition with ?.SELECT cust_ac_no, branch_code, ccy from sttms_cust_account where cust_no = ? and record_stat = 'O' and once_auth = 'Y' and ac_stat_de_post = 'Y' - In the block field, after selecting Return
Fields, click the Bind Variables
tab.Bind Variables Mapping tab opens.
- Click the Default From Lov Definition
button.New rows will be created depending on the number of bind variables provided in the LOV query.
- Select the bind filed in the screen (and its block ) for the LOV.
- Select the Data Type of the field.The Block Field Properties_Bind Variables Mapping screen displays.
Figure 2-29 Defining bind variable for the LOV
Parent topic: Screen Development


