2 Domain Creation and Cluster Configuration

This topic provides the information about the domain creation instructions, cluster configuration, and post domain creation configurations.

2.1 Create Domain and Cluster Configuration

This topic provides the systematic instructions to create domain and cluster configuration.

Note:

Names need not to be same as provided in the screenshot.
  1. Open /oracle_common/common/bin and run config.cmd (or .sh if operating system is linux).
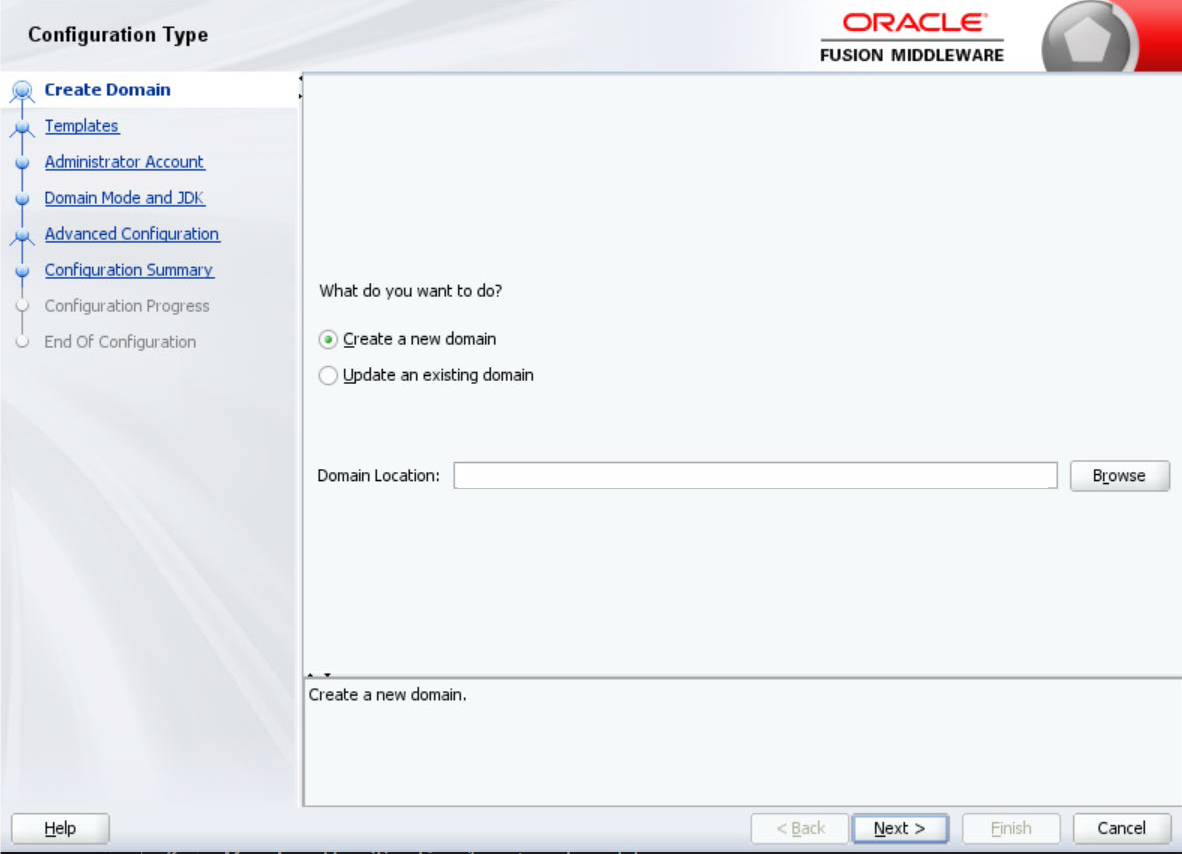
  2. Create domain with required cluster and server configurations. Refer to the screenshots below.
  3. Select Create a new domain and specify the domain name. For example, platoinfra_domain.
    The Create Domain screen displays.
  4. Click Next.
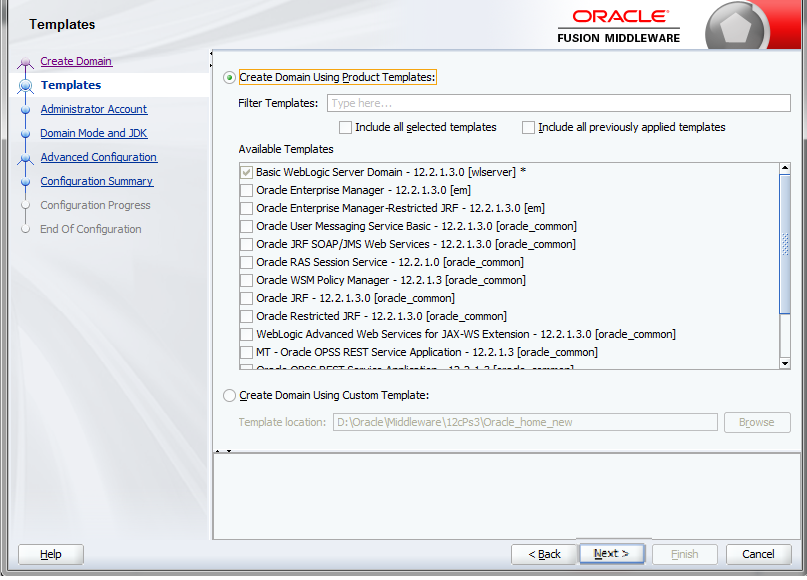
    The Templates screen displays.
  5. Click Next to create simple domain with default templates.
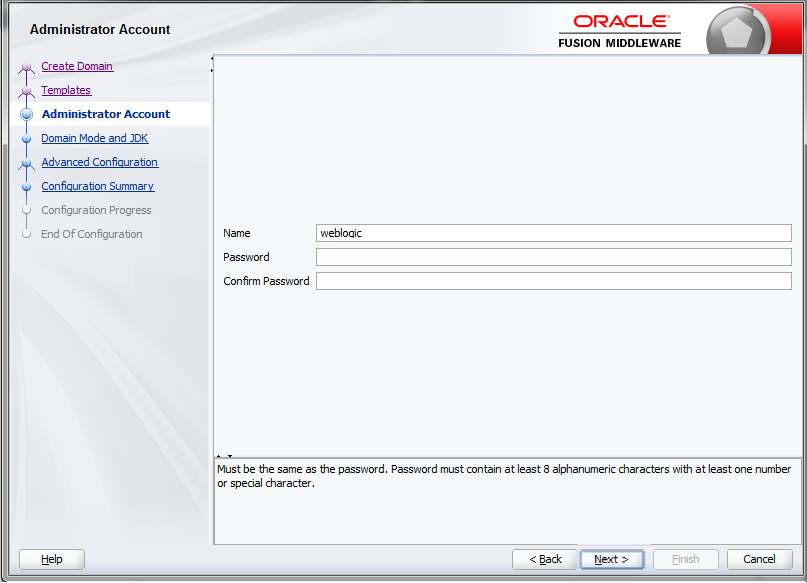
    The Administrator Account screen displays.

    Figure 2-3 Administrator Account


  6. Fill the fields Password and Confirm Password to set the password, and click Next to proceed.
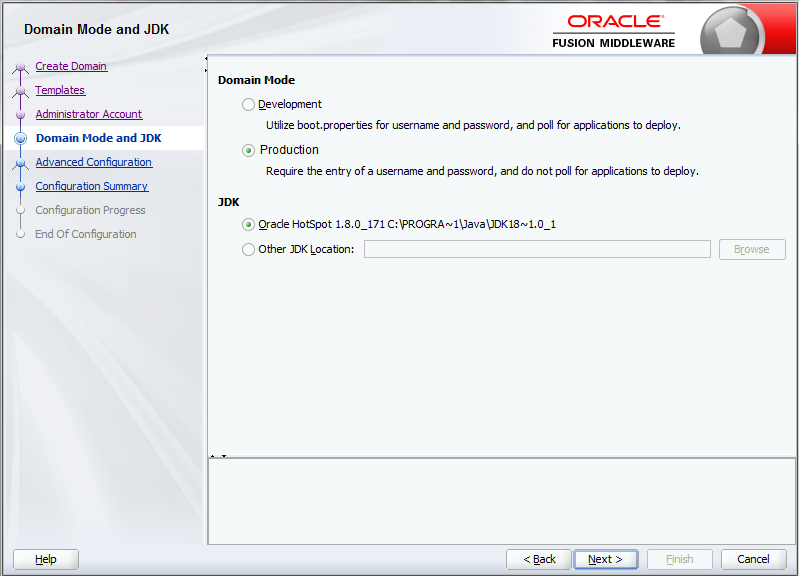
    The Domain Mode and JDK screen displays.
  7. Select Domain Mode as Production.
  8. Select JDK, and click Next.
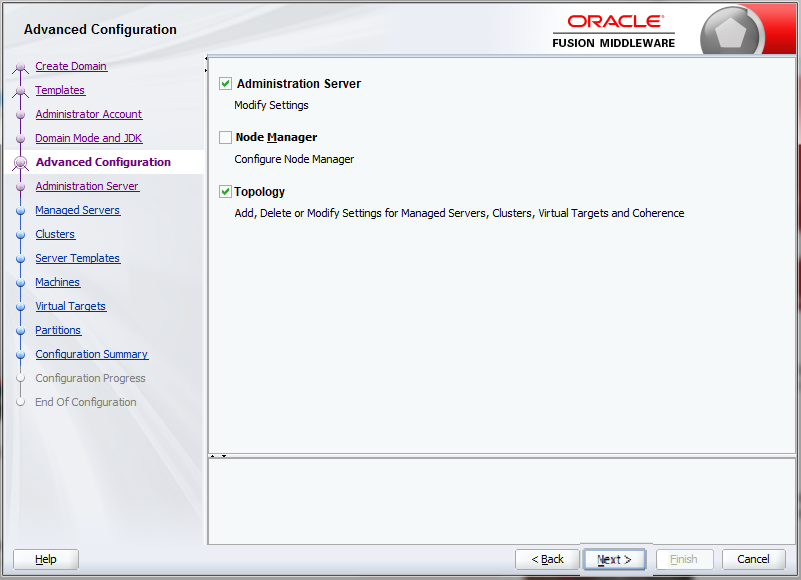
    The Advanced Configuration screen displays.

    Figure 2-5 Advanced Configuration


  9. Select Administration Server and Topology, and click Next.
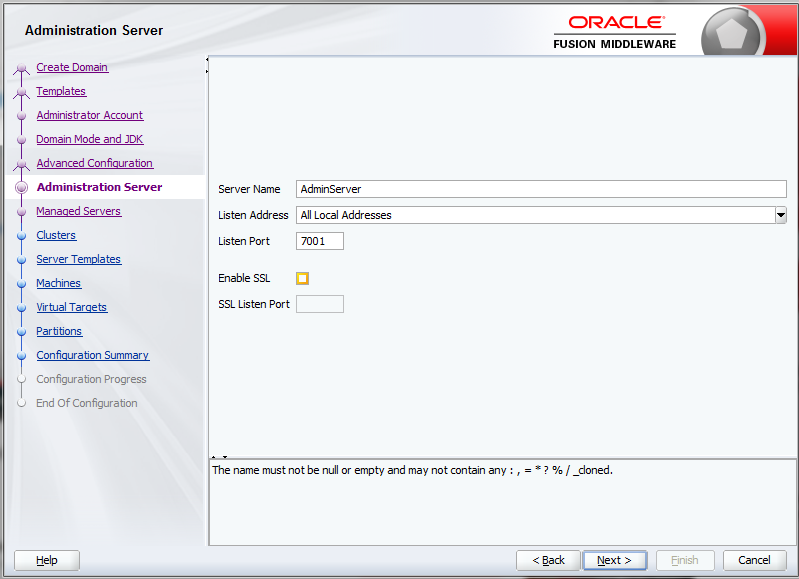
    The Administration Server screen displays.

    Figure 2-6 Administration Server


  10. Edit the fields Listen Port and host configurations as required, and click Next.
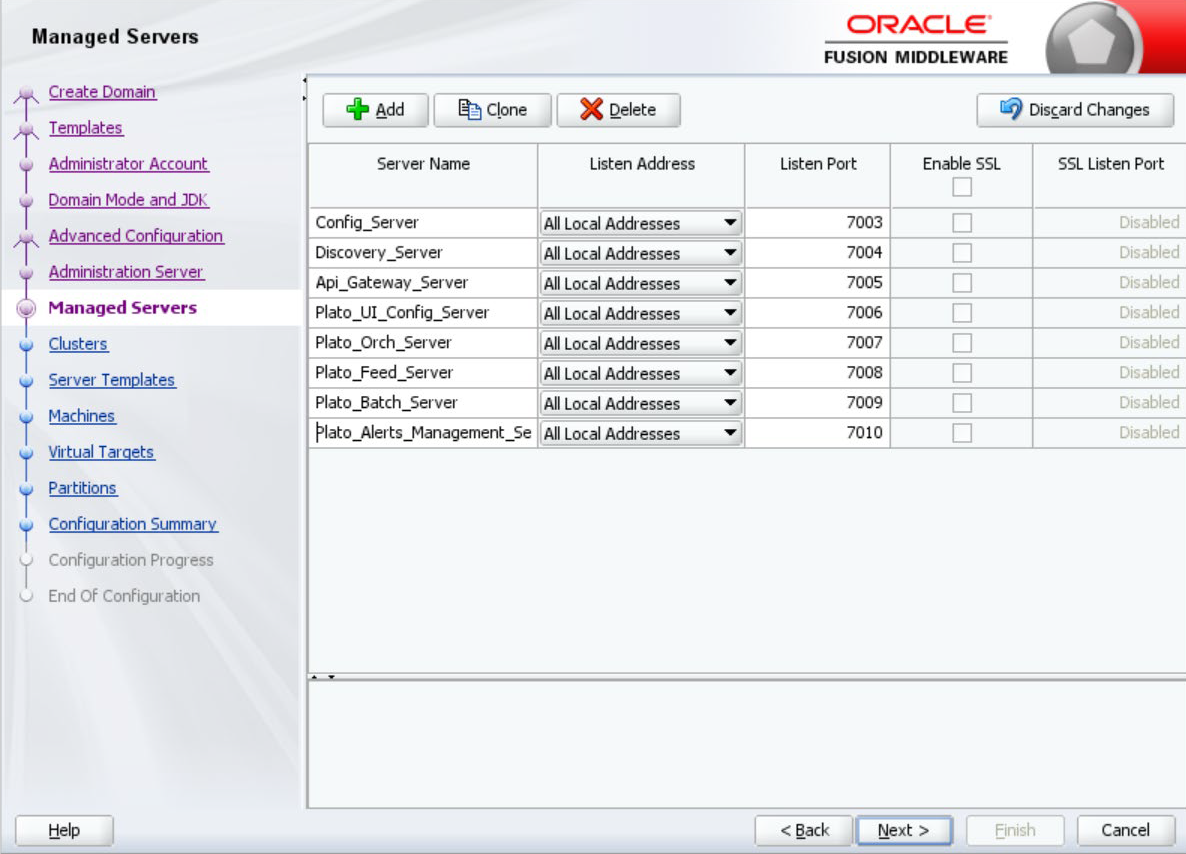
    The Managed Servers screen displays.
  11. Click Add to add managed servers and edit the fields as required.
    1. Specify the name in Server Name filed.
    2. Edit the address in Listen Address filed.
    3. Edit the port in Listen Port filed.
  12. Click Next.
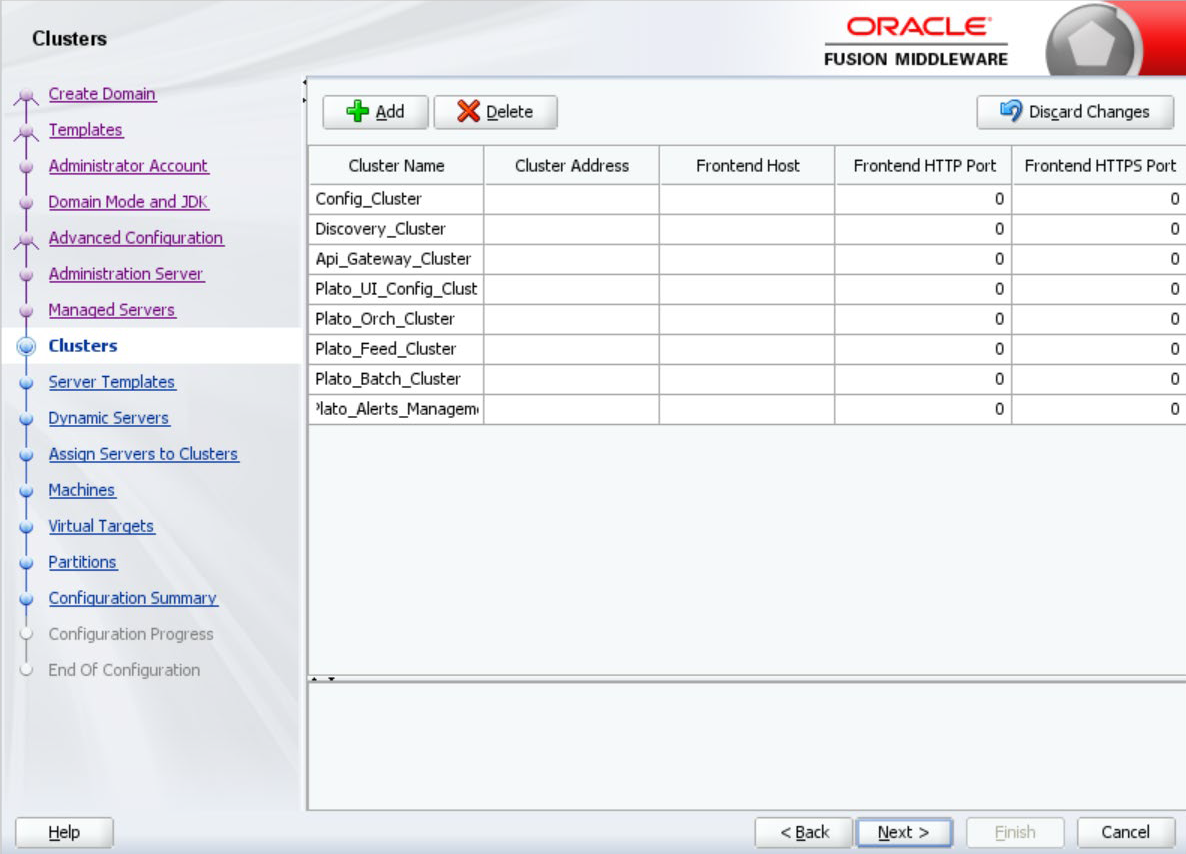
    The Cluster screen displays.
  13. Click Add to add clusters one for each Managed Servers, and click Next.
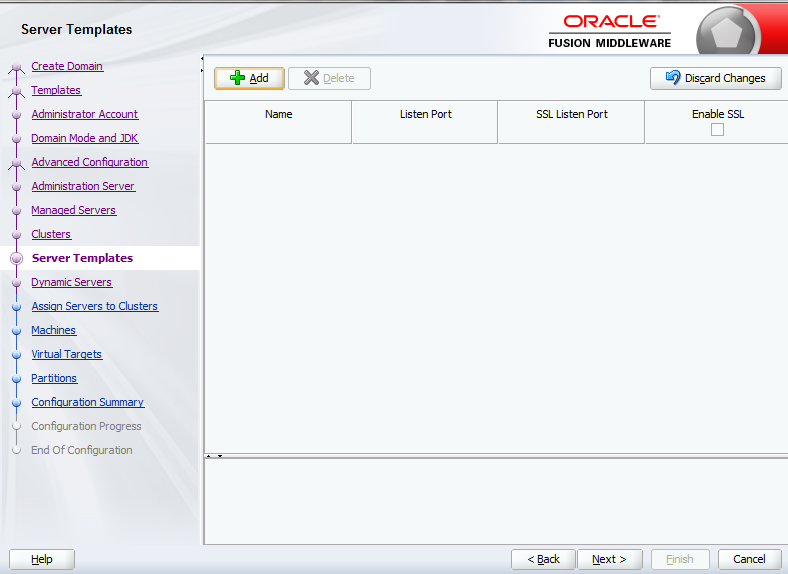
    The Server Template screen displays.
  14. Skip the Server Templates and Dynamic Servers, and click Next.
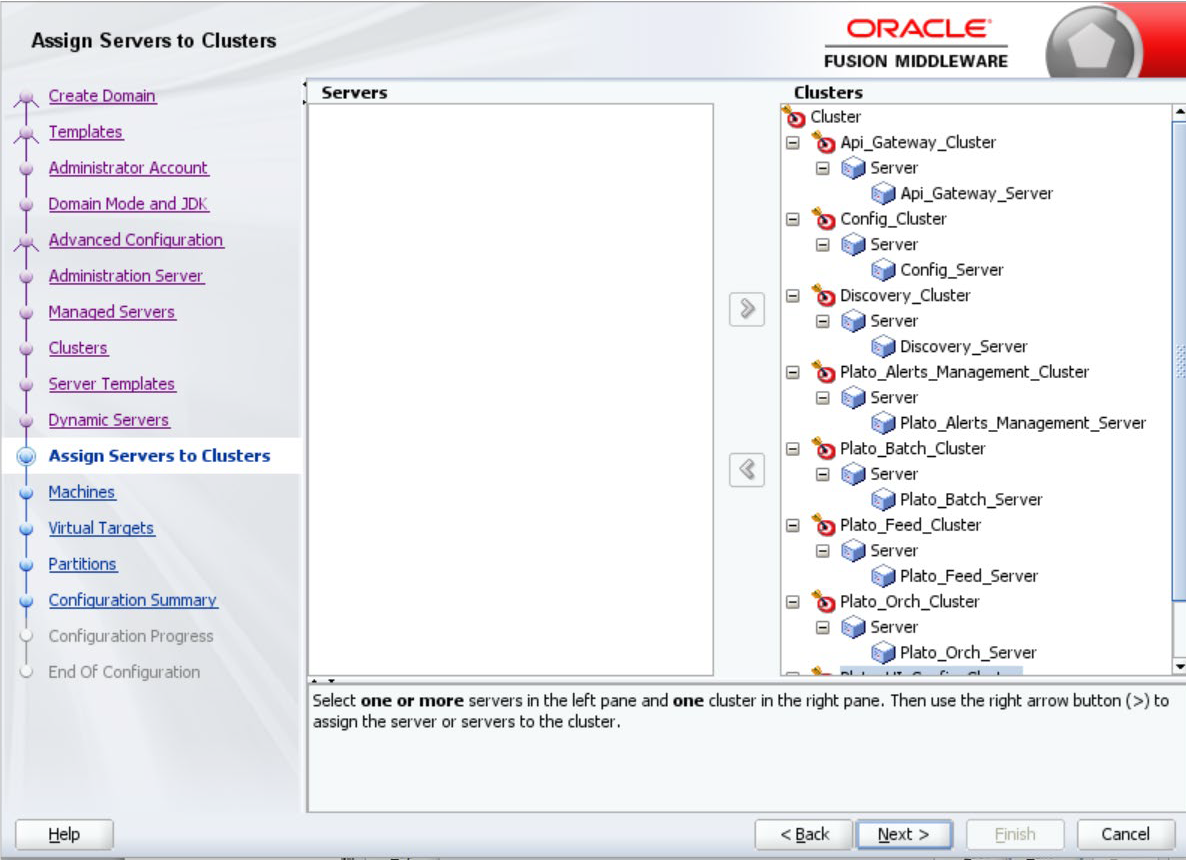
    The Assign Servers to Clusters screen displays.

    Figure 2-10 Assign Servers to Clusters


  15. Assign clusters with servers, and click Next.
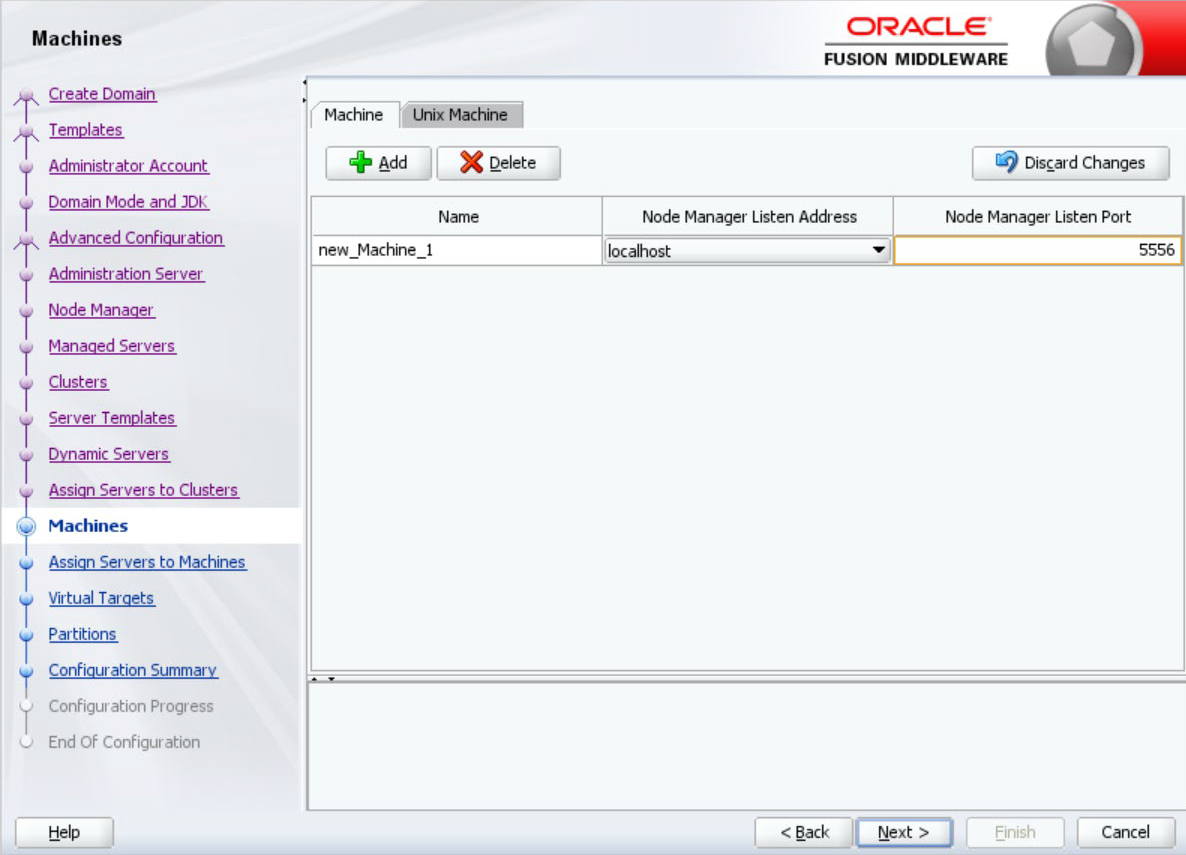
    The Machines screen displays.
  16. Click Add to add Machine or Unix Machine based on the operating system and configure Name, Node Manager Listen Address, and Node Manager Listen Port as required.
  17. Click Next.
    The Assign Servers to Machines screen displays.

    Figure 2-12 Assign Servers to Machines


  18. Map all the managed servers under the machine created, and click Next.
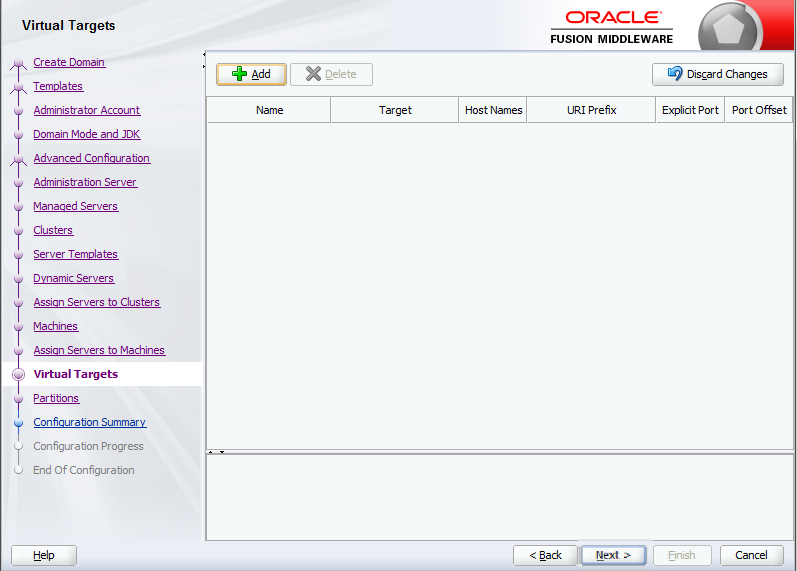
    The Virtual Targets screen displays.
  19. Skip or configure Virtual Targets, and click Next.
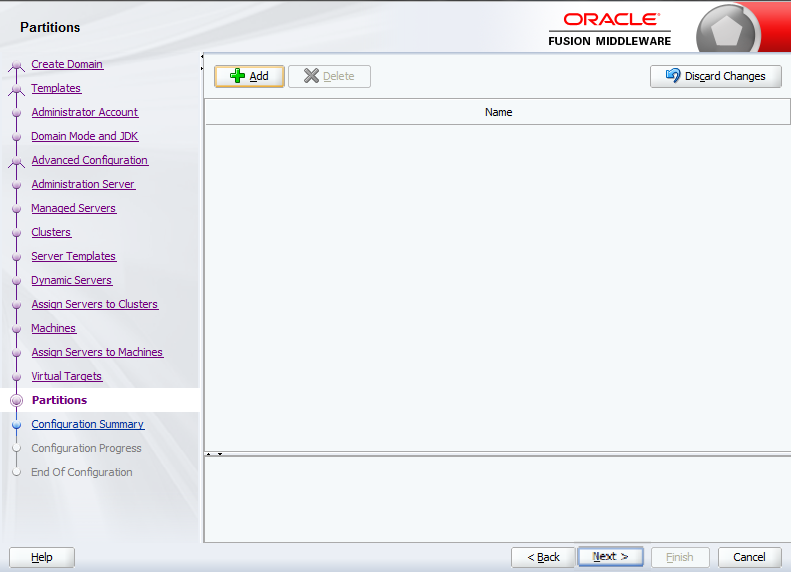
    The Partitions screen displays.
  20. Skip or configure Partitions, and click Next.
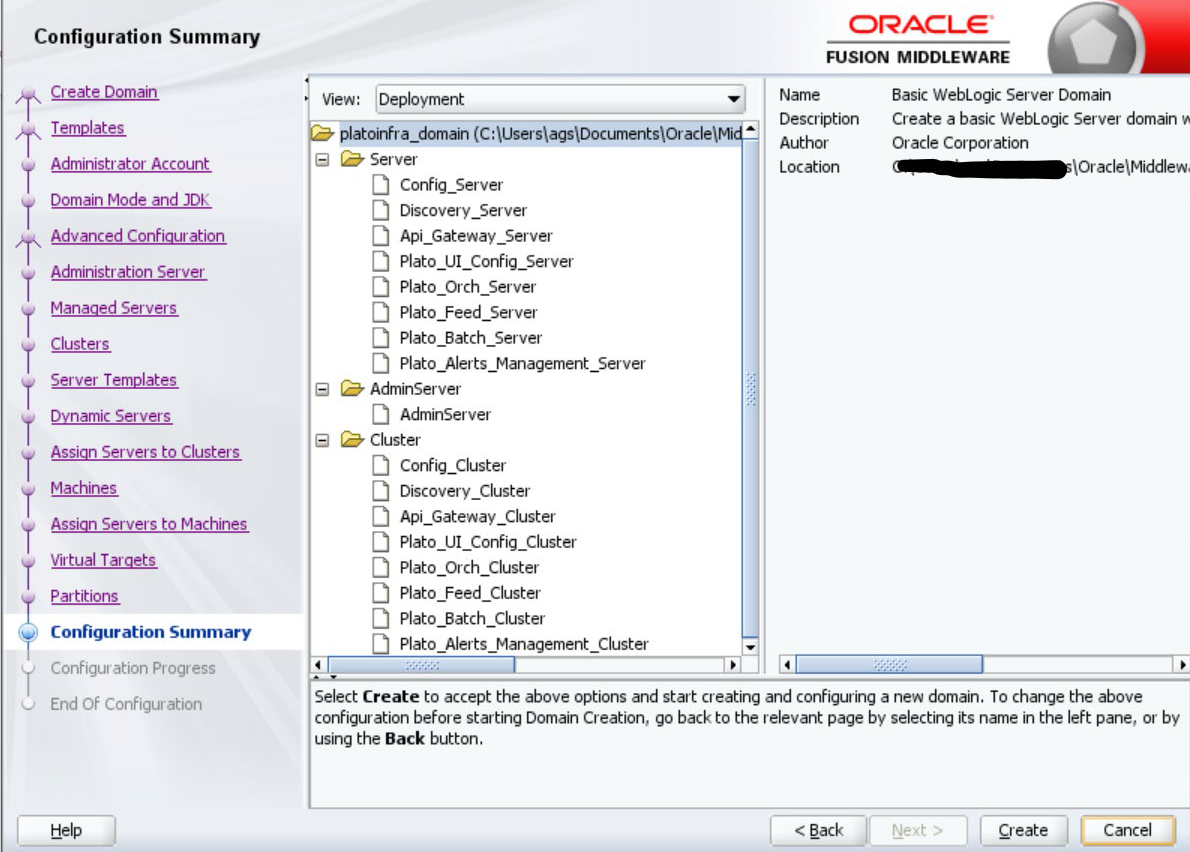
    The Configuration Summary screen displays.

    Figure 2-15 Configuration Summary


  21. Check the Configuration Summary and confirm creating the domain.
  22. Click Next.
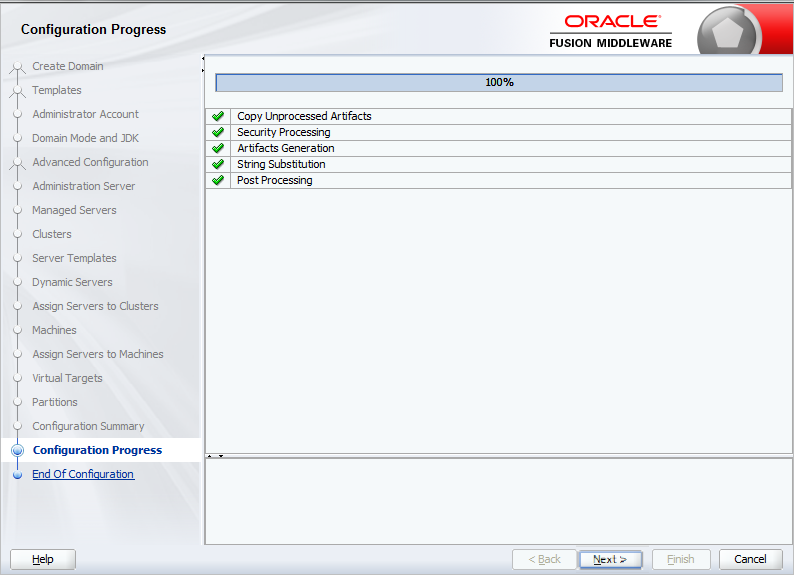
    The Configuration Progress screen displays.

    Figure 2-16 Configuration Progress


  23. Check the Configuration Progress screen, and click Next.
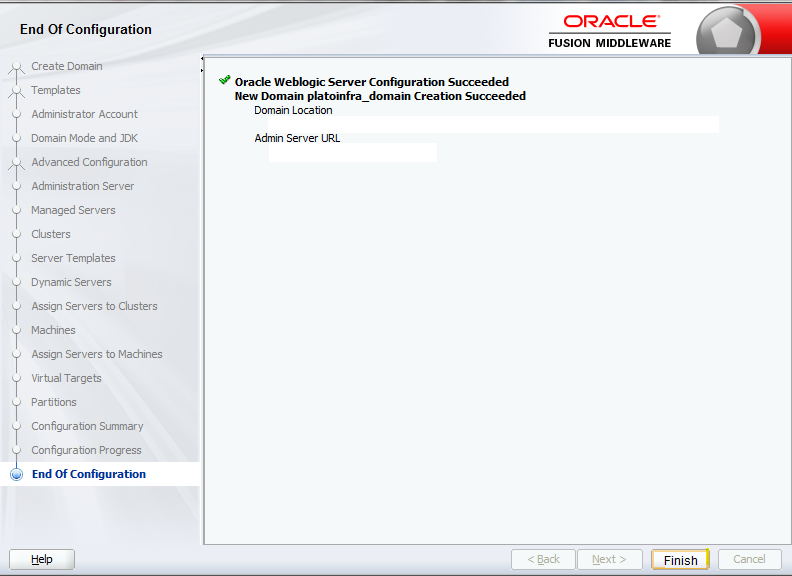
    The End of Configuration screen displays.

    Figure 2-17 End of Configuration


  24. Click Finish to complete the procedure.
    The configuration is completed successfully.

2.2 Post Domain Creation Configurations

This topic provides the systematic instructions for the configurations to be performed once the domain is created.

Note:

Once domain creation and cluster configuration is done, refer to Oracle Fusion Middleware documents for more details on how to start an admin server, node manager, and managed servers.
  1. Open /user_projects/domain/platoinfra_domain/bin.
  2. Perform all the Environment Setup steps such as setting -D parameters, Embedded Weblogic Setup and, changes required for OAuth.
  3. Run startWeblogic.cmd. Run .sh if operating system is linux.
  4. Open /user_projects/domains/platoinfra_domain/bin.
  5. Run setNMJavaHome.cmd. Run .sh if operating system is linux.
  6. Open /user_projects/domains/platoinfra_domain/nodemanager.
  7. Edit nodemanager.properties as required (securelistner = false if ssl and keystore is not given).
  8. In admin console, select the following options in sequential order:Under Machine, select platoinfra_Machine.
    1. Machine
    2. platoinfra_Machine
    3. Node Manager
    4. Type
    5. Plain
    6. Save
  9. Open /user_projects/domains/platoinfra_domain/bin.
  10. Run startNodeManager.cmd. Run .sh if operating system is linux.
  11. Start all managed servers.
  12. Access the Oracle WebLogic Administration Console.
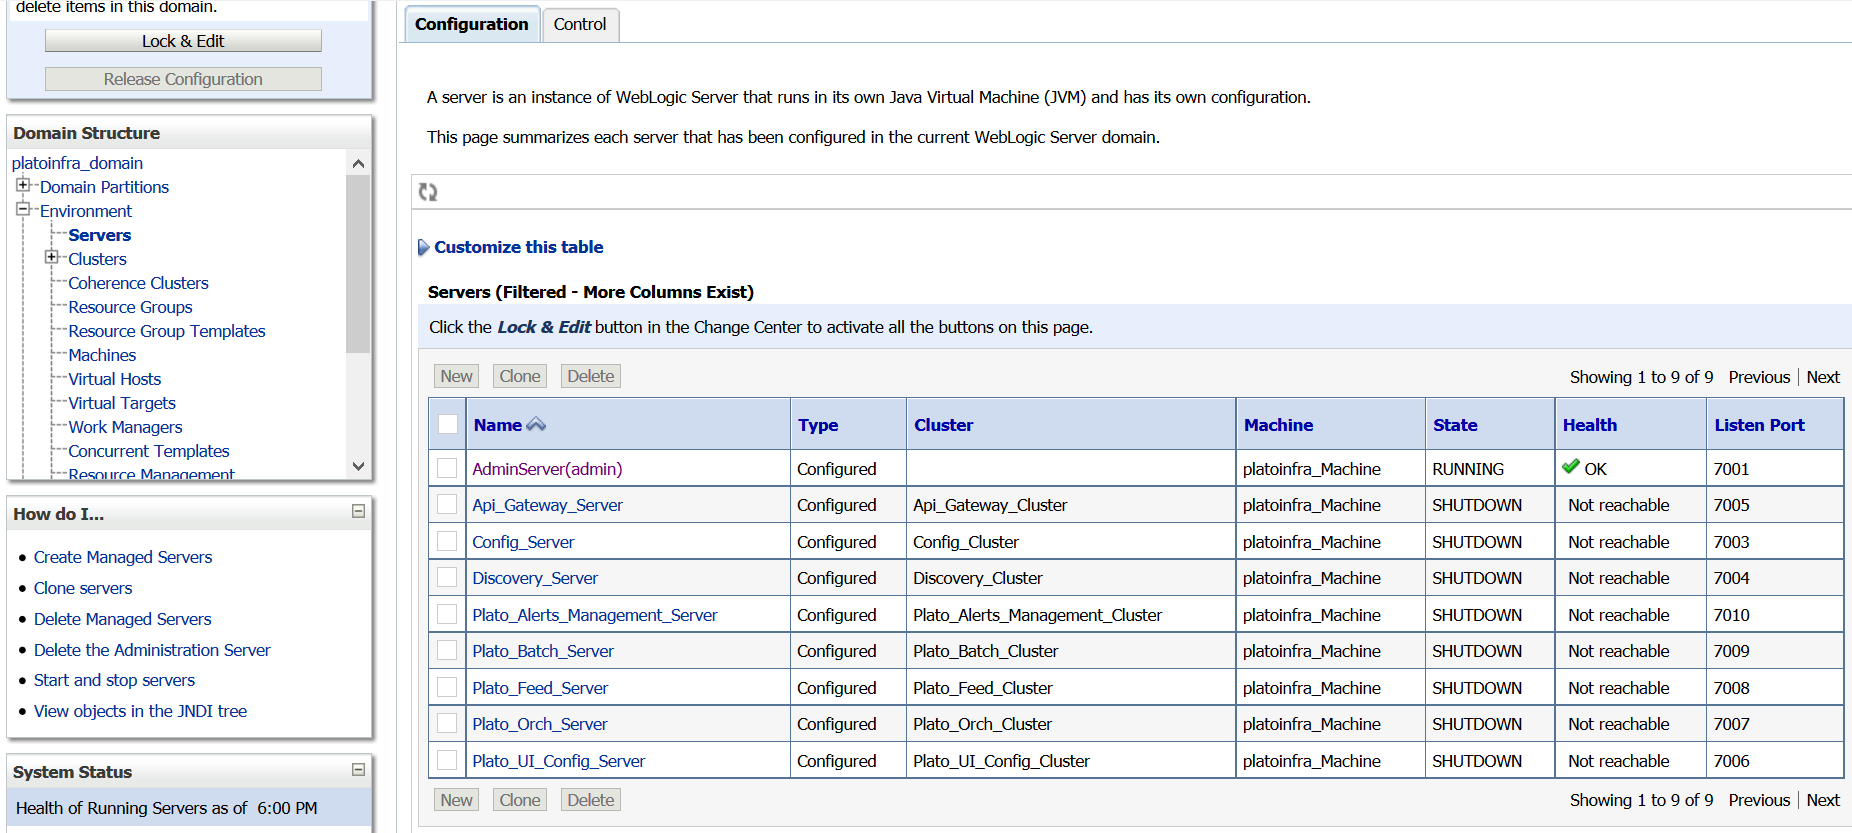
  13. From Domain Structure, Click Services and verify the Servers (Filtered - More Coloumns Exist) table.
    The Summary of Services screen displays.

    Figure 2-18 Summary of Services


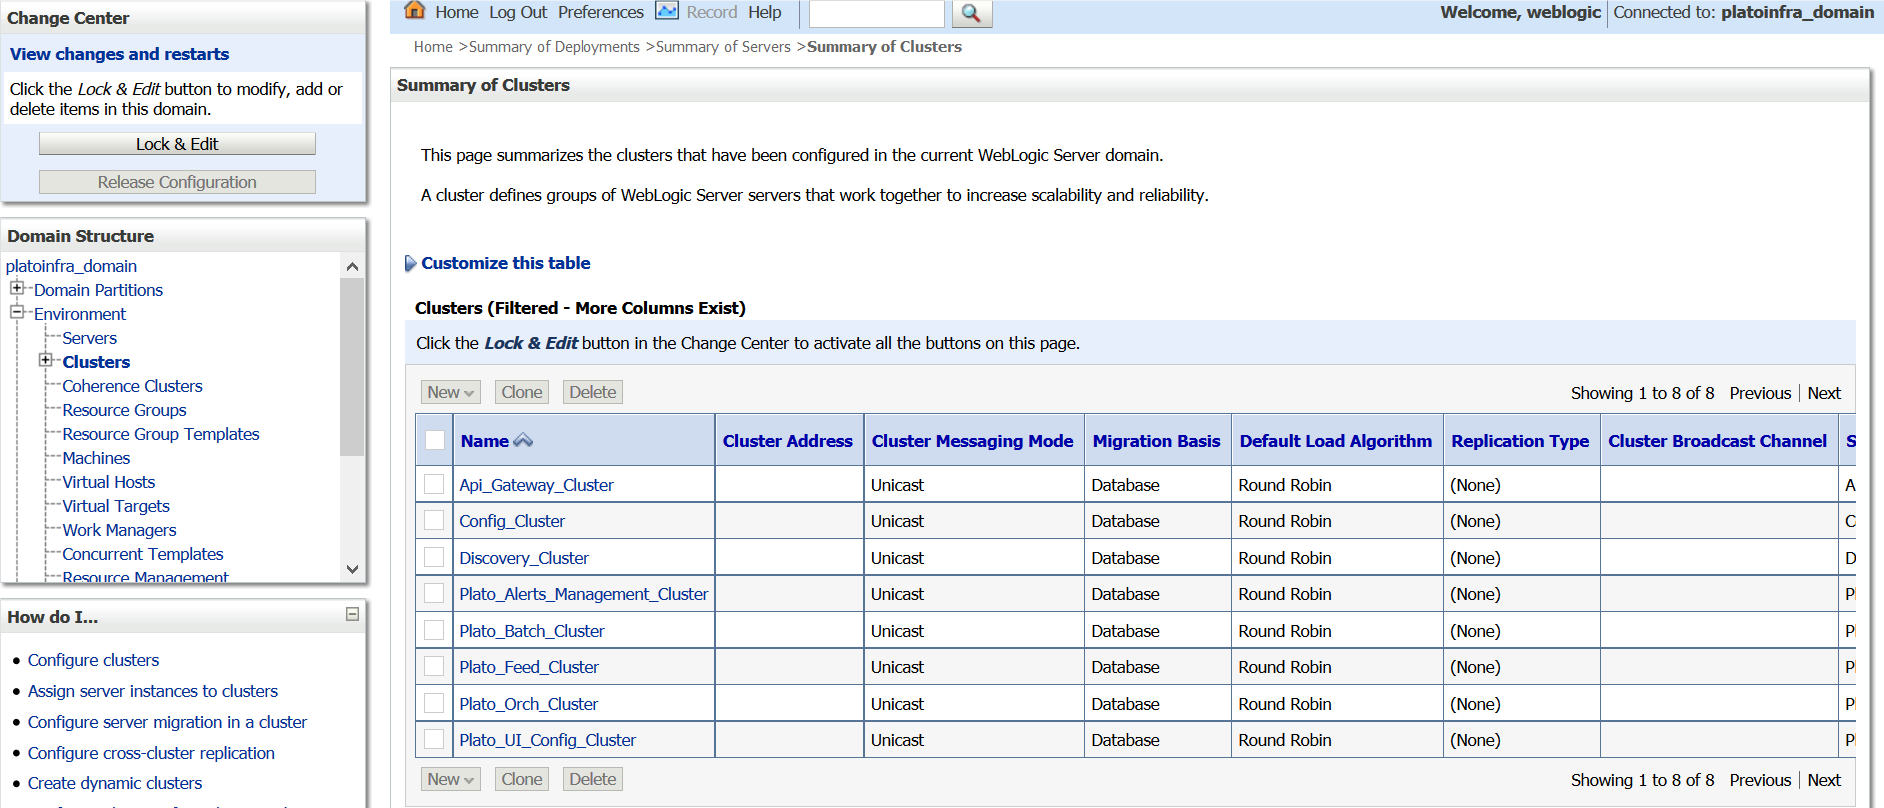
  14. Click Clusters and verify the Clusters (Filtered - More Coloumns Exist) table.
    The Summary of Clusters screen displays.

    Figure 2-19 Summary of Clusters


  15. Click Machines and verify the Machines (Filtered - More Coloumns Exist) table.
    The Summary of Machines screen displays.

    Figure 2-20 Summary of Machines