8 Routing
This topic describes the systematic instructions to configure the routing.
Routing defines no rule or rule-based route configuration. Route decide the actual request to be send to which service provider based on maintenance and evaluation.
- On Consumer Services screen, click Routing.The Routing screen displays.
Add Route
The user can create routing manually.
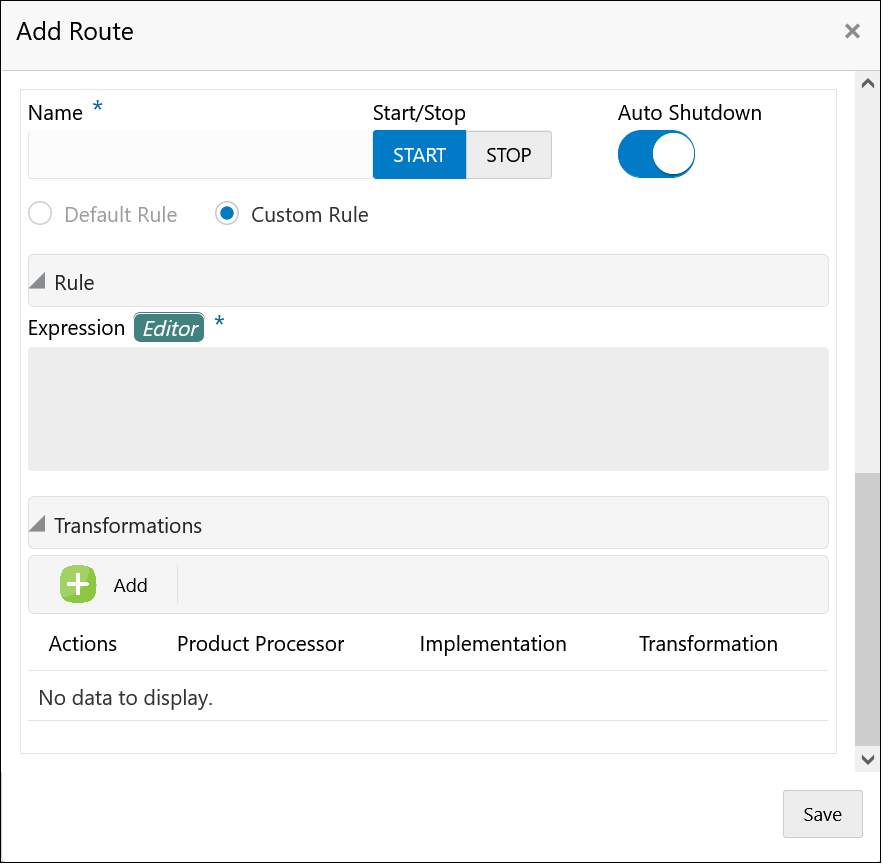
- On Routing screen, click Add.The Add Route screen displays.
- Specify the fields on Add Route screen.
Note:
The fields, which are marked with an asterisk, are mandatory.For more information on fields, refer to the field description table.
Table 8-1 Add Route - Field Description
Field Description Name Specify the name for the route. Note:
- Enter 0 to maximum of 255 characters.
- No numeric value at beginning and no space allowed.
START / STOP START / STOP If routing is marked as STOP, then consumer request fails at routing hub level only.
Auto Shutdown ON / OFF If AutoShutdown flag is ON, then route state will be changed to STOP if route failure goes beyond the threshold failure limit based on the monitoring and alert configuration.
Rule Type Select the rule type. The available options are:- Default Rule
- Custom Rule
Expression Editor Displays the expression that is formed through expression editor. Add To add, refer to the below steps. Actions Displays the action. The user can edit or delete the header.
Product Processor Displays the product processor. Implementation Displays the implementation. Transformation Displays the transformation.
Add Custom Rule using Expression Editor
- To add Editor, follow the below steps.
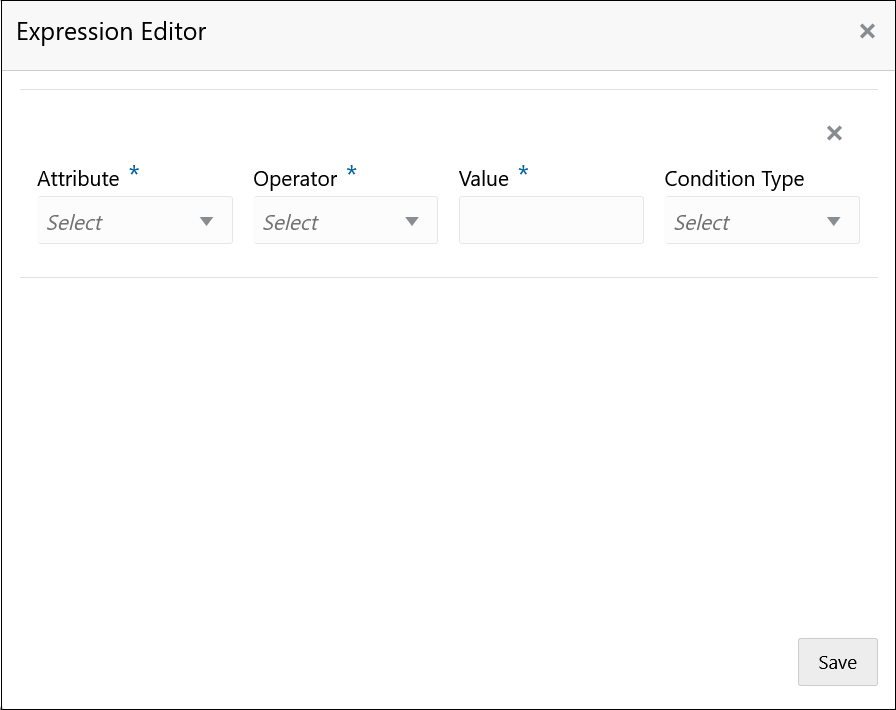
- On Add Route screen, click Editor button.The Expression Editor screen displays.
- Specify the fields on Expression Editor screen.
Note:
The fields, which are marked with an asterisk, are mandatory.For more information on fields, refer to the field description table.
Table 8-2 Expression Editor - Field Description
Field Description Attribute Select attribute relevant to consumer service from drop-down list. Operator Select the logical operators to form an expression from drop-down list. Value Specify the value. Note:
Enter 0 to 255 characters.Condition Type Select the condition type from drop-down list. - Click Save to save the details.
Note:
String value should be quoted using single quotes ( ' ) Example: 'abc'List value should be comma separated values and quoted using single quotes ( ' ) Example: 'abc,xyz,1.23,true'
- On Add Route screen, click Editor button.
Transformations
The user can define the sequence of transformations for each routing in which request should be processed. Sequence of transformations in list can be changed by using drag-n-drop feature.
- To add Transformations, follow the below steps.
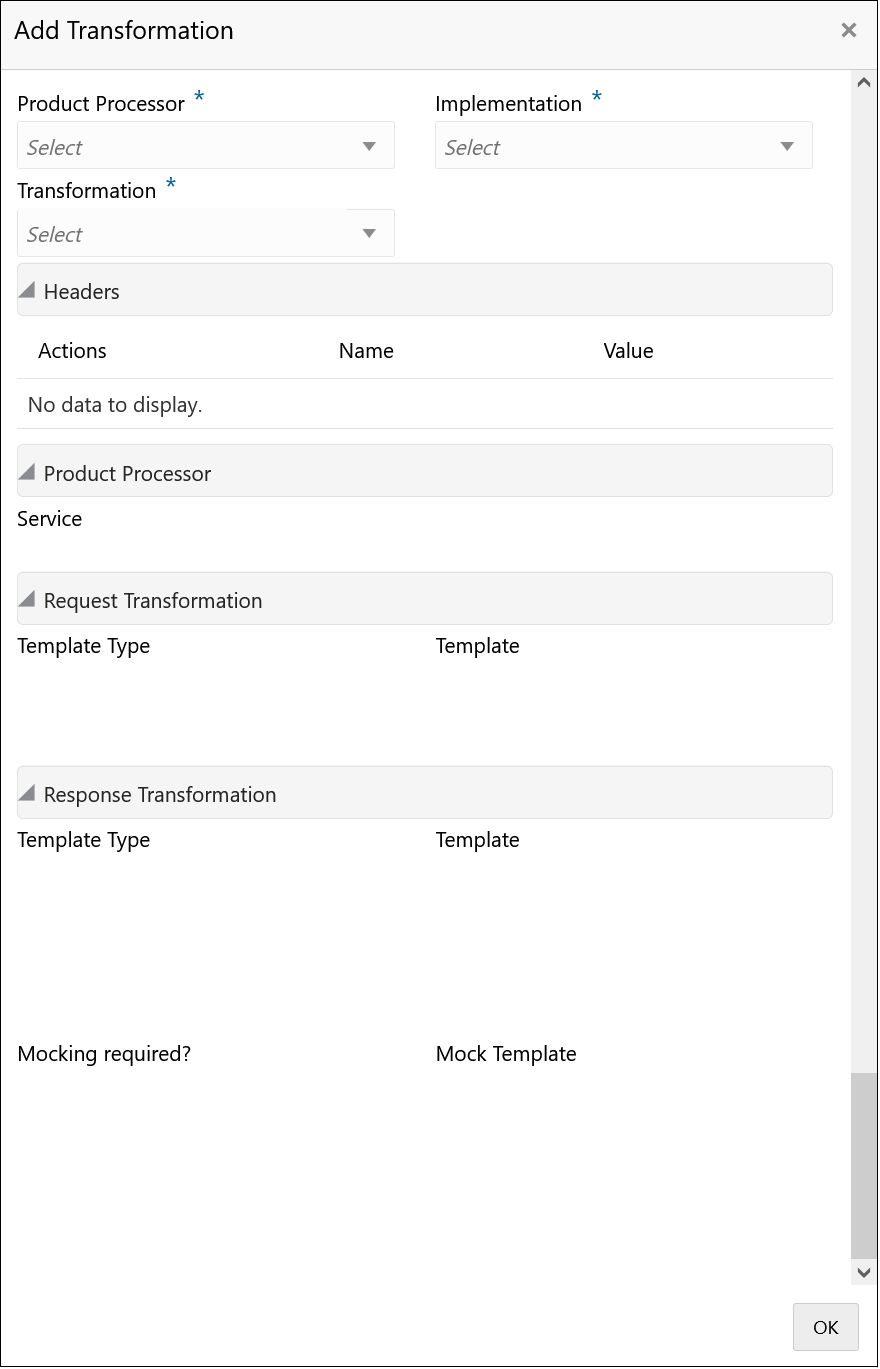
- On Add Route screen, click Add.The Add Transformation screen displays.
- Specify the fields on Add Transformation screen.
Note:
The fields, which are marked with an asterisk, are mandatory.For more information on fields, refer to the field description table.
Table 8-3 Add Transformation - Field Description
Field Description Product Processor Select the product processor from the drop-down list. Implementation Select the implementation from the drop-down list. Transformation Select the transformation from the drop-down list. Action Displays the action. The user can edit or delete the header.
Name Displays the name of the header. Value Displays the value of the header. Service Displays the service of the product processor. Template Type Displays the template type for the request transformation. Template Displays the template for the request transformation. Template Type Displays the template type for the response transformation. Template Displays the template for the response transformation. Mocking required? Displays whether the mocking required for the response transformation or not. Mock Template Displays the mock template for the response transformation. - Click OK.
- On Add Route screen, click Add.
- Click Save to save the details.The Confirmation screen displays.
- Click Confirm to add the routing details.
View Route
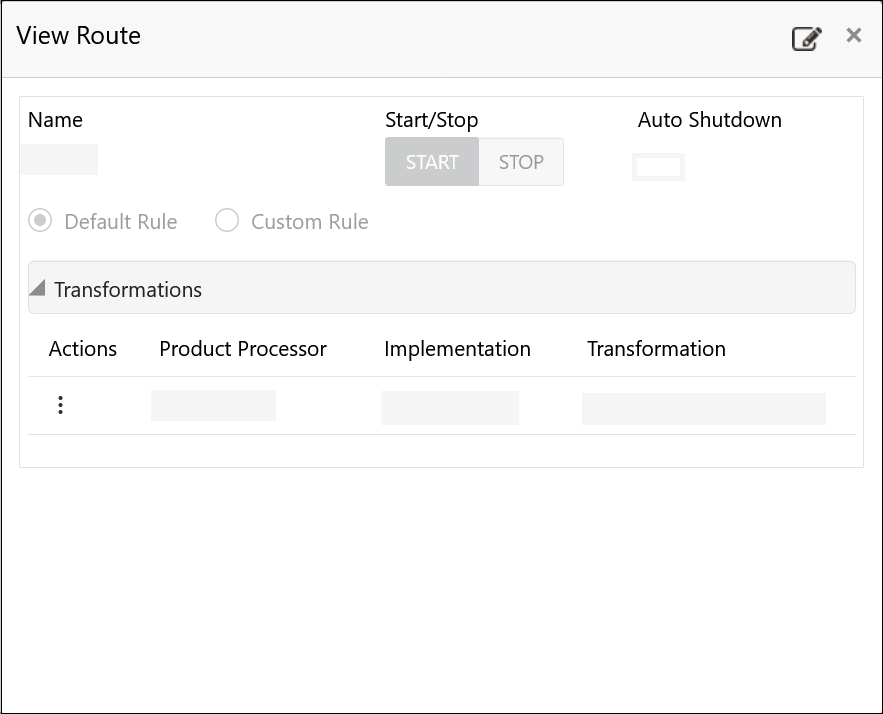
The user can view the routing details and can also switch to edit form by clicking on edit icon.
- On Routing screen, click Operation menu (3 dots button), and click View.The View Route screen displays.
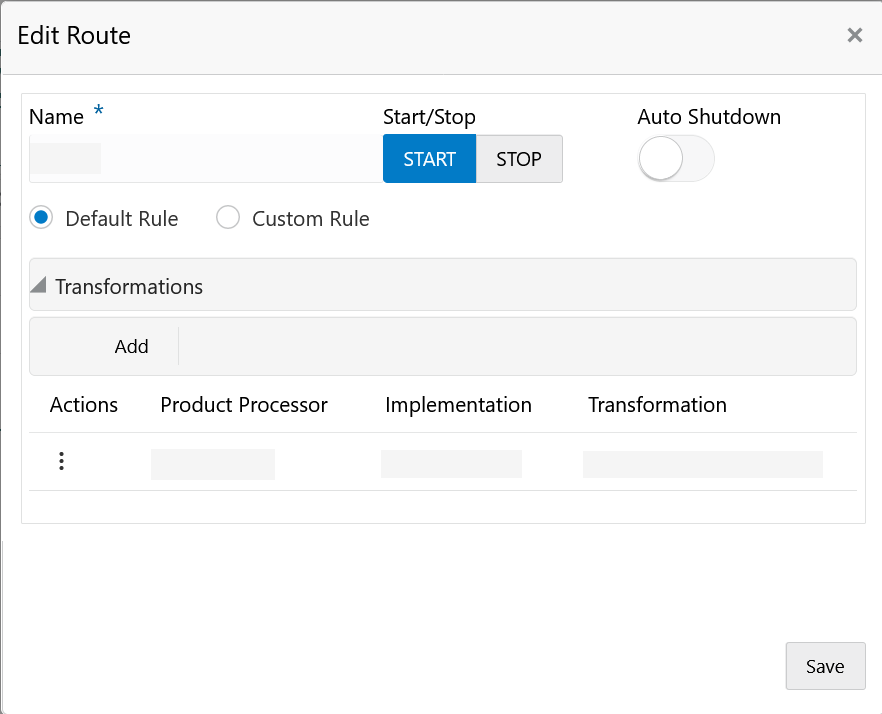
Edit Route
The user can modify the routing details.
- On Routing screen, click Operation menu (3 dots button), and click Edit.The Edit Route screen displays.
Delete Route
The user can delete the routing details.
- On Routing screen, click Operation menu (3 dots button), and click Delete.The Confirmation screen displays.
- Click Confirm to delete the selected routing.
Routing - Configuration
- On Routing screen, click Operation menu (3 dots button), and click Configuration.The Configuration screen displays.
Note:
Refer to Configuration topic for screen and field description.
Routing - Request Audit
- On Routing screen, click Operation menu (3 dots button), and click Request Audit.The Request Audit screen displays.
Note:
Refer to Request Audit topic for screen and field description.

