- Retail Onboarding User Guide
- Retail Onboarding
- Onboarding Initiation
- Onboarding Initiation - Basic Details
1.2.1 Onboarding Initiation - Basic Details
You can add personal details such as name, date of birth, and address of the customer to be onboarded in the Basic Details screen.
Note:
The fields, which are marked with an asterisk, are mandatory.- On Initiation - Basic Details screen, click and expand
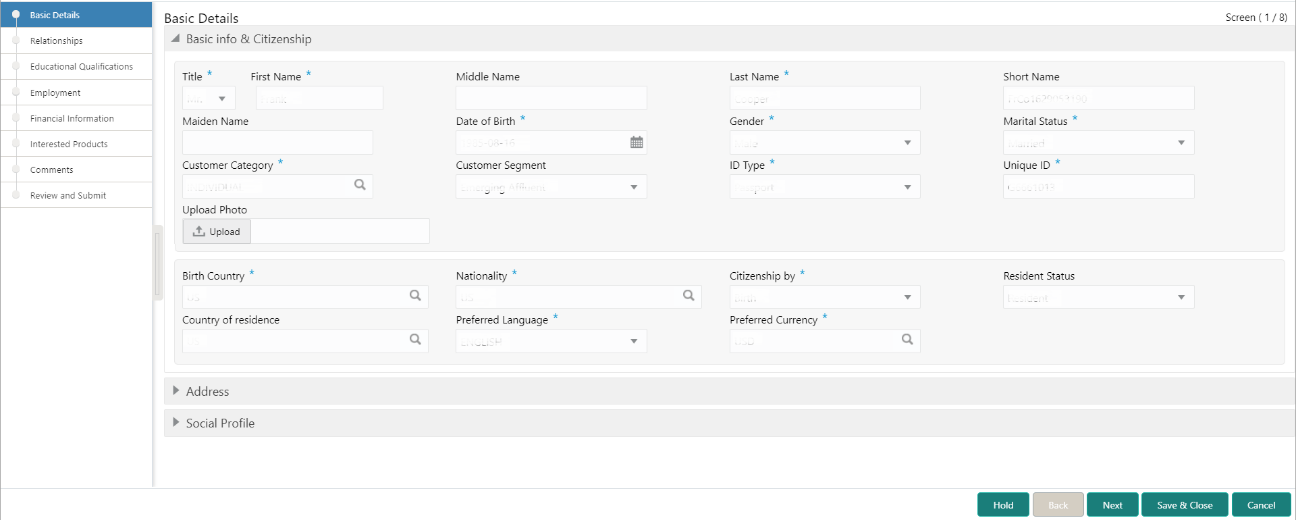
the Basic Info and Citizenship section.The Basic Info and Citizenship screen displays.
Note:
Basic details provided in the Quick Initiation screen are automatically populated on this screen. - On the Basic Info and Citizenship segment, specify the
details of the customer. For more information on fields, refer to the field
description table.
Table 1-1 Basic Info and Citizenship – Field Description
Field Name Description Title Select the title from the drop-down values. First Name Displays the first name of the customer. Middle Name Displays the middle name of the customer. Last Name Displays the last name of the customer. Short Name Specify the short name of the customer. Maiden Name Displays the maiden name of the customer. Name in Local Language Specify the name is local language (as applicable at the country of implementation). Date of Birth Displays the date of birth of the customer. Customer Type Displays, if the customer is a Minor Customer. Minor Customer is determined based on the date of birth of customer and a minor age configured in the properties. Note:
For more details about minor age configuration, refer Oracle Banking Party Configurations User Guide.Gender Displays the gender from the drop-down values. Marital Status Select the marital status from the drop-down values. Customer Category Displays the category of the customer. Customer Segment Select the customer segment from the drop-down values. Customer Access Group Click Search icon and select the customer access group for the party. Note:
- User should have required access to onboarding a party within a customer access group.
- For more details, refer to Oracle Banking PartyConfigurations User Guide.
Details of Special Need Specify the details of special needs if the customer is differently abled. Remarks for Special Need Specify the remarks for special needs, if applicable. Relationship Manager ID Specify the ID of the relationship manager. Profession Code Specify Profession Code of the party. Staff Select if the person onboarded is a staff of the bank. Upload Photo Upload the photo of the customer. Birth Country Displays the birth country of the customer. Nationality Click search icon and select the nationality of the customer from the list of values. Citizenship By Displays the ‘Citizenship By’ value. Residential Status Select the residential status from the drop-down values. Country of Residence Displays the country of residence. Preferred Language Select the preferred language from the drop-down values. Preferred Currency Click search icon and select the preferred currency from the list of values. - Click and expand the Address section.
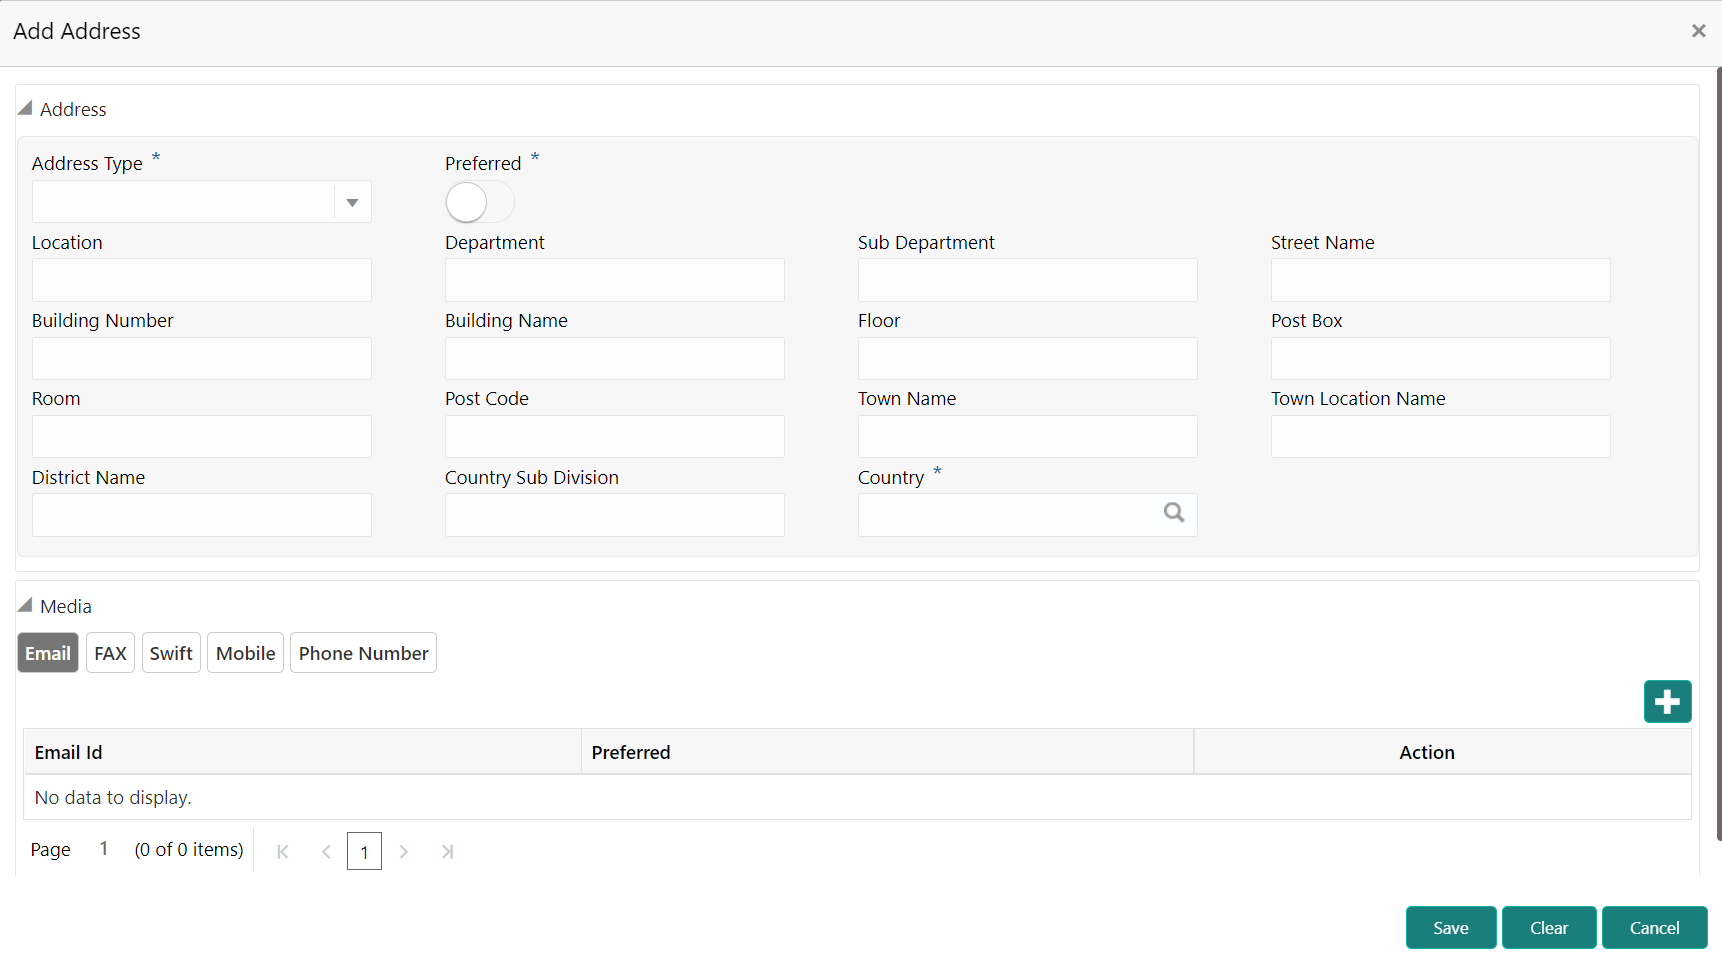
- Click on the + button to add the address details.The Address screen displays.
- On the Address segment, specify the fields. For more information
on fields, refer to the field description table.
Table 1-2 Address – Field Description
Field Description Address Type Select the address type from the drop-down list. Location Click Search and select the preferred location. This pertains to a particular area in a country.
Preferred Click the toggle to specify the preferred to be used for communication. Address From Specify Address Start Date. Address To Specify Address End Date. Address Line 1 / Building Name Specify Address Line 1 or Building Name. Address Line 2 / Street Name Specify Address Line 12 or Street Name. Address Line 3 / City / Town Name Specify Address Line 3 or City Name or Town Name. State / Country Sub-division Specify State or Country Sub-division. Country Click the search icon and select country code from the list. Zip Code / Post Code Specify Zip Code or Post Code. - Expand the Additional Info section on the Address segment to specify the Additional Address Information. For more information on fields, refer to the field description table.
Table 1-3 Additional Info – Field Description
Field Description Department Specify the name of the department for the customer. Sub Department Specify the sub-department for the customer. Building Number Specify the building number. Floor Specify the floor for the given address. Post Box Specify the post box. Room Specify the room for the given address. Town Location Name / Locality Specify Town Location or Locality Name. District Name Specify the district name. Landmark Specify the near Landmark to address. Contact Name / Narrative Specify Contact Name or Narrative for the address Street Name Specify the street name. + icon Click the + button to add another address. - On the Add Address screen, in the Media
segment, specify the details under the Email tab. For more
information on fields, refer to the field description table.
Table 1-4 Media (Email) – Field Description
Field Description Email Id Specify the email id of the customer. Preferred Specify the preferred email id, in case more than one email id is captured. Action If required, select the desired icon to edit/delete the entry. - On the Add Address screen, in the Media
segment, specify the details under the FAX tab. For more
information on fields, refer to the field description table.
Table 1-5 Media (Fax) – Field Description
Field Description ISD Code Specify the ISD code for the FAX number of the customer. Area Code Specify the area code for the FAX number of the customer. Fax Number Specify the FAX number of the customer. Preferred Specify the preferred FAX number, in case more than one FAX number is captured. Action If required, select the desired icon to edit/delete the entry. - On the Add Address screen, in the Media
segment, specify the details under the Mobile tab. For more
information on fields, refer to the field description table.
Table 1-6 Media (Mobile) – Field Description
Field Description ISD Code Specify the ISD code for the mobile number of the customer. Mobile Number Specify the mobile number of the customer. Preferred Specify the preferred mobile number, in case more than one mobile number is captured. Action If required, select the desired icon to edit/delete the entry. - On the Add Address screen, in the Media
segment, specify the details under the Phone Number tab. For more
information on fields, refer to the field description table.
Table 1-7 Media (Phone Number) – Field Description
Field Description ISD Code Specify the ISD code for the phone number of the customer. Area Code Specify the area code for the phone number of the customer. Phone Number Specify the phone number of the customer. Preferred Specify the preferred phone number, in case more than one phone number is captured. Action If required, select the desired icon to edit/delete the entry. - On the Add Address screen, in the Media
segment, specify the details under the SWIFT tab. For more
information on fields, refer to the field description table.
Table 1-8 Media (SWIFT) – Field Description
Field Description Business Identifier Code Specify the business identifier code of the customer. Address Line 1 to Address Line 4 Specify the address of the customer in SWIFT format. Preferred Specify the preferred mobile number, in case more than one mobile number is captured. Action If required, select the desired icon to edit/delete the entry. - Click and expand the ID Details section and click add icon to
add ID detials. For more information on fields, refer to the field description table.
Table 1-9 ID Details - Field Description
Field Description ID Type
Select type of identification from the drop-down list.
ID Status
Select Status of Identification from drop down list.
Unique ID Specify unique ID number as per the ID type. Place of issue Specify place of issue of ID. Valid From Specify valid from date of ID. Valid Till Specify validity end date of ID. Remarks Specify remarks for ID. Preferred Select, if ID type is preferred. - Click and expand Tax Declaration section.
- Click on the + button to specify the details.
For more information on fields, refer to the field description table.
Table 1-10 Tax Declaration – Field Description
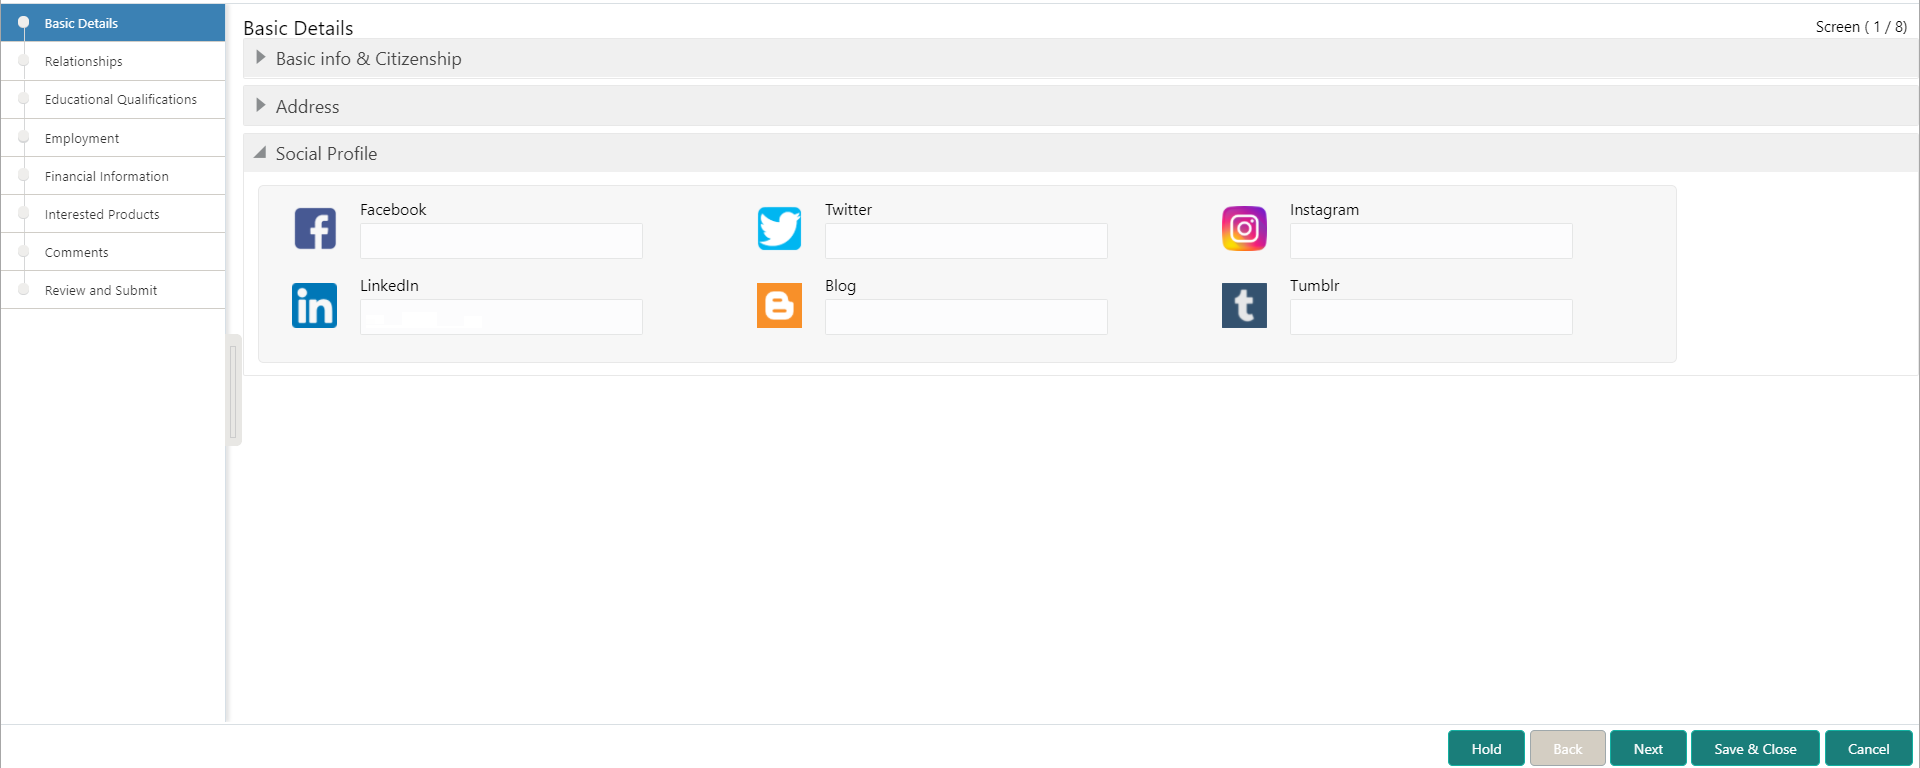
Field Description Form Type Specify type of tax declaration form. Valid From Specify validity start date of tax declaration form. Valid Till Specify validity end date of tax declaration form. Remarks Specify remarks for tax declaration form. - Click and expand the Social Profile section.The Social Profile screen displays.
- On the Social Profile segment, specify the fields. For
more information on fields, refer to the field description table.
Table 1-11 Social Profile – Field Description
Field Description Facebook Select the address of the Facebook profile. Twitter Select the address of the Twitter profile. Instagram Select the address of the Instagram profile. LinkedIn Select the address of the LinkedIn profile. Blog Select the address of the Blog profile. Tumblr Select the address of the Tumblr profile. - Click Next to move to the Relationships screen.
Parent topic: Onboarding Initiation


