- Corporate Onboarding User Guide
- Corporate Customer Onboarding
- Onboarding Initiation
1.3 Onboarding Initiation
This topic describes the systematic instructions to capture the basic demographic information about the corporate customer to be onboarded using Oracle Banking Enterprise Party Management.
Before you begin, log in to the application Home page. For information on how to log in, refer to the Getting Started User Guide.
Note:
The fields marked as Required are mandatory.- On the Home page, click Party Services. Under Party Services, click Onboarding.The Onboarding screen displays.
- On the Onboarding screen, specify the fields. For more
information on fields, refer to the field description table.
Table 1-1 Onboarding - Field Description
Field Description Customer Type Select Corporate from the drop-down values. Business Process Code Select the desired business process code, if required. Note:
This field is displayed and required only if more than one process code is configured for a given customer type. - Click Onboard Now.The Quick Initiation screen displays.
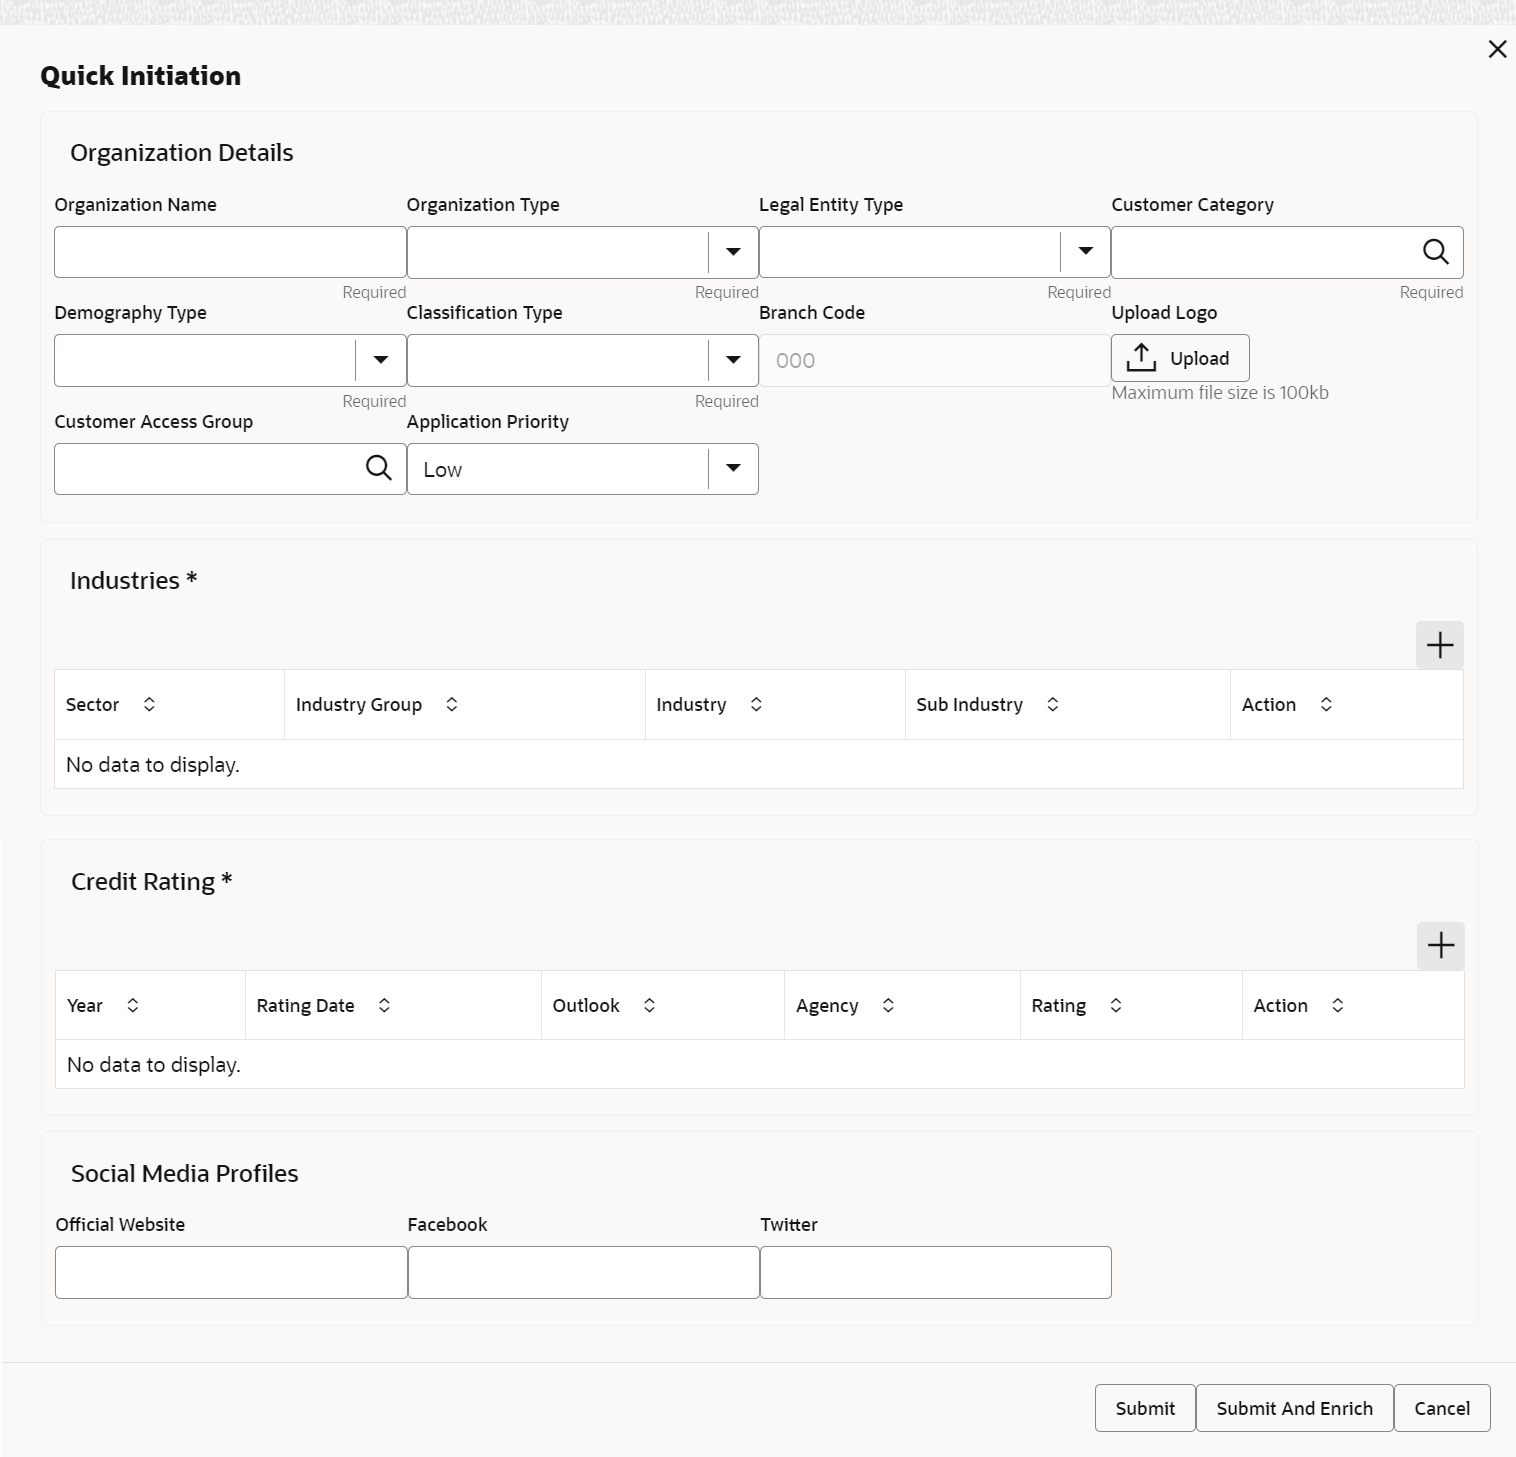
- On the Quick Initiation screen, specify the details
about the customer. For more information on fields, refer to the field
description table.
Table 1-2 Quick Initiation - Field Description
Field Name Description Organization details Specify the fields under this section. Organization Name Specify the registered name of the organization. Organization Type Select the type of organization from the following drop-down values: - Conglomerate
- Single
Customer Category Click Search icon and select the customer category from the list of values. Entity Type Select the type of business entity from the following drop-down values: - Private Limited
- Public Limited
- Trusts
- Government Owned
- Associations
Demography Type Specify the company demography from the following drop-down values: - Global
- Domestic
Geographical Spread Select the geographical spread of the company from the given list. Classification Type Select the Classification of the Corporate as per the local regulations from the following drop-down values: - Micro
- Small
- Medium
Branch Code Specify the branch code. Note:
For the parent customer, the branch code defaults to the logged-in branch. For subsidiaries, the values can be entered at the time of capturing the details.Logo Upload the logo of the company. Customer Access Group Click Search icon and select the customer access group for the party. For more details, refer Oracle Banking Party Configuration User Guide.Note:
The user should have required access to onboarding a party within a customer access group.Application Priority Specify the Priority of Party Onboarding application. Industries Specify the fields under this section. Sector Specify the industry sector to which the corporate belongs. For example, - Energy
- Real Estate
- Utilities
- Consumer Staples, etc.
Industry Group Specify the industry group within the sector. For example, - Software
- Hardware
- Semiconductor Industry Groups within Information technology Sector
Industry Specify the industry within the Industry group. For example, IT services and software products within software. Sub Industry Specify the sub-industry within the industry. For example, - IT Consulting Services
- Data Processing Services
- Internet Services within IT services
Credit Rating Specify the fields under this section. Rating Agency Select the name of the credit rating agency which has given a rating to the corporate. Rating Select the rating provided by the credit rating agency. Social Media Profile Specify the fields under this section. Official Website Specify the official website address for the corporate customer. Facebook Specify the Facebook URL for the corporate. Twitter Specify the corporate’s Twitter handle. - Click Submit.The system will check for duplicate customers.
If there is no duplicate customer existed in the system, then the system creates a unique party ID for the customer and displays the Initiation - Basic Details screen.
If there are duplicate customers exist in the system. It will display the list of customers with the same name. the user will have the following facility:- Abort to discard the Customer Onboarding.
- Continue to save the Customer Onboarding.
- Cancel to cancel the Customer Onboarding.
The Initiation - Duplication Check screen displays.Figure 1-4 Initiation – Duplication Check
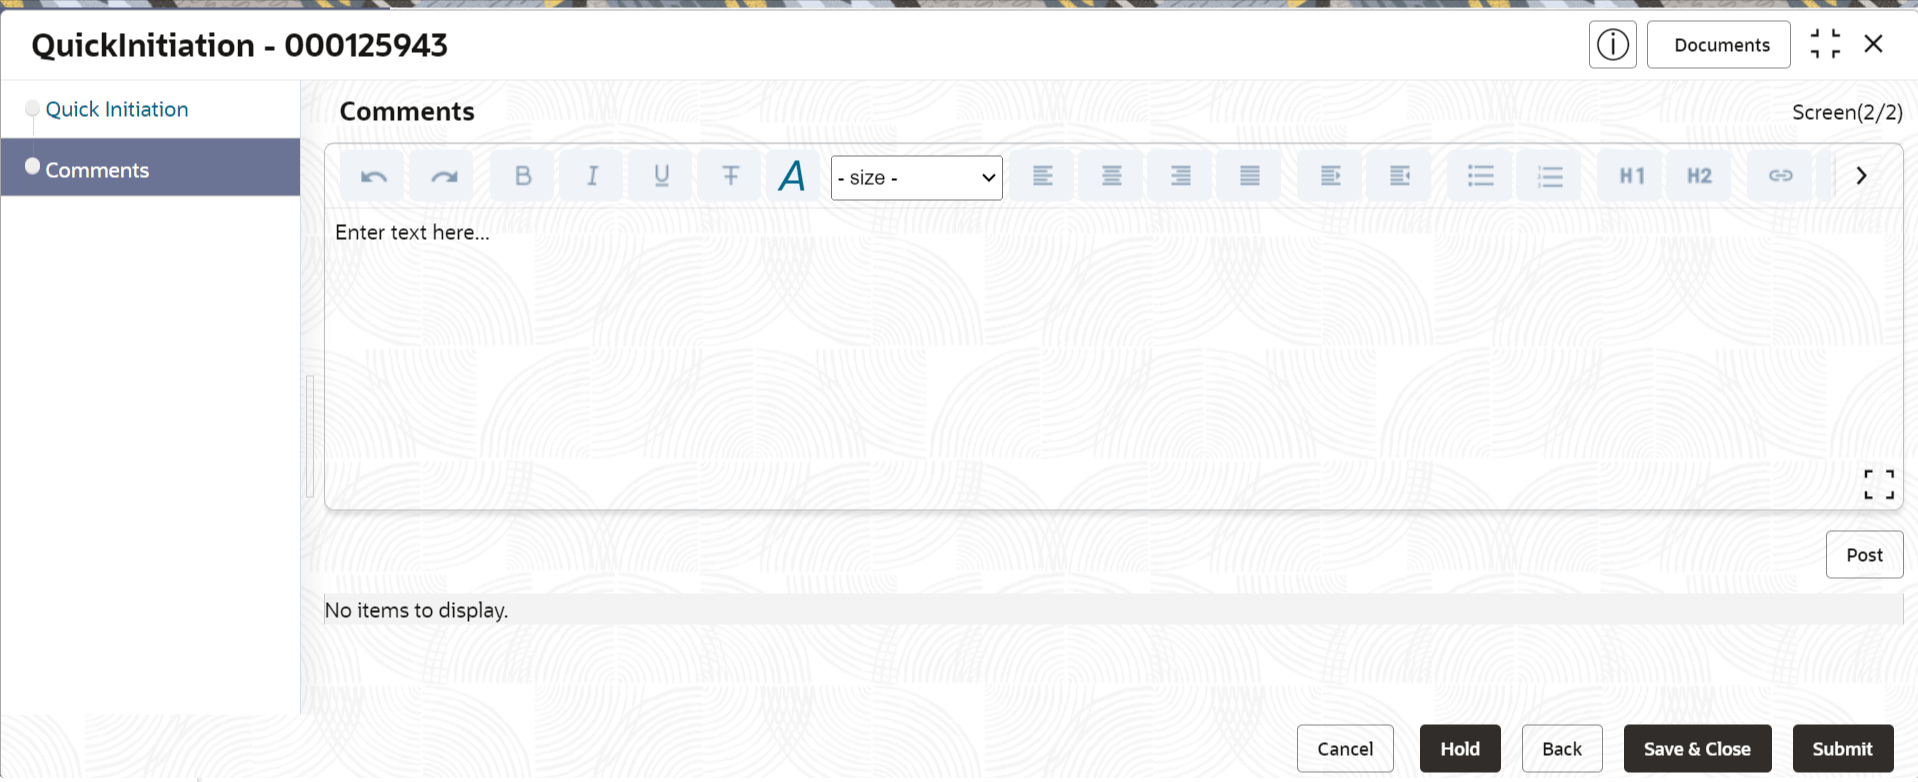
- Click Next.The Initiation - Comments screen displays.
Note:
The Relationship Managers can capture overall comments for the Initiation stage. Capturing comments helps in a better understanding of the task by the banker who will work with this task in the next stage. - Specify the overall comments for the Onboarding Initiation stage.
- Click Submit to submit the Onboarding Initiation stage.
The Checklist window is displayed and select the Outcome.
The available Outcome options are:- If Approve is selected, the task is moved to the KYC stage.
- If Reject is selected, the task is terminated.
After Submit successful screen displays and Task will be available in the Free Task screen.
Parent topic: Corporate Customer Onboarding


