2.2 Initiate Migration

Initiate Migration allows the data migration process by moving data from object store to staging tables.

To initiate migration:
  1. On the homepage, click Party Services. Under Party Services, click Data Migration.
  2. Under Data Migration, click Migration Dashboard.
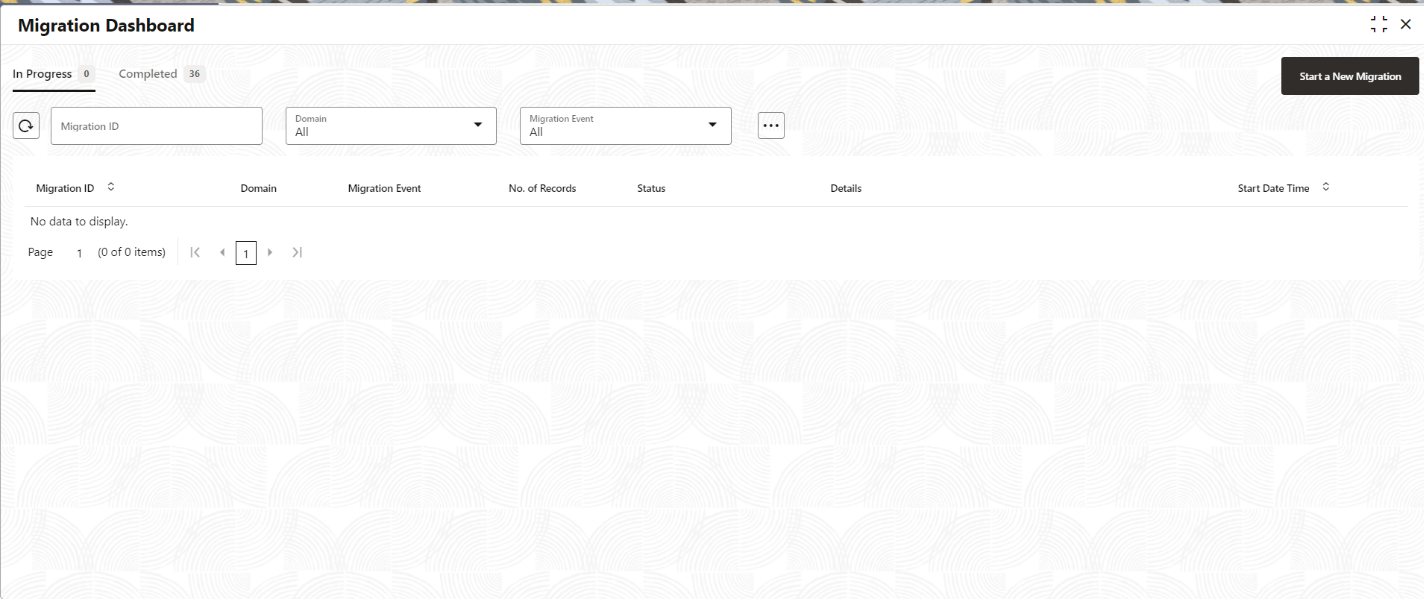
    The Migration Dashboard screen is displayed.
  3. Under Migration Dashboard, click Start a New Migration.
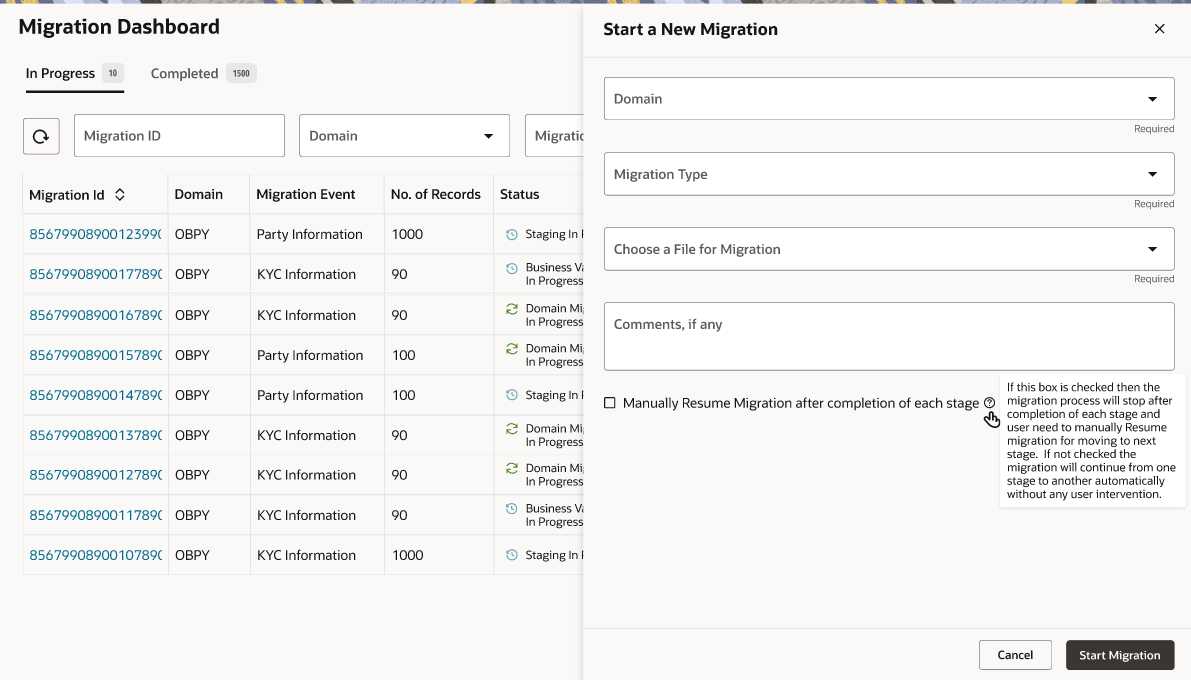
    The Start a New Migration overlay screen is displayed.

    Figure 2-4 Start a New Migration


  4. On the Start a New Migration overlay screen, select the domain as OBPY.
  5. Select migration event as per the uploaded files from the drop-down values. The available options are:
    • Party Information
    • Party Account Information
    • Relationship Information

    Note:

    Party KYC Information is not supported in the available product version.
  6. Select files for migration from drop-down in Choose a File for Migration.

    Note:

    Files will be available for selection as per the files uploaded for domain and migration event during file upload process.
  7. Provide comments if any and click Start Migration.
  8. Select Checkbox for “Manually Resume Migration after completion of each stage”.

    Note:

    When a user checks the Checkbox, the migration process stops after completing each stage and requires the user to manually resume it to move to the next stage. If not checked, the system will automatically migrate from one stage to another stage without manual intervention.
A unique migration reference ID will be generated and new record will be available in migration dashboard for the initiated migration for monitoring.