- Administration and Configuration Guide
- Process Modeling Framework Configurations
- Work Manager Configurations
- Creating Work Manager in WebSphere Application Server
Creating Work Manager in WebSphere Application Server
- Open the WebSphere admin console in the browser window:
http://<ipaddress>:<administrative console port>/ibm/console. (https if
SSL is enabled). The Login window is displayed.
Figure 8-1 IBM WebSphere Integrated Solutions Console window
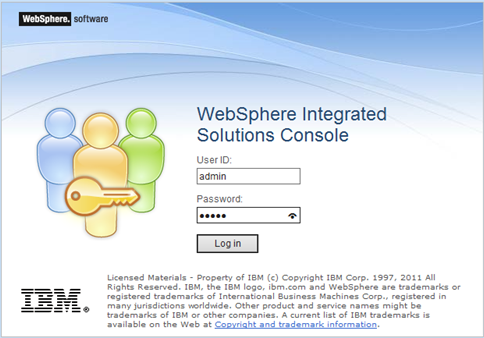
- Login with the User ID that has Admin rights.
Figure 8-2 WebSphere Homepage

- From the LHS menu, expand Resources and
Asynchronous beans and then, select Work
Managers.
Figure 8-3 WebSphere Homepage Work Managers option
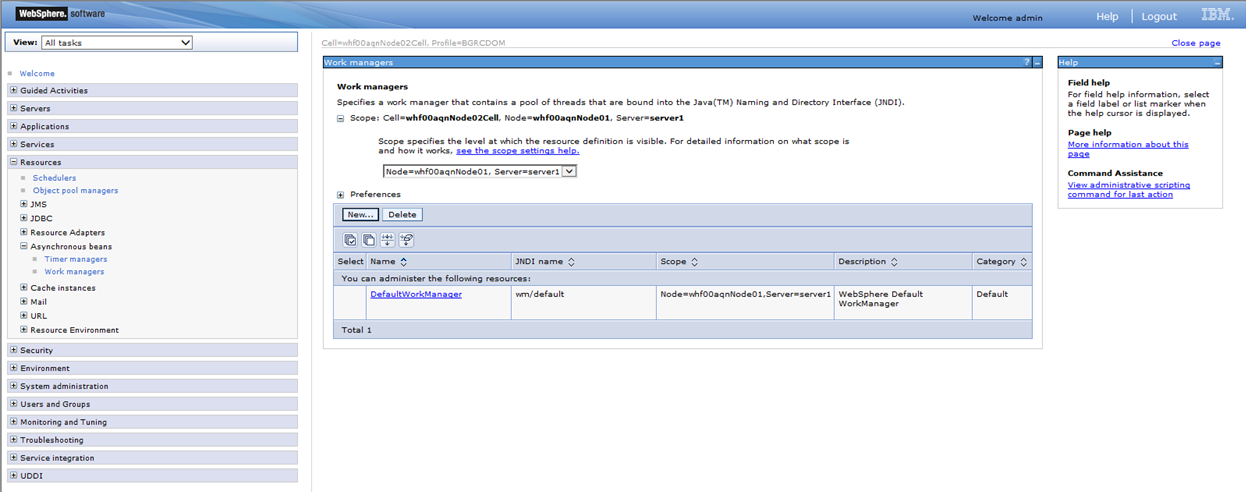
- Select the required Scope from the drop-down list.For example,
Node=whf00aqnNode01, Server=server1. - Click New in the Preferences section.
Figure 8-4 Work Managers Configuration page
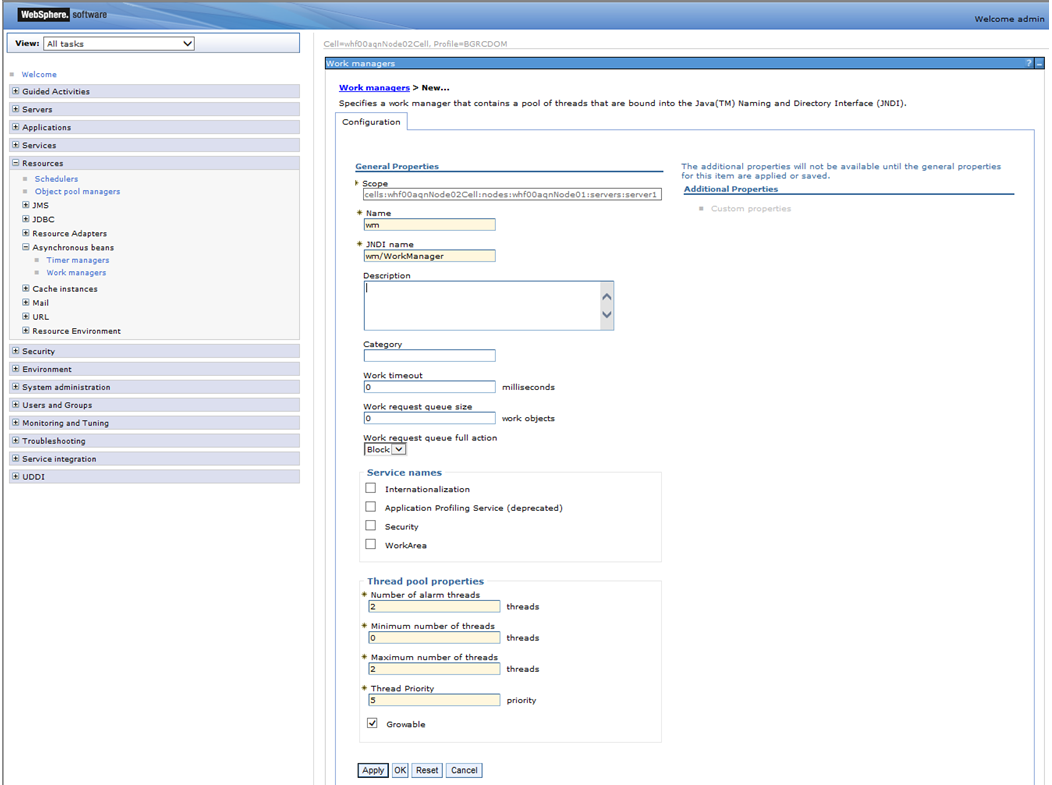
- Enter the Name as ‘wm’ and JNDI name as ‘wm/WorkManager ‘ in the respective fields.
- Enter the Thread pool properties.
- Click Apply.
Figure 8-5 Work Managers Configuration page
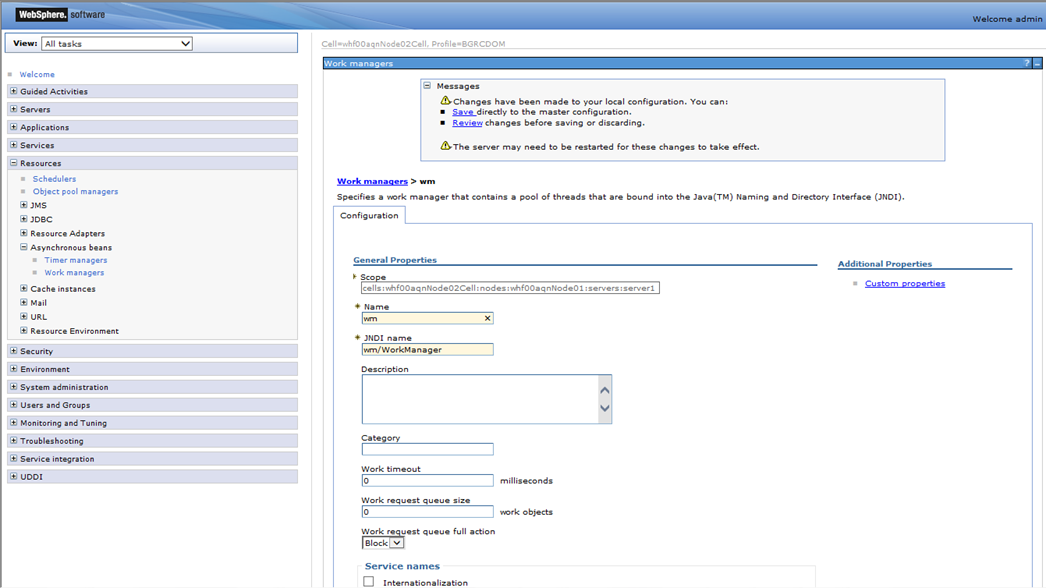
- Click Save.
Figure 8-6 Work Managers Configuration page
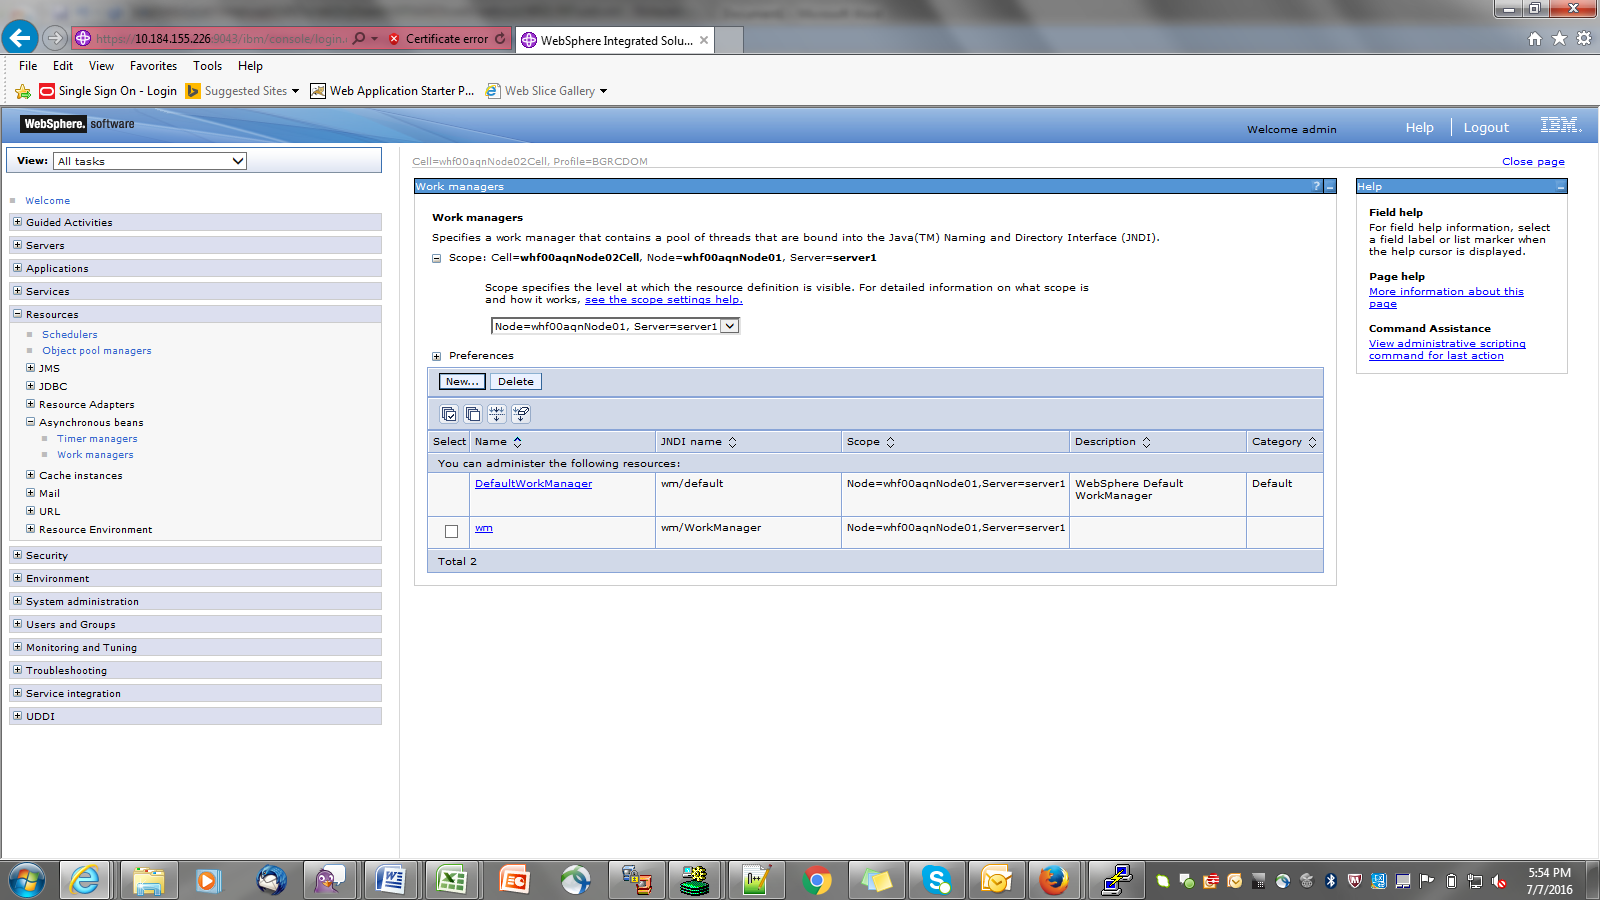 After creating work manager successfully, you have to map it to OFSAA instance.