- Analytical Application Infrastructure User Guide
- Data Maintenance Interface
- Creating Forms Definition
- Creating Forms Definition Using Excel Upload
Creating Forms Definition Using Excel Upload
You can use an Excel file that has columns names as per the table in the
Atomic Schema. You can also modify the mapping for the attributes while you create the
Forms Definition. When the Forms Definition that you create using the Excel option is
approved from the Forms Definition – Summary, users with the
necessary role and permission can perform Data Entry for the records updated by the
Excel file.
To create a Forms Definition by using an Excel file:
- Click Financial Services Enterprise Modelling from the Navigation List on your Home page.
- Click Common Tasks,
Data Maintenance Interface, and then select
Designer View.The Forms Definition – Summary page is displayed.
- Click Create New from the Forms Definition –
Summary page.The Create Forms Definition pane is displayed.
- Click Apply after completing the fields as per the
following table:
Table 11-2 Options in the Forms Definition pane
Field Description Type Select Excel Upload as the method to create the Forms Definition. Auto Map Entities This option is enabled when the Type is selected as Excel Upload. Select this box to auto map the attributes in the Excel file with the attributes in the Entity table. Name Enter a name for the Forms Definition. Description Enter a description for the Forms Definition. The File Upload tab of the Configure page is displayed. - Enter a name and description for the excel template in the Template Name, and Description Fields.
- Click Drag and Drop, and select the excel file to update
the required table.
Note:
You can also drag and drop the required excel file in the Drag and Drop field.The excel file is uploaded and a confirmation box is displayed. - Click Apply.The Mapped Entities tab is displayed.
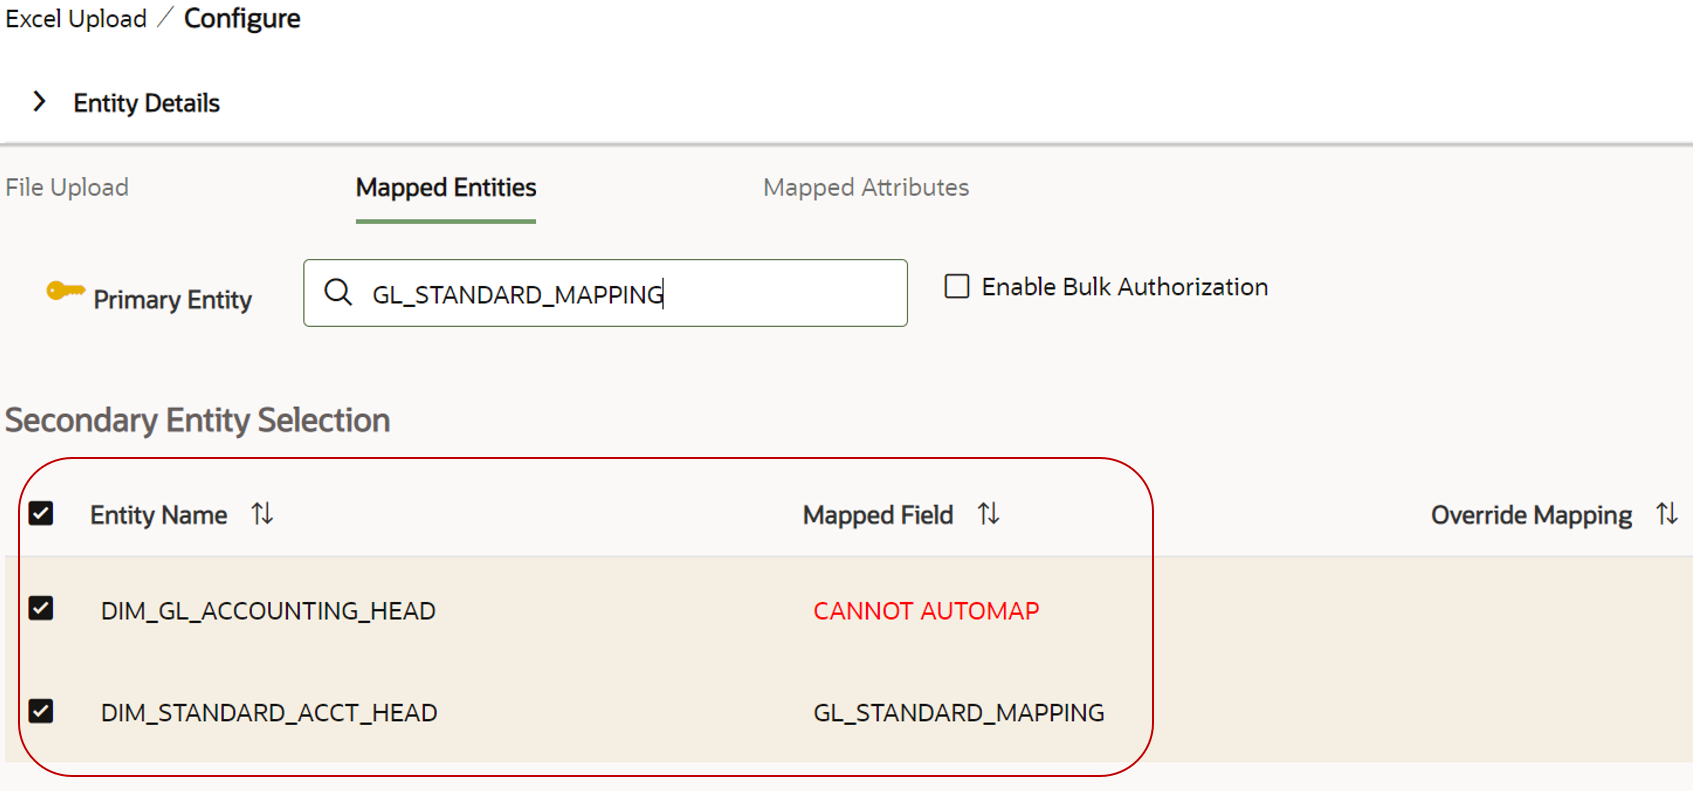
- Enter the name of the table that you want to modify in the Primary
Entity field.If the table has Child tables, the Child tables also get displayed in the Mapped Entities tab. You can select the required child tables for which data should be input during data entry.
Figure 11-1 Mapped Entity tab
- Select Enable Bulk Authorization if you want to enable the bulk authorization of all the records when you edit an approved Form from Data Entry.
- Click Apply.The Mapped Attributes tab is displayed.
- Click the table in the Entity Name field.The source attributes from the table and the mapped attributes from the Excel File are displayed.
Figure 11-2 Expanded table
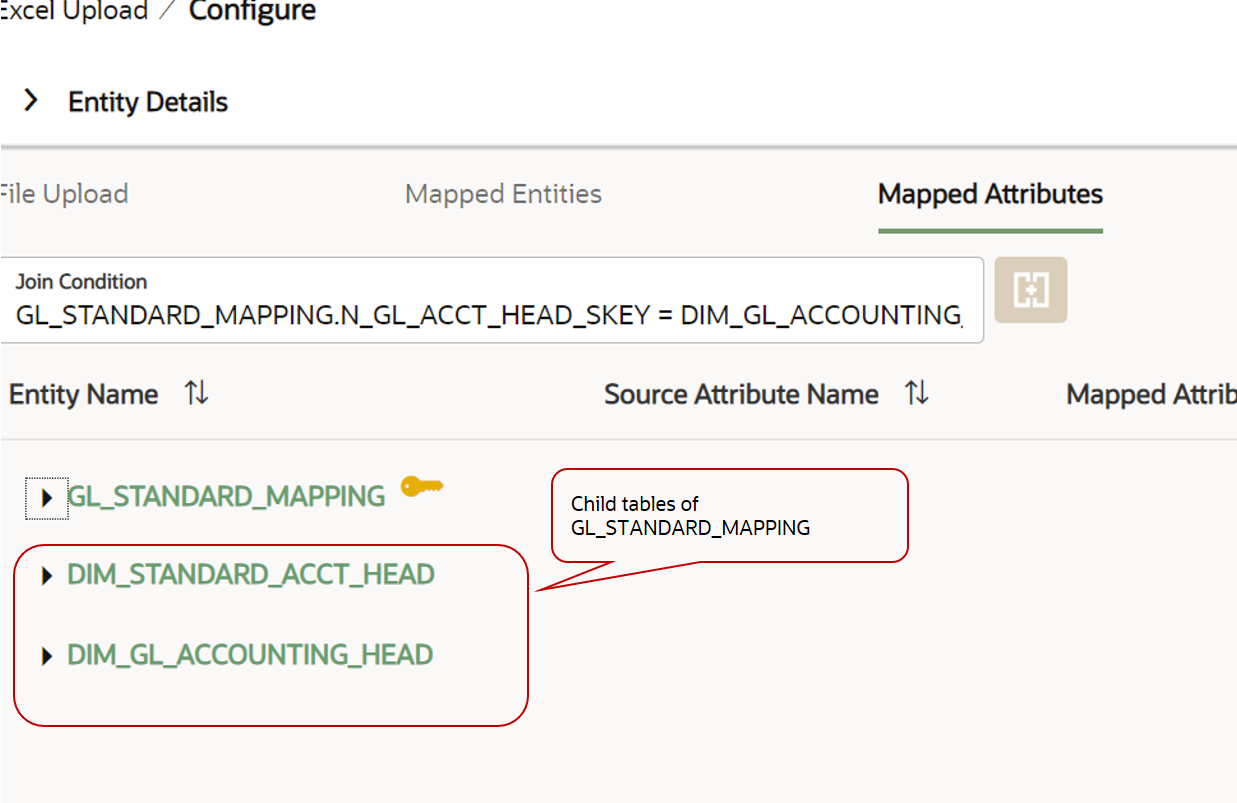
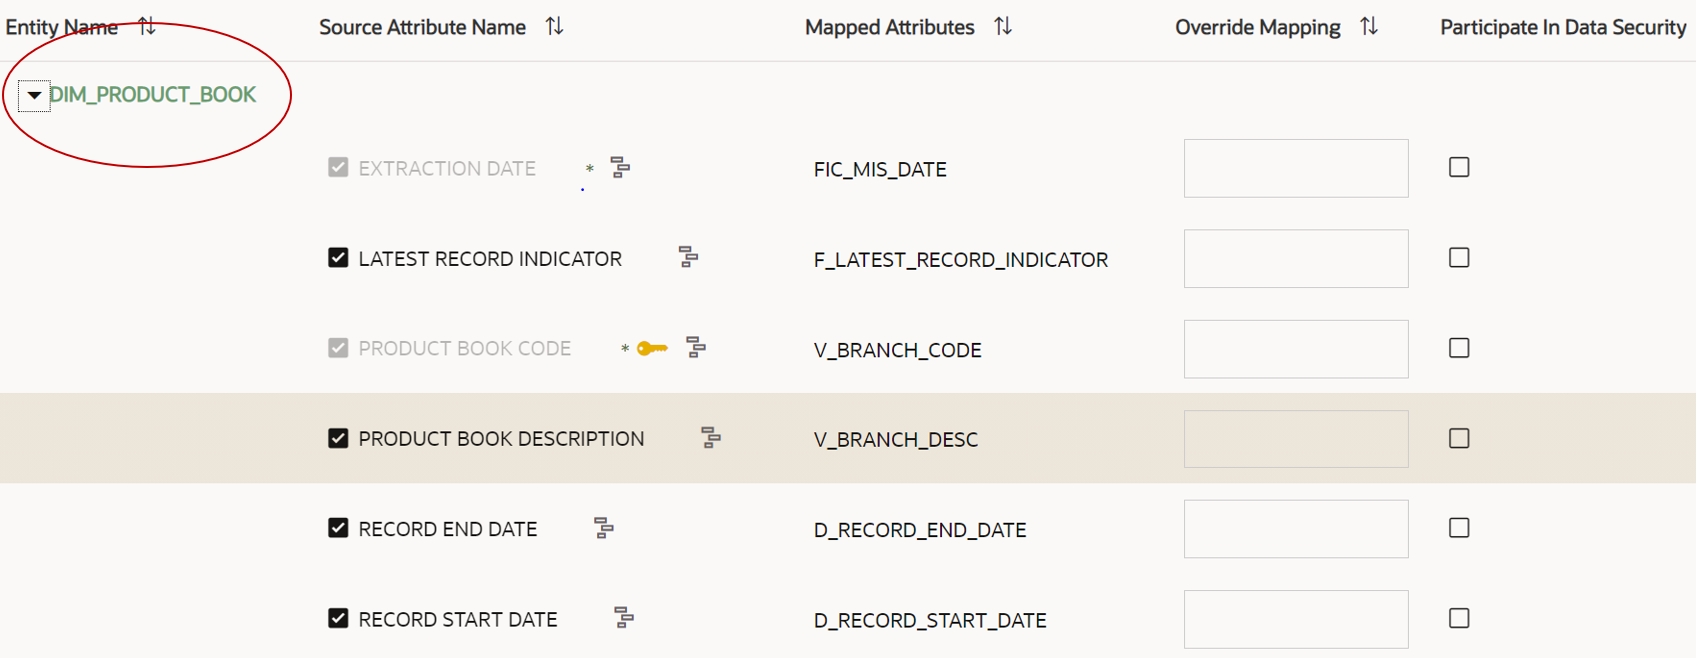 If the selected table has Child tables, the Child tables that you select from the Mapped Entities tab are also displayed in the Attributes tab. You can configure the attributes for the master table and its child tables here.
Figure 11-3 Master Child Tables in the Mapped Attributes tab
- Click the required mapping in the Override Mapping column and enter the required attribute name if you want to change the default mapping.
- Select Participate in Data Security if you want to
configure a specific condition. The condition that you configure is applicable
when a user performs the data entry for the table records for each approved
Forms Definition from the Data Entry page.For example, consider that you configure the condition
DIM_ACCOUNT_COUNTRY_NAME = ‘INDIA’for the reference table DIM_Account. When a user performs the data entry for this Forms Definition from the Forms Definition - Summary page and enters a country name other than ‘INDIA’, the record gets rejected by the application when another user approves this record.Complete the following steps if you want to configure Data Security for the Forms Definition:- Select the check box in the Participate in Data Security column. The icon is displayed.
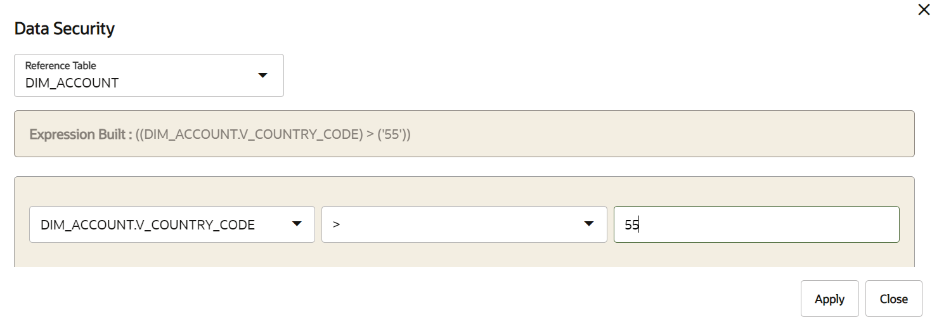
- Click the icon. The Data Security pop-up box is displayed.
- Select the required table based on which you want to build your condition from the Reference table drop-down list.
- Build your expression by selecting the required column, condition, and
filter value.
Figure 11-4 Expression for Data Security
- Click Apply. The filter condition is applied to the selected mapping.
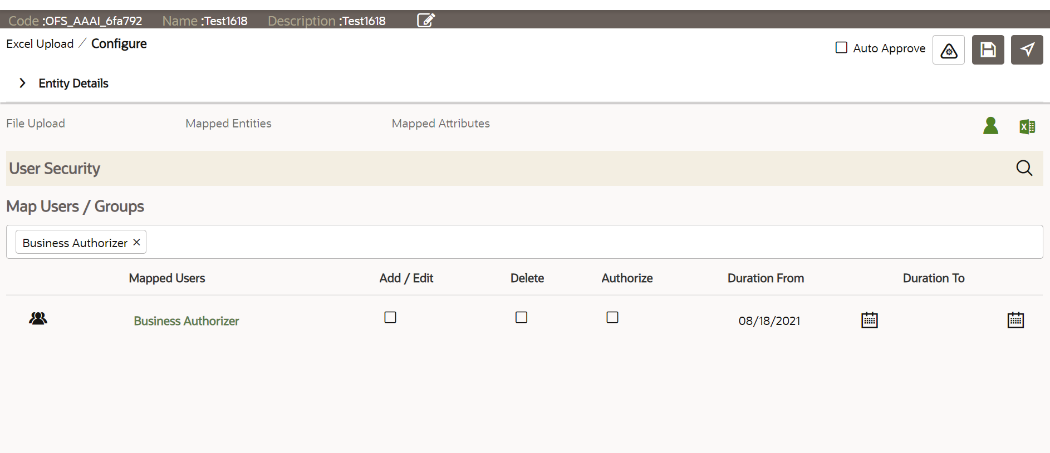
- Click User Security to select the user or user groups
who can perform data entry to maintain the data in the table.The User Security pane is displayed.
- Enter the required user group or user to assign permissions from the
Map Users / Groups field.When you select the user group or user, the permissions for each approved Forms Definition are displayed. These permissions are the actions that the selected user group or user can perform while performing Data Entry.
Figure 11-5 User Security Options in the Entity Details page
- Select the following permissions in the Map Users /
Groups pane that the user group or user can perform for each
Forms Definition from the Data Entry page:
Table 11-3 Permissions in the Map Users / Groups Pane
Option Description Add /Edit Add or modify records in an approved Forms Definition Delete Delete records in an approved Forms Definition Authorize Authorize the records in an approved Forms Definition Duration From Optional. Select the start date for which the permissions are available to the user or user group. Duration To Optional. Select the end date for which the permissions are available to the user or user group. The User Security Configuration is complete.Note:
If you select a user group for User Security, you can view the users mapped to that particular group by clicking the Admin icon. - Select DMI_WorkFlow from the Workflow drop-down list if you want the process of
data entry to go through the Process Modelling Framework (PMF) workflow that you
have already created.For information on PMF workflows, see the OFSAAI PMF Orchestration Guide.
- Click Save as Draft if you want to save the Forms Definition in draft format.
- Click Submit if you want to submit the Forms Definition for approval. The Forms Definition is created and is displayed in Forms Definition - Summary in Awaiting status.