17.2 Creating Cash Flow Process
To create a new Cash Flow process, perform the following steps:
- Navigate to the Cash Flow Process Summary page.
- Click Add . The Create Cash Flow Process page is
displayed.
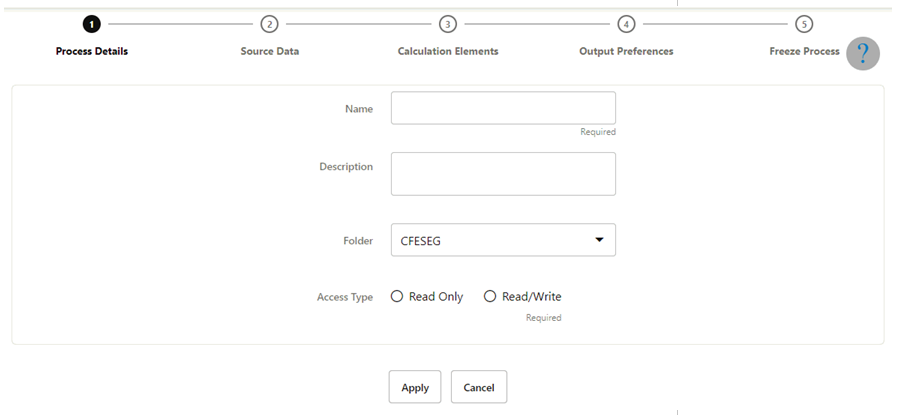
Figure 17-3 Create Cash Flow Process page
- Enter the details shown in the following table.
Table 17-3 List of process details used for Creating Cash Flow Process
Parameter Description Name Enter the name of the Cash Flow Process rule. Description Enter the description of the Cash Flow Process rule. Folder Select the Folder where the Cash Flow Process needs to be saved. Access Type Select the Access Type as Read-Only or Read/Write. - Click Apply to navigate to the Source Data section.
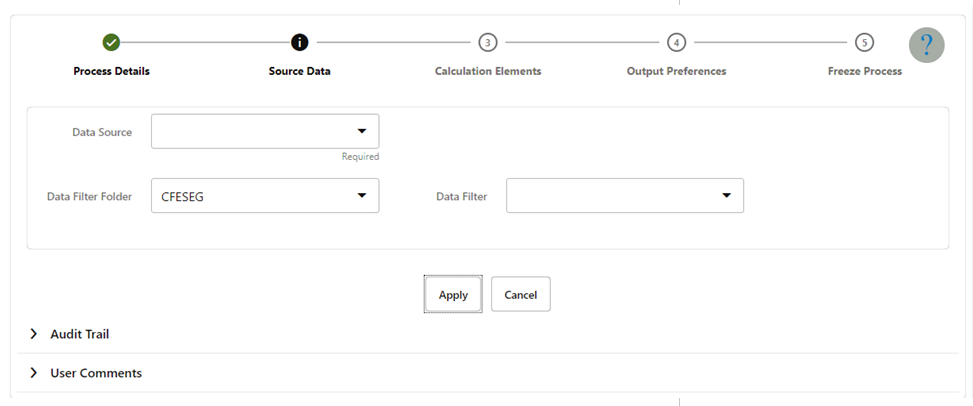
Figure 17-4 Creating Cash Flow Process
- Enter the Source Data details shown in the following table.
Table 17-4 List of Source Data details used for Creating Cash Flow Process
Parameter Description Data Source This field allows you to select the Instrument tables that must be included in a Cash Flow process. Data Filter Folder Select the Folder from which you want to apply Data Filter. Data Filter This field allows you to select a subset of data for processing by selecting a filter that was previously created. - Click Apply to navigate to the Calculation Elements
section.
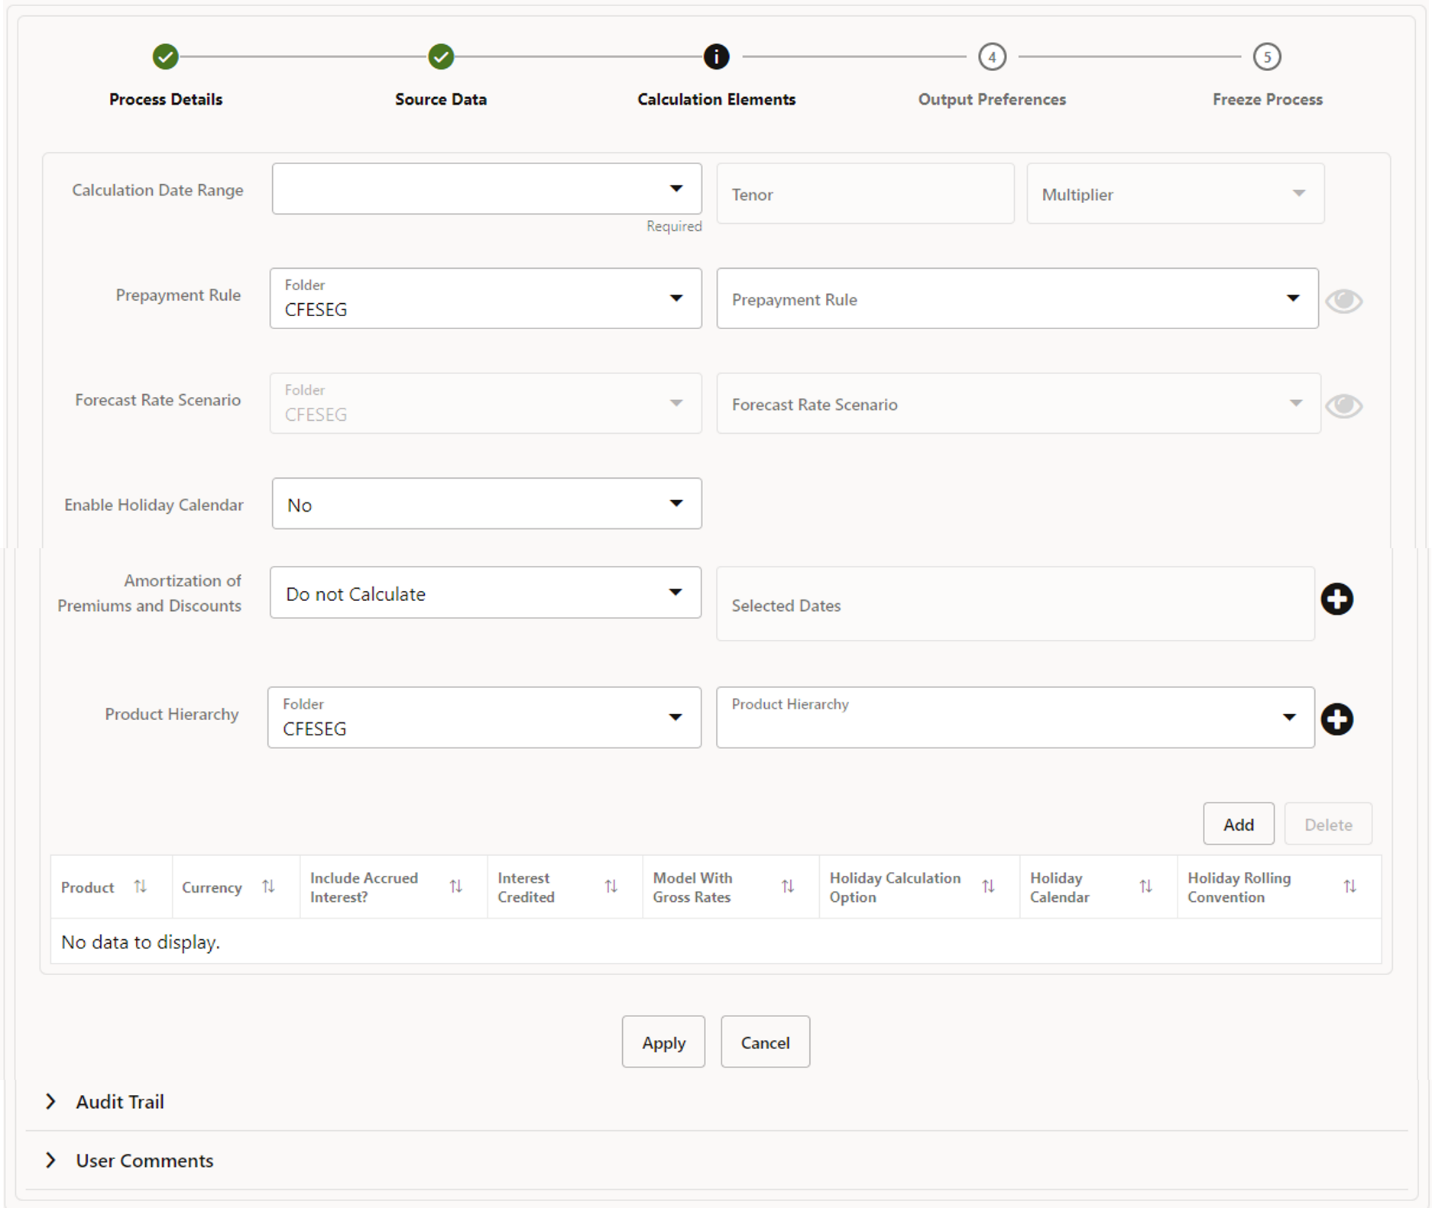
Figure 17-5 Creating Cash Flow Process
- Enter the Calculation Elements shown in the following table.
Table 17-5 List of Calculation Elements details used for Creating Cash Flow Process
Parameter Description Calculation Date Range Select the time horizon for which you want to perform the cash flow calculation. This has the following options:
- As of Date to Maturity Date: Calculation is performed between As of Date and Maturity Date of the instrument.
- As of Date to Next Reprice Date: Calculation is performed between As of Date and Next Repricing Date of the instrument.
- Origination Date to Maturity Date: Calculation is performed between Origination Date to Maturity Date of the instrument.
- Last Reprice Date to Next Reprice Date: Calculation is performed between Last Reprice Date to Next Reprice Date of the instrument.
- As of Date to Future Specified Date: Calculation is performed for the specified tenor starting from As of Date.
For more information, see the Cash Flow Engine Data Dictionary Guide.
Prepayment Rule Select the Folder and Prepayment Rule you want to be applied during cash flow calculation. See Prepayment Rule, to set up prepayment methods. This is an optional step. Forecast Rate Scenario Select the Folder and Forecast Rates rule you want to be applied to the process. See Forecast Rate Scenarios to set up rate scenarios. This is an optional step and enabled only when the calculation data range is ‘As of Date to Maturity Date’. Enable Holiday Calendar Select Yes or No from Enable Holiday Calendar drop-down list. No is selected by default. If this is selected as Yes, then cash flow dates falling on a holiday get adjusted as per defined conventions. You can also select the holiday calculation option, calendar, and business day convention at the product-currency level. Amortization of Premiums and Discounts Determines the method used for amortizing the premiums and discounts. This has the following options:
- Do not Calculate: The default value for the Calculation Method drop-down list is Do not calculate. In this case, cash flow for premium/discount does not get calculated even when Deferred Balance is given with instrument data.
- Amortize on Payment Dates: Select this option if you want to calculate premiums and discounts on Payment Dates.
- Amortize on User Defined Dates: Select this option if you want to calculate premiums and discounts on user-defined dates instead of payment dates. After selecting this option, perform these steps:
a. Click Add icon next to Selected Dates field.
Figure 17-6 Amortization of Premiums and Discounts
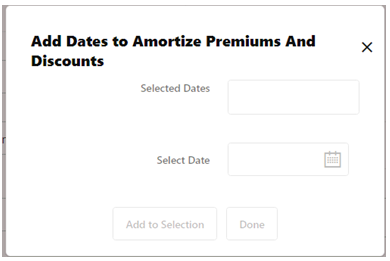
b. Add one or more dates on which you want to amortize premium/discount using Calendar icon and click Add to Selection.
Product Hierarchy Folder You can specify some processing parameters at product-currency combination. To do product hierarchy is used.
Select the Folder from the Product Hierarchy Folder list and Product Hierarchy on which you want to specify parameters:
1. Click Add icon next to the Product Hierarchy field.
Figure 17-7 Product Hierarchy Folder
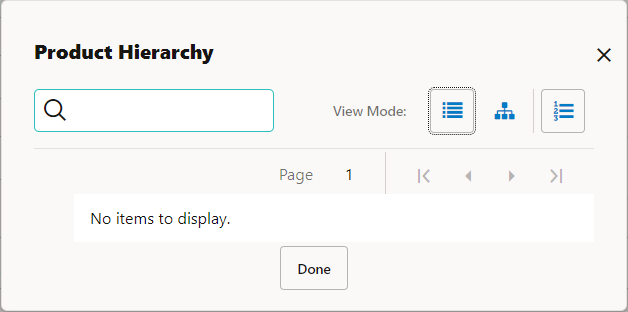
2. Select one or more products using the corresponding check-box and click Done.
- Click Add to add the defined calculation elements for processing. The list of
product is displayed with the following details:
Table 17-6 Product Hierarchy Selection
Parameter Description Product Shows the selected product details. Currency Shows the currency of the selected product. Include Accrued Interest Yes or No status of Include Accrued Interest. The basis on which the interest accrual on an account is calculated. Interest Credited Yes or No status of Interest Credited. This option shows the interest payments to be capitalized as principal on simple or non-amortizing instruments. Model With Gross Rates If the institution has outsourced loan serving rights for some of the assets (most typically mortgages), the rates paid by customers on those assets (gross rates) are greater than the rates received by the bank (net rates). For these instruments, both a net and gross rate is calculated within the cash flow engine and both gross and net rate financial elements are the output. The gross rate is used for prepayment and amortization calculations. The net rate is used for income simulation and the calculation of retained earnings in the auto-balancing process. Holiday Calculation option Shows the list of calculation options Shift dates Only and Recalculate Payment. Holiday Calendar Shows the list of holiday calendar. You can select one. Holiday Rolling Convention The default value is Unadjusted and is enabled, only when Holiday Calendar is selected. This can have the following values:
- Actual/Un-adjusted: Payment on an actual day, even if it is a non-business day.
- Following Business Day: The payment date is rolled to the next business day.
- Modified following business day*: The payment date is rolled to the next business day unless doing so would cause the payment to be in the next calendar month, in which case the payment date is rolled to the previous business day.
- Previous business day: The payment date is rolled to the previous business day.
- Modified previous business day*: The payment date is rolled to the previous business day unless doing so would cause the payment to be in the previous calendar month, in which case the payment date is rolled to the next business day
- Many institutions have month-end accounting procedures to use this.
- Click Apply to navigate to the Output Preferences section.
Figure 17-8 Output Preferences
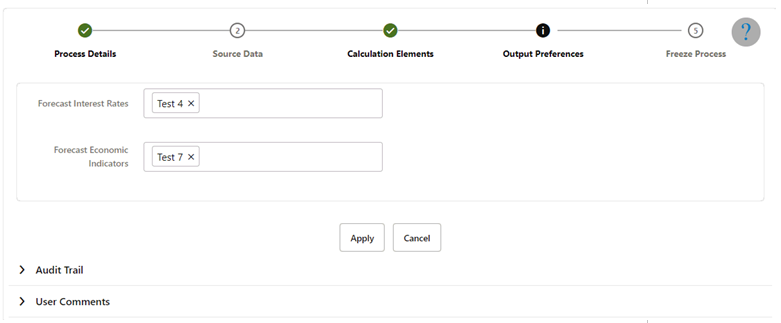
- Enter the Output Preferences details shown in the following table.
Table 17-7 List of Output Preferences details used for Creating Cash Flow Process
Parameter Description Forecast Interest Rates Select the Interest Rate Curves for which you want the engine to write forecasted interest rates in the database table Forecast Economic Indicators Select the Economic Indicators for which you want the engine to write forecasted interest rates in the database table - Click Apply to navigate to the Freeze Process section.
Figure 17-9 Freeze Process
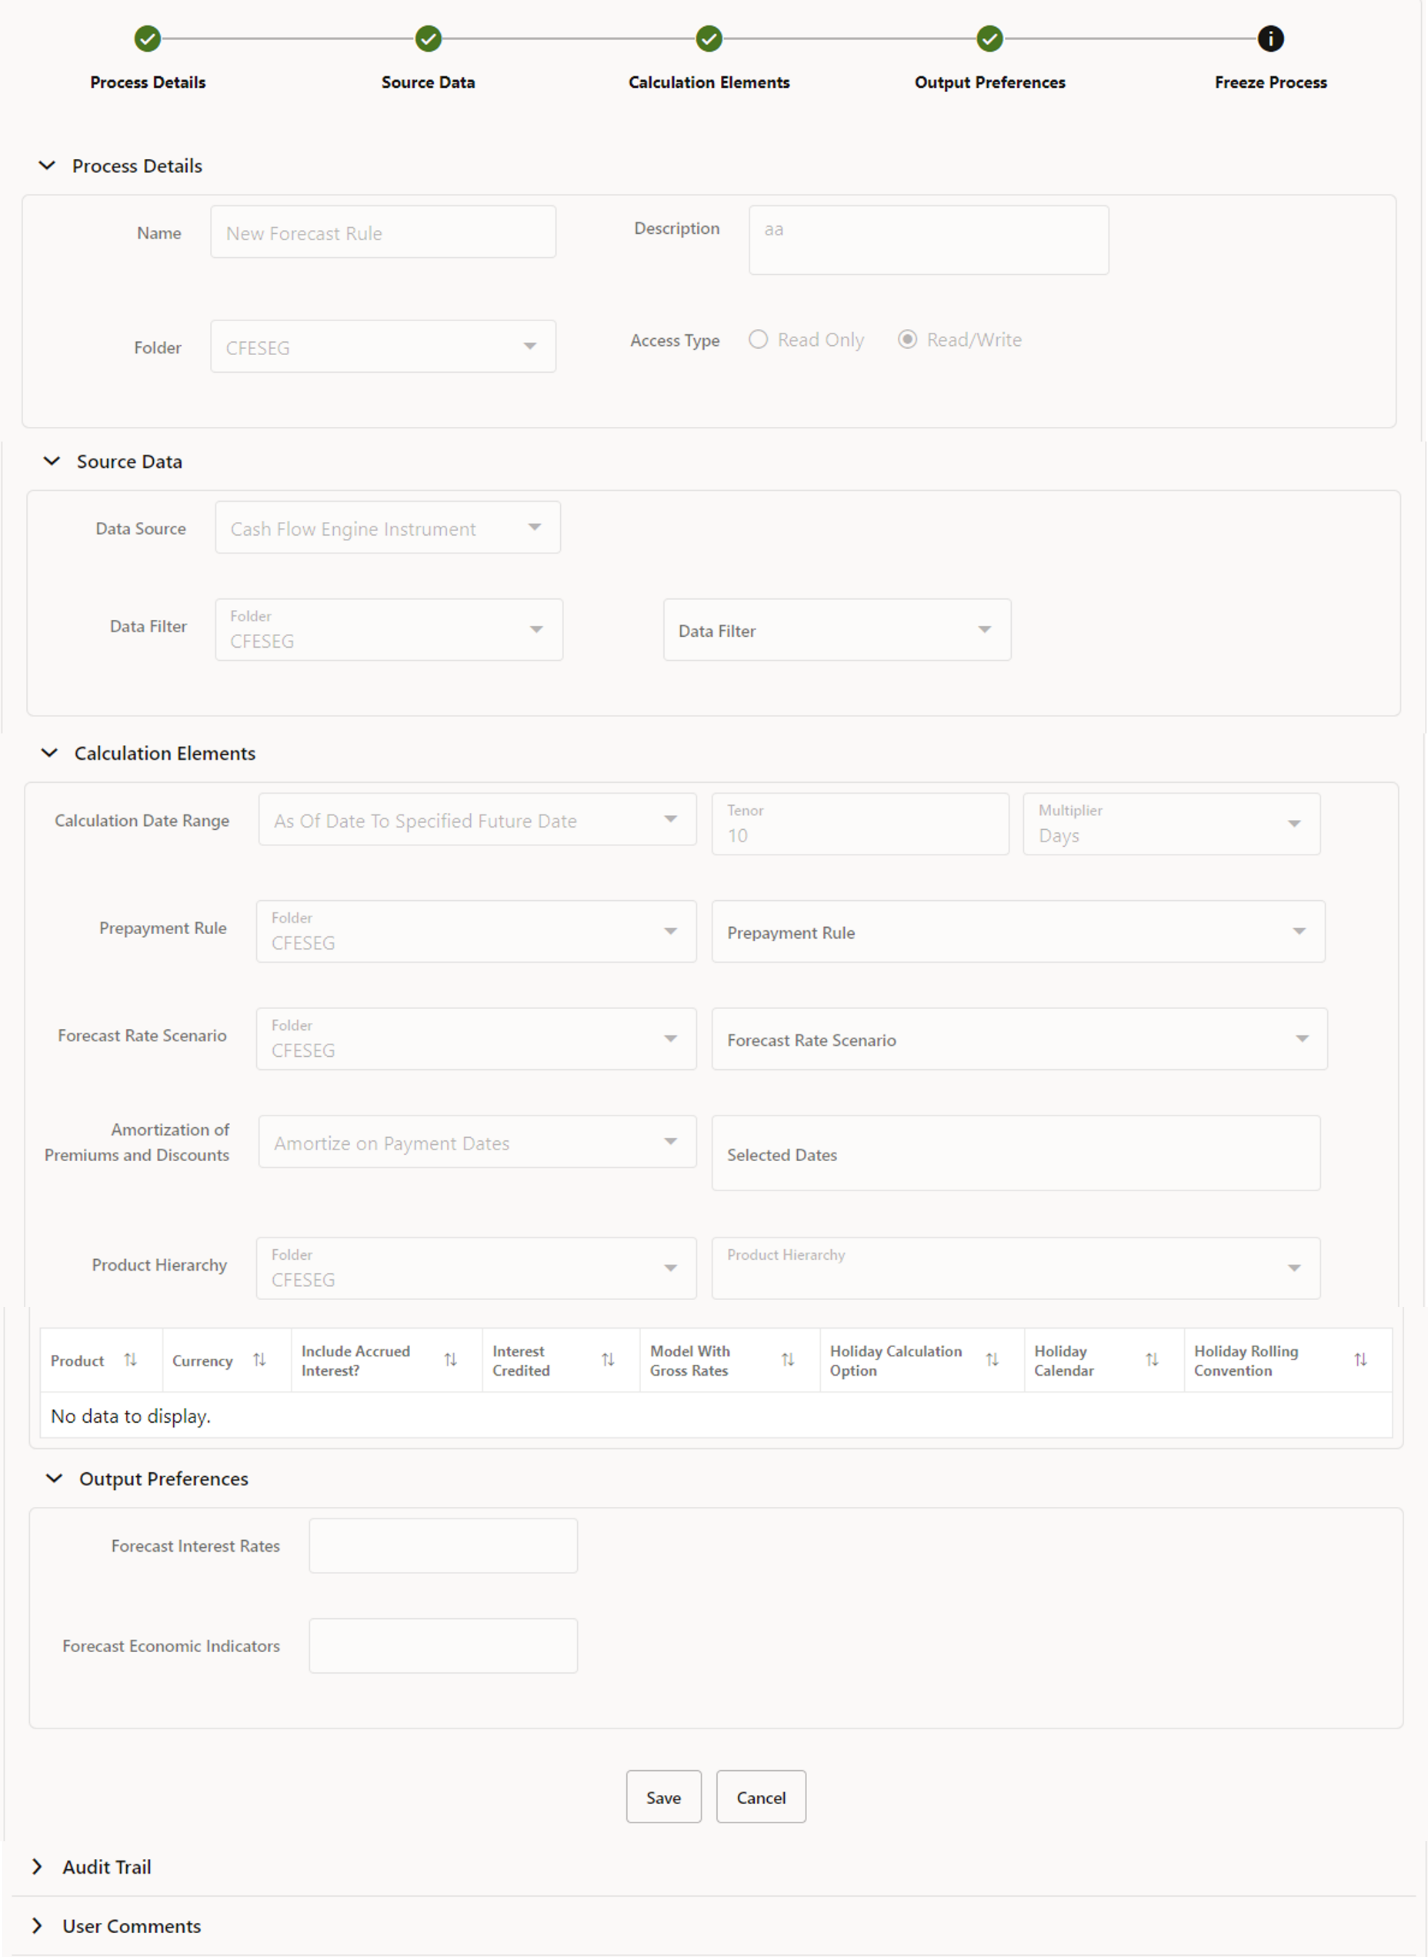
- Verify the changes and click Save.