- Process Modelling Framework Orchestration Guide
- Timer
- Configure a Timer
- Configuring a Timer using the GUI
Configuring a Timer using the GUI
To configure a Timer, follow these steps:
- Click a Process Flow in the Process Modeller window to display it in the PMF Canvas.
- Click the Timer icon from the toolbar to display the Timer drawer window.
- Click the Add icon to configure in the Timer
Details window.To configure Timer details in the Details tab, follow these steps:
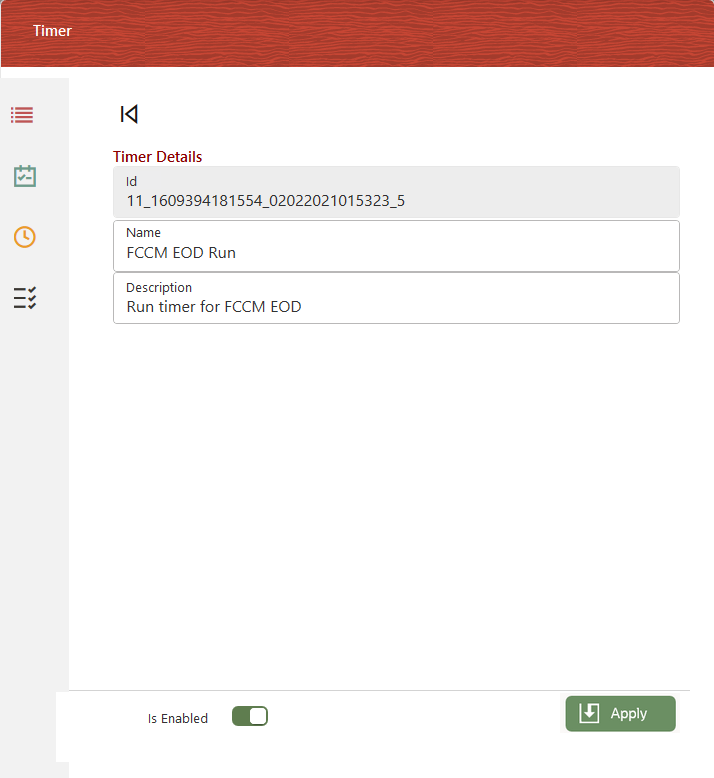
Figure 17-4 The Timer Details Tab

- Enter a name for the Timer in the Name field. The application auto-populates the ID field with a unique identifier and is read-only.
- Enter a description for the Timer in the Description field. You have to map the Timer to an activity on the canvas from the Activity tab.
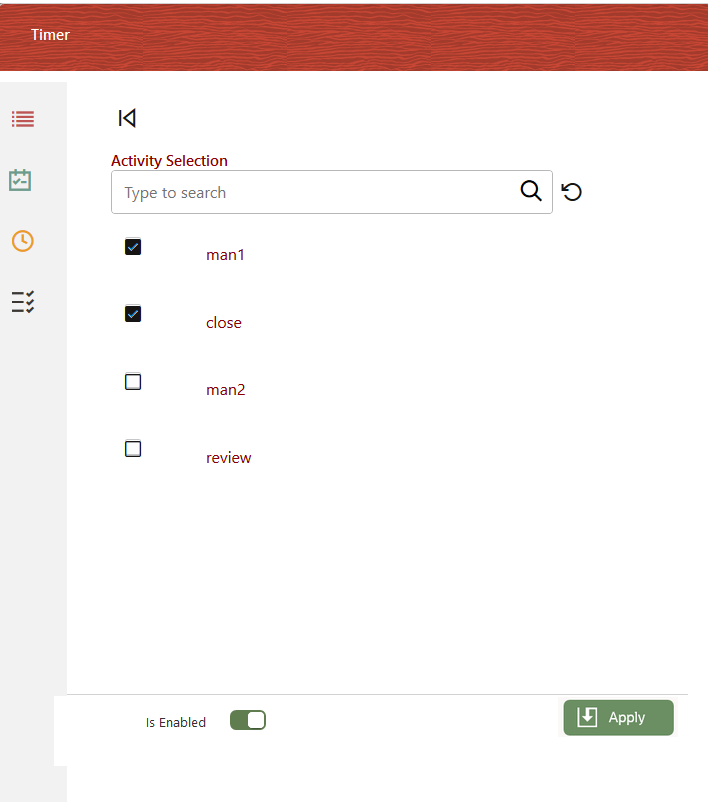
To configure details in the Activity tab, follow these steps:Figure 17-5 The Activity tab

- Click the Activity tab.
- Select the required activities from the list. These activities are the activities that exist in the Process Flow Canvas.
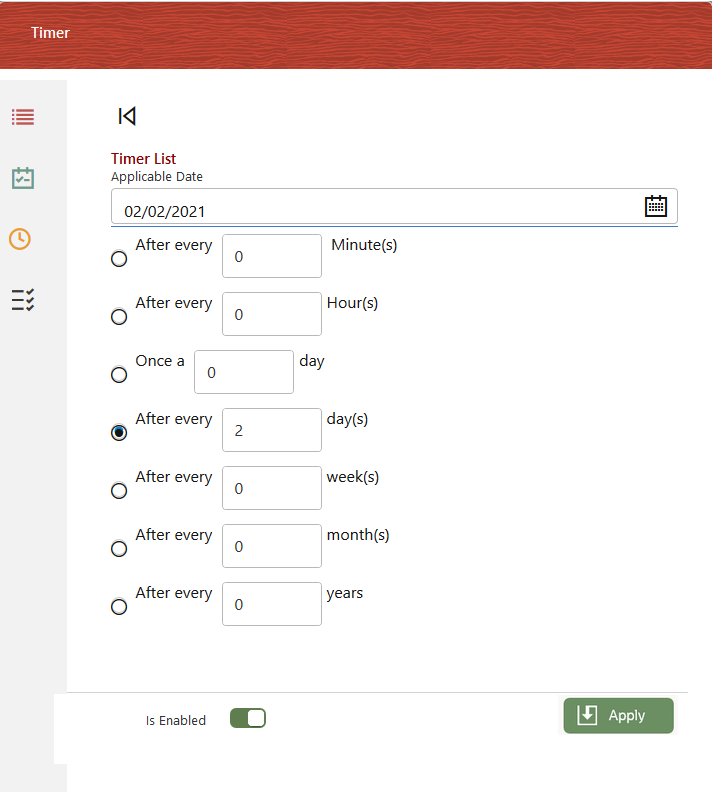
After mapping an Activity to the Timer, you must set the frequency of execution of the rule on the activity from the Frequency tab.To configure details in the Frequency tab, follow these steps:Figure 17-6 The Frequency tab

- Click the Frequency tab to set the frequency of execution of the timer.
- Select the date from which the timer is required to start executing in the Applicable Date date-picker.
- Select the required frequency from the following and enter a value:
- After every Minute(s) - Enter the number of minutes after which to execute the Timer. The timer is executed periodically after the entered number of minute(s) elapses.
- After every Hour(s) - Enter the number of hours after which to execute the timer. The timer is executed periodically after the entered number of hour(s) elapses.
- Once a day - Select the Once a day option if you want the timer to run only once.
- After every days(s) - Enter the number of days after which to execute the timer. The timer is executed periodically after the entered number of day(s) elapses.
- After every weeks(s) - Enter the number of weeks after which to execute the timer. The timer is executed periodically after the entered number of week(s) elapses.
- After every month(s) - Enter the number of months after which to execute the timer. The timer is executed periodically after the entered number of month(s) elapses.
- After every year(s) - Enter the number of years after which to execute the timer. The timer is executed periodically after the entered number of year(s) elapses.
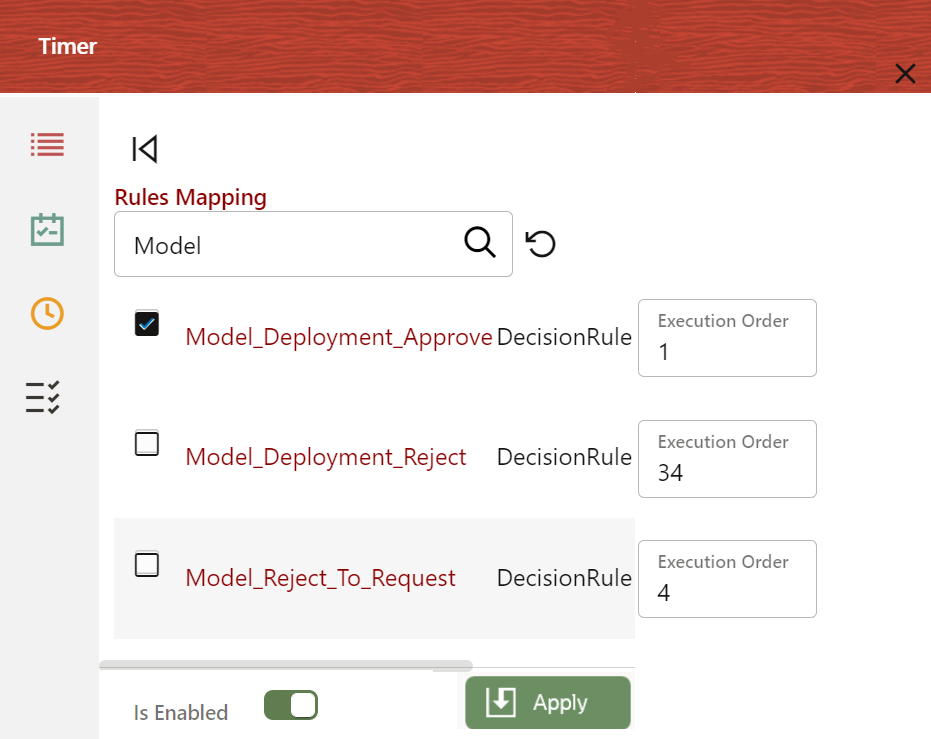
After you set the frequency, you must map the activity to execute the selected rule(s). The Timer executes the selected rules on the activity for the set frequency.To map rules to the Timer from the Rules tab, follow these steps:Figure 17-7 The Rules tab

- Click the Rules tab.
- Select the rules required from the list.
Note:
You can select only:- Decision and Execution Rules from the Rules Mapping list.
- One Decision Rule from the Rules Mapping list to avoid conflict in the Decision Rule execution.
- After the execution of a decision rule, the Timer stops retriggering or executing.
- Set the Execution Order to execute the rules in
sequence.The execution order by default is set to 1. You can set it to any number from 1 – 999. The rules are sorted in ascending order and executed sequentially.
- Click the Apply icon to save the details. Select the Is Enabled toggle button to enable the Timer. If you keep it in the Deselect state, the Timer will not be enabled. However, you can enable it later when required.