- Inline Processing Engine User Guide
- Executing an Assessment Batch
- Executing an Assessment Batch through Rules Run Framework
- Creating a Run and Executing it
Creating a Run and Executing it
To create a run and execute it
- Navigate to the OFSAA Home Page and select IPE Execution from Select Application drop-down list.
- Select Process Management under it and then Orchestration.
- Select Run Definition. The Run Definition page is
displayed.
Figure 12-9 Run definition page

- Click New (+) on the List tool bar. The Run Rule
framework window is displayed.
Figure 12-10 New Run Definition details page
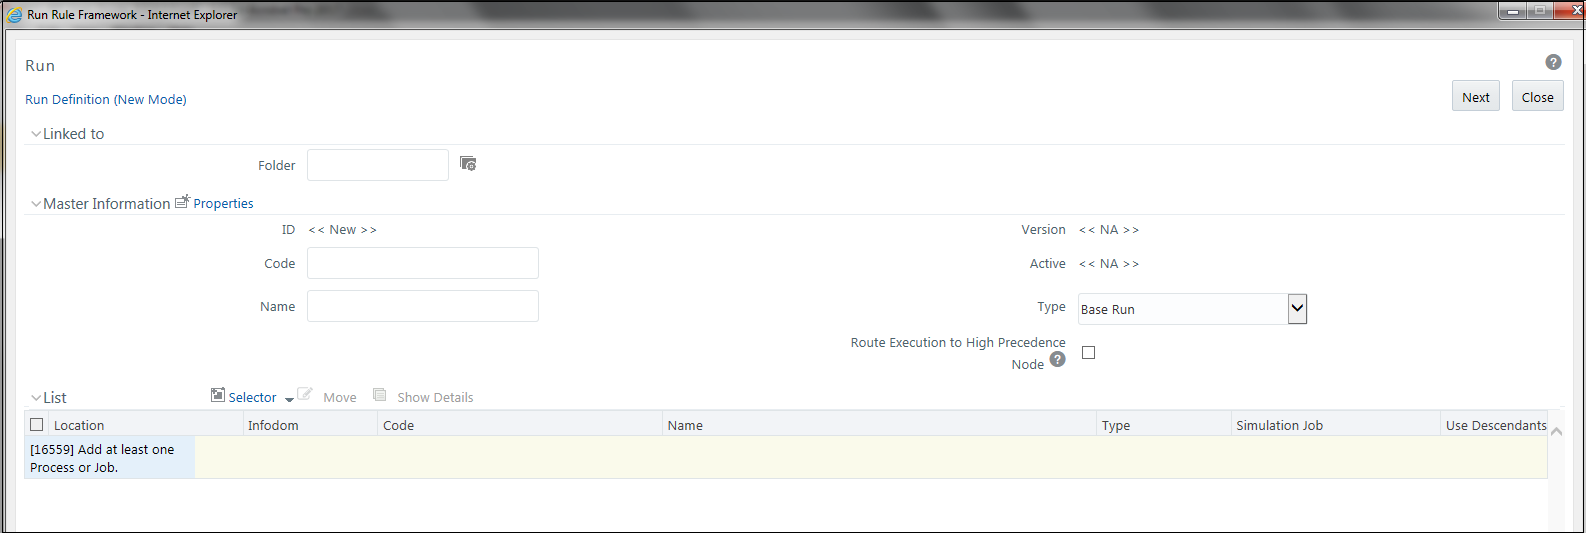
- Select the folder that is to be linked to the process run.
- In the Master Information tool bar, enter the following
details:
- Code: Enter the Code of the process.
- Name: Enter the Name of the process.
- Type: Select Type. It has the following
options:
- Simulation Run
- Base Run
From these options, select Base Run.
- Click Selector on the List tool bar. From the options
displayed, select Job. The Job Details page is
displayed.
Figure 12-11 Job RRF window
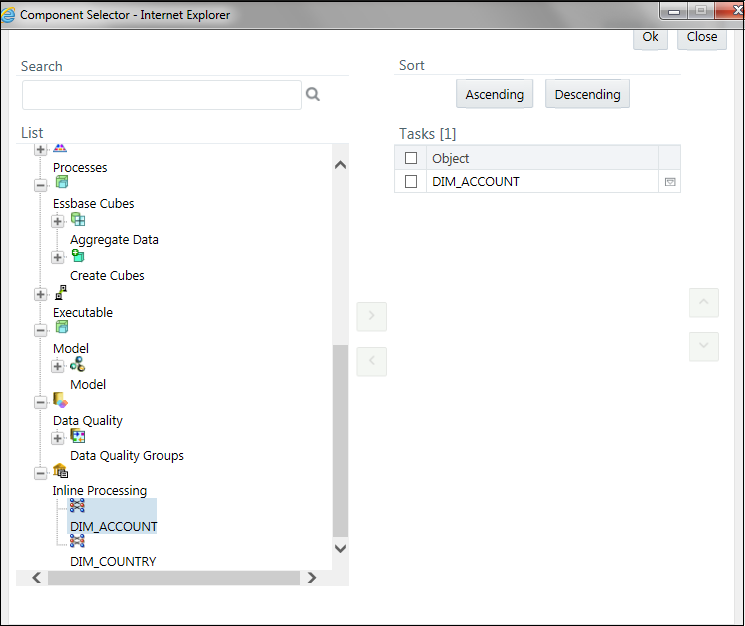
- Select the Process from the list. The process gets displayed on the right.
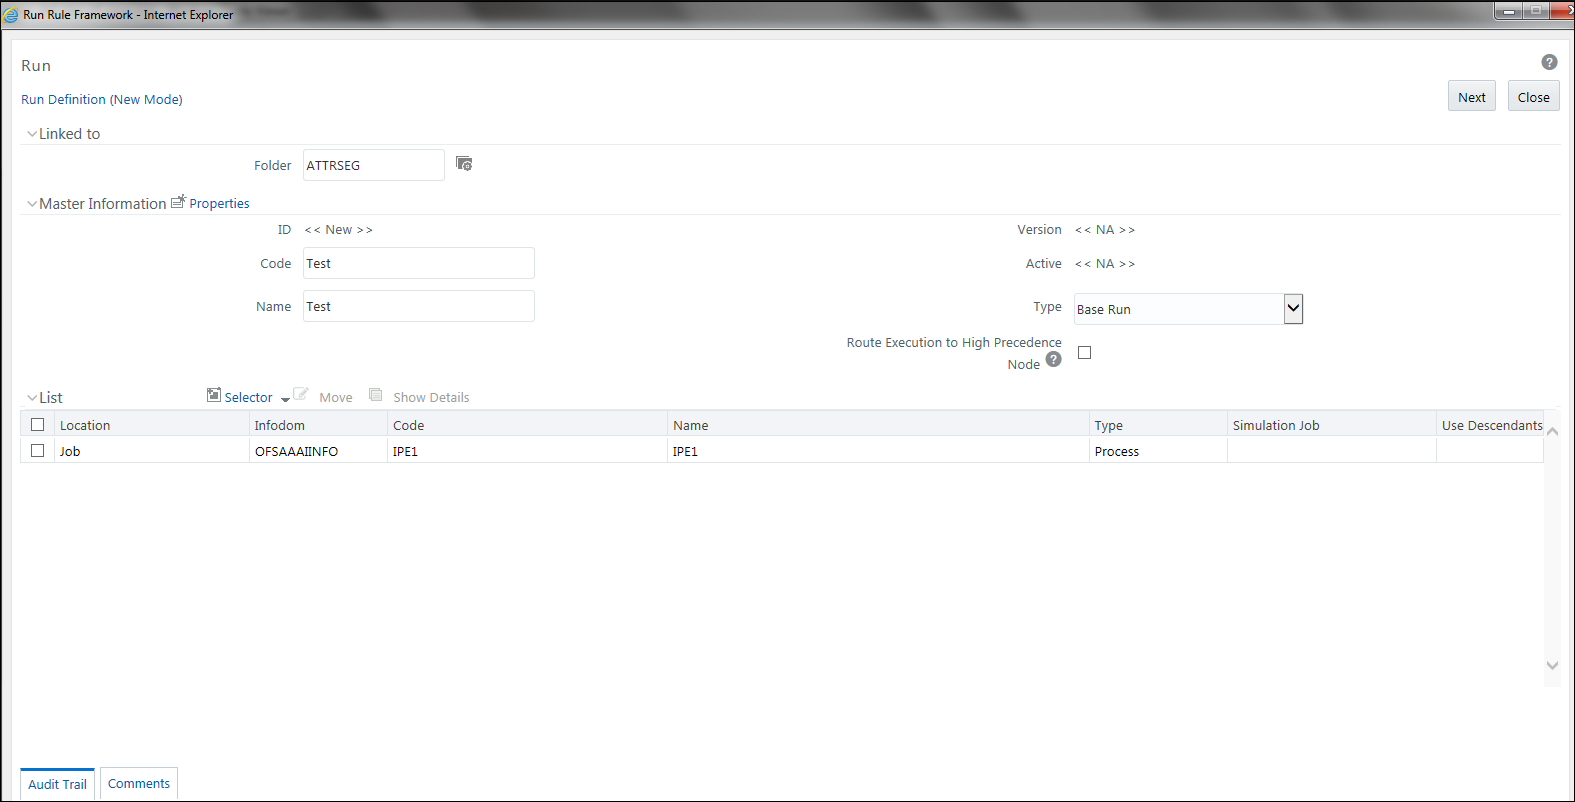
- Click OK. The job is displayed on the Run Rule Framework
window.
Figure 12-12 Jobs for Run RRF page
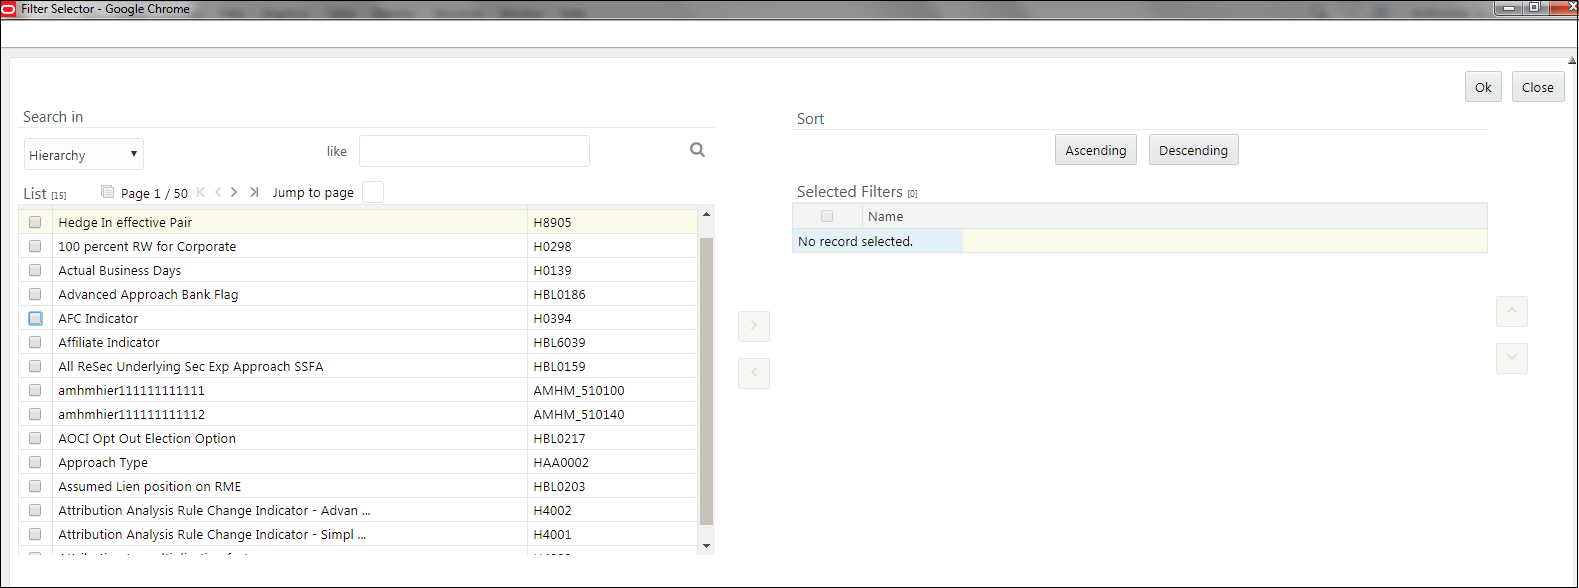
- Click Next. Add the required hierarchy to the jobs.
- Select the filter to be added to the job.
Figure 12-13 Hierarchy Browser window
- Click OK. The required hierarchy for the job is selected
and is displayed on the Run Rule Framework window.
Figure 12-14 Job Hierarchy RRF page
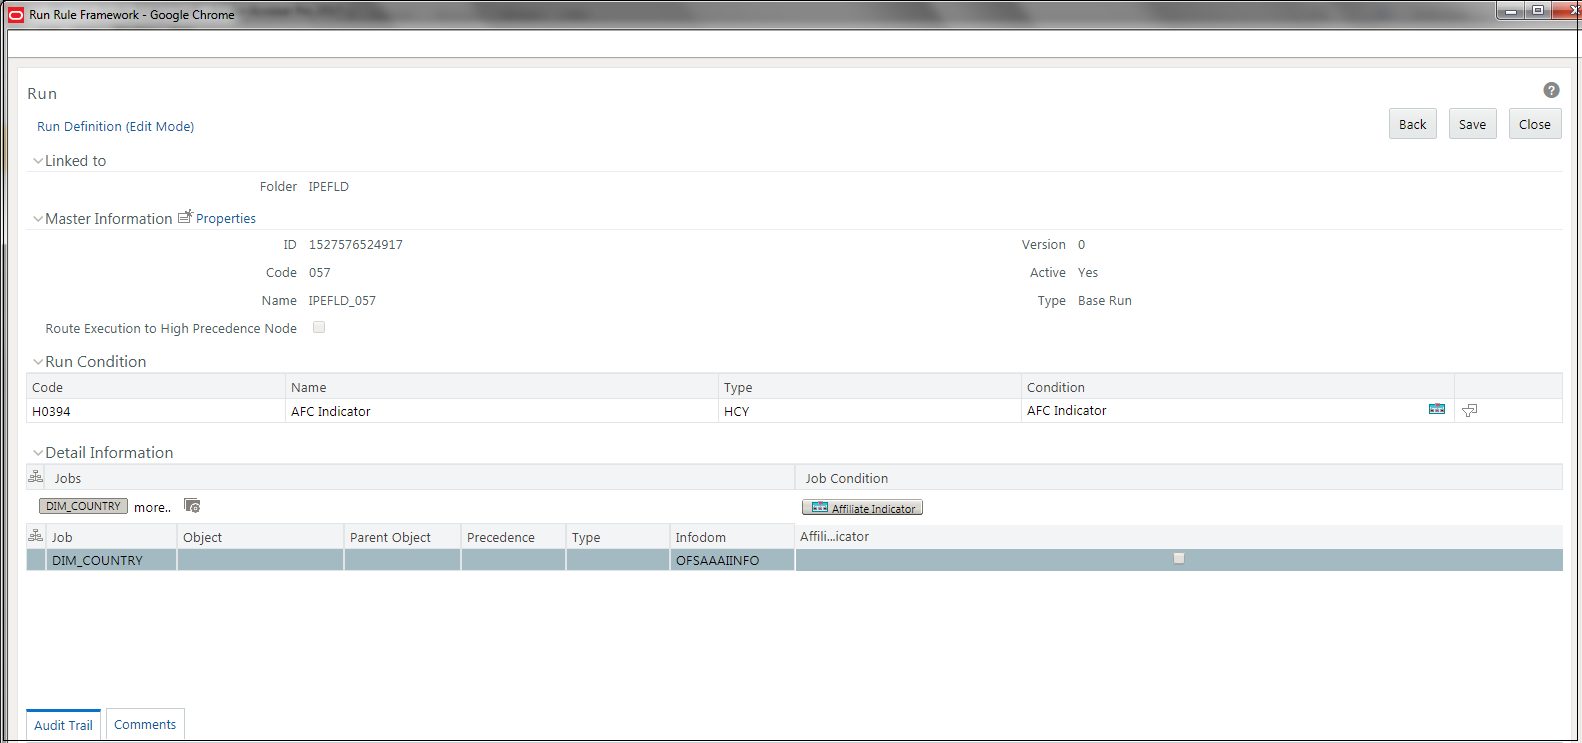
- Click Save. A confirmation message is displayed. The run
is created and displayed on the Run Definition page.
Figure 12-15 Fire Run Page

- Select the run from the Run definition page that is to be executed and click
Fire Run. The Fire Run Rule Framework dialog box is
displayed.
Figure 12-16 Fire Run Details Page
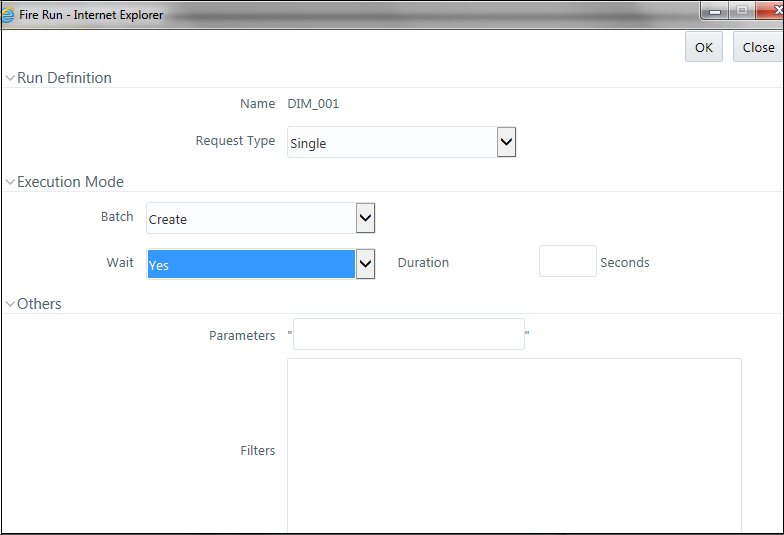
- Enter the following details:
- Request Type: Select Request Type based on the following
options:
- Single: If the batch has to be executed once.
- Multiple: If the batch has to be executed multiple times at different intervals.
- Batch: Select Batch. It has the following options:
- Create
- Create & Execute
From these options, select Create & Execute.
- Wait: Select Wait. It has the following options:
- Yes: This will execute the batch after a certain duration. Enter the duration as required.
- No: This will execute the batch immediately.
- Filters: Enter the filter details.
Note:
- $MISDATE option can be used to execute the run for that
particular day. The format for it to enter in the filter details
is:
to_date(<ACTIVITY_TABLE_NAME>.<ACTIVITY_DT_COL>)=$MISDATE - For $MISDATE option:
- For either Date or Timestamp datatypes, to_date is mandatory for the filter.
- Activity Table Name and Activity Column Name should be in capital.
- $MISDATE option can be used to execute the run for that
particular day. The format for it to enter in the filter details
is:
- Request Type: Select Request Type based on the following
options:
- Click OK to run the batch.