- Inline Processing Engine User Guide
- Executing an Assessment Batch
- Executing an Assessment Batch through Rules Run Framework
- Creating a Hierarchy filter
Creating a Hierarchy filter
To create a Hierarchy Filter:
- Navigate to the OFSAA Home Page and select Common Tasks from Select Application drop-down list.
- Select Unified Analytical Metadata under it and then Dimension Management.
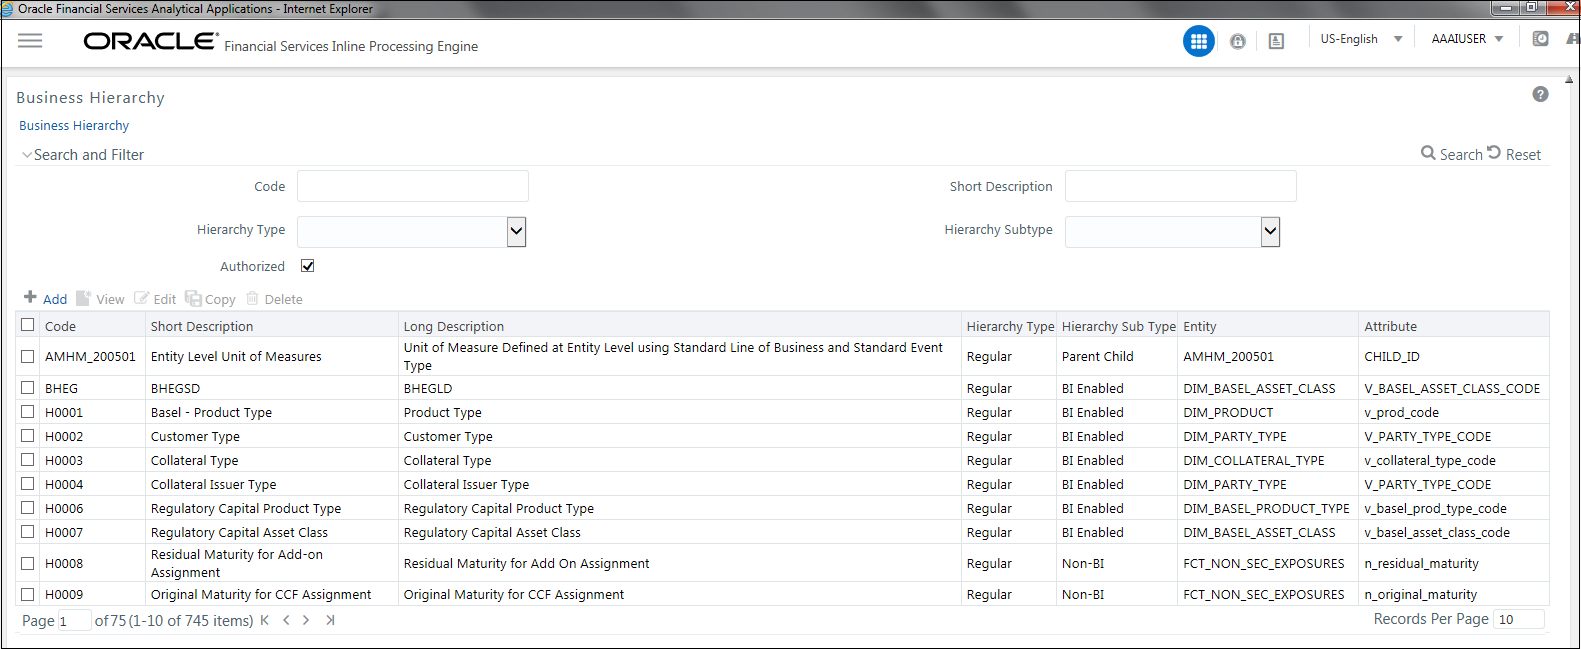
- Select Build Hierarchy. The Business Hierarchy page is
displayed.
Figure 12-5 Build Hierarchy page

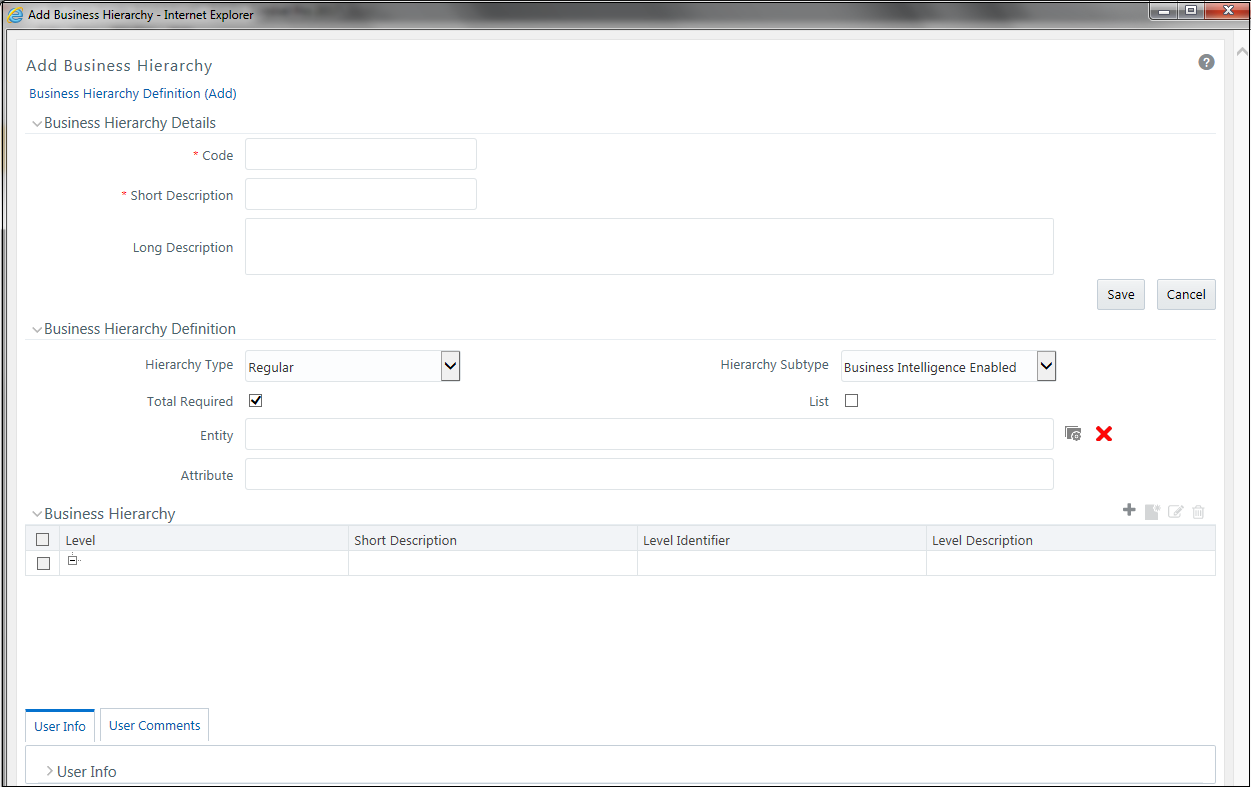
- Click Add (+) on the Business Hierarchy tool bar. The
Add Business Hierarchy window is displayed.
Figure 12-6 Adding Business Hierarchy Details

- Enter the following details:
- Code: Enter the Code.
- Short Description: Enter the short description.
- Long Description: Enter the long description.
- Hierarchy Type: Select Hierarchy Type. It has the
following options:
- Regular
- Measure
- Time
From these options, select Regular.
- Hierarchy Subtype: Select Hierarchy Subtype. It has the following
options:
- Business Intelligence Enabled
- Non Business Intelligence Enabled
- Parent Child
From these options, select Non Business Intelligence Enabled.
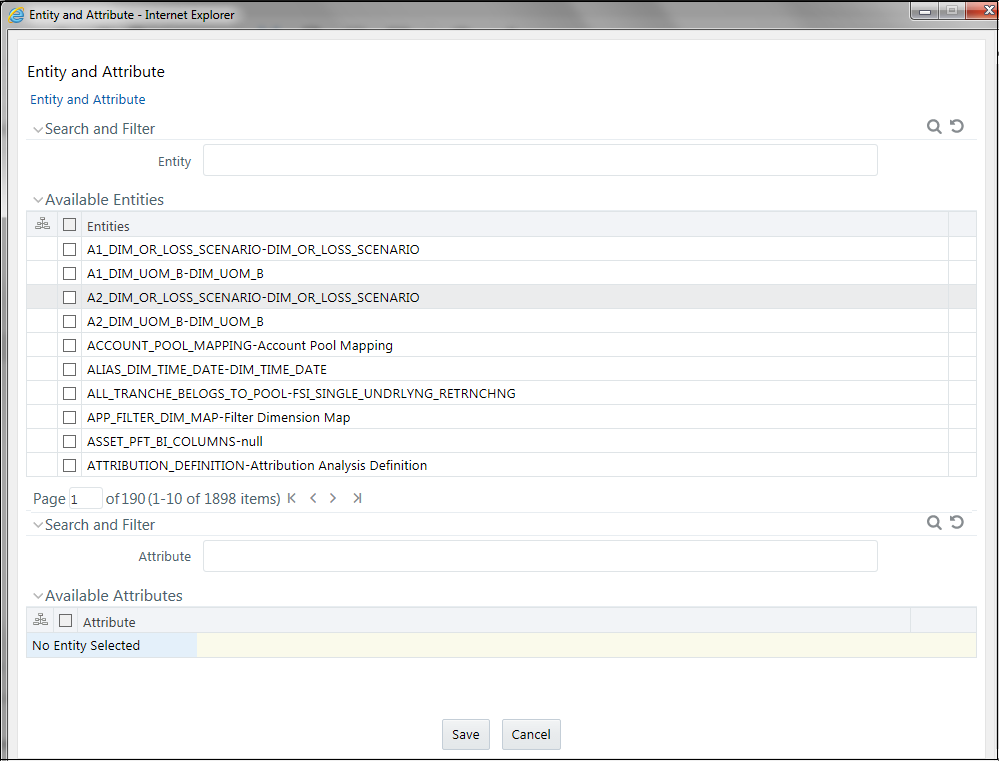
- Click on the button next to Entity. The Entity and
Attribute dialog box is displayed.
Figure 12-7 Entity and Attribute details page

- Select the Activity table from Entity. The Attributes of the Activity table are displayed.
- Select the Attribute whose result is to be displayed.
- Click Save. The details are displayed on the Add Business Hierarchy window.
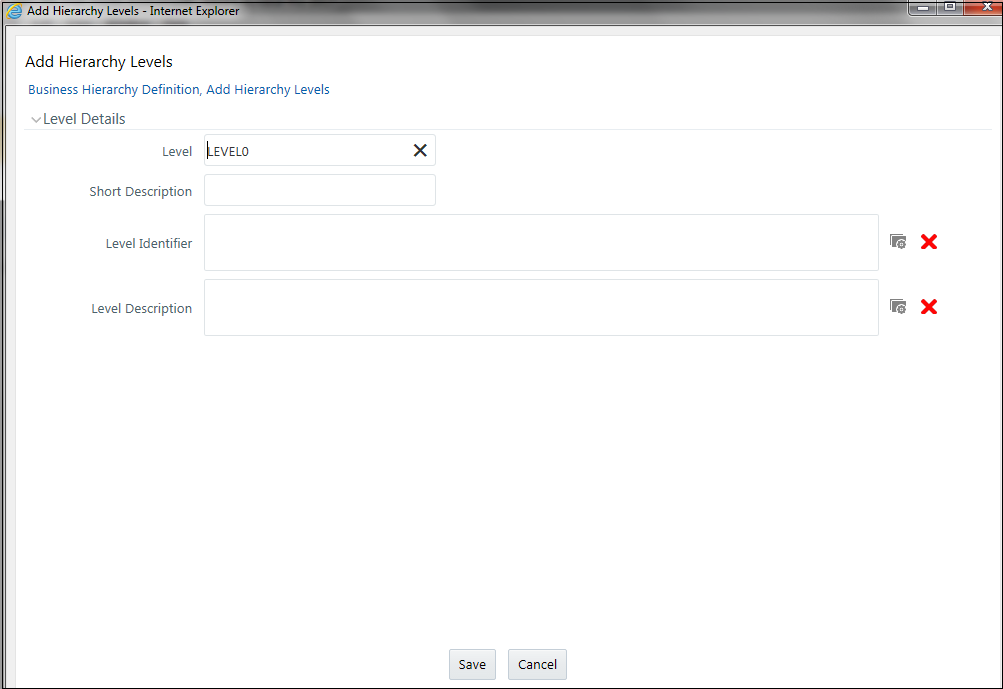
- Click Add (+) on the Business Hierarchy tool bar. The
Add Hierarchy Levels dialog box is displayed.
Figure 12-8 Adding Hierarchy Levels

- Enter the following details:
- Short Description: Enter the short description.
- Level Identifier: Enter the Level Identifier from the Expressions dialog box.
- Level Description: Enter the Level Identifier from the Expressions dialog box.
- Click Save. A confirmation message is displayed.