3.4 Setting up Jurisdiction Codes, Segments, Accounts, Channels, and Limits

In this section you will configure the various products (accounts and channels) offered to various segments within your institution. You will also specify any limits or restrictions imposed on these products for each segment.

Figure 3-8 Set up Account, Channels, and Limits


To set up an account, channels, and limits, follow these steps:
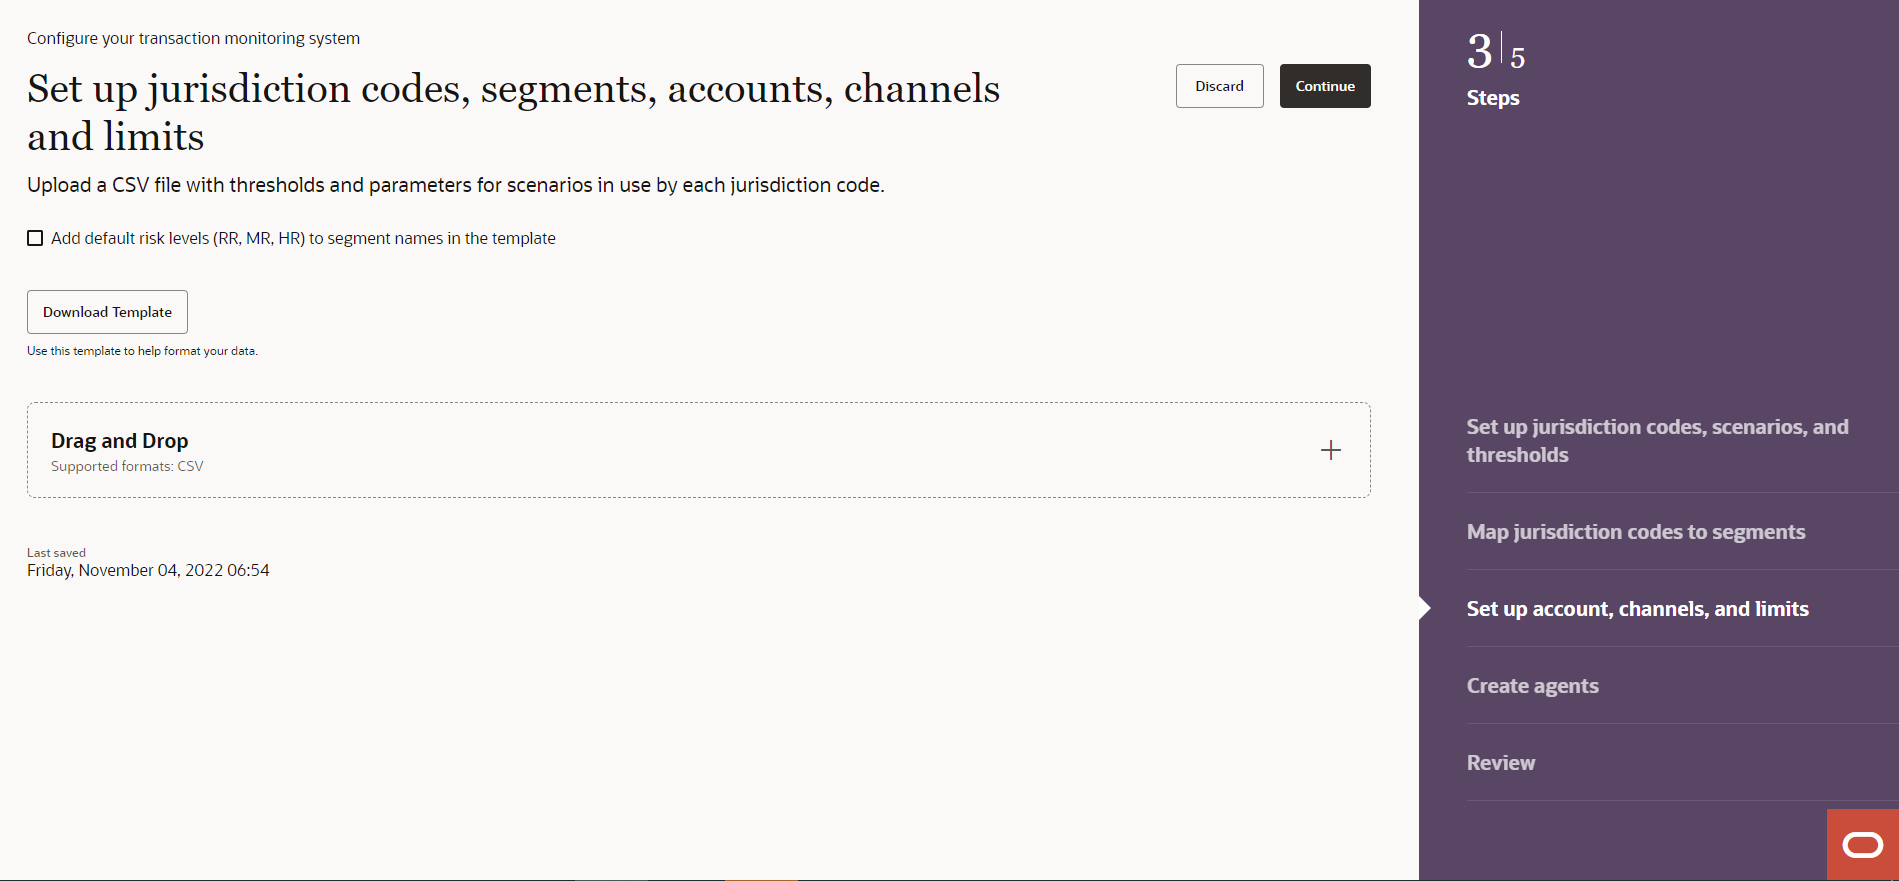
  1. Enable the Add default risk levels (RR, MR, HR) to segment names in the template check box if your institution uses Oracle's default risk tiers - RR, MR, and HR and if each customer segment at your institution is mapped to one of these risk tiers.
  2. Click Download Template to download the template and populate the template with required data

    Note:

    • You can update details in the Channel and Withdraw_Limit columns as per requirement.
    • Specify the channel name as CASH, MI, and WIRE in the Channel column.
    • Withdrawal limits refer to hard limits on how much funds can be withdrawn from an account type through a specific channel.
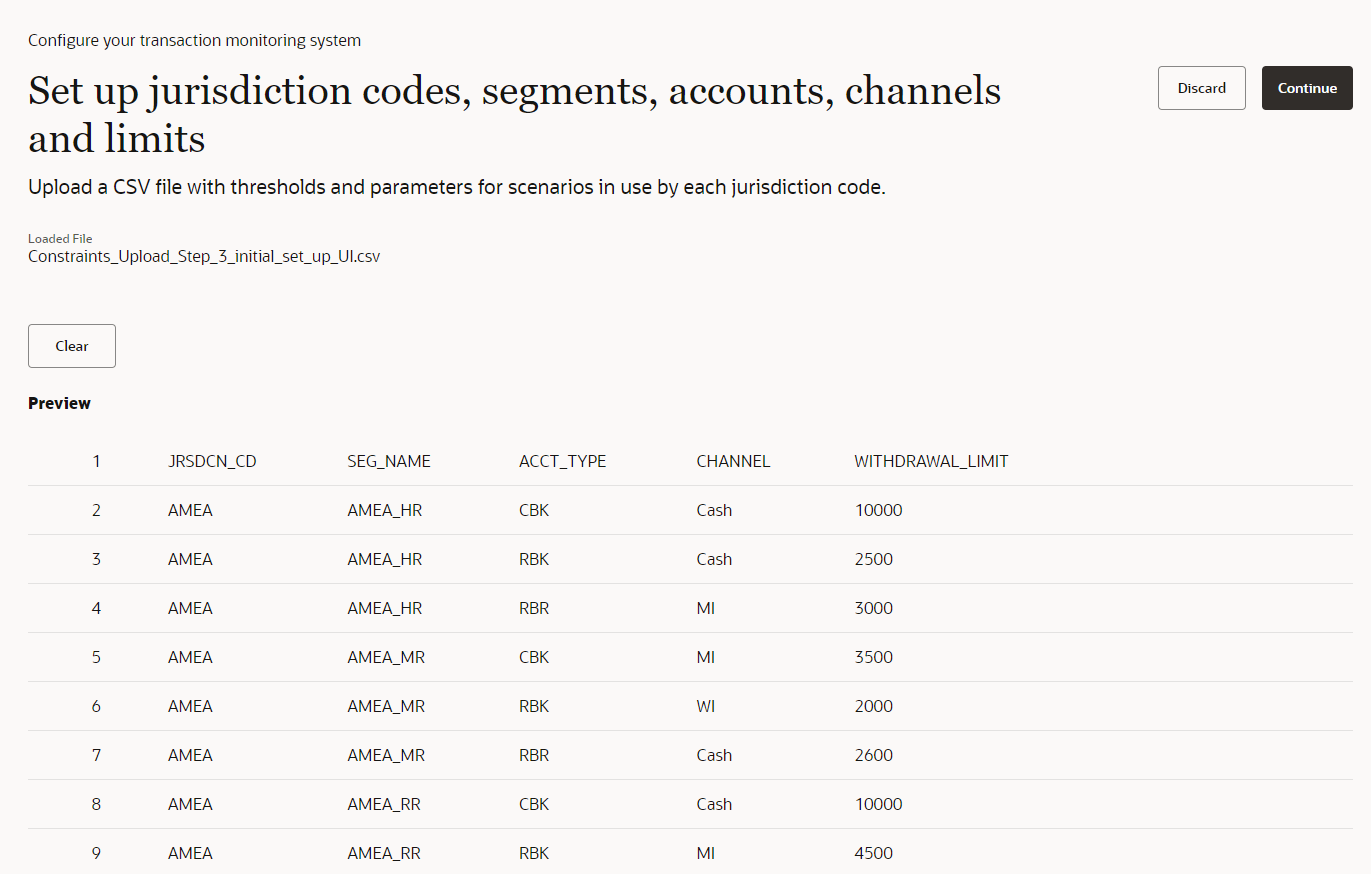
  3. Drag and drop the CSV file into the Drag and Drop field or click Add Iconicon to open the file selector dialog box and select the required file. Once the CSV file is loaded, the following window is displayed.

    Figure 3-9 Uploaded CSV file to Set up Account, Channels, and Limits


    Note:

    • If a channel does not have a withdrawal limit, this can be indicated as NA instead of a number.
    • You can remove the uploaded CSV file if required by using the Clear button.
  4. Click Continue to navigate to the Create an agent for each segment step.