3.3.3.8 Managing Views
You can edit, delete, set as default or remove default the saved Views.
To manage the views, follow these steps:
- Select the DEFAULT button. The Views window is displayed.
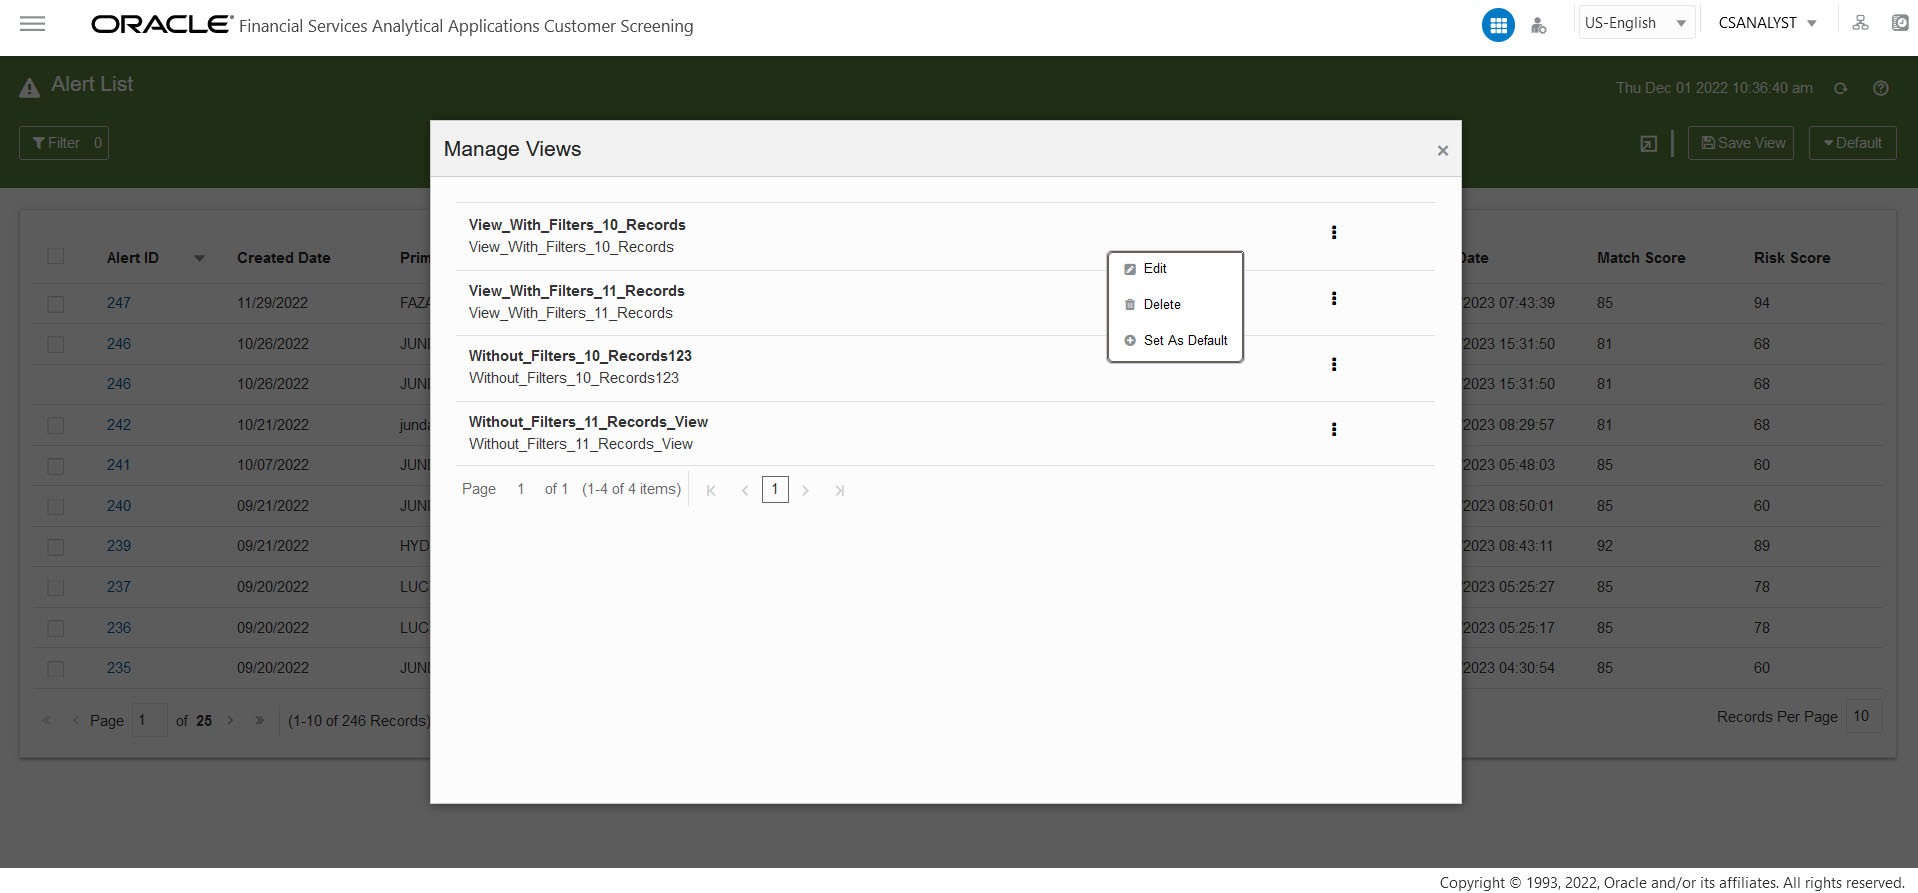
- Use the Search bar to search for the views and select to apply or click the Manage Views bottom in the right corner to view the complete list of available views. You can view all the list of user created views in the Manage Views window.
- To edit, delete, set as default or remove default, select the view from the
list and click the More Actions
 icon and select the required action from the drop down.To edit the View follow these steps:
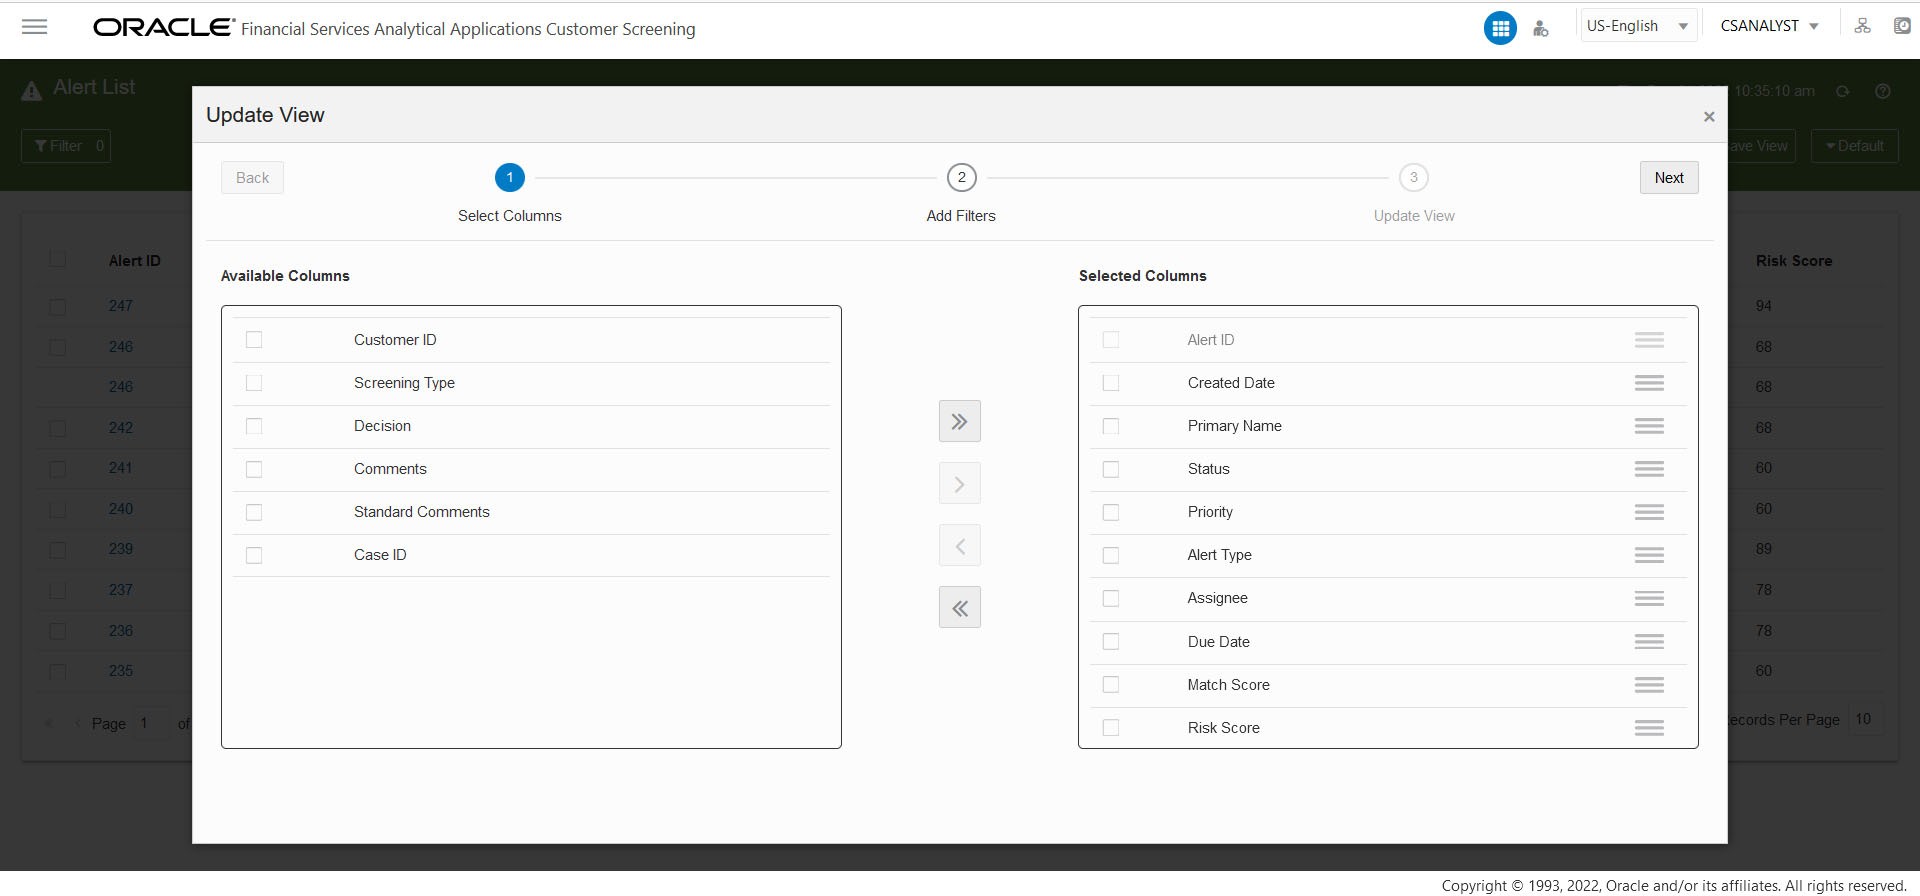
- Click Edit. The Update View window displays.
- To add new column to the View or delete the column from the View,
select the required column from the Available
Column list or Selected Column
list and use the following icon to move columns:
- Use
 icon to move all Columns from the Available
Columns list to the Selected
Columns list to add new columns.
- Use
 icon to move the selected Columns from the
Available Columns list to the
Selected Columns list to add new
columns.
- Use
 icon to move the selected Columns from the
Selected Columns list to the
Available Columns list to delete the
columns.
- Use
 icon to move All Columns except Alert ID from
Selected Columns list to the
Available Columns list to delete the
columns.
- Use
- Click Next for Add Filters page.
- You can add or edit the required fields in the Add Filter page. Click
Next for Update View page.
Note:
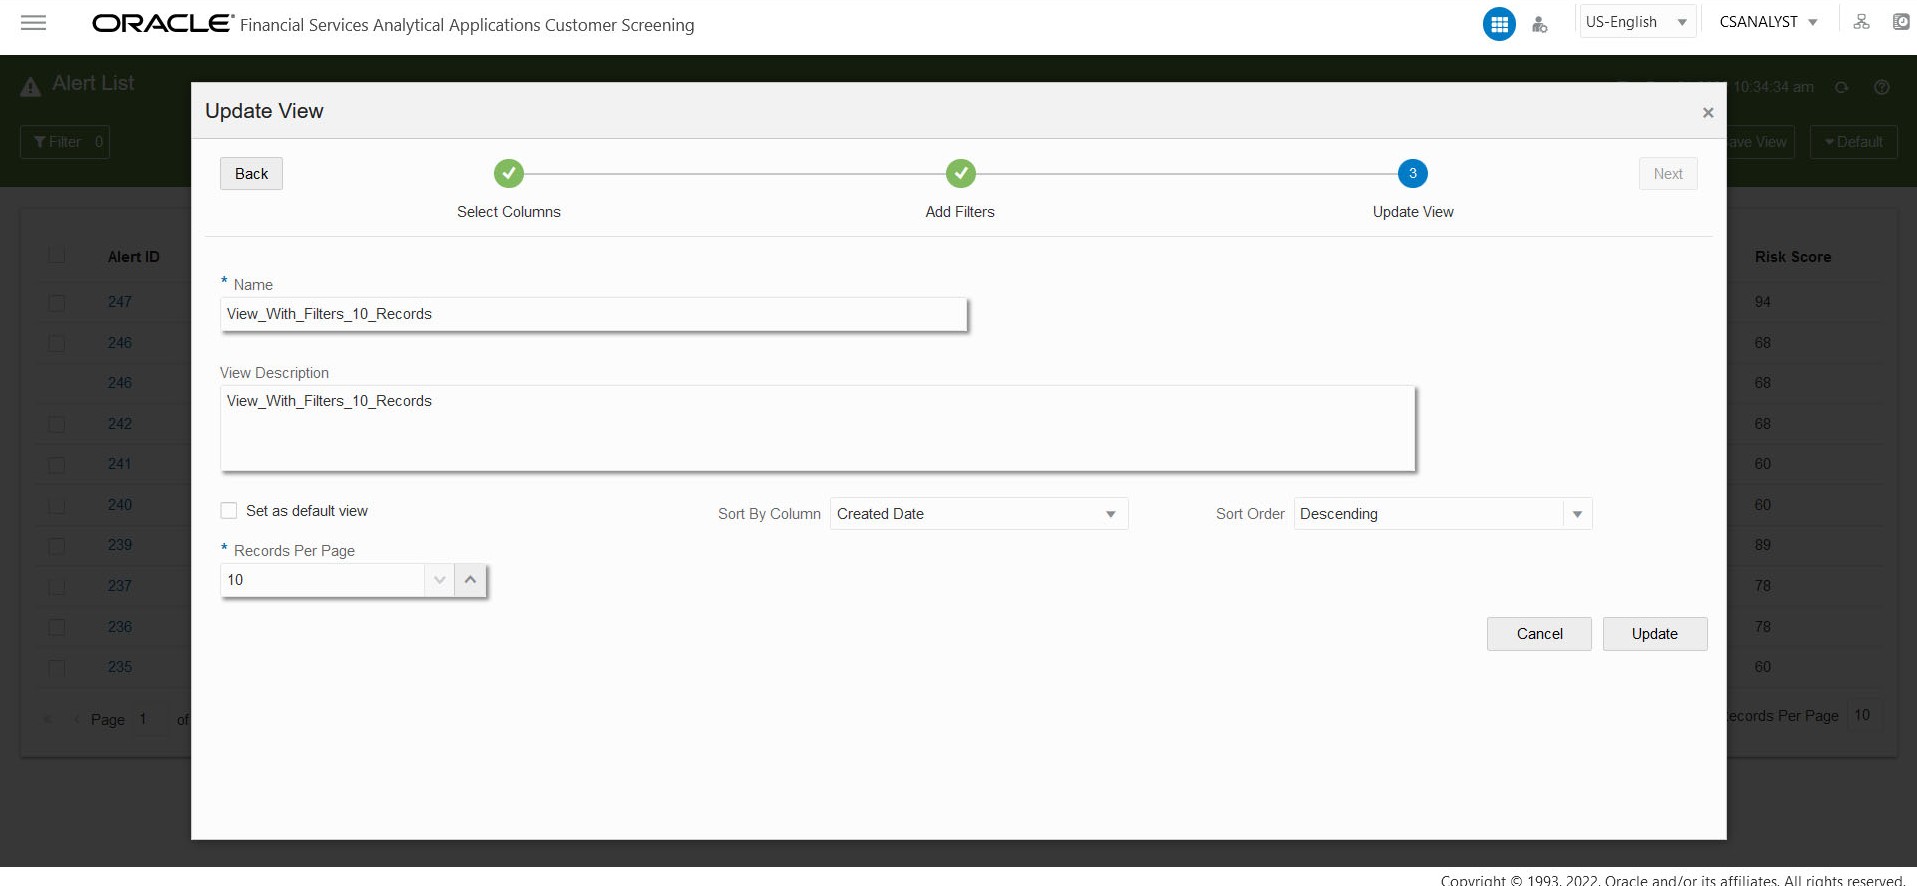
Use the Reset option to reset all the filter values. - You can edit Name, View
Description and Records Per Page
field in the Update View page. To set the current view as the default
view click Set as default view check box.
Note:
Name and Records Per Page are mandatory fields. - Click Update. A confirmation warning message is displayed.
- To overwrite the existing view click Yes. To
cancel click No.
To delete the View, follow these steps:- Click Delete. A confirmation warning message is displayed.
- To delete the selected View click Yes. To
cancel, click No.To set the view as default view click Set as Default and to remove the applied default view click Remove Default.


