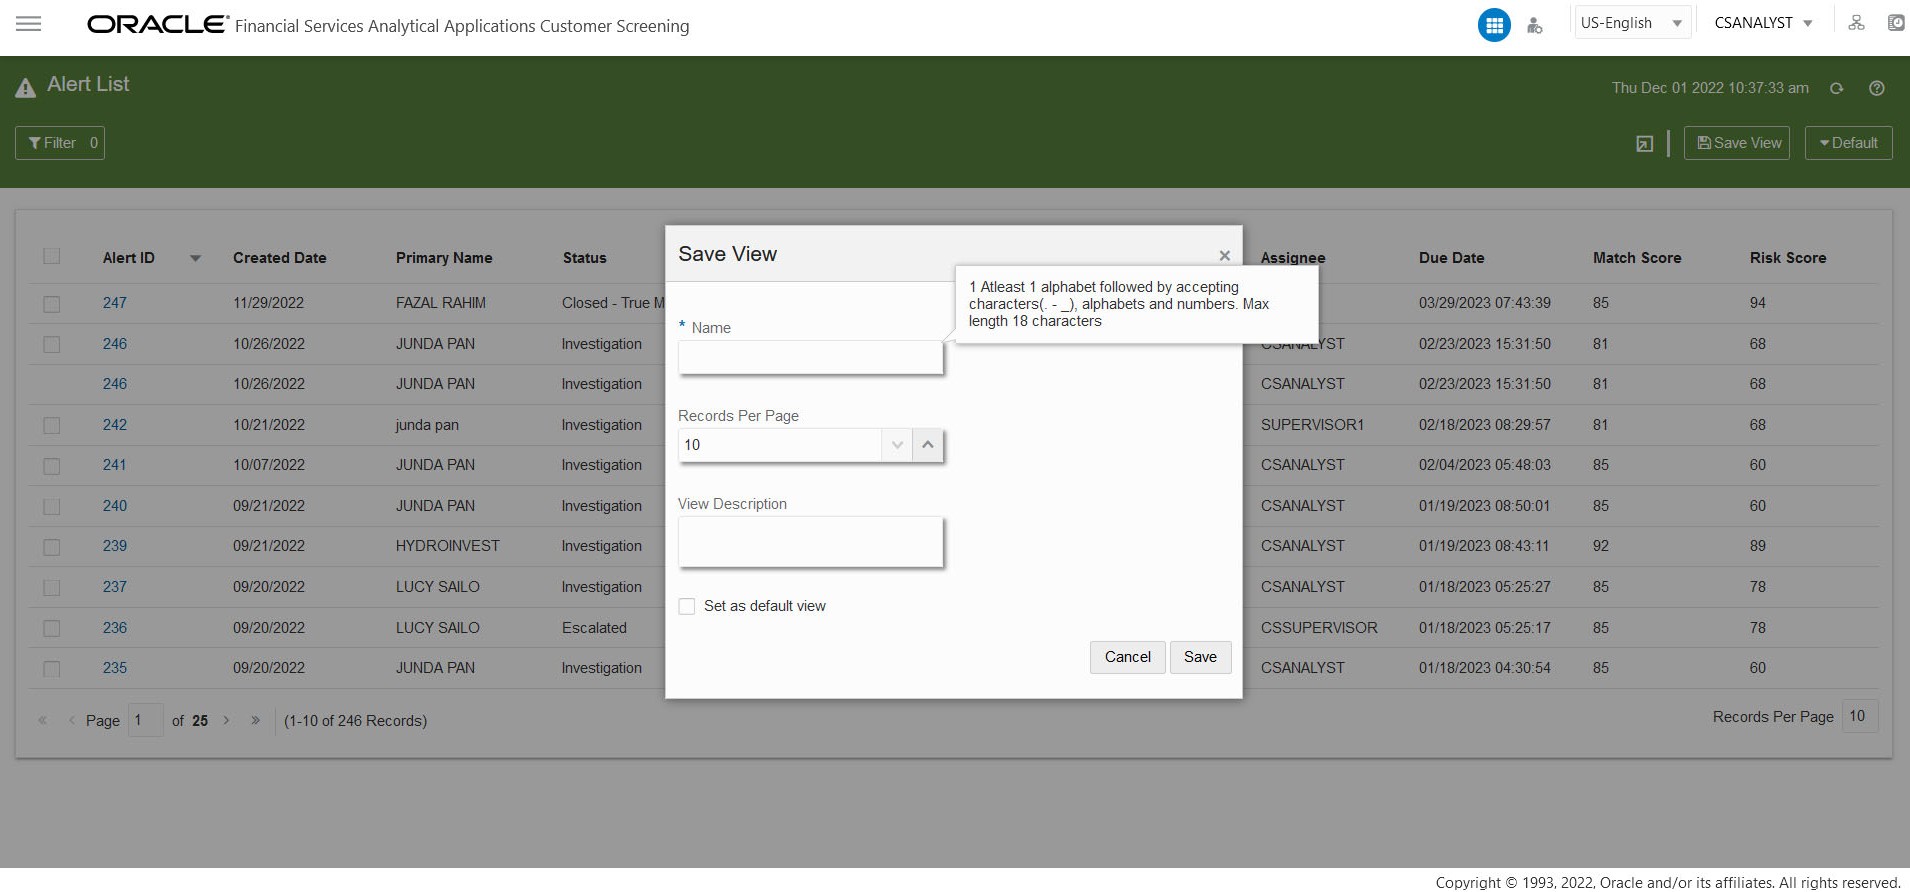
3.3.3.7 Saving the View
You can add the Customized View to the Views List by saving it.
To save and add the customized view, follow these steps:
- Click Save View field after customizing the Alert List page with the required columns and properties. The Save View window is displayed.
- Enter the name of the view in the mandatory Name Field.
- Select the mandatory Records Per Page value.
- Enter the description in the View Description field.
- To set the current view as the default view click Set as default view check box.
- Click Save.
Saving the view includes applied filters, column sort, column re-order, selected
columns, view description (optional) and records per page data.
You can find the saved
views list from the Views menu by selecting the
DEFAULT option next to the Save
View button. You can also use the Search bar in the
View window to search for the views.
