5.2 Creating a Critical Data Element (CDE)
While defining a CDE, the fields that appear are explained as tabulated.
Note:
- You must have CDE Creator rights to create a CDE.
- You can only create a CDE that are in the Draft status.
- Justification entered during rejection is not displayed in draft status.
To create a CDE, follow these steps:
- From the Financial Services Data Governance for North America Regulatory Reporting
window navigate to Standards and Policies and select
Critical Data Element.
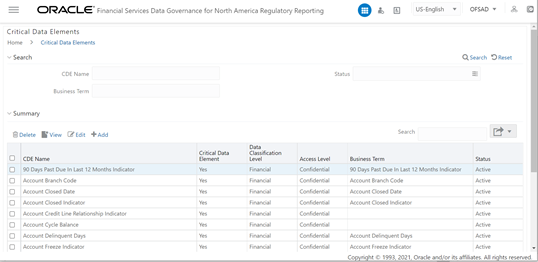
Figure 5-3 Critical Data Elements Summary

- Click the Add icon.
The Critical Data Element section is displayed.
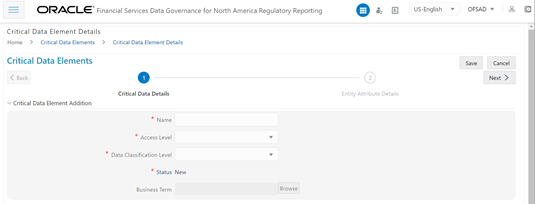
Figure 5-4 Critical Data Elements Details

- Enter the data in the available fields.
Table 5-4 Critical Data Elements Details
Fields Description Fields marked in blue asterisk(*) are mandatory CDE Name* Provide a name for the CDE Access Level* Select the access level from the drop-down list:
- Public
- Confidential
- Restricted
Data Classification Level* Select the data classification level from the drop-down list:
- Legal
- Financial
- PHI
- PII
Business Term* Select a Business Term from the HierarchyBrowser window. Justification* Provide a justification for classifying the Business Term as a CDE Note:
The Entity Name and Attribute Name can only be added if a CDE is in a Draft state. - Click Save and then click Next.
- In the Entity Attribute Details section:
Figure 5-5 Entity Attribute Details Addition

- Click Add. The Entity Attribute Details Addition window is displayed.
- Enter the CDE Name.
- Click Browse, to select the Entity Name from the Entity Hierarchy Browser and select the Attribute Name from the Attribute Hierarchy Browser.
- Click Save.
- Additionally, click Edit to review and update the fields and then click Submit and then click OK.