11.1 Logging an Issue
To log an issue or view or create tasks, issues, and actions, follow these steps:
- From Financial Services Data Governance for North America Regulatory Reporting
window navigate Inbox.
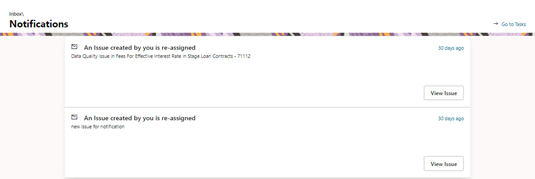
The Notifications window is displayed.
Figure 11-1 Inbox - Notifications

- Click View to re-open or close an issue.
- Click Go to Tasks.
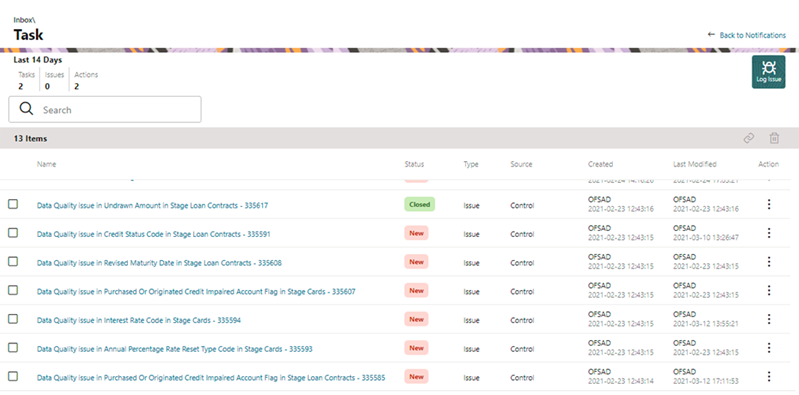
The Inbox – Task window is displayed with the list of tasks, issues, and actions.
Figure 11-2 Inbox Summary

- Click the Log Issue icon to log an issue.
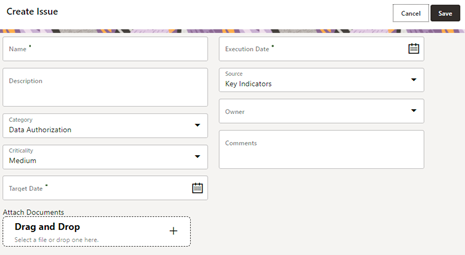
The Create Issue window is displayed.
Figure 11-3 Create Issue

- Enter Issue Name and Description.
- Select the Category from the drop-down list:
- Data Authorization
- Data Privacy
- Data Security
- Data Accuracy
- Data Availability
- Timeliness
- Select the Criticality:
- High
- Medium
- Low
- Choose the Target Date from the Calendar.
- Choose the Execution Date from the Calendar.
- Select the Source from the drop-down list:
- Key Indicators
- Controls
- Select the Owner from the drop-down list.
- Enter Comments if any.
- Select a file or drag and drop a file to Attach a document.
- Click Save.
A new issue is created and is displayed under the inbox summary screen.
- Click an existing issue.
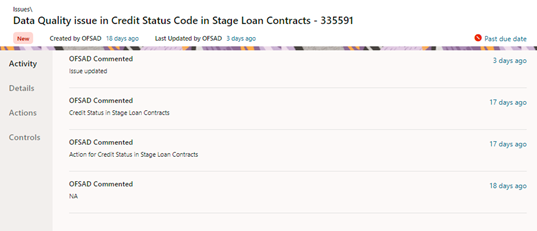
The following window is displayed.
Figure 11-4 Issues

- Click Activity. Any comment that gets logged for an issue is displayed here.
- Click Details. See section Editing an Issue for information.
- Click Actions. See section Creating an Action for information.
- Click Controls. You can create an action for an existing issue.
- Select an issue and click the Link icon.
The Controls window is displayed with the control details that can be linked to the issue.
Figure 11-5 Controls

- Select the controls and click Link. At any point in time, you can search for control in the search field.
- Select an issue or an action and click the Delete icon. A
confirmation message is displayed. Click Yes to delete or
click No to cancel the deletion.
Note that, it is possible to delete an issue or an action that is in status ‘New’ and it is not possible to delete a closed issue or an action.
- Click the Actions icon against the required issue or an
action to perform one of the following.
Figure 11-6 Task

- If an Issue is in:
- New state, you can link or close an issue.
- Closed state, you can re-open an issue.
- Re-open state, you can close the issue.
- If an Action is in:
- New state, you can close an action.
- Closed state, you can re-open an action.
- Re-open state, you can close the action.